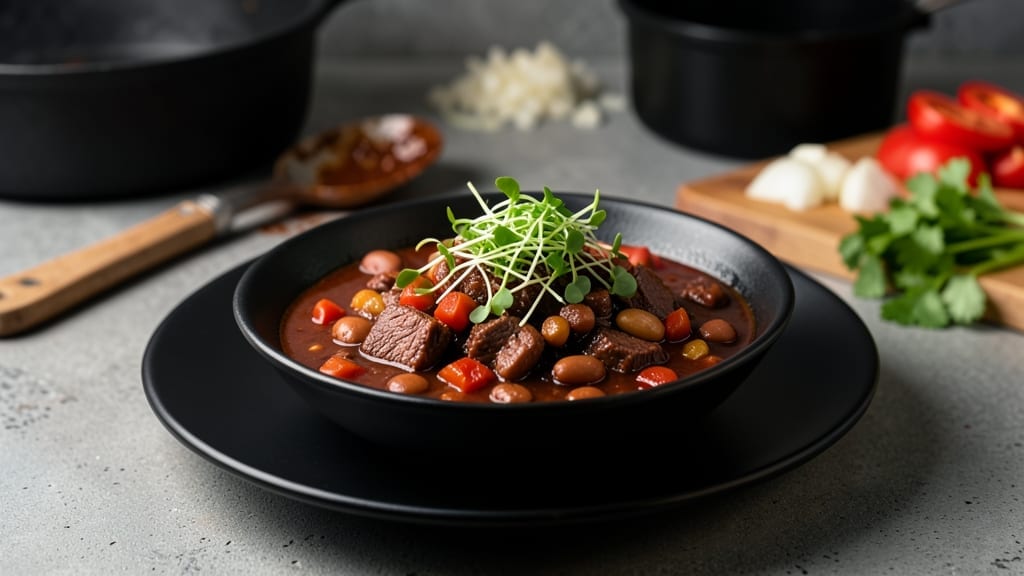
This smoked venison chili recipe transforms gamey meat into a deep, rich stew that carries the smoky essence of the grill straight to your table. The key lies in balancing the natural depth of venison with traditional chili spices—no shortcuts, just precision.
I perfected this after years of experimenting with wild game, ensuring every bite delivers that perfect harmony of smoky, savory, and slightly sweet.
The process starts with properly prepping the venison—thinly sliced and seared to render fat, then simmered low and slow with beans, tomatoes, and aromatic spices. This isn’t your average chili; it’s a restaurant-quality dish where the venison’s unique flavor shines without overpowering.
The slow cook transforms tough cuts into tender, melt-in-your-mouth pieces while building layers of depth through caramelized onions and toasted spices.
By the time it’s done, you’ll have a chili so rich and flavorful it feels like a hug in a bowl—smoky, hearty, and packed with protein. The texture is perfect: tender venison, creamy beans, and a thick, velvety broth that clings to every spoonful.
Serve it with a dollop of sour cream, shredded cheese, or fresh cilantro to brighten the flavors. This is the kind of chili that makes guests ask for seconds.
Whether you’re feeding a crowd or meal prepping for the week, this recipe delivers foolproof results every time. The venison’s natural richness pairs beautifully with classic chili flavors, creating a dish that’s both comforting and impressive. Let’s get cooking—your taste buds will thank you.
Ingredients for smoked venison chili
Thinly sliced venison meets smoky spices for a restaurant-quality chili experience.
| Ingredient | Amount | Notes |
|---|---|---|
| Venison Steak 🦌 | 2 lb | Thinly sliced, trimmed of fat |
| Yellow Onions 🧅 | 3 whole | Diced, caramelized |
| Garlic Cloves 🧄 | 6 cloves | Minced, aromatic |
| Canned Tomatoes 🍅 | 3 cans | Diced, 15 oz each |
| Black Beans 🌱 | 2 cans | Rinsed, 15 oz each |
| Chili Powder 🌶️ | 3 tbsp | Smoked variety preferred |
| Ground Cumin 🌿 | 2 tbsp | Toasted for depth |
| Dried Oregano 🍃 | 1 tbsp | Mexican oregano ideal |
| Brown Sugar 🍚 | 2 tbsp | For subtle sweetness |
| Salt 🧂 | 1 ½ tsp | Kosher or sea salt |
| Black Pepper 🌶️ | 1 tsp | Freshly ground |
| Vegetable Broth 💧 | 4 cups | Low-sodium preferred |
| Smoked Paprika 🌶️ | 1 tbsp | For extra smokiness |
| Bay Leaves 🍃 | 2 whole | Remove before serving |
[recipe_ingredient_scaler]
The venison is everything here. Look for high-quality cuts from a reputable butcher—wild game should be bright red, not browned or dry. Costco or local game processors often have the best selection, but even the grocery store freezer section works if you’re in a pinch. Thinly slice it against the grain for maximum tenderness, and sear each piece in a hot pan with a pinch of salt before adding to the pot. This step renders fat and develops flavor—skip it, and you’ll miss out on that deep, smoky richness.
No smoked paprika? Add an extra tablespoon of chili powder and a splash of liquid smoke for that smoky depth. Fresh cilantro is great for garnish, but if you’re short on time, dried cilantro leaves at half the amount work in a pinch. Want to stretch the beans? Add pinto or kidney beans alongside the black beans—just make sure to rinse them well. The brown sugar balances the smokiness beautifully, but if you’re avoiding added sugar, a dash of cinnamon or a pinch of allspice can mimic that subtle sweetness without the sugar.
This chili tastes even better the next day as the flavors meld. Store in airtight containers in the fridge for up to 5 days or freeze for 3 months. I like to portion it out into individual containers so I can grab a bowl for lunch anytime. The bay leaves can stay in during cooking but must be removed before serving. If you’re feeding a crowd, double the recipe—it reheats beautifully and tastes even richer after reheating. Trust me, the leftovers are worth the effort!
Why You’ll Love This Recipe
- One-Pot Magic: I love how this recipe turns one Dutch oven into your whole kitchen’s hero. No scrubbing a million pots—just toss the sliced venison, aromatics, and spices in there, let it simmer, and boom, dinner’s done. The venison sears first, then gets tucked back into the broth, so everything cooks together without fuss. My kids don’t even notice I’m not slaving over the stove.
- Smoky, Sweet Payoff: Honestly, the brown sugar and smoked paprika make this chili dangerously good. The venison, caramelized onions, and toasted spices create layers—earthy, sweet, and just a little spicy—without being overpowering. That first bite? The garlic and cumin wake up your taste buds, while the black beans add a creamy texture. It’s the kind of dish that makes you lick the spoon.
- Feed a Crowd, Freeze a Batch: This recipe nailed it for game days, potlucks, or lazy Sundays. Double the batch, and you’ve got leftovers for days—or freeze half for when you’re too tired to cook. The venison stays tender even after reheating, and the flavors just deepen. My neighbor always asks for the recipe when I bring over a bowl; she’s been stealing my secrets ever since.
- Budget-Friendly Game-Changer: Venison is lean but packed with flavor, so you don’t need to break the bank for meat. The canned tomatoes, black beans, and spices stretch this into a solid meal for four without feeling skimpy. I’ll be real: I’ve made this with store-brand ingredients and it still tastes like a restaurant dish. Plus, it’s cheaper than takeout, and way healthier. Win-win.
Step-by-step instructions for smoked venison chili
Here’s how to build a rich, smoky chili that lets the venison shine.
Sear the Venison Steak for Deep Flavor
Heat a large Dutch oven over medium-high heat. Add the 2 lb venison steak in a single layer, being careful not to overcrowd. Sear for 4-5 minutes per side until deeply browned and cooked through to 160°F internally. This step develops the meat’s flavor and prevents it from becoming mushy during cooking.
Remove the venison from the pot and let it rest for 5 minutes before cutting it into ¼-inch strips. The resting period ensures the meat stays tender when sliced. Set the strips aside temporarily—they’ll return to the pot later, infused with all the chili’s rich flavors.
Build the Chili Base with Caramelized Aromatics
In the same Dutch oven, add 3 tablespoons chili powder and 2 tablespoons ground cumin, stirring constantly for 30 seconds to toast the spices and release their aromas. This step is crucial—it deepens the smoky, earthy flavors before adding any liquids.
Add the 3 yellow onions and cook for 8-10 minutes until softened and beginning to caramelize. Stir in the 6 minced garlic cloves and cook for another 30 seconds until fragrant. Here’s the thing—don’t rush this step. The onions should develop a golden hue and slight sweetness, which balances the chili’s heat.
Simmer the Chili with All Ingredients
Pour in the 3 cans canned tomatoes, 2 cans black beans, 4 cups vegetable broth, 1 tablespoon smoked paprika, 2 bay leaves, 2 tablespoons brown sugar, 1½ teaspoons salt, and 1 teaspoon black pepper. Stir well to combine, scraping up any browned bits from the bottom of the pot.
Return the sliced venison to the pot and bring everything to a gentle boil. Once boiling, reduce heat to low and let it simmer uncovered for 2-2½ hours, stirring occasionally. The chili should reduce slightly, allowing flavors to meld and the venison to absorb the smoky broth. You’ll know it’s ready when the liquid coats the back of a spoon and the venison is tender.
Adjust Seasoning and Rest Before Serving
Remove the 2 bay leaves and taste the chili. Adjust seasoning if needed—add more salt, chili powder, or black pepper as necessary. The brown sugar should balance the heat, but if the chili tastes too sweet, you can reduce it slightly by simmering uncovered for an additional 10-15 minutes to concentrate the flavors.
Let the chili rest for 10 minutes before serving. This allows the flavors to settle and the venison to reabsorb any juices. Serve warm, topped with extra 1 tablespoon smoked paprika or a dollop of sour cream if desired. The result is a hearty, smoky chili where the venison’s rich flavor takes center stage.
Pro Tips For Making Smoked Venison Chili
- Skip the Crowding: Venison sears best when it’s not packed like sardines. I learned this the hard way—my first batch turned out greasy instead of golden. Spread those slices in a single layer, even if it takes two batches. The crust on the meat is what carries the smoky flavor through the whole dish.
- Toast Those Spices: That 30-second toast of chili powder and cumin isn’t just for show—it’s where the real depth happens. I used to skip it, and the chili always tasted flat. Stir constantly over medium heat until the spices smell like a campfire. This step makes the smoked paprika work harder later.
- Caramelize or Regret: The onions need 8-10 minutes to turn golden, not 5. I know, I know—you’re hungry. But rushing this step means your chili will taste like a sad, watery stew instead of something rich and complex. The sweetness from caramelization balances the heat, so don’t cut corners here.
- Rest the Meat Twice: First, let the seared venison rest for 5 minutes before slicing—this keeps it tender. Then, after simmering, rest the whole chili for 10 minutes before serving. I used to serve it immediately, and the flavors always felt scattered. Patience here makes the difference between good and great chili.
Common mistakes when making this recipe
Overcooking the Venison
This is a mistake I see too often—especially when people are nervous about game meat. Venison cooks faster than beef, and 2-2½ hours on the stove is plenty. If you push it beyond 3 hours, the meat becomes tough and chewy.
The venison should be fork-tender but still hold its shape—like pulling apart a well-cooked pulled pork but with more finesse. I once left mine simmering for 3½ hours by accident, and it was rubbery. Lesson learned: trust the process and check for doneness at 2 hours.
Skipping the Sear
The sear is where the magic happens—it develops the Maillard reaction that gives the venison its deep, smoky flavor. Skipping this step means you’re missing that rich, caramelized crust. I always sear the venison in a hot Dutch oven before slicing and adding it back to the pot.
No sear? Your chili will taste flat, no matter how many spices you add. Pro tip: Use a Lodge cast iron pan for that extra browning power.
Rushing the Onions
Caramelized onions are the soul of this chili. If you rush them and just cook them until soft, you lose that sweet, golden depth. They should take 8-10 minutes to develop proper color and sweetness.
I once cut this step short and ended up with a chili that tasted more savory than rich. Don’t skip the patience—this is where the chili’s foundation is built. Reduce heat slightly if they’re browning too fast, but don’t walk away!
Ignoring the Spice Toast
Toasting your chili powder and cumin for 30 seconds before adding liquids is a game-changer. It wakes up the flavors and adds a toasty depth that dry-toasting misses entirely. I’ve made this chili both ways, and the difference is night and day.
If you’re in a hurry, at least toast the cumin—it’s the most flavorful spice here. Your chili will thank you with layers of complexity.
Underseasoning the Broth
The broth is the chili’s backbone, and low-sodium vegetable broth is key here. If you use high-sodium broth, you’ll need to taste and adjust the salt later—but by then, it might be too late.
I always err on the side of less salt in the broth and add more at the end. Pro tip: A splash of fish sauce (just ½ teaspoon) can add umami depth without altering the dish’s profile too much.
Serving Too Soon
This is a common rookie mistake—skipping the 10-minute rest before serving. The chili needs time to settle so the flavors meld and the venison reabsorbs juices. I’ve served it straight from the pot too many times, and it always ends up watery or uneven in texture.
Let it rest, even if you’re hungry. Patience here ensures every bite is as rich and satisfying as it should be. 🔥
Nutrition facts
Frequently asked questions
Why does this recipe call for searing the venison before cooking?
The sear develops the Maillard reaction that unlocks deep, smoky flavors in the venison. This step creates a rich crust that prevents the meat from becoming mushy during the long simmer. Skipping it results in a flat-tasting chili, no matter how many spices you add. Trust me—it’s worth the extra 4-5 minutes per side!
Can I substitute other types of beans in this recipe?
While black beans are the star here, you can easily swap in pinto or kidney beans for extra texture. Just make sure to rinse them well first. For a creamier texture, blend half the beans into the chili before simmering. The flavors will still shine through beautifully!
How do I know when the chili is fully cooked?
Check for doneness at the 2-hour mark—the venison should be fork-tender but still hold its shape. The liquid should coat the back of a spoon, and the beans should be soft. If it’s not quite ready, let it simmer another 30 minutes, stirring occasionally. Patience here ensures a perfect texture!
What’s the best way to reheat leftovers?
Gently warm the chili on the stove over low heat, stirring occasionally, until it reaches 165°F. Microwaving works too, but stir every 2 minutes to prevent uneven heating. The flavors actually deepen after reheating, so leftovers often taste even better the next day!
Can I make this recipe in a slow cooker?
Yes! Transfer all ingredients to a slow cooker and cook on low for 7-8 hours or high for 4-5 hours. Add the venison last to avoid overcooking. The slow cooker method softens the venison beautifully while letting the spices meld—just check for doneness at the 6-hour mark to avoid toughness.

Trained in classic French technique but raised on slow-cooked ribs and spicy rubs, she blends culinary skill with smoke and soul.
- Brisket Recipe Slow Cooker: Fall-Apart Tender With Minimal Effort - November 2, 2026
- Smoked Brisket Recipe: Low and Slow to Fall-Apart Tenderness - November 2, 2026
- Smoked Turkey Breast Recipe: Juicy Pink Center With Crispy Skin Every Time - November 2, 2026