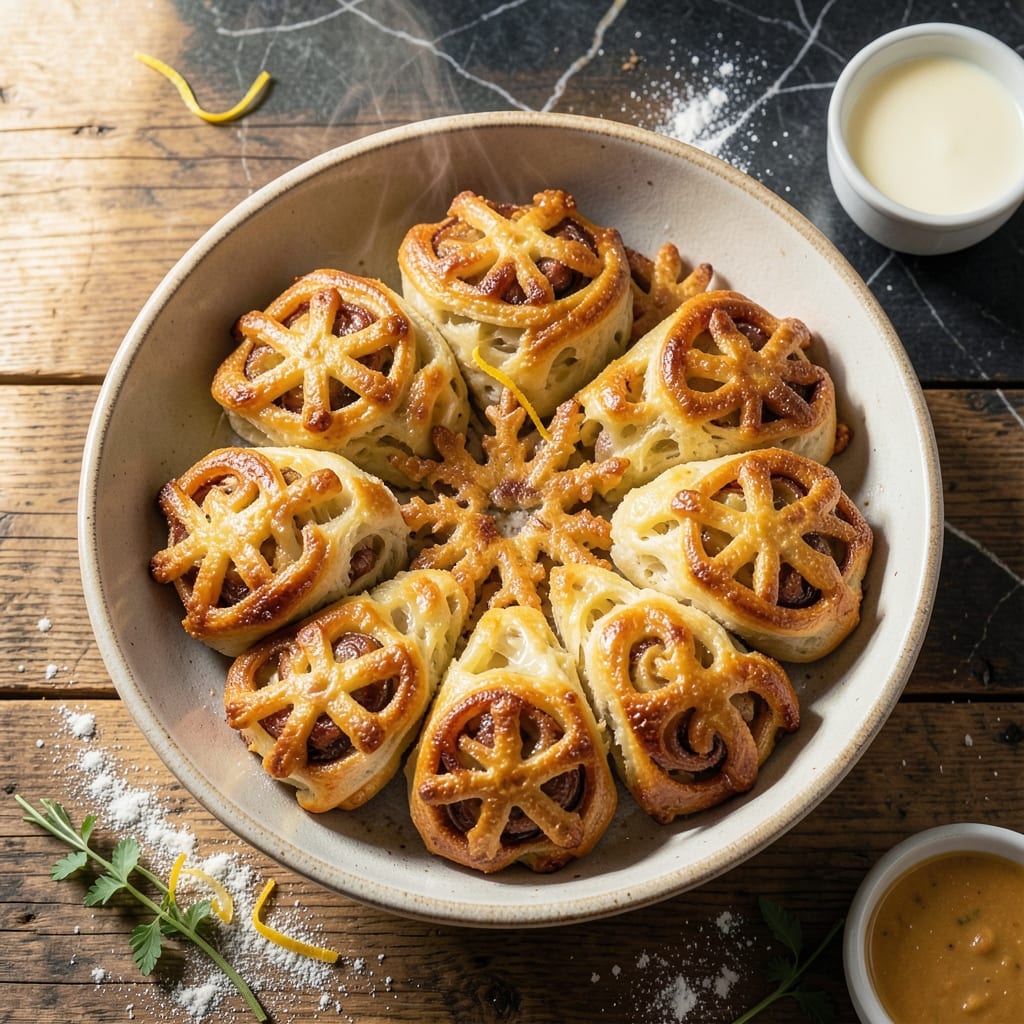
These rolls transform any meal into a special occasion with their intricate, pull-apart design and tender texture.
I developed this recipe to create bakery-quality results at home without complicated techniques. The dough comes together quickly, then rests before shaping into those signature snowflake patterns. Each piece bakes up golden and soft, with layers that separate effortlessly.
The secret lies in precise folding and cutting before the final rise. This ensures every roll emerges with a delicate, flaky structure that’s as beautiful as it is delicious. The process is simpler than it appears, with foolproof results every time.
Serve warm for maximum effect—they disappear faster than you can make them.
Ingredients for Snowflake Rolls
Warm milk, butter, and flour create these bakery-style pull-apart rolls with delicate layers.
| Ingredient | Amount | Notes |
|---|---|---|
| Whole Milk 🥛 | 1 cup | Warm to 110°F for yeast activation |
| Granulated Sugar 🍚 | ¼ cup | Divided for dough and yeast proofing |
| Active Dry Yeast 🍞 | 2 ¼ tsp | One 0.25-oz packet plus extra |
| Unsalted Butter 🧈 | ½ cup | Melted and cooled, plus extra for brushing |
| Large Egg 🥚 | 1 whole | Room temperature, lightly beaten |
| All-Purpose Flour 🌾 | 4 cups | Spoon and level for accuracy |
| Fine Sea Salt 🧂 | 1 tsp | For balancing sweetness |
| Vanilla Extract 🌿 | 1 tsp | Pure extract for best flavor |
| Bread Flour 🍞 | ½ cup | For extra chewiness (optional) |
| Honey 🍯 | 1 tbsp | For glaze (optional) |
[recipe_ingredient_scaler]
The butter quality matters most here. Plugra or European-style gives the best flavor and texture, but any unsalted will work. I grab mine from Whole Foods or Trader Joe’s—both have reliable options. For the milk, whole is ideal for richness, but 2% works in a pinch (don’t use skim). Yeast needs to be fresh—check the expiration date or proof it first if you’re unsure.
No whole milk? Half-and-half or evaporated milk adds even more richness. Short on all-purpose flour? Bread flour at a 1:1 ratio makes them extra chewy. The egg can be skipped (replace with 1/4 cup yogurt), but the texture won’t be quite as tender. For a hint of warmth, swap the vanilla for almond extract—just use half the amount.
Dough can rest overnight in the fridge—just let it warm up before shaping. Baked rolls keep 2-3 days wrapped tightly at room temp, or freeze for 1 month. Reheat wrapped in foil to restore that just-baked softness (worth the extra minute).
Why You’ll Love This Recipe
- One Bowl Wonder: I mix the whole milk, sugar, and yeast right in the bowl—no extra dishes, no fuss.
- Buttery Heaven: The unsalted butter and egg make these rolls so rich, I catch myself sneaking bites before dinner.
- Holiday Star: They look fancy enough for Christmas morning but are simple enough for a random Sunday.
- Doubles Easily: I always make two batches—one for now, one to freeze and pull out whenever I need a quick win.
Step-by-Step Instructions for Snowflake Rolls
These steps ensure perfectly layered, pull-apart rolls with a golden finish every time.
Step 1: Activate the Yeast and Prepare Wet Ingredients
Warm the 1 cup Whole Milk to exactly 110°F—any hotter and you’ll kill the yeast. This temperature should feel just warm to the touch, like a baby bottle. In a large bowl, whisk together the warm milk, 0.25 cup Granulated Sugar, and 2.25 tsp Active Dry Yeast. Let this sit undisturbed for 5-7 minutes until the mixture becomes foamy and bubbly—this is your visual confirmation the yeast is active.
Once foamy, add the 0.5 cup Unsalted Butter (melted and cooled to room temperature), 1 whole Large Egg (lightly beaten), and 1 tsp Vanilla Extract. Whisk until fully combined. The butter should be just warm enough to blend smoothly but not hot enough to cook the egg. This wet mixture forms the base of your dough.
Step 2: Create the Dough and First Rise
In a separate large bowl, combine the 4 cups All-Purpose Flour, 0.5 cup Bread Flour, and 1 tsp Fine Sea Salt. Make a well in the center and pour in your wet mixture. Using a wooden spoon, gradually incorporate the dry ingredients into the wet until a shaggy dough forms. The dough will be slightly sticky, but resist the urge to add more flour at this stage.
Turn the dough out onto a lightly floured surface and knead for 8-10 minutes until smooth and elastic. You’ll know it’s ready when you can stretch a small piece thin enough to see light through it without tearing (the windowpane test). Place the dough in a greased bowl, cover with a damp towel, and let rise in a warm, draft-free place for 1-2 hours or until doubled in size.
Step 3: Shape and Second Rise
Punch down the risen dough to release the air. On a lightly floured surface, roll the dough into a 12-inch circle about ¼-inch thick. Using a sharp knife or pizza cutter, cut the circle into 16 equal wedges like a pizza. This precision ensures even baking and consistent pull-apart layers.
Starting from the wide end, roll up each wedge tightly into a crescent shape. Place the rolls point-side down in a greased 9-inch round pan, arranging them so they’re just touching. Cover with a damp towel and let rise for another 30-45 minutes until puffy and nearly doubled. The rolls should look like they’re about to burst out of the pan.
Step 4: Bake to Golden Perfection
Preheat your oven to 375°F. Bake the rolls for 18-22 minutes or until they’re deep golden brown on top and sound hollow when tapped. Rotate the pan halfway through baking to ensure even browning. The internal temperature should reach 190-200°F when fully baked.
If the tops begin to brown too quickly, tent the pan loosely with aluminum foil. The rolls are done when the layers have separated slightly and the center roll is as golden as the outer ones. Remove from the oven and let cool in the pan for 5 minutes before transferring to a wire rack.
Step 5: Add the Finishing Touch
While the rolls are still warm, brush the tops generously with additional melted Unsalted Butter. For extra shine and sweetness, drizzle with the 1 tbsp Honey mixed with a teaspoon of warm water. This glaze soaks into the layers, enhancing the pull-apart magic.
Let the rolls cool for another 10 minutes before serving. The ideal serving temperature is warm, not hot, allowing the glaze to set slightly while the layers remain soft and pillowy. Pull apart with your hands to reveal the beautiful snowflake pattern inside.
Pro Tips For Making Snowflake Rolls
- Warm the Milk: Heat the whole milk to 110°F—any hotter and you’ll kill the yeast, any cooler and it won’t activate properly. I learned this the hard way after a few flat batches.
- Soften Butter Right: Take the unsalted butter out 30 minutes before mixing so it’s soft but not melted. Sounds picky, but it blends better into the dough.
- Proof the Yeast: Always dissolve the active dry yeast in the warm milk with a pinch of sugar first. If it doesn’t foam after 5 minutes, your rolls won’t rise—toss it and start over.
- Brush with Egg: Use the large egg for an egg wash before baking to get that shiny, golden finish. Skip the milk here—egg alone gives a richer color and texture.
Pro Cooking Tips for Great snowflake rolls
Yeast Activation Secrets
Warm the milk to exactly 110°F—any hotter kills the yeast instantly. I use a digital thermometer for precision. Let the yeast foam for 5-7 minutes; if it doesn’t bubble, your yeast is dead and should be replaced. This step ensures your rolls rise properly. 🌡️
Dough Consistency
The dough should be slightly sticky but smooth after kneading. If it’s too wet, add 1 tbsp flour at a time. Over-flouring makes dense rolls. The windowpane test (stretching a small piece thin) confirms it’s ready for the first rise.
Precise Shaping
Roll the dough to a 12-inch circle exactly ¼-inch thick. Use a ruler for accuracy. Cut into 16 equal wedges with a sharp knife or pizza cutter. Uneven cuts lead to misshapen rolls that don’t bake uniformly.
Perfect Rise
Let shaped rolls rise until they’re puffy and nearly doubled—about 30-45 minutes. They should look like they’re bursting from the pan. A warm oven (turned off with light on) speeds this up without overproofing.
Baking Temperature
Bake at 375°F for 18-22 minutes, rotating the pan halfway. Tent with foil if browning too fast. The rolls are done when internal temp hits 190-200°F and they sound hollow when tapped. 🔥
Glazing Technique
Brush warm rolls with melted butter immediately after baking. For extra shine, mix 1 tbsp honey with a teaspoon of warm water and drizzle over the top. This keeps the layers soft and enhances the pull-apart effect.
Nutrition Facts
Frequently Asked Questions
Can I make these ahead of time?
Yes! Shape and place in the pan, then cover and refrigerate overnight. In the morning, let rise at room temperature for 30-45 minutes before baking as usual.
Why didn’t my rolls pull apart easily?
This usually means the dough wasn’t rolled thin enough or the wedges weren’t cut precisely. Aim for a ¼-inch thick circle and 16 equal wedges for perfect layers.
Can I use instant yeast instead?
Skip the proofing step and mix instant yeast directly with dry ingredients. Reduce the amount slightly to 2 tsp since it’s more potent.
How do I store leftovers?
Keep in an airtight container at room temperature for up to 3 days. Reheat wrapped in foil at 350°F for 10 minutes to restore freshness.

Trained in classic French technique but raised on slow-cooked ribs and spicy rubs, she blends culinary skill with smoke and soul.
- Recipe for Boneless Pork Chops in Cast Iron Skillet: Sear and Baste to Juicy Perfection - October 3, 2026
- Recipe for Boneless Cross Rib Roast: Slow-Roasted Beef with Herb Crust - October 3, 2026
- Hamburgers in Sauce Recipe Crock Pot: Slow-Cooked Savory Delight - October 3, 2026