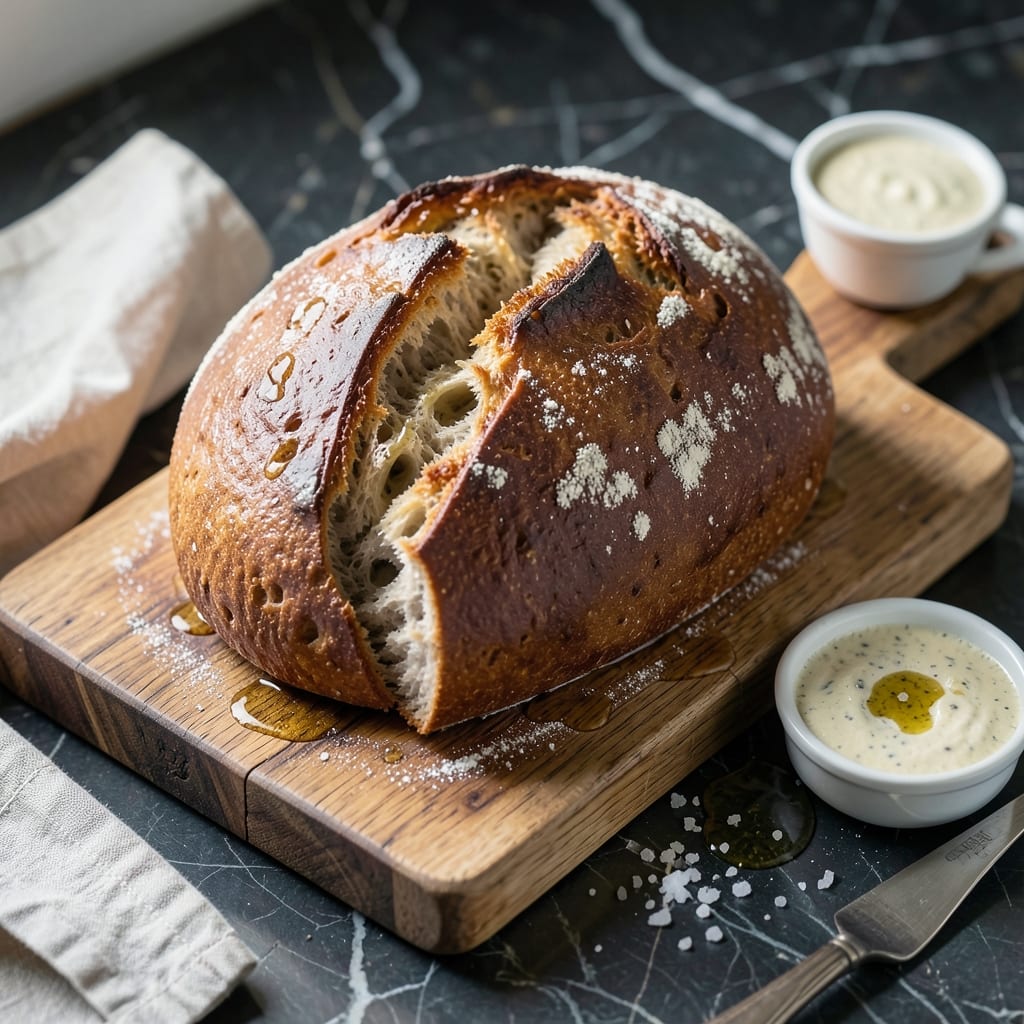
I spent years perfecting my sourdough technique, and this bread machine method delivers the same artisan results with minimal effort. The machine handles the kneading and rising, while your starter provides that signature tangy flavor.
This approach removes the guesswork from traditional sourdough baking. Your active starter combines with simple ingredients to create a crusty loaf with a soft, open crumb. The bread machine’s consistent temperature ensures reliable results every time.
You’ll achieve a golden, crusty exterior and a tender interior that rivals bakery sourdough. The process is hands-off but still produces that distinctive sourdough character you love.
The beauty lies in the balance between convenience and authenticity. Your kitchen will fill with the aroma of fresh-baked bread as the machine does the work for you.
Ingredients for Sourdough Bread Machine Recipe with Starter
Few ingredients, one active starter, and your bread machine create bakery-level sourdough at home.
| Ingredient | Amount | Notes |
|---|---|---|
| Active Sourdough Starter 🍞 | 1 cup | Fed and bubbly, 100% hydration |
| Bread Flour 🌾 | 3 ½ cups | High-protein, unbleached preferred |
| Water 💧 | 1 ¼ cups | Filtered, room temperature |
| Sea Salt 🧂 | 1 ½ tsp | Fine grain for even distribution |
| Olive Oil 🫒 | 1 tbsp | Extra-virgin for subtle richness |
| Honey 🍯 | 1 tbsp | Optional, enhances browning |
| Vital Wheat Gluten 🌾 | 1 tbsp | Improves structure in machine |
| Cornmeal 🌽 | 2 tbsp | For dusting pan, optional |
| Sugar 🍚 | 1 tsp | Feeds yeast in starter |
| Milk Powder 🥛 | 2 tbsp | Adds tenderness to crumb |
[recipe_ingredient_scaler]
The starter is everything here. Use active, bubbly starter that’s been fed within 4-12 hours (it should float in water). Bread flour’s higher protein gives you that chewy, open crumb—King Arthur is my go-to. If your starter’s sluggish, give it a boost with a teaspoon of sugar. I keep mine at room temp for this recipe (fridge starter takes too long to wake up).
No bread flour? All-purpose works at a 1:1 ratio, but the texture won’t be as chewy. Skip the honey if you want a more traditional tang. Vital wheat gluten isn’t mandatory, but Bob’s Red Mill makes a difference in rise. For extra flavor, swap the water for warm whole milk—just don’t exceed 110°F or you’ll kill the starter.
Baked loaves keep 3-4 days wrapped in a towel at room temp—never plastic, it makes the crust soggy. Slice and freeze for up to 3 months. The starter can live in your fridge for weeks between bakes (feed it weekly).
Why You’ll Love This Recipe
- Hands-Off Magic: I just dump the starter, flour, water, salt, and a drizzle of olive oil in the machine and let it do the work—no kneading, no fuss.
- That Sourdough Tang: The active starter gives it that signature deep, slightly tangy flavor that store-bought just can’t match.
- Meal Prep Hero: I bake one loaf on Sunday and it’s my sandwich base, toast, and soup-dipper all week long.
- Budget-Friendly Loaf: Bread flour and a maintained starter are all it takes—no special trips to the store, and it’s way cheaper than artisan bakery sourdough.
Step-by-Step Instructions for Sourdough Bread Machine Recipe With Starter
Here’s my tested method for achieving bakery-style sourdough with minimal hands-on effort.
Step 1: Prepare the Bread Pan and Liquid Ingredients
Begin by adding the 1.25 cups water to your bread machine pan. I use filtered water at room temperature to ensure consistent fermentation. Add the 1 tbsp olive oil, 1 tbsp honey, and 1 tsp sugar to the water.
The honey and sugar feed the yeast in your 1 cup active sourdough starter, while the olive oil adds subtle richness to the crumb. Whisk these liquid ingredients together briefly with a fork to incorporate them evenly before adding the dry components.
Step 2: Layer Dry Ingredients Strategically
Add the 3.5 cups bread flour to the pan, spreading it evenly over the liquid layer. I always use high-protein bread flour for better gluten development, which is crucial for sourdough’s characteristic chew.
Create a small well in the center of the flour and add the 1.5 tsp sea salt. Keep the salt separate from the liquid ingredients initially, as direct contact can inhibit yeast activity. Add the 1 tbsp vital wheat gluten and 2 tbsp milk powder to the flour, ensuring even distribution.
Step 3: Add Starter and Final Touches
Make another small indentation in the flour and add your 1 cup active sourdough starter. The starter should be fed and bubbly for optimal rise. I’ve found that 100% hydration starter works perfectly with this recipe’s ratios.
If using, sprinkle the 2 tbsp cornmeal around the edges of the pan. This adds a subtle crunch to the crust and prevents sticking. The cornmeal is optional but recommended for that artisanal touch.
Step 4: Select and Start the Dough Cycle
Insert the pan into your bread machine and select the dough cycle. Most machines have a specific setting for sourdough that allows for a longer rise time. Set it for a 2-pound loaf size, which accommodates this recipe’s yield perfectly.
Press start and let the machine work its magic. The dough cycle typically takes 1 hour 30 minutes to 2 hours, during which the machine will mix, knead, and allow the dough to rise. You’ll know it’s progressing well when you see the dough double in size and develop a smooth, elastic texture.
Step 5: Bake to Golden Perfection
After the dough cycle completes, reset the machine to the bake cycle. For sourdough, I recommend selecting a medium crust setting and a bake time of 45-50 minutes. The loaf is done when it’s deep golden brown and sounds hollow when tapped on the bottom.
Once baking is complete, carefully remove the pan from the machine. Let the loaf cool in the pan for 5 minutes, then transfer it to a wire rack to cool completely. This cooling period is crucial—it allows the crumb structure to set and prevents a gummy texture. Wait at least 1 hour before slicing for the best results.
Pro Tips For Making Sourdough Bread Machine Recipe With Starter
- Warm Your Starter: Take your active sourdough starter out of the fridge 4-6 hours before baking, or it won’t rise properly in the machine. I learned this the hard way after my first few loaves came out dense.
- Measure by Weight: Use a kitchen scale for the flour and water—1 cup of bread flour can weigh 120-150 grams depending on how it’s packed. Guessing by volume leads to inconsistent texture.
- Skip the Overproof: Resist the urge to let the dough rise too long in the machine; sourdough can collapse if it overproofs. Set a timer and check at the 1-hour mark if your machine has a “dough” setting.
- Brush with Oil: Lightly coat the bread pan with olive oil before adding the dough, even if it’s nonstick. After burning one loaf to the pan, I finally started doing this religiously.
Regional Styles of These Flavors
San Francisco Style
This West Coast approach leans into a tangier flavor by using a 12-16 hour cold ferment after the dough cycle. I transfer the dough to the fridge in the bread pan, then bake the next morning. The extended cold rise develops that iconic Lactobacillus tang San Francisco is famous for. 🌟
Texas Hill Country
In central Texas, bakers add 1 tbsp molasses to the water for a deeper, caramelized crust. I also increase the vital wheat gluten to 2 tbsp to handle the humidity. The result is a slightly sweeter loaf with a thicker, chewier crust that stands up to hearty stews.
Pacific Northwest
Seattle bakers often incorporate ½ cup whole wheat flour into the 3.5 cups bread flour for a nuttier profile. I reduce the water by 2 tbsp to compensate for whole wheat‘s higher absorption. The dense, moist climate here makes this adjustment essential.
Midwest Farmhouse
This style uses 2 tbsp powdered milk and 1 tbsp butter instead of olive oil for a softer, sandwich-friendly loaf. I bake it on the light crust setting to maintain tenderness. Perfect for Sunday family dinners with soups or stews.
My grandmother’s version always included a 1 tbsp brown sugar swap for the honey—it’s a small change that makes the house smell incredible while baking. 💛
Nutrition Facts
Frequently Asked Questions
Does my starter need to be at room temperature?
Yes, use room-temperature starter that’s active and bubbly. Cold starter from the fridge will take too long to activate. Feed it 4-12 hours before baking for best results.
Can I use all-purpose flour instead of bread flour?
Yes, but expect a slightly denser crumb. Bread flour’s higher protein creates better structure. If substituting, keep the ratio 1:1 and consider adding 1 extra tbsp vital wheat gluten.
Why is my loaf dense instead of light and airy?
This usually means your starter wasn’t active enough or the dough didn’t rise properly. Ensure your starter floats in water before using. Also, avoid opening the machine during cycles.
How do I get a crispier crust?
Select the dark crust setting and add 1 tbsp cornmeal to the pan. For extra crispness, brush the top with water before baking or bake 5 extra minutes.

Trained in classic French technique but raised on slow-cooked ribs and spicy rubs, she blends culinary skill with smoke and soul.
- Recipe for Boneless Pork Chops in Cast Iron Skillet: Sear and Baste to Juicy Perfection - October 3, 2026
- Recipe for Boneless Cross Rib Roast: Slow-Roasted Beef with Herb Crust - October 3, 2026
- Hamburgers in Sauce Recipe Crock Pot: Slow-Cooked Savory Delight - October 3, 2026