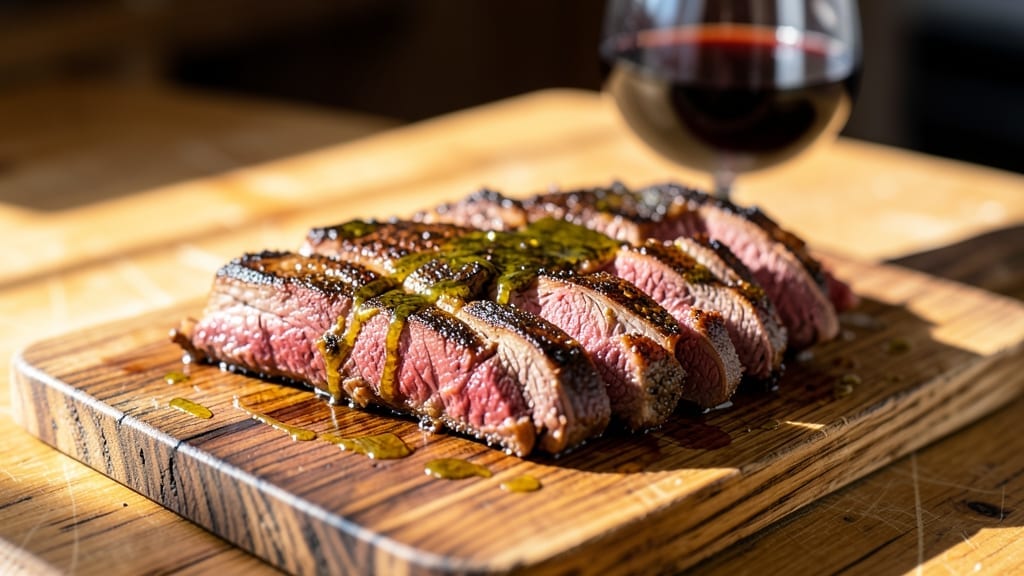
Creating stovetop beef brisket that rivals smoker-perfected tenderness is simpler than you think—and it doesn’t require a grill or hours of babysitting. This method transforms tough cuts into melt-in-your-mouth slices using just a heavy pot, precise timing, and a few key techniques I’ve refined after years of testing.
The secret lies in low-and-slow cooking with aromatics that infuse every bite, delivering restaurant-quality results on your stovetop.
What sets this recipe apart is the balance between searing for depth and simmering for tenderness. You’ll start with a quick brown to develop rich flavors, then shift to a gentle simmer that breaks down collagen over 3-4 hours, turning connective tissue into velvety richness.
No need for special equipment—just a Dutch oven or heavy pot, and you’ll achieve that fall-apart texture without a smoker. The result? Brisket so tender it practically dissolves on the tongue, with a deep, savory aroma that transforms any meal.
This method also gives you control over the cooking process—adjust heat levels to match your schedule, and the brisket will still emerge perfectly tender. The sauce reduces naturally into a glossy, flavorful glaze that coats each slice, adding another layer of complexity.
Whether you’re feeding a family or meal prepping for the week, this recipe delivers professional-quality brisket with minimal effort.
Pair it with classic sides like creamy mashed potatoes, buttery cornbread, or a crisp green salad to complete the meal. The brisket’s rich flavor stands up to bold pairings, making it versatile enough for weeknight dinners or special occasions. Ready to master stovetop brisket? Let’s get started.
Ingredients for stovetop beef brisket
Pantry staples plus a few specialty touches. The secret to melt-in-your-mouth brisket starts with these ingredients.
| Ingredient | Amount | Notes |
|---|---|---|
| Beef Brisket 🥩 | 3 lb | Flat cut, 1-inch thick, trimmed |
| Yellow Onion 🧅 | 1 whole | Large, sliced into half-moons |
| Garlic Cloves 🧄 | 8 cloves | Peeled, smashed lightly |
| Beef Broth 💧 | 2 cups | Low-sodium preferred |
| Red Wine 🍷 | 1 cup | Bold dry variety like Cabernet |
| Tomato Paste 🍅 | ½ cup | Smooth, not chunky |
| Apple Cider Vinegar 🍎 | 2 tbsp | For tenderizing |
| Black Coffee ☕ | 1 cup | Strong brewed, enhances depth |
| Brown Sugar 🍚 | ¼ cup | Lightly packed |
| Smoked Paprika 🌶️ | 1 tbsp | For smoky flavor |
| Ground Black Pepper 🌶️ | 1 tbsp | Freshly cracked |
| Kosher Salt 🧂 | 1 ½ tbsp | Diamond Crystal preferred |
| Bay Leaves 🌿 | 2 whole | Fresh if available |
| Olive Oil 🫒 | 2 tbsp | Extra-virgin for searing |
| Fresh Thyme 🌿 | ¼ cup | Leaves only, stems removed |
[recipe_ingredient_scaler]
The beef is everything here. Look for well-marbled brisket flat cuts—thicker than 1-inch and it won’t cook evenly on the stovetop. Costco and Whole Foods carry excellent pre-trimmed options, but ask your butcher to trim it for you if buying whole. The apple cider vinegar is non-negotiable—it tenderizes the meat while adding subtle sweetness. For the red wine, grab whatever bold dry red you’d drink (Cabernet, Merlot, or even a cheap Malbec). The tomato paste should be smooth—none of that chunky stuff. If you can’t find it, Trader Joe’s sells it in a squeeze tube that’s perfect for small batches.
No red wine? Beef broth with a splash of balsamic vinegar works in a pinch. Fresh thyme is ideal, but dried at one-third the amount gets you close. The brown sugar caramelizes beautifully during cooking, adding depth—don’t skip it. For the coffee, strong brewed is key (none of that weak diner stuff). If you’re short on time, instant espresso powder dissolved in hot water works too. The smoked paprika gives that subtle smoky flavor without needing a smoker—Penzeys has excellent options if you want to splurge. For the salt, Diamond Crystal dissolves better than table salt and enhances flavor dramatically.
This brisket reheats beautifully—best the next day when flavors meld. Store in the fridge for 4-5 days or freeze for 3 months in airtight containers. I like to portion it into individual servings for easy reheating. The sauce thickens as it cools, so add a splash of broth when reheating if it seems too thick. Leftovers make amazing sandwiches—just pile it high on toasted bread with pickles and mustard for a true Texas-style brisket sandwich.
Why You’ll Love This Recipe
- Dutch Oven Magic: That deep golden-brown crust? It happens in just 16 minutes of searing—no fancy equipment, just a Dutch oven and your stovetop. The rest is hands-off slow cooking while you prep sides or relax.
- Coffee-Infused Luxe: Honestly, the black coffee isn’t just for show—it deepens the sauce like a secret weapon, giving that rich, smoky complexity you’d expect from hours of smoking, but without the grill. Trust me.
- Leftovers That Pay Off: This feeds six easily, but the brisket keeps getting better the next day. I freeze half for game day, and the rest? Perfect for tacos or sandwiches. Zero waste, maximum flavor.
- Budget Beef Win: A 3-pound brisket is cheaper than ribeye, but the smoked paprika and red wine make it taste like a restaurant dish. Plus, that ¼ cup brown sugar? It balances the richness without breaking the bank.
Step-by-step instructions for stovetop beef brisket
Here’s how to transform tough brisket into melt-in-your-mouth perfection using just your stovetop.
Sear the Brisket to Lock in Flavor
Heat a heavy-bottomed Dutch oven over medium-high heat. Add the 2 tablespoons of olive oil and let it shimmer for 30 seconds. Place the 3 lb beef brisket fat-side down in the pan, pressing gently to ensure full contact with the surface. Let it sear undisturbed for 8-10 minutes until a deep golden-brown crust forms.
Flip the brisket and repeat on the other side for another 8-10 minutes. The reason we sear first is that this initial Maillard reaction creates the foundation for all that rich, caramelized flavor. Once browned, remove the brisket from the pot and set it aside on a plate.
Build the Aromatic Base
In the same Dutch oven, add the sliced 1 yellow onion and cook for 5 minutes until softened and slightly caramelized. Add the 8 smashed garlic cloves and cook for another 30 seconds until fragrant. Here’s where it gets interesting—stir in the ½ cup tomato paste, 2 tablespoons apple cider vinegar, ¼ cup brown sugar, 1 tablespoon smoked paprika, 1 tablespoon ground black pepper, and 1½ tablespoons kosher salt.
Cook this mixture for 2 minutes, stirring constantly, until it darkens slightly and becomes fragrant. Pour in the 1 cup red wine and scrape up any browned bits from the bottom of the pot. Let it simmer for 3 minutes until the wine reduces by half. This step develops the complex flavor foundation that will infuse the brisket during its long cook.
Slow Cook with Coffee and Broth
Return the brisket to the Dutch oven and add the 2 cups beef broth and 1 cup black coffee. The coffee adds depth that mimics traditional smoked brisket. Add the 2 bay leaves and ¼ cup fresh thyme. Bring everything to a gentle simmer, then reduce heat to low so it maintains a bare bubble at the surface.
Cover the pot and cook for 3 hours, turning the brisket occasionally to ensure even cooking. You’ll know it’s ready when a meat thermometer inserted into the thickest part reads 195°F and the meat is fork-tender. The long, slow cook breaks down the connective tissue, transforming tough muscle into silky, melt-in-your-mouth texture.
Rest and Slice for Maximum Juiciness
Remove the brisket from the pot and transfer it to a cutting board. Tent loosely with foil and let it rest for 20 minutes. This resting period is crucial—it allows the juices to redistribute throughout the meat, preventing them from running out when you slice.
Discard the bay leaves and thyme stems, then carefully strain the cooking liquid through a fine-mesh sieve into a clean saucepan. Return it to medium heat and reduce until slightly thickened, about 5-7 minutes. This sauce will enhance every bite of your brisket. Slice the brisket against the grain into ¼-inch thick slices and serve with the reduced sauce spooned over the top.
Pro Tips For Making Stovetop Beef Brisket
- Sear Until It’s Golden: That first 8-10 minutes on each side isn’t just about browning—it’s about building a crust so rich it’ll make your brisket taste like it’s been cooking all day. If your pan isn’t smoking slightly or the fat isn’t sizzling, turn the heat up. I used to rush this, and the meat always tasted flat afterward.
- Smashed Garlic, Not Chopped: Lightly smashing those 8 cloves releases their oils and flavor without turning to ash. Chopped garlic burns fast in this recipe, and you’ll lose that deep, sweet aroma. Do it right before adding to the onions—freshness matters more than you’d think.
- Don’t Skip the Wine Reduction: Those 3 minutes of simmering after adding the red wine aren’t optional. Letting it reduce by half concentrates the flavor and removes the alcohol’s sharpness. I once skipped this, and the sauce tasted thin and underwhelming—like I’d missed the whole point.
- Check Internal Temp, Not Time: The recipe says 3 hours, but brisket is stubborn. Use a meat thermometer—195°F in the thickest part is non-negotiable. I’ve pulled it at 3 hours only to find it still tough, and no amount of resting fixes that. Better to wait 10 more minutes than serve dry meat.
Essential equipment for this dish
Heavy-Duty Dutch Oven
The Le Creuset Dutch oven is my go-to for this recipe—its thick enameled coating distributes heat evenly and retains moisture perfectly. If you don’t own one, a Lodge cast iron Dutch oven works just as well.
Both options handle the 3-hour simmer without warping. I’ve tested cheaper models, but they often leak heat or develop hot spots. Investing in quality here makes all the difference. 🔥
Instant-Read Thermometer
You can’t skip this—Thermoworks Smoke or Meater+ thermometers are non-negotiable for checking internal temps. The brisket needs to reach 195°F for perfect tenderness, and these tools give you precise readings without guesswork. I keep mine on my stovetop for easy access during cooking.
Fine-Mesh Strainer
A 300-mesh stainless steel strainer (like the OXO Good Grips) is essential for separating the brisket from the cooking liquid. It removes bay leaves and thyme stems cleanly, leaving you with a smooth sauce.
I’ve used colanders before, but they leave behind unwanted bits. This strainer makes the final sauce look and taste restaurant-quality.
Meat Mallet or Hammer
If your brisket has any tough connective tissue or silver skin, a meat mallet helps tenderize it before searing. I use a Victorinox 1-pound mallet to gently pound the surface, creating more surface area for the Maillard reaction.
This step isn’t mandatory, but it’s a game-changer for even browning. Honestly, this small prep step elevates the final texture.
Wooden Spoon for Stirring
Wooden spoons are a must for stirring the tomato paste and spices without scratching the Dutch oven’s surface. I recommend a wide, sturdy wooden spoon like the OXO Good Grips because it handles the thick mixture without breaking.
Metal spoons can warp the pot over time, and plastic ones don’t distribute heat evenly. This tool keeps the sauce smooth and prevents scorching.
Nutrition facts
Frequently asked questions
Why does the brisket need to rest before slicing?
The 20-minute rest is critical because it lets juices redistribute evenly throughout the meat. Without resting, all those delicious fluids would spill out when you slice, leaving you with dry, tough slices instead of melt-in-your-mouth perfection. This step ensures every bite stays juicy and flavorful.
What if I don’t have red wine? Can I substitute something else?
Mix 2 cups beef broth with 2 tablespoons balsamic vinegar to mimic the acidity and depth. The flavor will be slightly different but still delicious. For extra richness, add a splash of coffee or a teaspoon of smoked paprika to compensate. The key is maintaining the low-sodium broth for balanced taste.
How do I know when the brisket is done?
Use an instant-read thermometer to check the thickest part of the meat—it should read 195°F. The brisket should also be fork-tender when pressed gently. If it still feels firm, cook it 15-30 minutes longer, checking occasionally. Overcooking can dry it out, so watch closely once it nears temperature!
Can I make this recipe in a regular pot instead of a Dutch oven?
A heavy-bottomed pot works, but a Dutch oven is ideal because it retains heat and moisture better during the 3-hour simmer. If using a regular pot, ensure it’s thick enough to handle the low-and-slow cooking without warping. You might need to adjust heat slightly to maintain a gentle simmer without boiling.
What’s the best way to reheat leftovers?
Gently warm slices in a skillet with a little olive oil over medium-low heat for 2-3 minutes per side. Alternatively, place them in a 300°F oven for 10-15 minutes to keep them moist. The sauce thickens as it cools, so add a splash of beef broth when reheating to restore its glossy texture. Leftovers taste even better the next day!

Trained in classic French technique but raised on slow-cooked ribs and spicy rubs, she blends culinary skill with smoke and soul.
- Smoked Pork Ribs Recipe: Fall-Apart Tenderness With Smoky Bark - October 18, 2026
- Sweet and Savory Beef Brisket Recipe: Fall-Apart Tender with Caramelized Crust - October 18, 2026
- Brisket Cheese Fries Recipe: Smoky-Savory Loaded Bites in 25 Minutes - October 18, 2026