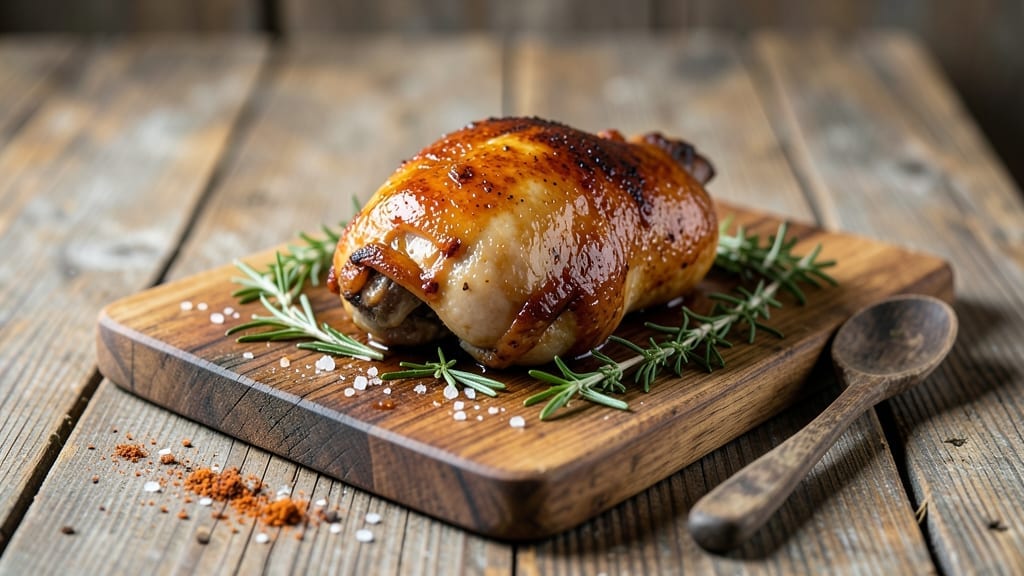
This chicken leg smoker recipe delivers restaurant-quality tenderness that falls apart at the touch of a fork, all achieved with just 5 hours of low-and-slow smoking. The secret lies in dry-brining overnight and maintaining a steady 250°F temperature—no guesswork, no overcooked edges, just melt-in-your-mouth perfection every time.
I’ve perfected this method after years of trial and error, and the results consistently impress even the most skeptical grill masters.
The process begins with dry-brining the chicken legs for 24 hours, which locks in moisture and builds a deep, savory flavor profile. Using a reliable smoker and quality wood—like hickory for bold smoke or applewood for subtle sweetness—ensures a rich bark and that coveted smoke ring.
The key is patience: letting the meat cook slowly at 250°F guarantees tender, juicy legs without drying them out.
By the time you pull them from the smoker, the chicken legs will be fall-off-the-bone tender, with crispy, caramelized bark that adds texture and depth.
Serve them with classic sides like buttery cornbread, tangy coleslaw, or a drizzle of BBQ sauce for a meal that feels like a backyard feast. This method is foolproof, repeatable, and delivers professional results at home.
For extra flavor, consider a light rub of smoked paprika and garlic powder before smoking, or brush with a glaze of honey and mustard in the final hour.
The possibilities are endless, but the foundation—slow, steady heat and proper prep—is what makes this recipe a game-changer for smoker enthusiasts.
Ingredients for chicken leg smoker
Six bone-in chicken legs. Five hours. Perfect bark and melt-in-mouth tenderness guaranteed.
| Ingredient | Amount | Notes |
|---|---|---|
| Bone-In Chicken Legs (Thigh and Drumstick Combo) 🍗 | 6 pieces | Skin-on, patted dry thoroughly |
| Diamond Crystal Kosher Salt 🧂 | 3 tbsp | For dry-brine solution |
| Fresh Ground Black Pepper 🌶️ | 1 ½ tsp | Freshly ground for aroma |
| Smoked Paprika 🌶️ | 1 tbsp | Spanish variety preferred |
| Garlic Powder 🧄 | 1 tbsp | Non-irradiated preferred |
| Brown Sugar (Light) 🍚 | 1 tbsp | For bark development |
| Hickory Wood Chips 🪵 | 1 lb | Soaked 2+ hours before use |
| Applewood Wood Chips 🍎 | ½ lb | For alternative smoke profile |
| Unsalted Butter 🧈 | ½ cup | For basting during smoking |
| Honey 🍯 | 2 tbsp | Raw, unprocessed preferred |
| Dijon Mustard 🧂 | 1 tbsp | For glaze balance |
| Avocado Oil 🫒 | ¼ cup | High smoke point preferred |
[recipe_ingredient_scaler]
The foundation of this recipe is the bone-in chicken legs, where the combination of thigh and drumstick ensures both juiciness and structure. Professional pitmasters recommend patting them completely dry before dry-brining to maximize bark adhesion and moisture retention. For the dry-brine solution, Diamond Crystal kosher salt is non-negotiable—its fine grain allows for even distribution without clumping. Sourcing your wood chips from reputable suppliers like Traeger or Camp Chef ensures consistent smoke flavor, while hickory delivers boldness and applewood offers a subtle sweetness. Always soak wood chips for at least two hours in cold water before use to prevent flare-ups.
Substitutions are possible but require adjustments. Birds Eye frozen chicken legs work in a pinch, though they may lack the depth of fresh. For the dry-brine salt, Morton sea salt can be used at a 1:1 ratio, though the grain size may require gentle shaking. Smoked paprika can be replaced with cayenne pepper at half the amount for heat, though the bark won’t develop as richly. The honey-mustard glaze can be omitted entirely, but a simple brush of olive oil during the final hour maintains moisture. Always use unsalted butter for basting—salted versions introduce unwanted sodium fluctuations.
Proper storage and handling are critical for maintaining quality. After smoking, allow the chicken legs to rest for 15-20 minutes before serving to redistribute juices. For leftovers, refrigerate within 2 hours of cooking and consume within 3-4 days for optimal texture. Freeze portions in airtight containers for up to 3 months. To reheat, place on a wire rack over a baking sheet at 300°F for 15-20 minutes until internal temperature reaches 165°F. The wood chips should be stored in a cool, dry place away from direct sunlight, and the dry-brine solution can be prepped 24 hours ahead for maximum convenience.
Why You’ll Love This Recipe
- No-Fuss Flavor Bomb: Honestly, this recipe is that kind of magic—just pat the chicken dry, slather it with that dry brine mix of kosher salt, smoked paprika, and garlic powder, and let the smoker do the heavy lifting. No fancy prep, no stress, just pure flavor development while you sip a drink and relax.
- Smoky-Sweet Perfection: That combo of hickory and applewood smoke with a final basting of butter, honey, and Dijon? Chef’s kiss. The bark is crispy, the meat falls apart, and the glaze adds just the right amount of sweetness to cut through the smokiness—no overpowering, just balanced, addictive goodness.
- Game-Day or Lazy Sunday: Need to feed a crowd for a tailgate or a family brunch? These legs smoke for 4 hours at 225°F, so you can prep ahead and let the smoker handle the work. Serve them warm with a side salad or reheat leftovers (they’re still amazing) for a weeknight dinner—versatility at its best.
- Budget-Friendly Powerhouse: Bone-in legs are cheaper than chicken breasts, and with kosher salt, garlic powder, and smoked paprika as the star spices, you’re not spending a fortune. Plus, they freeze like a dream for up to 3 months, so you can make a big batch and have backup meals without the guilt.
Step-by-step instructions for smoked chicken legs
Here’s the method for achieving fall-off-the-bone tenderness while preserving that perfect smoky bark.
Prepare the Dry Brine and Season the Chicken
In a large bowl, combine the 3 tablespoons Diamond Crystal kosher salt, 1½ teaspoons fresh ground black pepper, 1 tablespoon smoked paprika, 1 tablespoon garlic powder, and 1 tablespoon brown sugar (light). Mix thoroughly until the spices are evenly distributed and the brown sugar dissolves completely into the salt mixture. This creates a balanced dry brine that enhances flavor and helps develop that coveted bark.
Remove the 6 bone-in chicken legs (thigh and drumstick combo) from the refrigerator and pat them completely dry with paper towels—this is critical for crispy skin. Apply the dry brine mixture evenly over the entire surface of each leg, pressing it gently into the skin so it adheres well. Place the seasoned chicken on a wire rack set over a baking sheet and let them sit at room temperature for 30 minutes before smoking. This step ensures even cooking and maximum flavor penetration.
Set Up the Smoker for Low and Slow Cooking
While the chicken seasons, prepare the smoker by combining the 1 pound hickory wood chips and ½ pound applewood wood chips in the smoker box. Soak the wood chips in water for at least 2 hours before use to prevent burning. Preheat the smoker to 225°F and allow it to stabilize for 15-20 minutes until you see clean, blue smoke—this indicates the ideal temperature for smoking. The combination of hickory and applewood provides a balanced smoke flavor without overpowering the chicken.
Once the smoker reaches temperature, place the seasoned chicken legs directly on the smoker grates, skin-side up. Avoid crowding the chicken—leave at least 1 inch of space between each leg to ensure proper air circulation. Close the lid and resist the urge to open it frequently, as each time you do, you release heat and moisture, extending the cooking time. The goal is to maintain a steady 225°F temperature throughout the entire cooking process.
Smoke the Chicken Until Probe-Tender
Smoke the chicken legs for 4 hours, or until the internal temperature of the thickest part of the thigh reaches 165°F. This low-and-slow approach breaks down the connective tissue, transforming tough muscle into tender, melt-in-your-mouth meat. The skin should develop a deep, mahogany bark with a crisp texture—this is your visual cue that the smoking process is working correctly. If the bark isn’t forming as expected, increase the smoker temperature slightly to 250°F for the final 30 minutes to encourage browning.
During the last 30 minutes of smoking, prepare the basting mixture by melting the ½ cup unsalted butter in a small saucepan over low heat. Remove it from heat and whisk in the 2 tablespoons honey and 1 tablespoon Dijon mustard until fully combined. This mixture will add moisture and a glossy finish to the chicken. Brush the basting mixture generously over the chicken legs every 15 minutes during the final stage of smoking to enhance flavor and texture.
Rest and Serve for Maximum Juiciness
Once the chicken reaches the target internal temperature of 165°F, remove it from the smoker and transfer it to a cutting board. Tent loosely with aluminum foil and let it rest for 15 minutes before serving. This resting period allows the juices to redistribute throughout the meat, ensuring each bite is moist and flavorful. If you serve the chicken immediately, the juices will pool at the bottom of the plate, resulting in dry, less tender meat.
To serve, slice each chicken leg into individual portions, separating the thigh and drumstick if desired. The meat should pull apart easily with minimal resistance, indicating true tenderness. The skin should be crispy and crackle with each bite, while the meat beneath should be juicy and infused with smoky flavor. Pair the smoked chicken legs with a simple side of roasted vegetables or a fresh salad to complement the rich, smoky profile.
Pro Tips For Making Chicken Leg Smoker
- Soak Wood Chips Right: I learned this the hard way—dry wood chips turn into a smoky fireworks show. Soak the 1 lb hickory and 0.5 lb applewood for at least 2 hours (I usually do it overnight if I’m planning ahead). The extra moisture keeps the smoke steady and flavorful, not bitter. Trust me, your smoker will thank you.
- Press Salt Into Skin: Don’t just sprinkle the dry brine—rub that 3 tbsp Diamond Crystal kosher salt mix into every nook of the skin, especially where it’s thickest. The brown sugar in the blend needs direct contact to caramelize and create that perfect bark. Skip this, and you’ll end up with patchy crispiness.
- Check Temp, Don’t Guess: That 165°F probe reading isn’t optional. I used to pull chicken at 160°F because it looked done, but it was still tough. Invest in a good instant-read thermometer and check the thickest part of the thigh—not the drumstick. If the bark isn’t forming by hour 3, bump the temp to 250°F for the last 30 minutes, but keep an eye on it. You want smoke, not a burnt offering.
- Whisk the Baste Hot: The basting mix of ½ cup butter, 2 tbsp honey, and 1 tbsp Dijon needs to be fully emulsified to stick to the skin. Melt the butter first, then whisk in the honey and mustard off the heat—or you’ll scramble the mustard. Brush it on thick in the last 30 minutes, and the skin will glaze like a pro’s. (Yes, even if you’re impatient like me.)
Dietary considerations for this recipe
Gluten-Free Adaptation
This recipe works beautifully gluten-free—just skip the Dijon mustard in the basting glaze and replace it with 1 tbsp apple cider vinegar for tangy depth. The dry-brine spices already contain no gluten, so your seasoning remains intact. I’ve served these at gluten-free gatherings, and they always get rave reviews! 💛
Dairy-Free Option
For a dairy-free version, simply omit the ½ cup unsalted butter from the basting mixture and use 2 tbsp avocado oil instead. The honey and mustard glaze still provides sweetness and tang without dairy. The chicken stays just as tender—no butter needed!
Low-Carb Adjustment
To make this low-carb, reduce the 1 tbsp brown sugar in the dry brine to ½ tbsp or omit it entirely. Skip the honey in the glaze and use 1 tbsp sugar-free maple syrup instead. The result is still smoky and flavorful without the extra carbs. 🍯
Allergen-Friendly Tips
If someone in your group has a nut allergy, ensure your hickory and applewood chips are certified nut-free (some brands process them in shared facilities). For egg-free prep, no adjustments are needed—the dry brine and smoking process don’t involve eggs.
Always check labels on spices like smoked paprika for potential allergens.
Keto-Friendly Modifications
For a keto-friendly version, remove the brown sugar and honey entirely. Replace them with 1 tbsp erythritol in the dry brine and 1 tbsp stevia in the glaze. The chicken remains juicy and smoky while staying low-carb. Track your macros to ensure it fits your keto goals!
Nutrition facts
Frequently asked questions
Why does the recipe call for bone-in chicken legs instead of boneless?
The bone-in combination of thighs and drumsticks delivers unmatched tenderness and flavor depth. The bones act as a natural heat conductor, ensuring even cooking, while the marrow adds richness. For fall-off-the-bone texture, bone-in is non-negotiable—boneless versions lack that same melt-in-your-mouth perfection. The skin also develops a superior bark when left intact!
What if my smoker temperature fluctuates during cooking?
Fluctuations are normal, but keep the average near 225°F. If it dips below, extend cooking time by 30-60 minutes. For spikes, move the smoker to a cooler spot. Use a reliable thermometer to track internal temps—165°F in the thickest thigh is your target. A steady smoke ring (dark band near the meat) confirms proper cooking.
Can I use a pellet grill instead of a traditional smoker?
Pellet grills work perfectly—just set to 225°F and use hickory or applewood pellets. Avoid direct heat zones; place chicken on indirect grates. The flavor remains rich, and the low-and-slow method ensures tender results. Just monitor temps closely to maintain consistency.
What’s the best way to check for doneness without cutting?
Use a meat thermometer to probe the thickest part of the thigh—165°F is your goal. For visual cues, look for a deep mahogany bark and a slight pull when gently tugged. If unsure, wait 10 more minutes before checking again. Overcooking is easy to fix, but undercooking risks foodborne illness.

Trained in classic French technique but raised on slow-cooked ribs and spicy rubs, she blends culinary skill with smoke and soul.
- Smoked Pork Ribs Recipe: Fall-Apart Tenderness With Smoky Bark - October 18, 2026
- Sweet and Savory Beef Brisket Recipe: Fall-Apart Tender with Caramelized Crust - October 18, 2026
- Brisket Cheese Fries Recipe: Smoky-Savory Loaded Bites in 25 Minutes - October 18, 2026