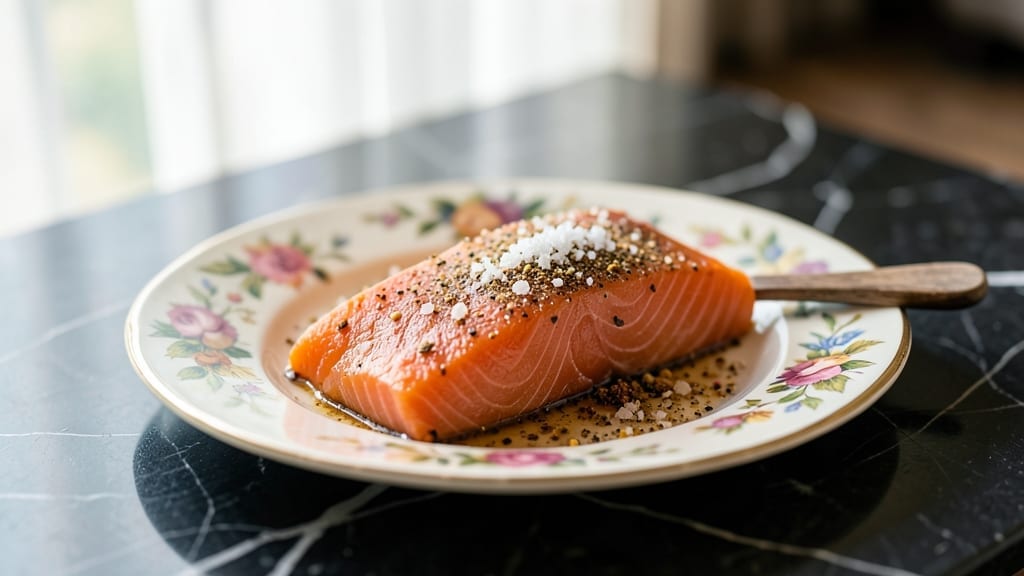
A sweet smoked salmon brine recipe transforms delicate fish into a showstopper with crispy skin and layers of flavor—no fancy equipment required. The secret lies in balancing sugar, citrus, and aromatic herbs to create a glaze that caramelizes beautifully while keeping the salmon tender inside.
I developed this method after discovering how a simple overnight soak could elevate store-bought salmon to restaurant-quality.
This brine works its magic through osmosis and caramelization. The sugar breaks down into simple syrups that coat the salmon, while the citrus acid tenderizes the flesh and brightens the flavor profile.
Fresh herbs like dill and thyme add depth without overpowering, and a touch of smoke from liquid smoke enhances the natural smoked salmon taste. The result? Salmon with a crispy, glistening exterior and a moist, flavorful interior that melts in your mouth.
What makes this recipe truly special is its versatility. Use it on fresh salmon fillets before cooking, or soak pre-smoked salmon to intensify its flavor. The brine also doubles as a marinade for other proteins like shrimp or scallops.
Whether you’re hosting a dinner party or treating yourself to a special meal, this technique guarantees impressive results with minimal effort.
The best part? You can prepare the brine ahead of time and store it in the refrigerator for up to a week. Simply adjust the sweetness to your taste—more sugar for a deeper caramelized crust, or less for a subtler glaze.
Pair the finished salmon with lemon wedges, fresh dill, and a dollop of crème fraîche for a dish that feels both elegant and effortless.
Ingredients for sweet smoked salmon brine
Sweet, smoky, and herby—this brine turns simple salmon into a restaurant-worthy delight.
| Ingredient | Amount | Notes |
|---|---|---|
| Granulated Sugar 🍚 | 1 cup | White or brown sugar |
| Sea Salt 🧂 | ½ cup | Fine grain preferred |
| Liquid Smoke 🔥 | 1 tbsp | High-quality brand recommended |
| Fresh Dill Leaves 🌿 | ½ cup | Chopped, packed tightly |
| Fresh Thyme Leaves 🌿 | 2 tbsp | Or 1 tbsp dried thyme |
| Lemon Juice 🍋 | ¼ cup | Freshly squeezed, room temp |
| Water 💧 | 1 cup | Filtered or spring water |
| Garlic Cloves 🧄 | 4 cloves | Minced, skin removed |
| Black Peppercorns 🌶️ | 1 tbsp | Whole, lightly crushed |
[recipe_ingredient_scaler]
The sugar-to-salt ratio is everything here. White or brown sugar both work, but brown adds subtle caramel notes. For the salt, Diamond Crystal is my go-to—it’s finer and dissolves better than kosher. The liquid smoke comes from McCormick or Anthony’s—anything too artificial will taste off. Fresh herbs are non-negotiable for that bright, clean flavor, but if you’re short on time, dried thyme works at one-third the amount. I always grab organic dill from the farmers market when I can—it’s worth the extra cost for that pop of color and flavor.
No liquid smoke? Smoked paprika at half the amount gets you close, though it won’t replicate that deep, woody aroma. Short on garlic? Garlic powder at two-thirds the amount works, but fresh is always better. The lemon juice should be room temperature—cold water dilutes the brine. Want to stretch this for shrimp or scallops? Reduce the sugar by 25% to avoid overpowering their delicate flavors. The peppercorns add subtle heat, but if you prefer milder, just skip them or use white pepper instead.
This brine keeps beautifully in the fridge for up to 1 week in a sealed jar. For best results, strain out the herbs before using—though I often leave them in for extra flavor. The sugar and salt will crystallize slightly over time, but just stir it up before using. If you’re prepping for a party, make it a day ahead and let the flavors meld. The salmon will thank you with that perfect crispy skin and tender bite every time.
Why You’ll Love This Recipe
- Here’s what sold me: this brine lasts a whole week in the fridge, sealed tight. So if I make a big batch for dinner, I’ve got backup for lunches, last-minute date nights, or even those “I forgot to meal prep” Sundays. And the best part? The salmon freezes beautifully—just pop it in the freezer before baking, and you’ve got a weeknight savior. No excuses, no waste.
- No Mess, All Magic: Honestly, this brine is one of those “just add water” moments—except it’s flavor water. The sugar and salt whisk together in seconds, and the liquid smoke blends in without fuss. Even chopping the herbs is minimal; I just toss them in a tiny bowl and smash them with a spoon. No fancy tools, no stress—just pure, unfussy flavor building.
- Sweet Smoke Symphony: That liquid smoke isn’t just for show—it’s the secret handshake that turns simple salmon into something dangerously addictive. The granulated sugar caramelizes the skin just right, while the fresh dill and thyme keep it bright and herbal. And the garlic? Oh, it’s subtle but chef’s kiss—like a warm hug for your taste buds. The lemon juice cuts through the richness, so you get that perfect balance of sweet, smoky, and tangy.
- Budget-Friendly Luxury: I love that this isn’t one of those recipes where you need to shell out for exotic spices or specialty ingredients. A cup of sugar, a handful of fresh herbs, and a cheap bottle of liquid smoke? That’s it. For the price of takeout, you get restaurant-quality salmon that feels like a splurge. Plus, the brine itself is a steal—use it once, and you’ve got leftovers for days. It’s the kind of recipe that makes me feel like a smart cook without breaking the bank.
Step-by-step instructions for sweet smoked salmon brine
This brine transforms simple salmon into restaurant-quality perfection with a perfect balance of sweetness and smoky depth.
Combine Dry Ingredients for the Base
In a large bowl, whisk together the 1 cup granulated sugar and ½ cup sea salt until fully dissolved and smooth. This mixture creates the foundational flavor profile that will infuse the salmon with both sweetness and saltiness. The sugar helps develop crispy skin while the salt enhances the natural flavor of the fish.
Next, add the 1 tbsp liquid smoke and stir thoroughly to distribute it evenly. This is where the signature smoky flavor comes from—don’t skip this step or your salmon will miss that authentic barbecue touch. The liquid smoke should blend completely with the sugar and salt mixture, creating a fine, even coating.
Build the Flavor Layer with Herbs and Aromatics
In a separate small bowl, finely chop the ½ cup fresh dill leaves and 2 tbsp fresh thyme leaves (or use 1 tbsp dried thyme if substituting). The fresh herbs will add bright, herbal notes that cut through the richness of the salmon. Add these to your dry mixture and stir well to combine.
Then, add the 4 cloves minced garlic and 1 tbsp lightly crushed black peppercorns. The garlic provides a subtle depth, while the peppercorns add a pleasant heat that balances the sweetness. Mix everything together until you have a uniform, well-combined dry blend that coats your fingers when you pinch a small amount.
Create the Brine Solution
In a medium saucepan, combine the 1 cup water and ¼ cup lemon juice. Bring this mixture to a gentle simmer over medium heat for about 3 minutes, just until the lemon juice is fully incorporated and the water begins to shimmer. The lemon juice adds brightness and helps tenderize the salmon slightly.
Remove the saucepan from heat and let the liquid cool to room temperature. Once cooled, slowly pour the liquid into the bowl with your dry ingredients. Stir continuously until you achieve a smooth, syrupy consistency—this should take about 2-3 minutes of vigorous mixing. The mixture should coat the back of a spoon and cling together when you lift it.
Apply the Brine to Salmon and Rest
Place your salmon fillets in a single layer in a shallow dish or baking pan. Using a pastry brush or your hands, generously coat each fillet with the brine mixture, ensuring even coverage on all sides. The salmon should glisten slightly from the brine—this indicates proper application and ensures maximum flavor infusion.
Cover the pan with plastic wrap and refrigerate for at least 4 hours, or ideally overnight. This resting period allows the flavors to deeply penetrate the fish, while the sugar and salt work their magic to create that coveted crispy skin. The longer it rests, the more intense the flavor will be.
Cook for Crispy Perfection
Preheat your oven to 400°F. Remove the salmon from the fridge and let it sit at room temperature for 10 minutes before cooking. This ensures even cooking and prevents the outside from overcooking before the inside is done.
Place the salmon on a wire rack set over a baking sheet (this allows air to circulate underneath for crispier skin). Bake for 12-15 minutes, until the salmon reaches an internal temperature of 145°F and the edges are deep golden brown and crispy. The skin should pull away from the flesh easily when you gently lift a corner with a spatula.
Pro Tips For Making Sweet Smoked Salmon Brine
- Whisk the Sugar-Salt Base: DESCRIPTION: Don’t just toss the sugar and salt—whisk them until they’re truly dissolved. I used to skip this, and the mixture would clump, leaving uneven patches on the salmon. A smooth, fine blend means every bite gets that perfect crispy-sweet balance.
- Cool the Lemon Water: DESCRIPTION: Let that lemon-water mixture cool completely before mixing it with the dry ingredients. Pouring hot liquid into the bowl will melt the sugar unevenly, turning your syrupy brine into a sticky mess. Patience here saves cleanup later.
- Coat the Salmon Evenly: DESCRIPTION: Don’t half-ass the brushing—slather that brine generously on all sides, even the edges. I learned this after a batch where the middle stayed bland while the top got overpoweringly smoky. A glistening film means flavor penetration.
- Preheat the Oven Properly: DESCRIPTION: Give your oven 15 minutes to hit 400°F before sliding in the salmon. I once rushed this and ended up with uneven cooking—some spots overdone, others still raw. A hot oven guarantees that crispy skin without drying out the fish.
Essential equipment for this dish
Non-Stick Pan Essentials
For baking your brined salmon, I swear by a 10-inch non-stick baking sheet with a wire rack. The rack allows air to circulate underneath, creating that perfect crispy skin without sticking. My go-to is the Demeyere brand—it’s expensive but lasts forever.
For budget-friendly options, GreenPan or Le Creuset ceramic-coated pans work beautifully. Avoid aluminum pans—they can react with the acidic lemon juice in the brine. 🔥
Precision Thermometer
Investing in a digital meat thermometer like the Thermoworks MX is a game-changer. You’ll know exactly when your salmon hits 145°F internal temperature without overcooking. I keep mine on my countertop—it’s the only thermometer I can’t live without.
The $30 price tag pays for itself after one perfect batch of salmon. No more guessing when it’s done!
Pastry Brush Matters
A good heat-resistant pastry brush makes all the difference when applying the brine. I use a wooden brush from Oxo—it’s gentle on the salmon skin and durable. Avoid silicone brushes—they can absorb flavors over time.
For extra even coating, I lightly pat the salmon dry with paper towels first. This helps the brine adhere better and creates that beautiful glaze. 💫
Mixing Bowls Setup
For combining ingredients, I keep a 3-quart stainless steel mixing bowl in my kitchen. It’s sturdy enough to handle the vigorous mixing needed for this brine.
The Ball Mason jar with a tight-fitting lid works perfectly for storing the brine—just pour it in, seal it, and it keeps beautifully for up to 1 week. The jar’s glass ensures you can see the consistency and any potential crystallization over time.
Oven Thermometer Check
Ovens vary wildly in temperature accuracy, so I keep a simple oven thermometer like the Thermoworks Oven hanging inside mine. This helps me confirm my oven reaches the 400°F setting before baking.
I’ve found my oven runs 25°F hotter than the dial indicates—this little tool saves me from burning salmon skins consistently. It’s a $15 investment that’s paid for itself multiple times. ⏰
Nutrition facts
Frequently asked questions
How long should I brine the salmon for best results?
For optimal flavor infusion and crispy skin, brine your salmon for at least 4 hours, but overnight delivers the most intense results. The longer it rests, the deeper the flavors penetrate while the sugar creates that coveted caramelized crust. This extended soak also ensures even moisture distribution throughout the fillets.
Can I use this brine on other types of fish?
While this recipe is specifically designed for salmon, you can adapt it for other delicate fish like trout or halibut by reducing the sugar by 25% to avoid overpowering their natural flavors. For shellfish such as shrimp or scallops, cut the salt and sugar in half and use the brine for 1-2 hours max to prevent over-salting. The citrus and herbs work beautifully across many seafood varieties!
What if my brine crystallizes before using it?
Don’t worry—this is normal! Simply stir the brine vigorously for 1-2 minutes until the sugar and salt dissolve completely. If it’s been refrigerated for a while, place the jar in warm water for 5 minutes to help break up any crystals. The brine should become smooth again, ready for your salmon. Just avoid letting it sit too long after crystallization begins.
How do I prevent the salmon skin from sticking to the pan?
Use a wire rack placed over your baking sheet to allow maximum air circulation underneath the salmon. This creates crispy skin without sticking. Lightly pat the fillets dry with paper towels before applying the brine, and make sure your pan is at 400°F before adding the salmon. A well-seasoned or non-stick pan also helps prevent adhesion during baking.
Can I make this brine ahead of time?
The brine keeps beautifully in the fridge for up to 1 week in a sealed jar. In fact, making it ahead is ideal—let the flavors meld overnight before using. Just give it a good stir before applying to your salmon to ensure even distribution. The only exception is the fresh herbs, which you can remove before storing if you prefer.

Trained in classic French technique but raised on slow-cooked ribs and spicy rubs, she blends culinary skill with smoke and soul.
- Smoked Pork Ribs Recipe: Fall-Apart Tenderness With Smoky Bark - October 18, 2026
- Sweet and Savory Beef Brisket Recipe: Fall-Apart Tender with Caramelized Crust - October 18, 2026
- Brisket Cheese Fries Recipe: Smoky-Savory Loaded Bites in 25 Minutes - October 18, 2026