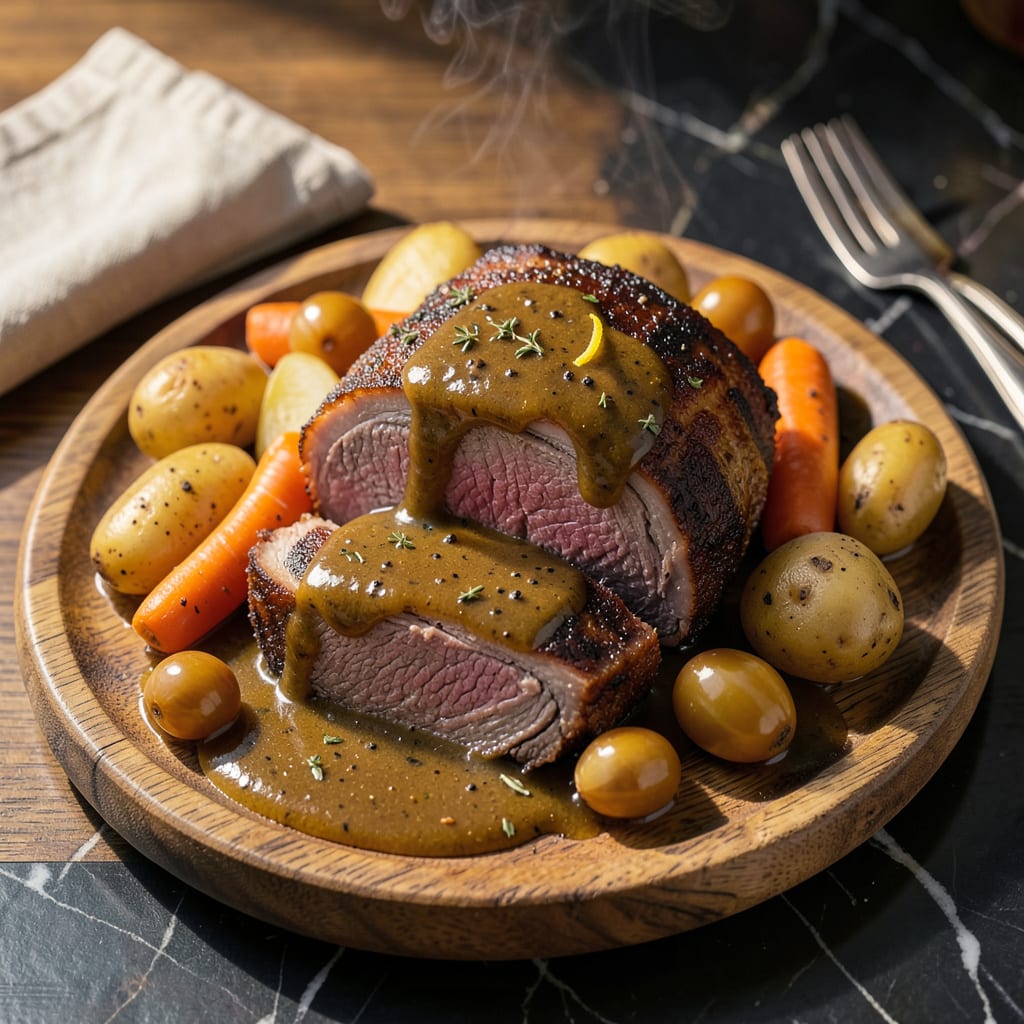
There’s nothing quite like a perfectly cooked pot roast with gravy so rich it coats the back of your spoon. I’ve been making this dish for years, and the secret to that velvety gravy? A simple flour technique that transforms ordinary broth into something extraordinary. No lumps, no fuss—just pure, comforting goodness.
This recipe starts with a well-seared chuck roast, slow-cooked until it practically falls apart. The real magic happens when you thicken the juices with flour—just a few tablespoons whisked in at the right moment creates a gravy that’s thick, glossy, and packed with flavor. It’s the kind of dish that makes your kitchen smell like home.
I’ll walk you through every step, from searing the meat to achieving that perfect gravy consistency. Whether you’re cooking for a Sunday dinner or just craving comfort food, this pot roast delivers. The best part? It’s easier than you think, and the results taste like you spent all day in the kitchen.
Serve it with buttery mashed potatoes or crusty bread to soak up every last drop of that incredible gravy. Let’s get started—your taste buds will thank you.
📚 In This Guide
- What You’ll Need
- Instructions
- Tips and Common Mistakes
What Youll Need
- ● Pot roast with liquid: 1 pre-cooked pot roast (3–4 lbs) with at least 2 cups of reserved broth/juices in the pot. (The more liquid, the easier to thicken!)
- ● All-purpose flour: ¼ cup (30g) for a standard 2-cup gravy. Use unbleached for smoother texture. 🌾
- ○ Fat separator (optional but helpful): To skim excess grease before thickening for a cleaner gravy.
- ● Whisk or fork: For lump-free mixing. A silicon whisk works best to avoid scratching pots.
- ● Small bowl: For creating a flour slurry (mix flour + cold water/broth).
- ● Cold water or broth: ½ cup (120ml) to mix with flour. Cold liquid prevents clumping! ❄️
- ● Measuring cups/spoons: For precise flour-to-liquid ratios.
- ● Spatula or wooden spoon: To stir gravy while it simmers.
- ○ Thermometer (optional): To check gravy temp (ideal: 165°F/74°C for food safety).
- ● Salt & pepper: To taste—adjust after thickening!
Instructions
Here’s the foolproof method to transform your pot roast liquid into the most luxurious gravy you’ve ever tasted.
Remove the Pot Roast and Strain the Juices
Carefully transfer the cooked pot roast to a serving platter and tent it loosely with aluminum foil to keep it warm. This is your chance to let the meat rest while you work on the gravy—don’t skip this step, as it allows the juices to redistribute throughout the roast.
Pour the cooking liquid through a fine-mesh strainer into a large measuring cup or bowl. I like to press down on the solids with a spoon to extract every drop of flavorful liquid. You should have about 3-4 cups of rich, meaty broth—this is the foundation of your velvety gravy.
Skim the Fat and Measure Your Liquid
Let the strained liquid sit for 2-3 minutes so the fat can rise to the surface. Using a large spoon, skim off as much fat as possible—this prevents your gravy from becoming greasy. I like to tilt the measuring cup slightly to make the fat pool at one end for easier removal.
You’ll need exactly 3 cups of liquid for perfect gravy consistency. If you’re short, add enough beef broth to reach the 3-cup mark. If you have extra, save it for soup or reduce it later. Pour your measured liquid into a clean saucepan and bring it to a gentle simmer over medium heat.
Create a Flour Slurry for Smooth Thickening
In a small bowl, whisk together ¼ cup all-purpose flour with ½ cup cold water until completely smooth. This slurry method prevents lumps and gives you better control over the thickening process than sprinkling flour directly into hot liquid. Make sure there are no dry spots of flour in the corners of your bowl.
The secret here is using cold water—it creates a perfect suspension that incorporates smoothly into hot liquid. If you see any lumps, keep whisking until the mixture is as smooth as heavy cream. This is your golden ticket to silky, lump-free gravy that will make your pot roast unforgettable.
Thicken the Gravy to Perfect Consistency
Slowly pour your flour slurry into the simmering liquid while whisking constantly. I like to add it in a thin, steady stream near the edge of the pan where the liquid is hottest—this helps prevent any potential lumping. Keep whisking vigorously for 1-2 minutes as the gravy begins to thicken.
You’ll notice the liquid transform right before your eyes, becoming richer and more velvety with each whisk stroke. Continue cooking for another 3-5 minutes until the gravy coats the back of a spoon and leaves a clear path when you run your finger through it. This is the perfect consistency—thick enough to cling to your pot roast but still pourable.
Finish and Serve Your Masterpiece
Taste your gravy and adjust the seasoning with salt and black pepper as needed. I often add a splash of Worcestershire sauce or a pinch of dried thyme at this stage for extra depth of flavor. Remember, the gravy should be well-seasoned enough to stand on its own but not overpower the pot roast.
Pour the gravy into a warmed gravy boat or directly over your sliced pot roast. Watch as it cascades down the tender meat, creating a glossy, flavorful coating. Serve immediately while hot—the contrast between the rich, velvety gravy and the fall-apart tender pot roast is what makes this dish truly spectacular. Prepare for compliments!
Tips and Common Mistakes
These are the secrets I’ve learned through years of perfecting this technique—small details that make a world of difference in your gravy.
Fat Skimming Technique: In Step 2, those 2-3 minutes of resting time are crucial! I like to use a fat separator if I have one, but if not, tilting the measuring cup and using a spoon works perfectly. The key is patience—don’t rush this step or you’ll end up with greasy gravy that coats your mouth unpleasantly. I’ve found that chilling the strained liquid for 10 minutes in the freezer speeds up fat separation dramatically when I’m in a hurry.
Slurry Success: When making your flour slurry in Step 3, use a fork instead of a whisk for the initial mixing. The tines help break up any tiny lumps more effectively than a whisk in this case. And here’s what nobody tells you—cold water is non-negotiable! I learned this the hard way after ending up with paste-like lumps when I tried using warm water. The ¼ cup all-purpose flour to ½ cup cold water ratio is perfect for that silky texture we’re after.
Whisking Wisdom: During Step 4, when you’re adding the slurry to the simmering liquid, pour it near where the bubbles are breaking at the surface. This is where the liquid is hottest and will immediately start incorporating the slurry. Those 1-2 minutes of vigorous whisking are when the magic happens—keep the heat at that perfect medium setting and don’t walk away! I like to use a flat whisk for this step as it covers more surface area.
Consistency Check: The 3-5 minutes of final cooking in Step 4 are your insurance policy against thin gravy. Here’s my test: dip a spoon in the gravy, then run your finger through it on the back of the spoon. If the trail holds and doesn’t immediately fill with liquid, you’ve nailed it. If it’s still too thin after 5 minutes, mix another tablespoon of flour with 2 tablespoons cold water and repeat the process—this always saves me when I’m serving a crowd and need extra gravy!
Pro Tips for Thicken Pot Roast With Flour
- These are the secrets I’ve learned through years of perfecting this technique—small details that make a world of diff…
- Fat Skimming Technique: In Step 2, those 2-3 minutes of resting time are crucial! I like to use a fat separator if I …
- Slurry Success: When making your flour slurry in Step 3, use a fork instead of a whisk for the initial mixing. The ti…
Frequently Asked Questions
Can I use flour to thicken pot roast while it’s still cooking?
Yes, but timing matters! Add flour at least 30 minutes before serving to avoid a raw taste. Mix 2 tbsp flour with cold broth or water first to create a slurry, then stir it in. Simmer uncovered to let the gravy reduce and thicken naturally.
How much flour should I use to thicken 4 cups of pot roast juice?
Start with 2–3 tbsp flour mixed into a slurry (equal parts flour + cold liquid). Stir well and simmer 5–10 minutes. If it’s too thin, repeat with 1 tbsp at a time. Too much flour can make gravy gluey—patience is key!
What’s a good flour substitute for thickening pot roast?
Try these swaps for dietary needs or texture preferences:
- Cornstarch (1 tbsp = 2 tbsp flour)—mix with cold water first.
- Arrowroot powder (gluten-free, clear gravy).
- Mashed potatoes (adds creaminess).
Why did my pot roast gravy turn lumpy after adding flour?
Lumps happen when flour isn’t fully dissolved. Fix it by:
- Whisking vigorously over medium heat.
- Straining through a fine-mesh sieve.
- Blending with an immersion blender (off-heat!).
Can I thicken pot roast gravy after refrigerating it?
Reheat the gravy gently, then whisk in a flour slurry (1:1 flour + cold water). Simmer 3–5 minutes until smooth. If the gravy is fatty, skim the solidified fat before reheating for a cleaner texture.
Now you’ve got the secret to turning that delicious pot roast into a rich, velvety masterpiece—no lumps, no stress! 🎉 Whether you prefer a simple flour slurry or a slow-cooked roux, thickening your gravy is easier than you think. The next time you whip up a pot roast, experiment with timing and ratios to find your perfect consistency.
Ready to take it further? Try pairing your thickened gravy with homemade mashed potatoes or crusty bread for the ultimate comfort meal. Happy cooking—your taste buds (and dinner guests) will thank you! 😋

Trained in classic French technique but raised on slow-cooked ribs and spicy rubs, she blends culinary skill with smoke and soul.
- Recipe for Boneless Pork Chops in Cast Iron Skillet: Sear and Baste to Juicy Perfection - October 3, 2026
- Recipe for Boneless Cross Rib Roast: Slow-Roasted Beef with Herb Crust - October 3, 2026
- Hamburgers in Sauce Recipe Crock Pot: Slow-Cooked Savory Delight - October 3, 2026