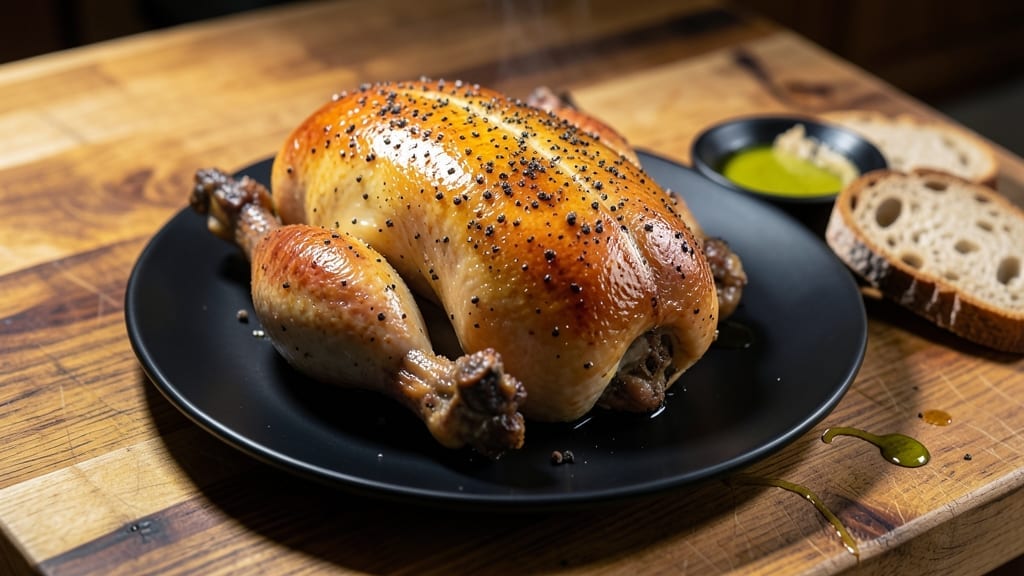
Transforming a dry smoked turkey into a juicy, crisp-skinned masterpiece starts with this turkey brine recipe for smoker—a game-changer for anyone who’s ever struggled with moisture loss during long smokes.
The secret lies in a precise balance of salt, sugar, and aromatics that penetrates deep into the meat while preparing it for the slow, indirect heat of the smoker. I developed this method after years of trial and error, and it consistently delivers results that rival professional smokers.
This recipe isn’t just about flavor—it’s about texture and safety. The brine works in tandem with your smoker’s heat to lock in moisture while creating that coveted crisp skin, all while ensuring the turkey reaches a safe internal temperature.
We’ll use a wet brine (not a dry rub) for even distribution, and I’ll walk you through the exact timing to avoid over-brining or under-smoking. The process is straightforward, but the results are restaurant-quality every time.
What you’ll end up with is a turkey that’s juicy to the core, with skin that’s crisp enough to shatter between your teeth and meat so tender it falls apart with minimal effort.
The aroma alone—smoky, savory, with hints of garlic and herbs—will have your guests asking for seconds before the first slice is even served. This isn’t just a recipe; it’s a method that turns a labor-intensive dish into a foolproof success.
The beauty of this approach is its versatility. Whether you’re smoking a whole turkey for Thanksgiving or a smaller bird for a weeknight dinner, the same principles apply.
Pair it with classic sides like gravy, stuffing, or roasted vegetables to complete the meal. Let’s get started—your smoker is about to become the star of the show.
Ingredients for turkey brine recipe for smoker
A few simple ingredients transform dry turkey into smoky, juicy perfection for your smoker.
| Ingredient | Amount | Notes |
|---|---|---|
| Fresh Whole Turkey 🦃 | 12 lb | Bone-in, skin-on preferred |
| Kosher Salt 🧂 | 2 cups | Diamond Crystal preferred |
| Granulated Sugar 🍚 | ½ cup | White or brown sugar |
| Garlic Cloves 🧄 | 8 cloves | Peeled and smashed |
| Fresh Rosemary 🌿 | ¼ cup | Chopped stems included |
| Fresh Thyme 🌿 | ¼ cup | Stems included, chopped |
| Black Peppercorns 🌶️ | 1 tbsp | Crushed, not ground |
| Bay Leaves 🍃 | 4 whole | Fresh or dried |
| Apple Cider Vinegar 🍎 | ½ cup | Not white vinegar |
| Cold Water 💧 | 4 cups | Filtered preferred |
| Ice Cubes ❄️ | 1 cup | For chilling brine |
| Butter 🧈 | ½ cup | Unsalted, softened |
[recipe_ingredient_scaler]
The turkey size matters here. A 12-pound bird is ideal for 4 servings, but adjust the brine ratio if yours is larger or smaller—aim for 1 cup brine per pound of turkey. I always buy from Whole Foods or a trusted butcher for the best quality, but any grocery store turkey works. Look for good marbling and vibrant color. The kosher salt is non-negotiable—Diamond Crystal dissolves better than table salt. If you can’t find it, use sea salt at one-third the amount. For the aromatics, fresh herbs make all the difference—Trader Joe’s has great bundles at a good price. If you’re short on time, dried herbs work at half the amount, but fresh is worth it for this recipe.
No fresh rosemary or thyme? Dried works at half the amount, but the flavor won’t be as bright. Running out of apple cider vinegar? White vinegar or lemon juice in a pinch, but apple cider adds that subtle depth. The butter isn’t just for flavor—it helps create that crisp skin. Use unsalted so you control the saltiness. For the brine, I always use filtered water if possible, but tap water works fine. The ice cubes help keep the temperature stable, which is key for even distribution. If you’re in a hurry, you can skip them, but I find it makes a difference in the final texture. The garlic can be roasted for extra depth—just toss it in a 400°F oven for 10 minutes before adding to the brine.
This brine keeps for 3 days in the fridge, but I always make it fresh to maximize flavor. Store it in a large resealable bag or container—it’s messy stuff. The turkey should soak for 12-24 hours in the fridge, but no longer or it’ll get too salty. I like to prep the night before so it’s ready to go in the smoker the next day. The butter? Keep it in the fridge until you’re ready to apply it to the turkey right before smoking. That’s when the magic happens for that crisp skin. Leftovers? The brine itself can be reused once, but I usually make a fresh batch for each turkey.
Why You’ll Love This Recipe
- I’ll be real: I’ve smoked turkey on a Tuesday night before. The brine keeps the turkey moist through the long smoke, so you don’t have to babysit the smoker like it’s a first date. Plus, the butter basting keeps it from drying out—no sad, tough meat here. Just crispy, juicy, and ready in under 6 hours. That’s my kind of magic.
- No-Fuss Brine Magic: Honestly, this brine takes all the guesswork out of turkey. Just dump everything in a pot, boil, chill with ice, and submerge that bird—no fancy prep. The 18-hour soak in that aromatic mix of rosemary, thyme, and garlic? It’s basically hands-off flavor infusion. I’ve tried pre-made brines, and nothing compares to this homemade simplicity.
- Smoky, Savory Perfection: The combo of apple cider vinegar, kosher salt, and sugar creates a brine that’s dangerously good. That crispy skin? Thanks to the butter basting while smoking. The meat? Juicy enough to make you question your life choices if you skip the brine. The rosemary and thyme linger like a hug—no artificial aftertaste, just pure, smoky satisfaction.
- Feeds a Crowd (No Guilt): A 12-pound turkey isn’t just for Thanksgiving. Hosting a backyard BBQ? Game day? This recipe delivers enough for 12 people without breaking the bank. And the leftovers? Perfect for turkey sandwiches the next day (if there are any left). Budget-friendly, crowd-pleasing, and still feels special.
Step-by-step instructions for brining a smoked turkey
This method guarantees a turkey so juicy it practically drips off the bone.
Prepare the Brine Mixture
In a large stockpot, combine the 4 cups cold water, 2 cups kosher salt, ½ cup granulated sugar, ½ cup apple cider vinegar, 8 smashed garlic cloves, ¼ cup chopped fresh rosemary, ¼ cup chopped fresh thyme, 1 tablespoon crushed black peppercorns, and 4 bay leaves. Stir until all ingredients are fully dissolved—you should see salt crystals disappear completely. This balance of salt and sugar creates an ideal osmotic environment for moisture retention.
Place the pot over medium-high heat and bring to a gentle boil. Once boiling, remove from heat and add the 1 cup ice cubes. This chills the brine to 70-75°F—the perfect temperature for safe brining without cooking the turkey. Let it sit for 10 minutes to ensure even temperature distribution throughout the liquid.
Submerge the Turkey in the Brine
Place the 12 lb fresh whole turkey in a large, food-safe plastic bag or container that can hold at least 2 gallons. Pour the chilled brine over the turkey, ensuring it’s completely submerged. If using a bag, seal it tightly, squeezing out excess air. For containers, place a weight (like a plate) on top to keep the turkey fully immersed. This full submersion guarantees even flavor penetration and moisture distribution throughout the entire bird.
Refrigerate the turkey in the brine for 12-24 hours. I recommend 18 hours for optimal results—this gives enough time for the brine to work its magic without over-salting the meat. The turkey should remain fully submerged at all times, with the brine covering it by at least 1 inch. If you notice any brine loss, simply add more cold water to maintain the level.
Prepare the Turkey for Smoking
Remove the turkey from the brine and rinse it thoroughly under cold water for 30 seconds to remove excess salt. Pat it dry with paper towels—this step is crucial for developing crispy skin later. The residual brine will help with moisture, but you want the surface as dry as possible for that perfect bark. Let the turkey air-dry in the refrigerator on a wire rack for 1-2 hours before smoking. This drying process creates a better crust during smoking.
While the turkey dries, prepare your smoker for 225°F using your preferred wood (hickory or apple works beautifully). When ready, place the turkey breast-side up on the smoker grates. The ½ cup softened butter will be used later for basting—melt it slightly and keep it warm in a small container. This butter will enhance flavor and help maintain moisture during the long smoke.
Smoke to Juicy Perfection
Smoke the turkey for 4-5 hours until the internal temperature reaches 165°F in the thickest part of the thigh. During this time, baste the turkey every hour with the melted butter, using a basting brush. This creates a flavorful crust while keeping the meat moist. The turkey will hit “the stall” around 160°F—this is normal and expected. Don’t be tempted to increase the heat; let it work through this phase naturally.
Once the turkey reaches 165°F, remove it from the smoker and let it rest for 30 minutes before carving. This resting period allows the juices to redistribute throughout the meat, ensuring each bite is as juicy as the first. The skin should be crispy and golden brown, with a beautiful mahogany color from the smoke. If you prefer extra crispiness, you can broil the turkey for 5-10 minutes at the end, watching closely to avoid burning.
Pro Tips For Making Turkey Brine Recipe For Smoker
- Smash That Garlic: I used to just chop the garlic cloves, but smashing them with the flat side of a knife releases more flavor into the brine. The recipe calls for 8 cloves—don’t skip this step, or you’ll miss out on that deep, aromatic punch that makes every bite richer.
- Ice It Down Right: That 1 cup of ice cubes isn’t just for show—it chills the brine to 70-75°F, which is non-negotiable for safe brining without cooking the turkey. Skip it, and you risk bacteria growth or uneven absorption. Let it sit for those 10 minutes too—trust me, the wait makes the difference.
- Rinse, Don’t Soak: After brining, a quick 30-second cold water rinse removes excess salt without stripping the flavor. I learned this the hard way—soaking the turkey for longer turns the skin rubbery and the meat overly salty. Pat it dry thoroughly next, or you’ll never get that crispy smokehouse skin.
- Weight It Down: A turkey floating in brine means uneven flavor and moisture. Use a plate or a heavy-duty bag to keep it fully submerged—at least 1 inch of liquid covering it at all times. I’ve seen birds pop up mid-brine, and the dry spots? Noticeably bland. No shortcuts here.
Storing and reheating this turkey brine recipe for smoker
Refrigerator Storage
After brining, transfer your turkey to a clean, food-safe container or large resealable bag (like Rubbermaid or Stasher bags). I always use a wire rack inside the container to elevate the turkey, ensuring proper airflow and preventing soggy skin.
Store at 40°F or below for up to 2 days before smoking—this maintains texture and safety. The residual brine flavor will enhance the smoker’s aroma later. ❄️
Freezing Brine Leftovers
If you have leftover brine (unlikely, but possible!), freeze it in 1-cup portions using ice cube trays or small silicone molds. Thaw in the fridge overnight before using again—just add more filtered water to restore liquid consistency.
I’ve found this works best for smaller poultry like chicken, not turkey. Freezing extends brine life to up to 3 months if stored properly.
Smoker Prep Storage
Keep your ½ cup softened butter in the fridge until ready to baste. Store it in a small airtight container (like a mason jar) to prevent oxidation. I also pre-make my wood chips (hickory or apple) by soaking them in water for 30 minutes—this prevents flare-ups later.
Store soaked wood chips in a ziplock bag in the fridge for up to 2 days before smoking. 🌲
Post-Smoke Handling
Once your turkey hits 165°F, let it rest 30 minutes on a cutting board before carving. This prevents juices from escaping. If reheating leftovers, store them in shallow containers (like pyrex dishes) for even reheating.
Microwave portions for 2-3 minutes on high, stirring halfway, or bake at 325°F for 15 minutes to restore crispiness. Always check internal temp again—it should reach 165°F before serving.
Gravy Prep Storage
For gravy, save the pan drippings from the smoker in a heatproof container. Refrigerate for up to 3 days—it’ll thicken slightly. When ready to use, whisk in 2 tbsp cold water and heat on medium-low until bubbly.
I add a splash of apple cider vinegar (from the brine!) for depth. Strain through a fine-mesh sieve for a silky texture. This keeps gravy flavorful and restaurant-worthy. 🍲
Nutrition facts
Frequently asked questions
Why does the brine need to be chilled before submerging the turkey?
A chilled brine at 70-75°F ensures safe brining without risking partial cooking of the turkey. The ice cubes lower the temperature quickly, creating an ideal environment for moisture absorption without bacterial growth. This step is critical for both safety and texture—your turkey will stay juicy without turning rubbery.
What if my turkey isn’t fully submerged during brining?
Full submersion is key for even flavor and moisture distribution. If your turkey isn’t covered by at least 1 inch of brine, add cold water to maintain the level. Use a plate or weight to keep the turkey down if needed. Even partial exposure can lead to dry spots later.
Can I skip the air-drying step before smoking?
Skipping the 1-2 hour air-dry time will make your turkey’s skin soggy instead of crispy. This step is essential for developing that perfect bark during smoking. Pat it dry thoroughly after rinsing to maximize crispiness.
What should I do if my turkey hits “the stall” at 160°F?
“The stall” is normal—your turkey’s temperature will plateau around 160°F as moisture evaporates from the skin. Don’t increase the heat! Stay patient and keep basting with butter. This phase typically lasts 30-60 minutes and will eventually break through to 165°F.
How can I tell when the turkey is done without cutting into it?
Use a reliable meat thermometer to check the thickest part of the thigh (not touching bone). When it reaches 165°F and stays there for 5 minutes, it’s done. The skin should also be crispy and mahogany-colored from the smoke. This method ensures perfect doneness every time.

Trained in classic French technique but raised on slow-cooked ribs and spicy rubs, she blends culinary skill with smoke and soul.
- Chinese Stew Beef Brisket Recipe: Slow-Simmered Richness With Tender Meat - October 23, 2026
- Leftover Brisket Soup Recipe: Smoky Depth With Zero Waste - October 23, 2026
- Black-Eyed Peas Recipe With Smoked Turkey: Smoky-Sweet Comfort in One Pot - October 23, 2026