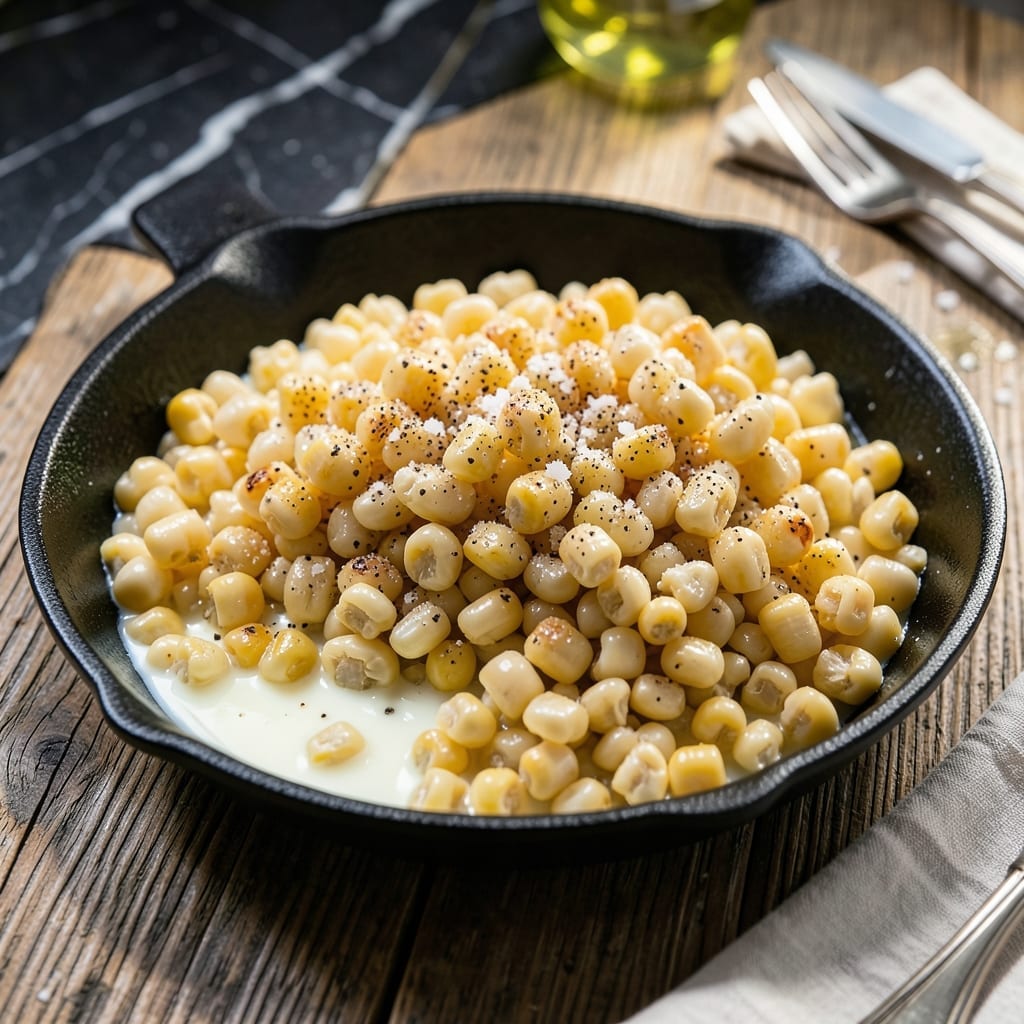
There’s something special about a dish that carries generations of tradition, and this Southern classic is no exception. I’ve tested this method in my own kitchen to ensure it delivers that signature sweetness and tender texture every time.
White shoepeg corn brings a delicate, buttery flavor that pairs perfectly with simple seasonings. The key is cooking it just long enough to soften the kernels while keeping their natural sweetness intact.
This side dish is a staple at family gatherings, offering comfort and nostalgia in every bite. It’s the kind of recipe that turns a simple meal into something memorable.
Serve it alongside roasted meats or as part of a holiday spread. The results are consistently perfect.
Ingredients for White Shoepeg Corn
Simple ingredients highlight the natural sweetness of this classic Southern side dish.
| Ingredient | Amount | Notes |
|---|---|---|
| White Shoepeg Corn Kernels 🌽 | 4 cups | Fresh or frozen, thawed |
| Unsalted Butter 🧈 | 4 tbsp | Divided for cooking and finishing |
| Granulated Sugar 🍚 | 1 tbsp | Adjust to taste preference |
| Kosher Salt 🧂 | 1 tsp | Diamond Crystal preferred |
| Freshly Ground Black Pepper 🌶️ | ½ tsp | Coarsely ground for texture |
| Whole Milk 🥛 | ¼ cup | Optional for creamier texture |
| Water 💧 | ½ cup | For initial cooking liquid |
| All-Purpose Flour 🌾 | 1 tbsp | For thickening if needed |
| Fresh Parsley 🌿 | 2 tbsp | Finely chopped, for garnish |
| Garlic Powder 🧄 | ¼ tsp | For subtle depth of flavor |
| Onion Powder 🧅 | ¼ tsp | Complements corn’s natural sweetness |
[recipe_ingredient_scaler]
The corn is the star here. Fresh white shoepeg corn is ideal when in season (late summer), but frozen works perfectly—just thaw it first. Look for Birdseye or Green Giant at your grocery store; their shoepeg corn retains that signature sweetness. Avoid canned corn for this recipe as it lacks the texture and fresh flavor this dish demands.
Need to make this dairy-free? Vegan butter or olive oil replaces the butter beautifully. Sugar can be swapped for maple syrup or honey at a 1:1 ratio. No fresh parsley? Dried parsley at one-third the amount works, or skip it entirely. The milk is optional, but if omitted, add a splash more water to prevent sticking.
Leftover corn keeps well in the fridge for 3-4 days. Reheat gently on the stove with a pat of butter to restore creaminess. Freezes beautifully for up to 3 months—thaw in the fridge overnight before reheating (the good stuff, not the pre-shredded kind).
Why You’ll Love This Recipe
- 5-Minute Side: I dump the corn, butter, and a pinch of sugar into a pan and it’s ready before the steaks finish resting.
- Sweet & Buttery: The shoepeg corn soaks up that melted butter and just a touch of sugar for a subtle sweetness that’s irresistible.
- Holiday Staple: Between us, this is my go-to for Thanksgiving and Sunday suppers alike—everyone cleans their plate.
- Budget Friendly: A big bag of shoepeg corn and a few pantry staples feed my family of four for under five bucks.
Step-by-Step Instructions for White Shoepeg Corn
This traditional method ensures a perfectly creamy, sweet, and buttery result every time.
Step 1: Sauté the Corn Kernels
Heat a large skillet over medium heat and add 2 tbsp Unsalted Butter. Once melted and foaming, add all 4 cups White Shoepeg Corn Kernels and cook for 5-6 minutes, stirring occasionally.
You’ll notice the kernels brighten in color and develop a slight golden edge—this builds depth of flavor. Avoid overcrowding the pan, as this can steam the corn instead of sautéing it.
Step 2: Season and Build the Base
Sprinkle in the 1 tsp Kosher Salt, 0.5 tsp Freshly Ground Black Pepper, 1 tbsp Granulated Sugar, 0.25 tsp Garlic Powder, and 0.25 tsp Onion Powder. Stir to evenly coat the corn. The sugar enhances the natural sweetness of the shoepeg corn, while the spices add subtle complexity.
Pour in the 0.5 cup Water and scrape up any browned bits from the bottom of the skillet. This deglazing step ensures no flavor is wasted and prevents sticking.
Step 3: Create a Creamy Texture
Reduce the heat to medium-low and stir in the 0.25 cup Whole Milk. If the mixture appears too thin, sprinkle in the 1 tbsp All-Purpose Flour and stir constantly for 1-2 minutes until it thickens slightly.
Watch for the liquid to reduce and coat the back of a spoon—this is your cue that the corn is nearing the ideal creamy consistency. The flour acts as a stabilizer, ensuring a velvety finish without clumping.
Step 4: Finish with Butter and Garnish
Remove the skillet from heat and stir in the remaining 2 tbsp Unsalted Butter until fully melted. This final addition enriches the dish and adds a glossy sheen to the corn.
Taste and adjust seasoning if needed. Transfer to a serving dish and garnish with the 2 tbsp Fresh Parsley, finely chopped. The parsley adds a pop of color and a fresh, herbal note that balances the richness of the dish.
Serve immediately while warm. The corn should glisten with a light, buttery sauce that clings to each kernel.
Pro Tips For Making White Shoepeg Corn
- Pre-cook the corn: I learned this the hard way—blanch the shoepeg corn in boiling water for 3-4 minutes before sautéing. It keeps the kernels tender and prevents that unpleasant raw crunch.
- Brown the butter: Melt the unsalted butter over medium heat until it turns golden brown (about 5 minutes). This adds a nutty depth that plain butter just can’t match.
- Don’t over-sweeten: Shoepeg corn is naturally sweet, so start with half the sugar you think you need—about 1 teaspoon per cup of corn—then adjust. Too much sugar masks the corn’s fresh flavor.
- Season in layers: Add half the salt and pepper when you start cooking, then finish with the rest at the end. This builds flavor without making the dish taste flat or one-note.
Essential Equipment for white shoepeg corn
Skillet Selection
I always reach for my 12-inch cast iron skillet for this recipe—its even heat distribution and natural non-stick surface (when properly seasoned) make it ideal. A Lodge brand skillet is my go-to, and it’s affordable at most hardware stores. 💪
Wooden Spoon
A sturdy wooden spoon is essential for stirring without scratching your skillet. I prefer one with a long handle to keep my hands away from the heat. Look for beechwood or maple—they’re durable and won’t absorb odors.
Measuring Tools
Precise measurements matter here, so I use a set of stainless steel measuring cups and spoons. For the 4 cups corn, a 1-cup dry measure works perfectly. Avoid plastic if possible—it can warp over time.
Fine Mesh Strainer
If using frozen corn, thaw it in a fine mesh strainer under cold running water. This prevents waterlogging the kernels, which can dilute the flavor. I use a Cuisinox strainer—it’s sturdy and fits over most sinks.
Butter Knife
For cutting the 4 tbsp butter, a simple serrated butter knife works best. I keep mine in the freezer for 10 minutes before slicing cold butter—it makes clean cuts without squishing the stick. 🔥
Serving Spoon
A large slotted serving spoon helps drain excess liquid while plating. I love the ones with a shallow bowl—they cradle the corn beautifully. Look for stainless steel for durability and easy cleaning.
Nutrition Facts
Frequently Asked Questions
Can I use canned corn instead?
Stick with fresh or frozen. Canned lacks the texture and sweetness this dish needs. Thaw frozen first for best results.
What if my mixture is too thin?
Sprinkle in 1 tbsp flour and stir for 1-2 minutes. The liquid should coat a spoon when done.
How do I make it dairy-free?
Swap butter for olive oil or vegan butter. Use water instead of milk. Flavor stays just as rich!
Can I prep this ahead?
Cook and store in the fridge for 3-4 days. Reheat gently with extra butter to refresh.

Trained in classic French technique but raised on slow-cooked ribs and spicy rubs, she blends culinary skill with smoke and soul.
- Recipe for Boneless Pork Chops in Cast Iron Skillet: Sear and Baste to Juicy Perfection - October 3, 2026
- Recipe for Boneless Cross Rib Roast: Slow-Roasted Beef with Herb Crust - October 3, 2026
- Hamburgers in Sauce Recipe Crock Pot: Slow-Cooked Savory Delight - October 3, 2026