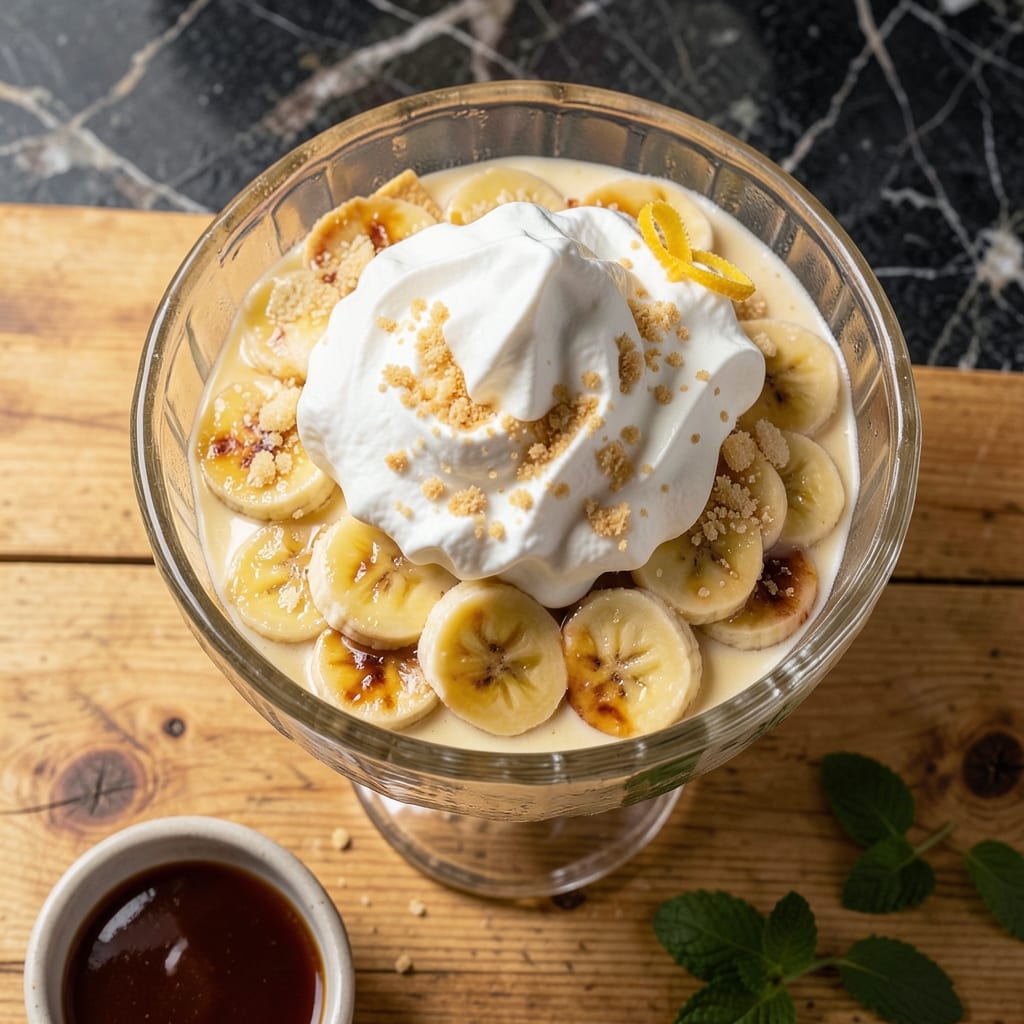
This no-bake dessert combines layers of vanilla wafers, fresh bananas, and a creamy custard made with sweetened condensed milk.
Cool Whip adds a light, fluffy texture that balances the richness of the custard perfectly. The layers soften together in the fridge, creating a harmonious blend of flavors and textures.
It takes just 15 minutes to assemble, then chills for 4 hours while the flavors meld. The result is a cool, creamy dessert that’s impossible to resist.
Perfect for potlucks, family gatherings, or a simple treat. Here’s how to make it.
Ingredients for Banana Pudding Recipe with Sweetened Condensed Milk and Cool Whip
Layers of vanilla wafers, bananas, and creamy custard come together effortlessly for this dessert.
| Ingredient | Amount | Notes |
|---|---|---|
| Vanilla Wafers 🍪 | 12 oz | About 36 wafers, divided |
| Ripe Bananas 🍌 | 4 whole | Sliced into 1/4-inch rounds |
| Sweetened Condensed Milk 🥛 | 14 oz | 1 can, full-fat preferred |
| Cold Water 💧 | 1 ½ cups | For custard mixture |
| Instant Vanilla Pudding Mix 🍮 | 3.4 oz | 1 box, Jell-O brand recommended |
| Cool Whip Topping 🥣 | 8 oz | Thawed, 1 tub |
| Whole Milk 🥛 | 1 cup | Cold, for pudding mix |
| Vanilla Extract 🌿 | 1 tsp | Pure extract preferred |
| Salt 🧂 | ¼ tsp | Fine sea salt |
| Ground Cinnamon 🌿 | ¼ tsp | Optional, for dusting |
[recipe_ingredient_scaler]
The vanilla wafers are non-negotiable here—Nilla Wafers are the gold standard, but generic brands work fine (just avoid the ones with added preservatives that taste artificial). Sweetened condensed milk is what gives this its signature richness, so Eagle Brand is my go-to. The pudding mix should be instant vanilla; Jell-O brand sets consistently every time.
No Cool Whip? Homemade whipped cream works at a 1:1 ratio, but it won’t hold up as long in the fridge. For a richer custard, swap the whole milk for half-and-half. Bananas must be ripe (yellow with brown speckles) for the best flavor, but avoid overripe ones that turn mushy. Vanilla bean paste can replace extract for a more pronounced vanilla flavor.
Assemble this in a 9×13-inch dish or individual serving cups. Refrigerate for at least 4 hours—overnight is even better. Leftovers keep for 3 days (if they last that long). The wafers will soften the longer it sits, which is exactly what you want.
Why You’ll Love This Recipe
- No-Fuss Layers: I just dump, layer, and chill—no baking, no stove, just Vanilla Wafers and bananas stacked with the creamy condensed milk pudding mix.
- Sweet Creamy Magic: The sweetened condensed milk and Cool Whip make it so rich, it’s like dessert and comfort food had a baby.
- Crowd-Pleasing Dish: I take it to potlucks and it’s always the first thing gone—kids and adults alike dig in without hesitation.
- Budget-Friendly Win: Ripe bananas, store-brand wafers, and a box of pudding mix keep costs low, but it tastes like a million bucks.
Step-by-Step Instructions for Banana Pudding with Sweetened Condensed Milk and Cool Whip
Follow this no-bake method for perfectly layered pudding with creamy texture and balanced sweetness.
Step 1: Prepare the Vanilla Pudding Base
In a large mixing bowl, whisk together the 3.4 oz instant vanilla pudding mix, 1.5 cups cold water, 1 cup whole milk, and 1 tsp vanilla extract until smooth. The mixture will thicken noticeably within 1-2 minutes as the pudding sets.
Add the 14 oz sweetened condensed milk and 0.25 tsp salt, then fold gently until fully incorporated. This creates a rich, creamy base that’s thicker than traditional pudding. Avoid overmixing to prevent a gluey texture.
Step 2: Fold in the Cool Whip for Lightness
Once the pudding mixture has thickened, add the 8 oz Cool Whip topping in thirds, folding gently with a spatula after each addition. The goal is to maintain air in the mixture for a fluffy, cloud-like consistency.
You’ll notice the color lighten as the Cool Whip integrates. Stop folding as soon as no white streaks remain—this preserves the delicate structure. The final mixture should hold its shape when scooped but still be spreadable.
Step 3: Layer the Vanilla Wafers and Bananas
Arrange a single layer of vanilla wafers at the bottom of a 9×13-inch dish, breaking pieces as needed to fill gaps. The wafers will soften slightly as they absorb moisture from the layers above, so don’t overlap them.
Top the wafers with a layer of sliced ripe bananas, using about half of the 4 whole ripe bananas. For best presentation, slice them into ¼-inch rounds just before assembling to prevent browning.
Step 4: Add the Pudding Mixture and Repeat
Spread half of the pudding mixture evenly over the banana layer. Use an offset spatula for a smooth surface. The thickness should be enough to fully coat the bananas without being so heavy that it crushes the wafers beneath.
Repeat with another layer of vanilla wafers, remaining sliced ripe bananas, and the rest of the pudding mixture. The top layer should be pudding, which will set firmly as it chills.
Step 5: Chill and Garnish Before Serving
Cover the dish with plastic wrap and refrigerate for at least 4 hours, or overnight for optimal texture. The wafers will soften to a cake-like consistency while the pudding sets completely.
Just before serving, dust the top with 0.25 tsp ground cinnamon for a subtle warmth that complements the sweetness. For clean slices, use a sharp knife dipped in hot water between cuts.
Pro Tips For Making Banana Pudding Recipe With Sweetened Condensed Milk And Cool Whip
- Chill the Condensed Milk: I learned this the hard way—warm sweetened condensed milk blends unevenly with the Cool Whip. Pop the can in the fridge for at least 30 minutes before mixing to keep the texture smooth and creamy.
- Slice Bananas Last: Sounds weird, but it works: slice the bananas right before layering to prevent browning. If you must prep ahead, toss them in a little lemon juice—but they’re best fresh-cut.
- Layer While Pudding Thickens: Don’t wait for the pudding to fully set. Start layering the Vanilla Wafers, bananas, and pudding mixture as soon as it thickens slightly—about 2-3 minutes after mixing—so the wafers soften just enough without turning to mush.
- Skip the Overmixing: After folding in the Cool Whip, stop as soon as it’s combined. Overmixing deflates the fluffiness, and the pudding will lose that light, airy texture that makes this dish so good.
Dietary Considerations for banana pudding recipe with sweetened condensed milk and cool whip
Gluten-Free Option
Swap the 12 oz vanilla wafers for gluten-free vanilla cookies—I recommend Mi-Del or Katz brands. They hold up well to the moisture and taste nearly identical to traditional wafers. My Italian-American friends with gluten sensitivities rave about this simple change.
Dairy-Free Adaptation
Use coconut condensed milk and coconut milk instead of dairy versions. For Cool Whip, So Delicious CocoWhip works perfectly. The coconut flavor adds a subtle tropical note that pairs surprisingly well with bananas.
Lower Sugar Version
Cut the sweetness by using sugar-free vanilla pudding mix and light sweetened condensed milk. The bananas provide natural sweetness, so you won’t miss the extra sugar. I’ve served this to family at Sunday dinners, and no one noticed the difference.
Vegan Modification
Replace the pudding mix with a vegan vanilla pudding (like Dr. Oetker), use coconut-based condensed milk, and swap Cool Whip for vegan whipped topping. The texture remains creamy and satisfying, and it’s a hit with my East Coast vegan friends.
Nut-Free Consideration
This recipe is naturally nut-free, but always check your vanilla wafers for cross-contamination warnings. For extra safety, use enjoy life foods brand cookies—they’re made in a dedicated nut-free facility. 💪
Egg-Free Option
The base recipe is already egg-free, making it safe for most egg allergies. Just verify that your instant pudding mix doesn’t contain egg derivatives—most major brands like Jell-O are egg-free. Always double-check labels to be certain.
Nutrition Facts
Frequently Asked Questions
Can I use fresh whipped cream instead of Cool Whip?
Yes, but it won’t hold its shape as long. Use 2 cups of freshly whipped heavy cream as a substitute. The texture may be slightly softer after chilling for 4 hours.
How far in advance can I make this?
You can assemble it up to 1 day ahead. The wafers soften more the longer it sits, but the flavor improves. For best results, add garnishes like cinnamon just before serving.
Why did my pudding turn out runny?
This usually happens if the pudding mix wasn’t fully dissolved or the Cool Whip was added too soon. Let the pudding thicken for 2 minutes before folding in the topping.
Can I use a different flavor of pudding mix?
Try cheesecake or banana cream pudding mix for a fun twist. The 14 oz sweetened condensed milk keeps the richness consistent.

Trained in classic French technique but raised on slow-cooked ribs and spicy rubs, she blends culinary skill with smoke and soul.
- Recipe for Boneless Pork Chops in Cast Iron Skillet: Sear and Baste to Juicy Perfection - October 3, 2026
- Recipe for Boneless Cross Rib Roast: Slow-Roasted Beef with Herb Crust - October 3, 2026
- Hamburgers in Sauce Recipe Crock Pot: Slow-Cooked Savory Delight - October 3, 2026