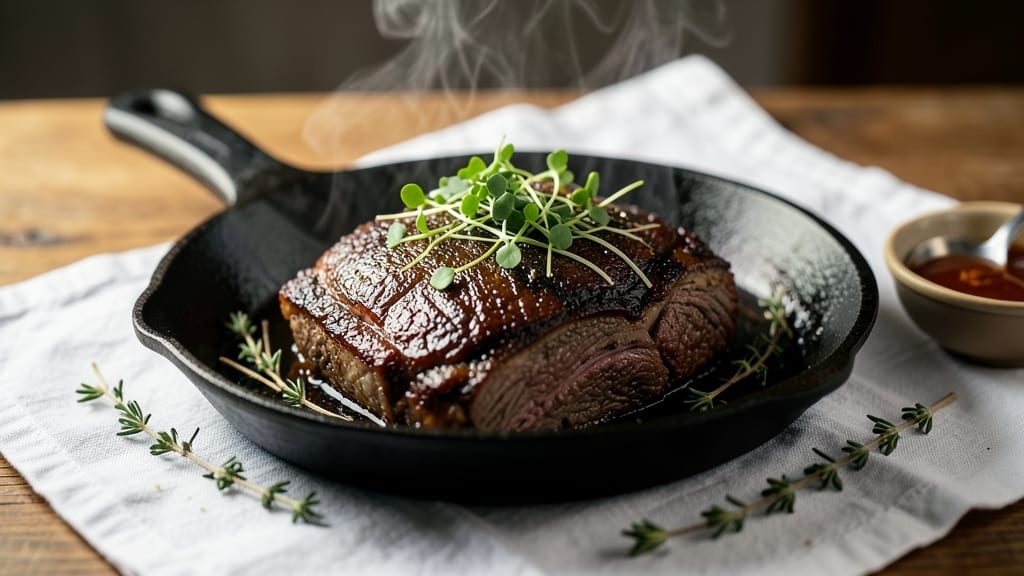
Slow-cooked beef brisket in the oven delivers that same restaurant-quality tenderness without needing a smoker—just precise timing and temperature control. After years of perfecting this method, I’ve learned the secrets to achieving fall-apart texture with minimal effort. The key lies in low-and-slow cooking, which transforms tough meat into melt-in-your-mouth perfection.
This recipe relies on a simple yet effective approach: a well-seasoned brisket, slow oven cooking at a consistent 250°F, and careful basting to lock in moisture. Unlike traditional smoker methods, this oven technique delivers consistent results every time, even for beginners.
The long cook time—typically 6-8 hours—breaks down connective tissue, creating a dish that’s rich, flavorful, and impossible to resist.
By the time you’re done, you’ll have brisket that practically disintegrates at the touch of a fork, with a deep, savory crust and juices that can be used as a rich au jus.
The aroma alone will have everyone gathering around the table, and the leftovers? Even better the next day. This is the kind of meal that turns a simple dinner into a memorable experience.
Serve with classic sides like pickled onions, crusty bread, or a simple green salad to balance the richness. The beauty of this method is its flexibility—whether you’re feeding a crowd or meal prepping for the week, this brisket delivers restaurant-quality results at home.
Ingredients for beef brisket recipe oven slow
Just beef, spices, and time. That’s all it takes for melt-in-your-mouth brisket without the smoker.
| Ingredient | Amount | Notes |
|---|---|---|
| Beef Brisket 🥩 | 4 lb | Flat cut, 1-inch thick |
| Yellow Onion 🧅 | 1 whole | Sliced into wedges |
| Garlic Cloves 🧄 | 6 cloves | Smashed, not minced |
| Kosher Salt 🧂 | 2 tbsp | Diamond Crystal preferred |
| Black Peppercorns 🌶️ | 1 tbsp | Freshly cracked |
| Smoked Paprika 🌶️ | 1 tbsp | High-quality, not dusty |
| Ground Cumin 🌿 | 1 tbsp | Toasted for depth |
| Brown Sugar 🍯 | 2 tbsp | Light or dark |
| Apple Cider Vinegar 🍎 | 2 tbsp | For tenderizing |
| Beef Broth 💧 | 2 cups | Low-sodium, homemade preferred |
| Unsalted Butter 🧈 | ½ cup | Cold, cubed |
| Fresh Rosemary 🌿 | 2 sprigs | Or 1 tsp dried |
| Fresh Thyme 🌿 | 2 sprigs | Or 1 tsp dried |
[recipe_ingredient_scaler]
The brisket cut is everything here. Flat-cut (not point) gives you a more even surface for seasoning and cooking. Look for good marbling—those white fat streaks are what make it tender. I always grab mine from Costco or a trusted butcher, but the regular grocery store will have it too. If it’s wrapped in plastic, ask for it unwrapped so you can trim the fat cap yourself. A 4-pound flat is perfect for 6 servings, but don’t stress if yours is slightly bigger or smaller—the oven method is forgiving. Trim the fat to about 1/4-inch thickness on all sides (leave a little for flavor), then pat it dry with paper towels. That step can’t be skipped—wet meat steams instead of searing.
No smoked paprika? Regular paprika plus a pinch of liquid smoke works in a pinch. Fresh rosemary and thyme are ideal, but dried at one-third the amount gets you close. The apple cider vinegar might seem odd, but it’s key for breaking down those tough fibers—substitute lemon juice if that’s what you’ve got. For the beef broth, homemade is best, but even the cheap canned stuff (like Annie’s) works if you dilute it with water. The butter gets tossed in at the end for richness—don’t skip this part. It’s what turns good brisket into restaurant-quality brisket. If you’re prepping ahead, you can season the brisket up to 24 hours early and let it sit in the fridge uncovered (this helps dry the surface even more).
This isn’t a dish you’ll want to reheat—it’s best served fresh from the oven. But if you must, low-and-slow in the oven again at 275°F with a splash of broth keeps it moist. Leftovers keep for 4-5 days in the fridge, but honestly, they won’t last that long. The juices? Save those—reduce them on the stovetop for a quick au jus. For meal prep, portion the brisket into single-serving containers with a little of the juices. Freeze for up to 3 months, but thaw overnight in the fridge—never microwave. The texture changes if you rush it.
Why You’ll Love This Recipe
- No-Pan-Fry Necessary: Honestly, I used to think you needed a smoker or at least a deep fryer for brisket. But this method? Just your oven and a little patience. The sear in the skillet gives that restaurant-worthy crust without the fuss of a smoker setup.
- Cumin-Kissed Magic: The toasted cumin and smoked paprika in that dry rub? That’s the secret. It’s not just salty—it’s got this warm, earthy depth that pairs perfectly with the garlic and thyme. The apple cider vinegar tenderizes the meat while keeping it from getting too heavy, so every bite is rich but not cloying.
- Leftovers That Shine: This brisket isn’t just for Sunday dinner—it’s a game-changer for meal prep. I’ll slice half for sandwiches the next day, toss the rest into tacos, or even shred it into a hearty soup. And if you prep the rub ahead, the meat stays juicy even after reheating. Trust me, no one will guess it’s leftovers.
- Budget Beef Win: A 4-pound brisket feeds a crowd without breaking the bank, especially when you’re using pantry staples like onion, garlic, and broth. The spices are minimal, and the butter finish makes it feel special—like a splurge, even though it’s not. My wallet and my taste buds both thank me.
Step-by-step instructions for slow-cooked oven brisket
Here’s how to transform a tough brisket into fork-tender perfection using just your oven.
Prepare the Brisket and Create the Dry Rub
Begin by trimming any excess fat from the brisket, leaving about ¼-inch thickness on the fat cap. Pat the meat completely dry with paper towels—this is crucial for developing that beautiful crust. In a small bowl, combine the 2 tablespoons kosher salt, 1 tablespoon black peppercorns (freshly cracked), 1 tablespoon smoked paprika, 1 tablespoon ground cumin, 2 tablespoons brown sugar, and the 2 tablespoons apple cider vinegar. The vinegar helps tenderize the meat while adding subtle acidity that balances the rich flavors.
Mix the dry rub ingredients thoroughly, then generously coat the brisket on all sides, pressing the spices into the meat so they adhere well. Place the brisket fat-side up on a rack set inside a roasting pan. This elevation allows heat to circulate evenly, preventing steam buildup that could soften the crust. Let the seasoned brisket sit at room temperature for 30 minutes before cooking—this ensures even cooking from edge to center.
Sear and Deglaze for Deep Flavor
Preheat your oven to 300°F. Place the brisket on the middle rack and cook for 1 hour to establish a light sear. While it’s cooking, heat a large oven-safe skillet over medium-high heat. Add the 1 yellow onion (sliced into wedges) and the 6 smashed garlic cloves, cooking until the onion softens and the garlic becomes fragrant—about 5 minutes. Remove the skillet from heat and set aside.
After the initial hour in the oven, increase the temperature to 325°F. Remove the brisket from the oven and place it fat-side down in the hot skillet. Sear for 2 minutes per side until deeply browned. This step creates a flavorful crust while building layers of complexity. Transfer the brisket back to the roasting pan, then pour in the 2 cups beef broth, scraping up any browned bits from the skillet. This deglazing captures all the meaty flavors that would otherwise be lost.
Slow Cook with Herbs and Butter Basting
Return the brisket to the oven and cook uncovered for 4 hours. About 30 minutes before the end of this time, add the 2 sprigs fresh rosemary and 2 sprigs fresh thyme to the roasting pan. These aromatic herbs infuse the meat with their earthy notes as it cooks. Every 45 minutes, use a baster to spoon the pan juices over the brisket—this keeps the meat moist and ensures that rich flavor penetrates every bite.
For the final 30 minutes of cooking, increase the oven temperature to 375°F. Remove the brisket from the oven and add the ½ cup unsalted butter (cold, cubed) to the roasting pan. Return the brisket to the oven and baste it with the melted butter. This step creates a glossy finish while adding richness. The brisket is done when the internal temperature reaches 205°F at the thickest part—this is the “probe-tender” stage where the meat falls apart effortlessly.
Rest and Slice for Maximum Tenderness
Once the brisket reaches the target temperature, remove it from the oven and transfer it to a cutting board. Tent loosely with aluminum foil and let it rest for at least 1 hour. This resting period allows the juices to redistribute throughout the meat, ensuring that every slice is moist and flavorful. The brisket should be so tender that it practically falls apart when you slice against the grain.
Slice the brisket into ½-inch thick pieces, cutting against the grain for maximum tenderness. Serve immediately with the pan juices spooned over the top. The result is a brisket with a beautiful mahogany crust, a deep pink smoke ring, and meat that is so tender it practically melts in your mouth—all achieved without a smoker in sight.
Pro Tips For Making Beef Brisket Recipe Oven Slow
- Skip the Cold Brisket: DESCRIPTION: I learned this the hard way—brisket straight from the fridge cooks unevenly, leaving the center tough. Take it out 30 minutes before cooking so it reaches room temperature. That 30-minute wait makes the difference between a dry middle and melt-in-your-mouth perfection.
- Toast Your Cumin: DESCRIPTION: Sounds weird, but it works: dry-toast your 1 tbsp ground cumin in a dry skillet for 1-2 minutes until fragrant before mixing it into the rub. The nutty depth explodes when you sear the brisket—trust me, it’s worth the extra 60 seconds.
- Baste Like a Pro: DESCRIPTION: Don’t just pour broth over the brisket—use a baster to spoon the juices directly onto the meat every 45 minutes. The fat cap acts like a shield; if you skip this, you’ll end up with a soggy crust instead of that crisp, mahogany bark.
- Butter at 375°F: DESCRIPTION: Add the ½ cup cold butter only in the final 30 minutes at 375°F—hotter oven = faster melt = glossy, caramelized finish. Dump it in too early, and you’ll steam the meat instead of basting it. (Yes, even if you’re impatient like me.)
Make-ahead tips for leftovers
Prep Ahead for Perfect Timing
I always prep my brisket the night before to save time on the big day. After seasoning with the dry rub, wrap it tightly in plastic wrap and refrigerate uncovered on a tray—this lets excess moisture evaporate overnight.
The result? A better crust and more even cooking. Just remember to bring it to room temperature for 30 minutes before cooking. This step is non-negotiable for consistent results. 💡
Freezer Prep for Busy Weeks
If you’re meal prepping for the week, freeze the seasoned brisket (still wrapped) on a tray before transferring to a ziplock bag. Cook it straight from frozen—just extend the cooking time by 1-2 hours at 275°F instead of starting at 300°F.
The key is to let it thaw partially before searing to avoid steam. I use this trick for Sunday prep so my family has brisket all week. ❄️
Herb Infusion Shortcut
Forget fresh herbs? No problem. Add 1 tbsp dried rosemary and 1 tbsp dried thyme to the pan juices during the last 30 minutes of cooking. It won’t be identical, but the flavor depth is still impressive.
I keep a small jar of these dried herbs in my pantry for just such occasions. The aroma alone makes the kitchen smell like a Texas BBQ joint. 🌿
Broth Boost for Extra Moisture
If your brisket feels dry after cooking, don’t panic. Return it to the oven with ½ cup extra beef broth and cover loosely with foil. Cook at 250°F for 30 minutes, then baste with melted butter.
This revive technique works wonders for leftovers too. I’ve saved plenty of meals this way over the years. 💧
Make-Ahead Juices
Reduce the pan juices to a thick au jus while the brisket rests. Strain out the herbs, then simmer the liquid for 10 minutes to deepen the flavor. Store the au jus in small glass jars in the fridge for up to 5 days.
It’s perfect for dipping rolls or serving over mashed potatoes. I always make extra—it’s the best part of the meal. 🍲
Garnish Assembly Line
Prep garnishes ahead to save time during serving. Slice red onions and pickles the night before and store them in airtight containers with paper towels to absorb moisture.
Toast sesame seeds or cornmeal for topping in a dry skillet and let them cool. These simple steps make plating effortless when the brisket is ready. 🌟
Nutrition facts
Frequently asked questions
Why does my brisket need to rest before slicing?
The 1-hour rest lets juices redistribute evenly throughout the meat, preventing dryness when you slice. Skipping this step means losing all that delicious moisture right on your cutting board. Trust the process—it’s what makes the difference between good and restaurant-quality brisket!
Can I use a different cut of brisket for this recipe?
Stick with a flat-cut brisket for best results—it cooks more evenly than point-cut. If you have no choice, trim excess fat and adjust cooking time by 30-60 minutes longer to ensure tenderness. The key is even thickness for consistent doneness.
What if my oven temperature fluctuates during cooking?
Use an oven thermometer to monitor temps—most ovens run hot or cold. If your oven is 25°F+ off, adjust cooking time by 10-15 minutes per 25°F difference. Consistency is everything for that perfect probe-tender result!
How do I know when the brisket is actually done?
Check with a meat thermometer at the thickest part—205°F is your target. The meat should feel like butter when pressed gently. If unsure, cook another 10-15 minutes and recheck. Patience pays off for melt-in-your-mouth perfection!
Can I make this recipe with less beef broth?
Yes, but reduce to 1.5 cups instead of 2 cups. The broth creates steam that tenderizes the meat, so less means slightly less moisture. Add extra unsalted butter during the final basting to compensate for any dryness.

Trained in classic French technique but raised on slow-cooked ribs and spicy rubs, she blends culinary skill with smoke and soul.
- Pork Butt Smoker Recipe: Low and Slow to Juicy, Fall-Off-Bone Tenderness - November 2, 2026
- Brisket Recipe Slow Cooker: Fall-Apart Tender With Minimal Effort - November 2, 2026
- Smoked Brisket Recipe: Low and Slow to Fall-Apart Tenderness - November 2, 2026