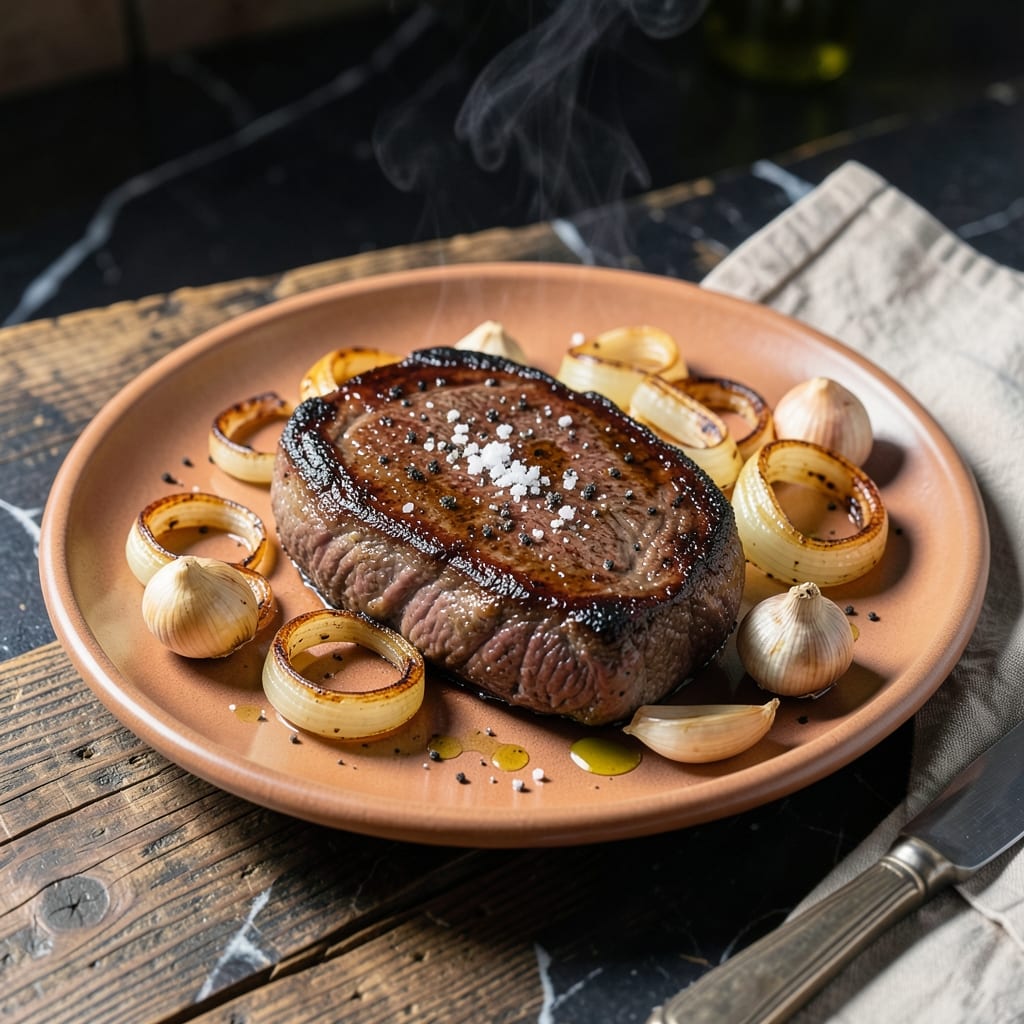
I’ve tested this method dozens of times to perfect a fork-tender result that rivals pricier cuts. The beef chuck mock tender, when braised properly, becomes impossibly soft and rich with flavor.
The secret lies in a slow, gentle cook with liquid and aromatics, transforming the tougher cut into something luxuriously succulent. Low heat and patience are key to achieving that melt-in-your-mouth texture.
This dish proves that budget-friendly beef can deliver restaurant-quality results. The braising liquid infuses every bite with deep, savory notes that make it unforgettable.
Serve it over mashed potatoes or with crusty bread to soak up the sauce. Here’s how to make it perfectly every time.
Ingredients for Beef Chuck Mock Tender Steak
Fork-tender beef chuck mock tender requires patience and a handful of aromatics for depth.
| Ingredient | Amount | Notes |
|---|---|---|
| Beef Chuck Mock Tender Steak 🥩 | 2 lb | Trimmed of excess fat |
| Kosher Salt 🧂 | 1 ½ tsp | Diamond Crystal preferred |
| Freshly Ground Black Pepper 🌶️ | 1 tsp | Coarse grind for texture |
| Olive Oil 🫒 | 2 tbsp | Divided for searing and braising |
| Yellow Onion 🧅 | 1 whole | Large, diced medium |
| Garlic Cloves 🧄 | 4 cloves | Minced finely |
| Carrots 🥕 | 2 whole | Peeled and sliced thick |
| Celery Stalks 🌿 | 2 whole | Sliced into 1-inch pieces |
| Dry Red Wine 🍷 | 1 ½ cups | Full-bodied like Cabernet |
| Beef Stock 🥣 | 2 cups | Low-sodium preferred |
| Tomato Paste 🍅 | 2 tbsp | For depth of flavor |
| Fresh Thyme Sprigs 🌿 | 3 whole | Leaves stripped, stems discarded |
| Bay Leaves 🍃 | 2 whole | Dried, whole leaves |
| Unsalted Butter 🧈 | 2 tbsp | For finishing sauce |
[recipe_ingredient_scaler]
The beef chuck mock tender is the star here. Look for well-marbled pieces at your butcher or Whole Foods—this fat renders down during braising, creating that luxurious mouthfeel. Avoid pre-cut stew meat, as the size won’t be uniform. If your supermarket doesn’t carry mock tender specifically, chuck roast cut into 2-inch chunks works identically. Always pat the beef dry before searing; it’s the only way to achieve a proper crust.
No red wine? Substitute with an extra cup of beef stock plus 1 tbsp balsamic vinegar for acidity. Fresh thyme can be swapped for 1 tsp dried thyme, but reduce the amount slightly—dried is more concentrated. If you lack tomato paste, 1/4 cup crushed tomatoes cooked down will work, though the flavor won’t be as intense. The butter at the end is optional but adds a silky finish.
Braised dishes improve overnight. Refrigerate in an airtight container for up to 4 days, or freeze for 3 months. Reheat gently on the stovetop to prevent the meat from breaking apart. The sauce will thicken slightly upon cooling; thin with a splash of stock if needed before serving.
Why You’ll Love This Recipe
- One Pan Wonder: I love that I only need a skillet, some olive oil, and a few simple seasonings to get this beef chuck mock tender steak sizzling—minimal cleanup, maximum flavor.
- Rich and Savory: The combination of kosher salt, black pepper, and caramelized yellow onion brings out the deep, beefy taste that makes this cut shine.
- Weeknight Hero: Honestly, this is my go-to for busy evenings when I need something hearty on the table fast without sacrificing quality.
- Budget Friendly: Beef chuck mock tender is an affordable cut that still delivers a tender, satisfying bite—so I can serve steak without the premium price tag.
Step-by-Step Instructions for Beef Chuck Mock Tender Steak
This braising method transforms the chuck mock tender into fall-apart tenderness with rich, concentrated flavor.
Step 1: Season and Sear the Beef
Pat the 2 lb beef chuck mock tender steak completely dry with paper towels. This step is non-negotiable—moisture prevents proper browning. Season all sides aggressively with the 1.5 tsp kosher salt and 1 tsp freshly ground black pepper, pressing the seasoning into the meat so it adheres.
Heat 1 tbsp olive oil in a heavy Dutch oven over medium-high heat until shimmering. Add the steak and sear undisturbed for 4-5 minutes per side until a deep, mahogany crust forms. You’ll hear a steady sizzle when it’s working correctly. Transfer the steak to a plate and tent with foil.
Step 2: Build the Aromatic Base
Reduce heat to medium and add the remaining 1 tbsp olive oil to the pot. Add the diced yellow onion, carrots, and celery stalks. Cook for 5-6 minutes, stirring occasionally, until the onion becomes translucent and the vegetables begin to caramelize at the edges.
Stir in the 4 cloves minced garlic cloves and 2 tbsp tomato paste, cooking for 1-2 minutes until the paste darkens slightly and coats the vegetables. This step develops the fond that will deepen your sauce’s flavor. Add the 3 whole fresh thyme sprigs and 2 whole bay leaves now to bloom their aromas.
Step 3: Deglaze and Braise
Pour in the 1.5 cups dry red wine and scrape the bottom of the pot with a wooden spoon to release all the browned bits. This is where the magic happens—those caramelized bits dissolve into the liquid, creating a deeply flavorful base. Simmer for 3-4 minutes until the wine reduces by half.
Return the seared steak to the pot along with any accumulated juices. Pour in the 2 cups beef stock. The liquid should come about halfway up the steak. Bring to a simmer, then reduce heat to low, cover, and braise for 2 to 2.5 hours, turning the steak every 30-45 minutes.
Step 4: Finish and Rest
When the steak is fork-tender and shreds easily with a gentle tug, transfer it to a cutting board and tent with foil. Skim any excess fat from the braising liquid, then simmer on medium-high heat for 8-10 minutes until reduced to a sauce consistency.
Remove from heat and whisk in the 2 tbsp unsalted butter until fully melted and emulsified into the sauce. This final step adds a silky richness that ties everything together. Slice the steak against the grain and serve immediately with the sauce spooned over the top.
Pro Tips For Making Beef Chuck Mock Tender Steak
- Sear It Hard: Get your pan screaming hot—about 2 minutes on medium-high with 2 tablespoons of olive oil—before adding the steak. I learned this the hard way after too many gray, sad-looking pieces of mock tender.
- Salt Generously: Sprinkle kosher salt on all sides at least 40 minutes before cooking, or right after if you’re short on time. Sounds like overkill, but beef chuck can handle it and rewards you with deeper flavor.
- Skip the Poking: Resist the urge to press or flip the steak constantly—once it hits the pan, leave it for 3-4 minutes per side. Every poke squeezes out juices you’ll miss later.
- Rest Under Foil: After cooking, tent the steak loosely with foil and let it rest for 8-10 minutes. My first few tries skipped this, and the juices ended up on the cutting board instead of in the meat.
Essential Equipment for This Dish
Dutch Oven Essentials
I never braise without my 5.5-quart enameled cast iron Dutch oven—the Lodge brand works beautifully. The heavy base distributes heat evenly, preventing hot spots that can burn your fond. It also retains heat perfectly for the 2-2.5 hour braise. 🔥
Wooden Spoon Magic
A good wooden spoon is your best friend for deglazing. I use mine to scrape every last bit of browned goodness from the bottom of the pot. Look for a spoon with a flat edge—it gets into corners better than rounded ones.
Tongs for Turning
For flipping the 2 lb steak during searing and turning it every 30-45 minutes while braising, 12-inch locking tongs give you the control you need. I prefer the OXO Good Grips version for its comfortable handle.
Instant Read Thermometer
While the internal temp isn’t as critical for braising as other methods, I still use my ThermoWorks Instant Read to check doneness. The steak is ready when it hits 195-205°F internally and shreds easily with a fork.
Fine Mesh Strainer
After braising, I strain the sauce through a fine mesh sieve to remove solids before reducing. This gives you that velvety smooth sauce that coats the meat beautifully. A 5-inch sieve works perfectly for this quantity.
Heat Resistant Gloves
Safety first! The Dutch oven and its contents stay dangerously hot for hours. I always use heat-resistant silicone gloves when transferring the pot in and out of my 350°F oven. They’ve saved me from countless burns over the years.
Nutrition Facts
Frequently Asked Questions
What’s the ideal internal temperature for this braised steak?
It’s ready at 195-205°F internally. At this point, the collagen breaks down and the meat becomes fork-tender. Use an instant-read thermometer to check.
Can I use a slow cooker instead of a Dutch oven?
Yes! Sear the steak first, then transfer everything to the slow cooker. Cook on low for 6-8 hours or high for 4-5 hours for similar results.
How do I prevent the sauce from being too thin?
Simmer the braising liquid uncovered for 8-10 minutes after removing the steak. This reduces it to a rich, sauce-like consistency.
What can I use instead of red wine?
Substitute with 1 cup beef stock plus 1 tbsp balsamic vinegar for acidity. This mimics the wine’s depth without the alcohol.

Trained in classic French technique but raised on slow-cooked ribs and spicy rubs, she blends culinary skill with smoke and soul.
- Recipe for Boneless Pork Chops in Cast Iron Skillet: Sear and Baste to Juicy Perfection - October 3, 2026
- Recipe for Boneless Cross Rib Roast: Slow-Roasted Beef with Herb Crust - October 3, 2026
- Hamburgers in Sauce Recipe Crock Pot: Slow-Cooked Savory Delight - October 3, 2026