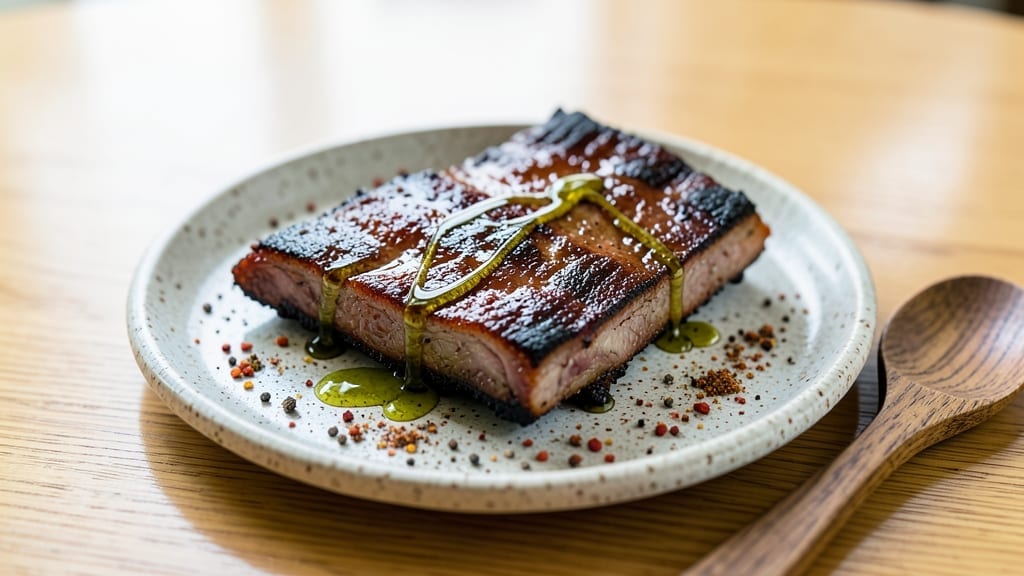
Mastering the best smoked St. Louis ribs recipe comes down to balancing a deep, flavorful bark with tender, fall-apart meat—something I’ve perfected after countless hours in the smoker. The key lies in a precise dry rub and unwavering temperature control, ensuring every bite delivers that signature smoky-sweet harmony.
This method transforms tough ribs into melt-in-your-mouth perfection, with a crust so crisp it shatters at the first touch.
What sets this recipe apart is the three-stage process: a 24-hour dry brine to tenderize, a slow smoke at 225°F for 10 hours using hickory wood, and a final hour wrapped in foil to lock in juices.
The rub—a blend of brown sugar, paprika, and cayenne—creates that iconic caramelized bark while keeping the meat moist. No shortcuts here; patience is the secret to ribs that impress even the most critical guests.
By the time you pull them from the smoker, you’ll have ribs with a deep amber crust and meat so tender it slides off the bone.
The aroma alone will have your kitchen smelling like a Southern BBQ joint, and the first bite delivers that perfect balance of smoky, sweet, and savory flavors. This isn’t just a recipe—it’s a game-changer for anyone who’s ever struggled with dry or bland ribs.
Serve with classic sides like coleslaw or cornbread to complete the meal, or plate them family-style for a showstopping centerpiece. The technique is foolproof, but the results are anything but ordinary—restaurant-quality ribs made in your backyard. Let’s get smoking.
Ingredients for best smoked st louis ribs
Six pounds of ribs promise melt-in-mouth perfection with that signature smoky-sweet crust.
| Ingredient | Amount | Notes |
|---|---|---|
| St. Louis Style Ribs (Packets) 🍖 | 10 lb | Bone-in, fully trimmed |
| Brown Sugar 🍯 | ½ cup | Packed, light or dark |
| Smoked Paprika 🌶️ | ¼ cup | For authentic bark color |
| Cayenne Pepper 🔥 | 1 tbsp | Adjust for heat preference |
| Garlic Powder 🧄 | 2 tbsp | Not garlic salt |
| Onion Powder 🧅 | 2 tbsp | For depth of flavor |
| Black Pepper 🌶️ | 1 tbsp | Freshly ground preferred |
| Kosher Salt 🧂 | 1 tbsp | Diamond Crystal preferred |
| Hickory Wood Chips 🌳 | 1 lb | For authentic smoke flavor |
| Apple Cider Vinegar 🍎 | ½ cup | For dry brine tenderization |
| Butter 🧈 | 4 tbsp | Full-fat for richness |
| Fresh Rosemary 🌿 | ¼ cup | Chopped, for final aroma |
[recipe_ingredient_scaler]
The ribs are your canvas—St. Louis style, bone-in, and fully trimmed is non-negotiable for that perfect shape. Costco or ButcherBox are my go-tos for quality cuts, but any reputable meat market works. Look for good marbling; that’s where the tenderness comes from. The hickory wood chips? Traeger or Weber brands are reliable, but any hardwood will do—just soak them for 30 minutes before smoking. Freshness matters here—use ribs within 5 days of purchase for best results.
No cayenne? Red pepper flakes at half the amount keeps the heat without the fine texture. Want more sweetness? Add 2 tbsp molasses to the rub—it caramelizes beautifully. Short on smoked paprika? Regular paprika plus 1 tsp liquid smoke gets you close. The apple cider vinegar in the brine is a game-changer—don’t skip it. It breaks down the meat fibers so the ribs fall apart. And if you’re short on rosemary, thyme works too, though the aroma won’t be exactly the same.
Dry brine the ribs 24 hours ahead—this is where the magic happens. Store them uncovered in the fridge to let the salt and vinegar work their tenderizing magic. The wood chips should be soaked in water for 30 minutes before adding to the smoker. For that perfect final touch, wrap the ribs in foil with butter and rosemary during the last hour to lock in moisture. They’ll keep 4-5 days in the fridge or freeze for up to 3 months—just reheat in the smoker or oven to restore that smoky crust.
Why You’ll Love This Recipe
- I’ll be real: smoking ribs usually sounds like a weekend project, but this recipe is my secret weapon for busy nights. Just prep the rub the night before, and you’re golden—no last-minute stress, just restaurant-quality ribs.
- No-Fuss Flavor Bomb: That dry rub with brown sugar and smoked paprika? It’s like giving your ribs a spicy, sweet hug. The cayenne and garlic powder pack enough heat and depth to make them unforgettable—no fancy marinades needed.
- Leftovers? More Like Leftovers Magic: You’ll have enough ribs to feed a small army, and honestly, they taste even better the next day. Reheat them in the smoker or oven to bring back that crispy bark, and suddenly, you’ve got a meal for days without extra effort.
- Weeknight Hero: I’ll be real: smoking ribs usually sounds like a weekend project, but this recipe is my secret weapon for busy nights. Just prep the rub the night before, and you’re golden—no last-minute stress, just restaurant-quality ribs.
Step-by-step instructions for smoked St. louis ribs
Here’s how to transform tough ribs into fall-off-the-bone perfection with a flawless bark.
Prepare the Dry Rub and Dry Brine the Ribs
In a large bowl, combine the ½ cup brown sugar, ¼ cup smoked paprika, 1 tablespoon cayenne pepper, 2 tablespoons garlic powder, 2 tablespoons onion powder, 1 tablespoon black pepper, and 1 tablespoon kosher salt. Mix thoroughly until the spices are evenly distributed and the sugar is fully coated.
Pat the 10 lb St. Louis Style Ribs dry with paper towels—this is critical for both bark formation and smoke penetration. Apply the dry rub generously to all surfaces, pressing it into the meat so it adheres completely. Then, in a separate bowl, mix the ½ cup apple cider vinegar with 1 tablespoon of the dry rub. Brush this mixture evenly over the ribs, which will act as a dry brine to tenderize the meat.
Place the ribs on a wire rack set over a baking sheet, fat side up. Refrigerate uncovered for 24 hours. This step ensures maximum flavor penetration and helps create that coveted bark. Don’t skip this—it’s what separates good ribs from exceptional ones.
Set Up the Smoker for Low and Slow Cooking
Soak the 1 lb hickory wood chips in water for 30 minutes before using. Fill your smoker with the soaked wood chips and preheat to 225°F. Use a water pan in the smoker to maintain moisture levels throughout the cook. The smoke should be thin and blue—this indicates proper combustion and the right temperature for tenderizing the meat.
Once the smoker reaches 225°F and you see steady, clean smoke, place the ribs bone side down on the grill grates. This position allows the fat to render slowly and baste the meat as it cooks. Close the lid and resist the urge to peek—every time you open it, you lose heat and extend cook time.
Cook the ribs undisturbed for 3 hours. This initial phase is where the magic happens—the collagen breaks down, the meat becomes tender, and that beautiful bark begins to form. After 3 hours, check the internal temperature using a meat thermometer—it should read around 165°F, and the ribs should be fork-tender but still have some resistance.
Wrap and Finish for Maximum Juiciness
When the ribs hit 165°F, it’s time for the “Texas Crutch”—wrapping them in butcher paper. This technique helps push the ribs through the stall (where the temperature plateaus) while preserving that crispy bark. Tear off a large sheet of butcher paper, place the ribs on it, and fold the paper tightly around them, sealing all edges.
Return the wrapped ribs to the smoker and continue cooking until the internal temperature reaches 203°F. This typically takes another 2 to 3 hours, but don’t rush it—patience is key. The ribs should pull apart easily with a fork, and the bark should be dark and crispy. If the bark starts to soften, that’s your cue to remove them from the smoker.
Once done, transfer the ribs to a cutting board and tent loosely with foil. Let them rest for 15 minutes before slicing. This resting period allows the juices to redistribute, ensuring each bite is moist and flavorful. While they rest, melt the 4 tbsp butter in a small saucepan over low heat, then stir in the ¼ cup chopped fresh rosemary. Keep this butter warm for basting.
Slice and Serve with Herb Butter
Slice the ribs between the bones into individual servings. The meat should be so tender it practically falls apart, with a dark, caramelized bark that’s crispy yet tender. Arrange the ribs on a platter and drizzle the warm herb butter over the top, letting it pool in the crevices.
Serve immediately with the herb butter basted over each portion. The combination of the smoky, spicy bark and the juicy, tender meat is what makes these ribs truly exceptional. Each bite should deliver a perfect balance of sweet, smoky, and spicy flavors, with the rosemary adding a fresh, aromatic finish.
For best results, serve with classic barbecue sides like coleslaw, baked beans, or cornbread. The ribs are rich and flavorful, so a simple, tangy side helps balance the meal. Enjoy your masterpiece—these are the kind of ribs that will have everyone asking for seconds.
Pro Tips For Making Best Smoked St Louis Ribs
- Preheat Smoker Properly: Soak those 1 lb hickory wood chips for 30 minutes first—don’t skip this. A smoker that’s already at 225°F with steady, blue smoke means no wasted time waiting for temperature swings, and your ribs start cooking right away. I’ve learned the hard way that rushing this step leads to uneven bark and a longer cook.
- Press Rub Into Meat: When applying the dry rub, don’t just sprinkle—press it in hard, especially on the meaty sides. The ½ cup brown sugar and ¼ cup smoked paprika need to stick for that dark, crackly bark. I used to slap it on lightly, and my ribs ended up with patchy flavor. A little elbow grease here makes all the difference.
- Don’t Open the Lid: The first 3 hours at 225°F are sacred—resist the urge to peek. Every time you crack the lid, you lose heat and delay the stall. I know it’s tempting, but trust the process. Your ribs will thank you with tender meat and a perfect crust.
- Use Butcher Paper, Not Foil: Wrapping in butcher paper (not foil) lets the ribs breathe while keeping them moist. Foil steams them into soggy disappointment. The paper lets the bark stay crispy while the meat finishes tender. I switched after my first foil disaster—now I never go back.
Serving suggestions for this dish
Family-Style Plating
Presenting ribs family-style is the most inviting way to serve them. Arrange the sliced ribs directly on a large, rustic wooden board or slate platter—this keeps the presentation warm and rustic.
I like to fan the ribs out in a circular pattern, with the bones pointing outward to create visual interest. The dark bark and juicy meat will naturally draw attention, making it easy for guests to serve themselves.
Add a small bowl of the herb butter in the center for easy basting, and let everyone drizzle it over their portions. 💛
Individual Serving Plates
For a more formal touch, plate each serving individually on white or dark slate plates. Slice the ribs into ½-inch thick portions and arrange them in a fan shape, with the bark side facing outward.
Drizzle the warm rosemary butter over the ribs and garnish with a sprig of fresh rosemary or a sprinkle of flaky sea salt. This presentation feels polished yet still celebrates the hearty nature of the dish.
A small side of pickles or sliced onions on the plate adds a tangy contrast.
Bib Impressions
For a playful touch, especially with kids or casual gatherings, use small bibs with the name “Ribs” or “Smoky Masterpiece” printed on them. This adds a fun, interactive element and keeps the focus on the meal.
I’ve found that even adults enjoy the lightheartedness—it turns mealtime into an experience. Pair with a simple “Ribs & Sides” chalkboard sign to set the tone for the meal. 🌟
Sauce Stations
Instead of serving the ribs dry, set up a sauce station with small bowls of complementary condiments. Offer spicy honey, pickled jalapeños, and a tangy apple cider vinegar drizzle to let guests customize their bite.
I also include a small bowl of crushed red pepper flakes for those who want extra heat. This approach turns the meal into a shared experience and lets everyone tailor the flavors to their taste. It’s a great way to keep the conversation flowing! 🔥
Garnish with Greens
Add a pop of color and freshness by garnishing each plate with a handful of baby arugula or shredded cabbage. The peppery bite cuts through the richness of the ribs and adds a visual contrast. For extra flair, drizzle a light balsamic glaze over the greens before serving.
This simple garnish elevates the dish without overpowering the smoky, spicy flavors of the ribs. It’s a small detail that makes a big difference! ✨
Nutrition facts
Frequently asked questions
Why does the recipe call for a 24-hour dry brine?
The 24-hour dry brine is what transforms tough ribs into melt-in-your-mouth perfection. The salt and apple cider vinegar break down muscle fibers, tenderizing the meat while allowing the dry rub to penetrate deeply. This step also helps create that coveted crispy bark—skipping it means less flavor and a softer crust. Trust the process; it’s the secret to ribs that fall apart at the first bite!
What’s the best way to check if the ribs are done?
Use a meat thermometer to check the internal temperature—203°F is your target. At this point, the ribs should pull apart easily with a fork and have a dark, crispy bark. If the bark starts softening, that’s your cue to pull them out. The Texas Crutch (wrapping in butcher paper) helps push them through the stall without losing that perfect texture.
Can I use foil instead of butcher paper for wrapping?
Butcher paper is ideal because it allows steam to escape while keeping the ribs moist, preserving that crispy bark. Foil traps too much moisture and can turn the bark soggy. If you’re in a pinch, use foil sparingly—just wrap the ribs loosely and check the bark frequently to avoid softening. For best results, stick with butcher paper!
How do I handle leftovers without ruining the texture?
Store leftovers in an airtight container in the fridge for up to 5 days. To reheat, place them on a wire rack over a baking sheet and warm in a 275°F oven for 20-30 minutes. This restores the smoky crust without drying them out. Avoid microwaving—it ruins the texture and bark.
What if my smoker runs too hot or too cold?
If your smoker exceeds 225°F, crack the vent slightly to lower the temperature. For temps below 225°F, add more wood chips or increase heat. Consistency is key—fluctuations can lead to uneven cooking or a less crispy bark. A good thermometer and patience are your best tools here!

Trained in classic French technique but raised on slow-cooked ribs and spicy rubs, she blends culinary skill with smoke and soul.
- Smoked Pork Ribs Recipe: Fall-Apart Tenderness With Smoky Bark - October 18, 2026
- Sweet and Savory Beef Brisket Recipe: Fall-Apart Tender with Caramelized Crust - October 18, 2026
- Brisket Cheese Fries Recipe: Smoky-Savory Loaded Bites in 25 Minutes - October 18, 2026