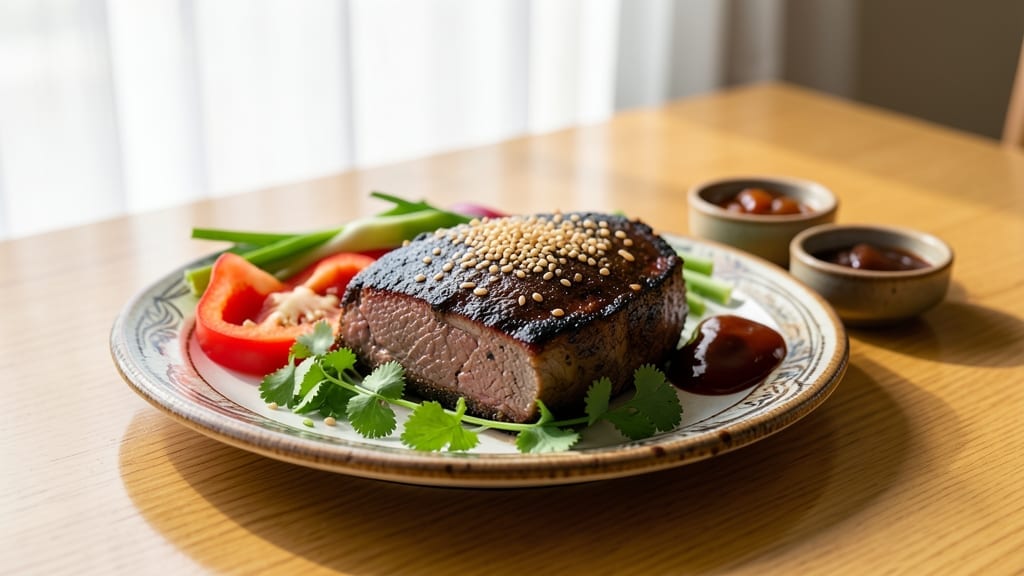
Mastering easy stovetop brisket transforms tough cuts into melt-in-your-mouth tenderness without needing a smoker—just your stovetop and patience. This method delivers restaurant-quality results in under 3 hours, making it perfect for weeknight dinners or special occasions when you crave that deep, smoky flavor.
The key lies in slow simmering, which breaks down collagen for that signature texture while keeping prep simple and foolproof.
What sets this recipe apart is the balance of time and technique: you’ll sear the brisket first to lock in juices, then braise it low and slow with aromatic vegetables and spices.
No fancy equipment required—just a heavy pot, a few pantry staples, and about 2 hours of hands-off cooking time. The result? Brisket so tender it falls apart at the touch, with rich, caramelized edges that make every bite worth the wait.
By the time you serve this brisket, your kitchen will smell like a Texas barbecue joint, and your guests will never guess it didn’t come from a smoker. Pair it with classic sides like mashed potatoes or crusty bread to soak up every last drop of that flavorful braising liquid.
Whether you’re feeding a crowd or treating yourself, this method proves tender brisket isn’t just for weekends or smokers.
The beauty of this recipe is its versatility—use it for sandwiches, tacos, or a hearty main dish. The instructions walk you through every step, from prep to plating, so you can achieve professional results without the fuss. Let’s get started on that perfectly tender stovetop brisket.
Ingredients for easy stovetop brisket
Just beef, veggies, and patience—this stovetop brisket turns tough cuts into melt-in-mouth magic.
| Ingredient | Amount | Notes |
|---|---|---|
| Chuck Roast Brisket 🥩 | 3 lb | Fat cap trimmed, 1-inch thick |
| Yellow Onions 🧅 | 3 whole | Thickly sliced, caramelized |
| Carrots 🥕 | 4 whole | Cut into 2-inch chunks |
| Garlic Cloves 🧄 | 6 cloves | Roasted for depth |
| Beef Broth 💧 | 4 cups | Low-sodium preferred |
| Brown Sugar 🍚 | ½ cup | For caramelization |
| Smoked Paprika 🌶️ | 2 tbsp | For smoky flavor |
| Dried Thyme 🍃 | 1 tbsp | Mexican oregano alternative |
| Salt 🧂 | 1 tbsp | Kosher or sea salt |
| Black Pepper 🌶️ | 1 tsp | Freshly ground, coarse |
| Olive Oil 🫒 | ½ cup | High smoke point preferred |
| Apple Cider Vinegar 🍎 | 2 tbsp | For tangy depth |
| Bay Leaves 🌿 | 2 whole | Remove before serving |
[recipe_ingredient_scaler]
The brisket is everything here. Chuck roast gives you that perfect balance of fat and muscle—Costco or butcher shops often have it pre-trimmed, which saves time. Look for 1-inch thick cuts so they cook evenly. I always buy mine with a visible fat cap—it renders down into flavor. If you can’t find chuck, flank steak works but needs extra slicing after cooking. The key is trimming just the surface fat, not all of it—keep some for juiciness. Pro tip: Ask the butcher to cut it against the grain for maximum tenderness.
No beef broth? Chicken broth plus 1/4 cup water gets you close. Smoked paprika is non-negotiable for that smoky depth—Penzeys or McCormick are solid choices. Short on thyme? Oregano at half the amount works, but it won’t taste exactly the same. The brown sugar caramelizes the onions and adds sweetness—dark brown sugar has more molasses for deeper flavor. Apple cider vinegar might sound odd, but it brightens the broth and balances the richness. If you’re in a rush, pre-chopped carrots and onions from the produce section work fine, but fresh tastes better.
This braise keeps beautifully for 5 days in the fridge—honestly tastes better the second day. Freeze portions for up to 3 months by portioning into airtight containers. I always save the braising liquid to make gravy or use it as a base for soups. The brisket reheats great in the oven at 300°F for 20 minutes. For serving, slice against the grain—trust me, it’s worth the extra minute. The veggies? Toss them in a salad or serve them alongside for a lighter option. The smoked paprika and thyme can be stored in a jar for 6 months if you’ve got leftovers—just keep them in a cool, dark place.
Why You’ll Love This Recipe
- No Dutch Oven? No Problem: I’ve made this with just a heavy pot and a lid—still turns out chef’s kiss. The key’s in that 5-minute sear and letting the onions caramelize while you flip the brisket once. No fancy equipment, just one pan and 30 minutes of hands-off time.
- The Sauce Steals the Show: That combo of brown sugar, apple cider vinegar, and smoked paprika? It’s not just flavor—it’s magic. The sauce clings to the meat like a second skin, sweet-tangy with a hint of smokiness. My kids fight over the last bites, even though they swear they don’t like brisket.
- Leftovers That Taste Better Cold: Honestly, this braise gets better the next day. I’ll reheat slices in the morning for lunches, mix them into tacos, or toss them with mashed potatoes. The sauce thickens up overnight, so every bite is richer. Five days in the fridge? I’ve got leftovers for three meals.
- Budget Beef Boost: A 3-pound chuck roast costs me less than a steak, but the payoff? A whole meal for six people. The carrots and onions stretch the flavor, and the broth keeps it juicy without skimping. I’ve fed a crowd for under $10—and they all ask for seconds.
Step-by-step instructions for easy stovetop brisket
Here’s how to transform a tough cut into melt-in-your-mouth brisket using your stovetop.
Sear the Brisket for Maximum Flavor
Heat the ½ cup olive oil in a large Dutch oven over medium-high heat until shimmering. Pat the 3 lb chuck roast brisket dry with paper towels—this ensures a proper sear. Place the brisket fat-side down in the pan and let it sit undisturbed for 5 minutes until a deep golden-brown crust forms.
Flip the brisket and sear the other side for another 4 minutes. Remove it from the pan and set aside. Here’s the thing—this initial sear locks in juices and builds that rich, caramelized foundation for the slow cook. If you see smoke, lower the heat slightly to prevent burning the meat.
Build the Flavorful Base
In the same Dutch oven, add the 3 yellow onions and 4 carrots cut into 2-inch chunks. Cook for 8-10 minutes until the onions soften and begin to caramelize. Stir occasionally to prevent sticking, but let them develop that sweet, golden color.
Add the 6 garlic cloves (peeled but left whole), 2 tbsp smoked paprika, 1 tbsp dried thyme, 1 tbsp salt, and 1 tsp black pepper. Stir for 1 minute until fragrant. This aromatic blend forms the flavor backbone of your brisket. The paprika adds smoky depth while the thyme and garlic create that warm, earthy complexity.
Slow Cook Until Fork-Tender
Return the brisket to the pot, fat-side up. Pour in the 4 cups beef broth and add the ½ cup brown sugar and 2 tbsp apple cider vinegar. Stir to combine, then add the 2 bay leaves. The vinegar adds a subtle tang that balances the richness, while the brown sugar helps caramelize the vegetables and brisket juices.
Bring to a gentle simmer, then reduce heat to low. Cover and cook for 3-4 hours, turning the brisket every 45 minutes to ensure even cooking. You’ll know it’s done when the meat is fork-tender and easily pulls apart. The liquid should reduce to a thick, flavorful sauce that coats the brisket beautifully.
Rest and Serve
Remove the brisket from the pot and transfer it to a cutting board. Tent loosely with foil and let it rest for 15-20 minutes. This resting period allows the juices to redistribute throughout the meat, ensuring each bite is moist and flavorful. During this time, remove and discard the 2 bay leaves from the sauce.
Slice the brisket against the grain into ¼-inch thick pieces. Spoon the rich, caramelized sauce over the top and serve immediately. The result is tender, flavorful brisket that falls apart with each bite, all made without a smoker. This method delivers restaurant-quality results with minimal effort—perfect for busy weeknights or special occasions.
Pro Tips For Making Easy Stovetop Brisket
- Wait 5 Minutes: DESCRIPTION: I used to flip that brisket too soon—now I let it sit fat-side down for the full 5 minutes, even if it feels like forever. That’s when the magic crust forms, and trust me, it’s worth the patience. The smoke might make you nervous, but lowering the heat just a notch keeps it golden without burning.
- Slice Onions Thick: DESCRIPTION: Thin slices caramelize too fast and turn to mush. Stick with thick slices—they’ll soften just enough to melt in your mouth while still holding their shape. And no, you don’t need to chop them into perfect rounds; just uneven chunks that’ll brown evenly.
- Don’t Skip the Vinegar: DESCRIPTION: That 2 tbsp of apple cider vinegar isn’t just for show—it cuts through the richness and keeps the sauce bright. Skip it, and you’ll end up with a one-note, overly sweet braise. Add it early with the broth, and let it work its magic while the brisket cooks.
- Turn It Often: DESCRIPTION: Every 45 minutes isn’t just a suggestion—it’s how you avoid a dry, unevenly cooked brisket. Fat-side up when you return it to the pot, then flip it again when you turn it. The sauce will coat it perfectly, and the meat will stay tender instead of tough.
Make-ahead tips for this recipe
Prep the Night Before
I prep everything the day before to save time on cooking day. Trim and sear the 3 lb chuck roast brisket as directed, then let it cool completely.
Store it in an airtight container with the thickly sliced onions and carrot chunks arranged around it. This keeps everything fresh and organized—no last-minute chopping stress. 💡
Broth Prep Shortcut
Make your life easier by prepping the broth mixture ahead. Combine 4 cups beef broth, ½ cup brown sugar, 2 tbsp apple cider vinegar, and spices in a separate container.
Store it in the fridge—just dump it into your Dutch oven when ready to cook. The flavors meld overnight, making the final dish even richer.
Double Batch for Leftovers
This recipe scales beautifully—double the ingredients if you’re feeding a crowd or want leftovers. The 3-4 hour cook time means you can prep one batch in the morning and cook another later.
Store the extra brisket in the fridge for up to 5 days or freeze portions for up to 3 months. It reheats perfectly in the oven at 300°F for 20 minutes.
Sauce Separation Hack
If you want to serve the brisket with extra sauce on the side, strain the braising liquid through a fine-mesh sieve before storing. This keeps the sauce smooth and ready to reheat quickly.
I also save the veggie scraps to make a simple stock for future recipes—zero waste, maximum flavor. 🌟
Freezer Prep for Busy Weeks
Portion the cooked brisket into freezer-safe bags with the sauce before freezing. Label each bag with the date—this brisket keeps well for 3 months. When ready to eat, thaw overnight in the fridge and reheat gently in the oven. It’s like having a restaurant-quality meal ready in minutes!
Nutrition facts
Frequently asked questions
Why does this recipe call for searing the brisket first?
The sear creates a flavorful crust that locks in juices while adding depth to the final dish. This 5-minute sear on each side develops a rich, caramelized foundation that enhances the slow-cooked tenderness later. Skipping this step means losing that delicious crust and some of the meat’s natural juices.
Can I use a different cut of beef instead of chuck roast?
While chuck roast works best, flank steak is a close substitute—just slice it ¼-inch thick against the grain after cooking for optimal tenderness. Avoid lean cuts like sirloin, as they lack the fat needed for moist results. The 3 lb size ensures enough meat for generous servings.
What if my brisket isn’t tender after 3-4 hours
?
Check if the meat is fork-tender by gently probing it. If it still feels firm, cook it 1 more hour uncovered to reduce the liquid further. Overcooking can dry it out, so keep an eye on it after 4 hours. The sauce should thicken naturally, coating the meat beautifully.
How do I reheat leftovers without drying out the brisket?
Place slices in a baking dish, cover with foil, and reheat in the oven at 300°F for 20 minutes. This gentle heat preserves moisture. Avoid microwave reheating, as it can make the meat rubbery. Serve with extra sauce from the pot for added flavor.
Can I make this recipe in a slow cooker instead of a Dutch oven?
Yes! Transfer the seared brisket and all ingredients to a slow cooker after Step 2. Cook on low for 7-8 hours or high for 4-5 hours, stirring occasionally. The results will be slightly less caramelized but still tender and flavorful. Just ensure the liquid reduces to a sauce before serving.

Trained in classic French technique but raised on slow-cooked ribs and spicy rubs, she blends culinary skill with smoke and soul.
- Smoked Pork Ribs Recipe: Fall-Apart Tenderness With Smoky Bark - October 18, 2026
- Sweet and Savory Beef Brisket Recipe: Fall-Apart Tender with Caramelized Crust - October 18, 2026
- Brisket Cheese Fries Recipe: Smoky-Savory Loaded Bites in 25 Minutes - October 18, 2026