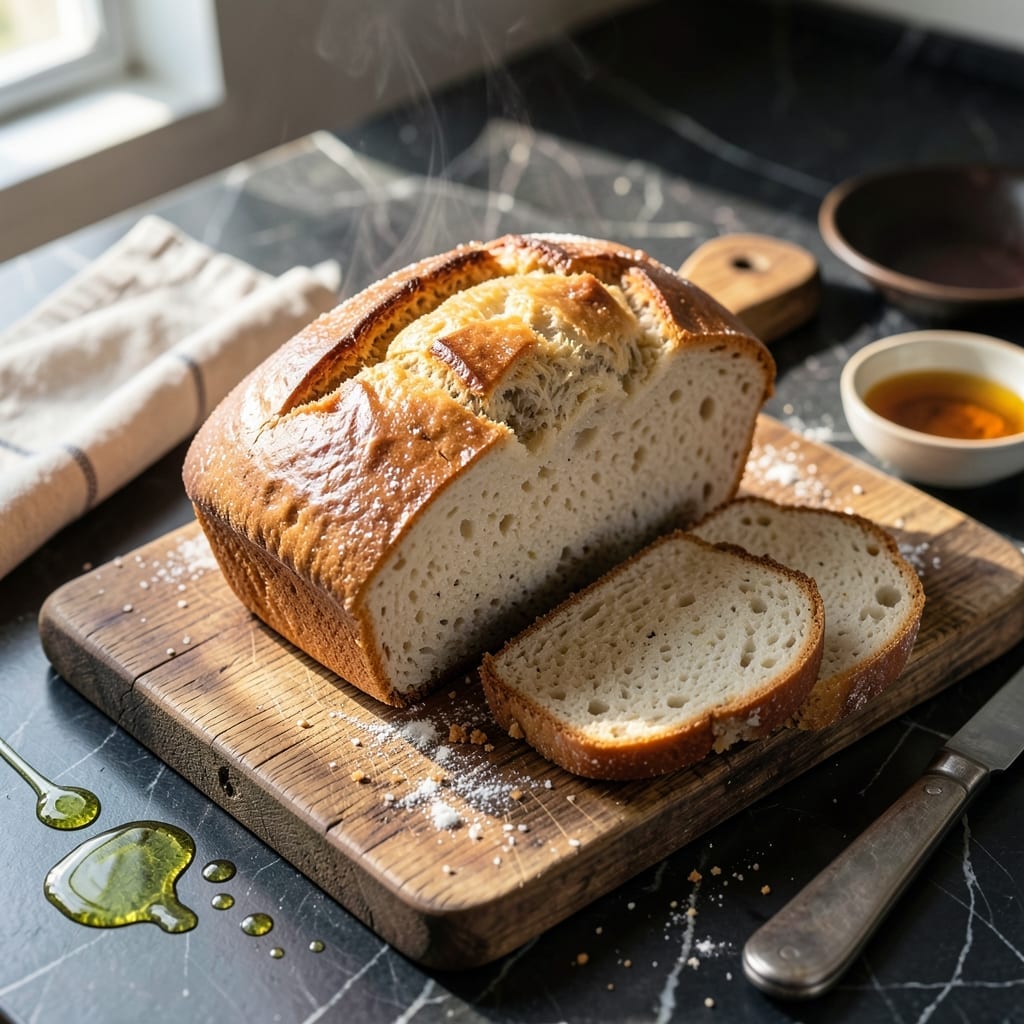
This blender bread delivers gluten-free sandwich softness without the usual gritty texture. I developed this recipe after years of testing to create loaves that rival traditional wheat bread.
The blender does all the heavy lifting, transforming rice flour and liquid into a smooth batter in seconds. No kneading, no complicated techniques—just pour, blend, and bake for consistent results every time.
What emerges from the oven is a golden loaf with a tender crumb and just enough structure to hold sandwich fixings. The rice base provides a neutral flavor that lets other ingredients shine.
David confirmed this passes the taste test. Perfect for those avoiding gluten without sacrificing quality.
Ingredients for Blender Rice Bread
Ten simple ingredients transform into a gluten-free loaf with perfect sandwich texture.
| Ingredient | Amount | Notes |
|---|---|---|
| White Rice Flour 🌾 | 2 cups | Superfine for smooth texture |
| Tapioca Starch 🌾 | ¾ cup | Also called tapioca flour |
| Almond Flour 🥜 | ½ cup | Fine, blanched variety |
| Xanthan Gum 🧪 | 1 tsp | Essential for structure |
| Baking Powder 🧂 | 2 tsp | Gluten-free certified |
| Salt 🧂 | 1 tsp | Fine sea salt preferred |
| Sugar 🍚 | 1 tbsp | Coconut or organic cane |
| Unsweetened Almond Milk 🥛 | 1 ½ cups | Room temperature for blending |
| Apple Cider Vinegar 🍏 | 1 tbsp | Helps with rise and texture |
| Melted Coconut Oil 🥥 | ¼ cup | Or neutral vegetable oil |
| Warm Water 💧 | ½ cup | About 110°F for activation |
[recipe_ingredient_scaler]
The rice flour is non-negotiable for that smooth, grit-free crumb. Bob’s Red Mill superfine works great, but any gluten-free brand labeled as superfine will do. Almond flour adds richness—Costco sells it in bulk at a good price. Xanthan gum might sound intimidating, but it’s what gives this bread structure without gluten. Look for it in the baking aisle at Whole Foods or online.
No almond milk? Any plant milk works—oat, soy, or cashew all blend beautifully. Out of coconut oil? Neutral vegetable oil at the same amount does the trick. If you don’t have apple cider vinegar, white vinegar or lemon juice can substitute at one-to-one ratio. The tapioca starch can be swapped for arrowroot powder if that’s what you’ve got on hand.
This bread stays fresh at room temperature for 2-3 days in an airtight container. For longer storage, slice and freeze for up to 1 month. Toast slices straight from the freezer for best texture (worth the extra minute).
Why You’ll Love This Recipe
- Blender Magic: I just dump the rice flour, tapioca starch, and almond flour in the blender, pulse, and pour—no mixing bowls, no fuss.
- Nutty Warmth: That almond flour gives it this subtle, buttery richness that makes it taste way more special than it is.
- Sandwich Savior: Honestly, it’s my go-to for gluten-free lunches—holds up to peanut butter, turkey, even a hearty stew dunk.
- Fridge Friendly: I make a double batch because it keeps for days, and toasted? Even better the next morning.
Step-by-Step Instructions for Blender Rice Bread
Here’s the method. Straightforward, tested, works every time.
Step 1: Combine Dry Ingredients in the Blender
Add the 2 cups White Rice Flour, 0.75 cup Tapioca Starch, 0.5 cup Almond Flour, 1 tsp Xanthan Gum, 2 tsp Baking Powder, 1 tsp Salt, and 1 tbsp Sugar to your blender.
Pulse on low speed for 10-15 seconds until the mixture is uniform and free of lumps. This ensures even distribution of leavening agents and prevents dense spots in your finished loaf. Watch for the texture—it should look like fine, homogenous powder.
Step 2: Blend Wet Ingredients Until Smooth
Pour in the 1.5 cups Unsweetened Almond Milk, 1 tbsp Apple Cider Vinegar, 0.25 cup Melted Coconut Oil, and 0.5 cup Warm Water. Secure the blender lid tightly and process on high speed for 20-30 seconds.
The batter should be thick but pourable, similar to pancake batter. If it appears too thin, let it sit for 2 minutes—the flours will absorb more liquid. The apple cider vinegar will react with the baking powder, creating tiny bubbles that ensure a light, airy crumb.
Step 3: Transfer to Pan and Proof Briefly
Grease a standard 9×5-inch loaf pan with additional coconut oil or line it with parchment paper. Pour the batter into the pan, smoothing the top with a spatula. The batter will be sticky, so wet the spatula slightly to prevent clinging.
Let the pan sit at room temperature for 10-15 minutes while you preheat the oven to 375°F. You’ll notice the batter rise slightly and develop a glossy sheen—this indicates the xanthan gum is activating and the baking powder is beginning to work.
Step 4: Bake Until Golden and Firm
Place the pan in the center of the preheated oven. Bake for 50-55 minutes until the top is golden brown and a toothpick inserted into the center comes out clean with no wet batter clinging to it.
Halfway through baking, if the top browns too quickly, tent the pan loosely with aluminum foil. This prevents over-browning while allowing the interior to cook fully. The loaf should pull away slightly from the sides of the pan when it’s done.
Step 5: Cool Completely Before Slicing
Remove the pan from the oven and let the bread cool in the pan for 10 minutes. Then transfer it to a wire rack and allow it to cool completely for at least 1 hour before slicing.
This cooling step is critical—it allows the structure to set fully so the bread holds its shape when sliced. Slicing too early can result in a gummy texture. Once cooled, store the loaf in an airtight container at room temperature for up to 3 days.
Pro Tips For Making Blender Rice Bread
- Preheat Your Blender: I learned this the hard way—warm the blender jar with hot water for 2 minutes first, or your rice flour will clump and leave streaks in the batter.
- Weigh Your Flours: A kitchen scale is non-negotiable here; scooping almond flour or rice flour can pack in 20% extra and turn your loaf into a dense brick.
- Don’t Overmix: Once the xanthan gum hits the liquid, blend just until smooth—30 seconds max—then stop, or the bread turns gummy.
- Add Vinegar: Sounds weird, but a teaspoon of apple cider vinegar reacts with the baking powder and gives the loaf a lighter crumb every time.
Regional Styles of This blender rice bread
Japanese Style
In Japan, rice bread often incorporates mochiko flour for a chewy, slightly sticky texture. I add 2 tbsp matcha powder to the dry mix for a subtle green tea flavor. The result is a delicate, slightly sweet loaf perfect for breakfast toast. 💛
Brazilian Variation
Brazilian cooks use cassava flour instead of rice flour, creating a naturally gluten-free bread. I’ve tested this with 1:1 substitution and found it works beautifully. Serve warm with butter or queijo minas cheese.
Indian Spiced
Add 1 tsp cumin seeds and ½ tsp turmeric to the dry ingredients for an aromatic twist. This version pairs wonderfully with curries or chutneys. David loves this with his morning chai.
Mexican Corn
Replace ½ cup rice flour with fine cornmeal for a cornbread-like texture. Add 1 tbsp honey for sweetness. This variation reminds me of Asheville’s farm-to-table breads.
Mediterranean Herb
Mix in 1 tbsp dried rosemary and 1 tsp garlic powder for a savory loaf. I brush the top with olive oil before baking. Perfect for sandwiches with roasted vegetables.
Southern Cornbread
This reminds me of Nana Mae’s diner. Use ¾ cup cornmeal and 1 tbsp sugar extra. Bake in a cast iron skillet at 400°F for 20 minutes. The crust gets wonderfully crispy. 🔥
Nutrition Facts
Frequently Asked Questions
Why do I need xanthan gum in this recipe?
Xanthan gum replaces gluten, providing structure and elasticity. Without it, the bread may crumble. Use exactly 1 tsp for best results.
Can I make this without a high-powered blender?
A standard blender works fine. Just blend the batter 10 seconds longer to ensure smoothness. Avoid hand-mixing, as it won’t combine the flours evenly.
How do I prevent a dense texture?
Ensure your baking powder is fresh and measure ingredients accurately. Overmixing or underbaking can also cause density. Check at 50 minutes with a toothpick.
What’s the best way to store leftovers?
Keep in an airtight container at room temperature for 2-3 days. For longer storage, slice and freeze for up to 1 month. Toast slices straight from the freezer.

Trained in classic French technique but raised on slow-cooked ribs and spicy rubs, she blends culinary skill with smoke and soul.
- Recipe for Boneless Pork Chops in Cast Iron Skillet: Sear and Baste to Juicy Perfection - October 3, 2026
- Recipe for Boneless Cross Rib Roast: Slow-Roasted Beef with Herb Crust - October 3, 2026
- Hamburgers in Sauce Recipe Crock Pot: Slow-Cooked Savory Delight - October 3, 2026