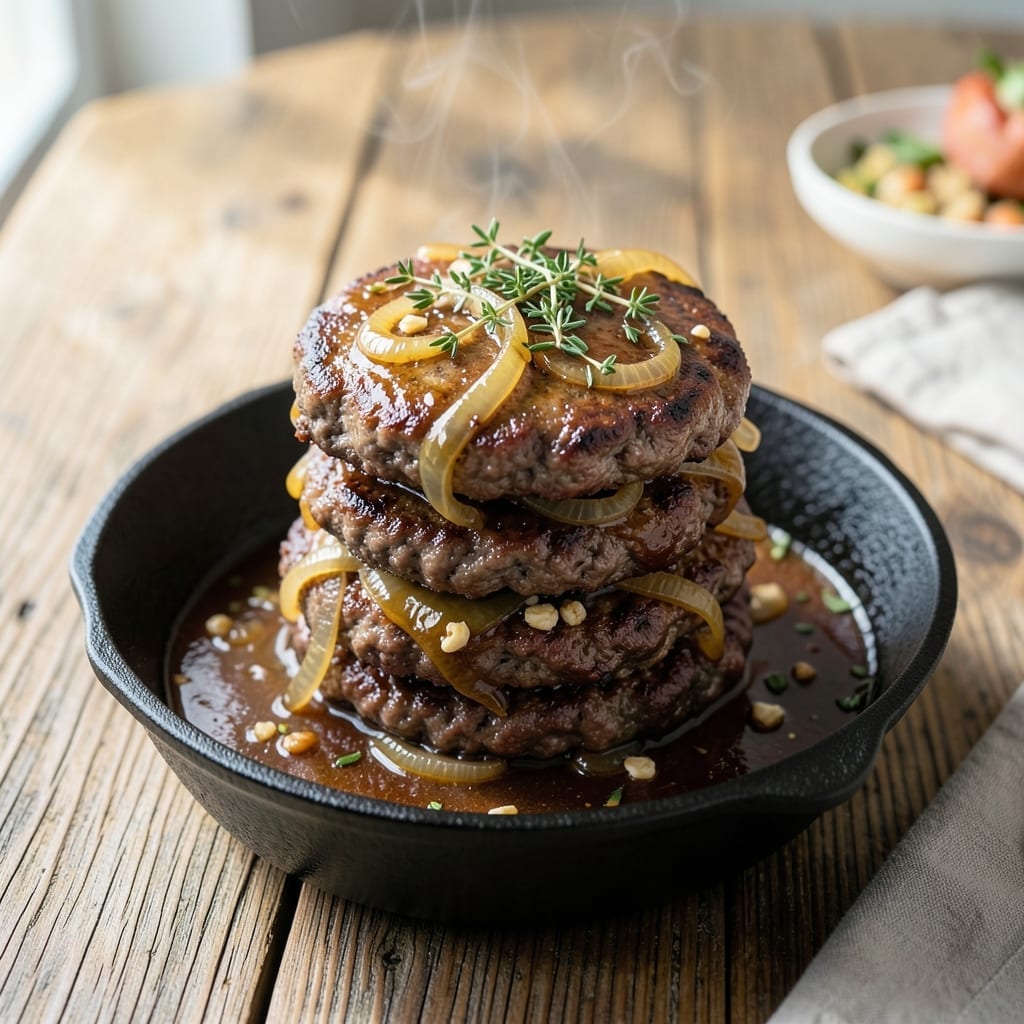
This old-fashioned method brings unexpected depth to simple ground beef. I first tried it during a blizzard when grilling wasn’t an option, and the results surprised even me.
The technique gently cooks the meat in liquid, keeping it moist and tender while creating a rich, savory broth. It’s a forgiving process that works with minimal supervision and standard kitchen tools.
What emerges is comfort food at its most pure – flavorful beef with a texture that’s perfect for sandwiches, casseroles, or serving as-is with mashed potatoes.
This approach delivers consistent results without the guesswork of stovetop browning.
Ingredients for Boiled Hamburger
Old-fashioned comfort starts with ground beef, broth, and a handful of pantry staples.
| Ingredient | Amount | Notes |
|---|---|---|
| Ground Beef 🥩 | 1 ½ lb | 80/20 lean-to-fat ratio preferred |
| Beef Broth 🍲 | 2 cups | Low-sodium for better control |
| Yellow Onion 🧅 | 1 whole | Medium, finely diced |
| Garlic Cloves 🧄 | 3 cloves | Minced for even distribution |
| Worcestershire Sauce 💧 | 2 tbsp | Adds umami depth to broth |
| Dried Thyme 🌿 | 1 tsp | Crushed between fingers |
| Dried Rosemary 🌿 | 1 tsp | Crushed between fingers |
| Bay Leaf 🍃 | 1 whole | Removed before serving |
| Kosher Salt 🧂 | 1 tsp | Diamond Crystal preferred |
| Freshly Ground Black Pepper 🌶️ | ½ tsp | Coarse grind for texture |
| All-Purpose Flour 🌾 | 2 tbsp | Optional, for thickening broth |
| Water 💧 | 1 cup | As needed for consistency |
[recipe_ingredient_scaler]
The beef quality directly impacts the final dish. 80/20 ground chuck provides the ideal fat ratio for moisture and flavor. Butcher-shop meat or Whole Foods organic ground beef yields superior results. The broth should be low-sodium to allow proper seasoning control. Fresh herbs can be used at triple the dried amount if preferred.
No Worcestershire sauce? Soy sauce plus a pinch of sugar offers similar depth. Vegetable broth can substitute beef broth in a pinch (though flavor will differ). For additional richness, red wine or mushroom stems can be simmered in the liquid. The flour is optional—omit for gluten-free or use cornstarch slurry instead.
Cooked beef keeps 3-4 days refrigerated in its broth. Freeze portions for up to 3 months—both meat and liquid freeze well. Reheat gently to prevent drying. The broth intensifies in flavor overnight, making leftovers even more delicious.
Why You’ll Love This Recipe
- One Pot Wonder: I just brown the beef, toss everything in, and let it simmer—no fancy techniques, no extra pans.
- Rich Beefy Depth: The Worcestershire and garlic turn simple ground beef into something deep and savory, like a hug in a bowl.
- Feeds the Freezer: I double the batch and stash half for those nights I’d rather not cook at all.
- Budget Friendly: A pound of ground beef, a few pantry staples, and I’ve got a hearty meal that doesn’t break the bank.
Step-by-Step Instructions for Boiled Hamburger
This method delivers tender beef in a rich, savory broth with minimal effort and maximum flavor.
Step 1: Brown the Ground Beef with Aromatics
In a large skillet over medium-high heat, add the 1.5 lb Ground Beef. Break it up with a wooden spoon as it cooks, allowing it to brown evenly for 5-7 minutes until no pink remains. The beef should develop a deep, caramelized crust on some pieces—this adds depth to the final dish.
Add the finely diced Yellow Onion and minced 3 cloves Garlic Cloves to the skillet during the last 2 minutes of browning. Stir frequently to prevent burning. The onions should soften and become translucent, while the garlic releases its aroma without turning bitter.
Step 2: Build the Broth Base
Pour in the 2 cups Beef Broth, 2 tbsp Worcestershire Sauce, 1 tsp Dried Thyme, 1 tsp Dried Rosemary, 1 whole Bay Leaf, 1 tsp Kosher Salt, and 0.5 tsp Freshly Ground Black Pepper. Stir well to combine, scraping up any browned bits from the bottom of the skillet.
Bring the mixture to a gentle simmer over medium heat. The liquid should just bubble at the edges, not boil vigorously. This simmering process allows the flavors to meld together while keeping the beef tender. You’ll notice the broth taking on a rich, golden hue as the spices infuse.
Step 3: Simmer to Perfection
Reduce the heat to low and let the mixture simmer uncovered for 20-25 minutes. This slow cooking time ensures the beef absorbs the flavors of the broth and herbs. Stir occasionally to prevent sticking, and skim off any excess fat that rises to the surface if desired.
The dish is ready when the broth has reduced slightly and taken on a deeper, more concentrated flavor. The beef should be fully tender, and the onions nearly dissolved into the sauce. If the broth reduces too much, add up to 1 cup Water to maintain your desired consistency.
Step 4: Thicken the Broth (Optional)
For a richer, gravy-like consistency, sprinkle the 2 tbsp All-Purpose Flour evenly over the simmering mixture. Stir constantly for 1-2 minutes to cook off the raw flour taste and allow the broth to thicken. The flour will create a smooth, velvety texture that coats the beef beautifully.
Continue cooking for another 3-5 minutes until the broth reaches your preferred thickness. Remove the Bay Leaf before serving, as it’s added for flavor infusion only. Taste and adjust seasoning with additional Kosher Salt or Freshly Ground Black Pepper if needed.
Pro Tips For Making Boiled Hamburger
- Use Cold Beef: I learned this the hard way—start with cold ground beef straight from the fridge to prevent the patties from falling apart in the broth.
- Simmer, Don’t Boil: After burning two batches, I finally figured out that a gentle simmer keeps the meat tender while infusing flavor into the broth.
- Skip Over-Mixing: Resist the urge to overwork the beef when forming patties; it makes them dense and tough once cooked.
- Add Worcestershire Last: Sounds weird, but it works: stir in the Worcestershire sauce during the last 5 minutes to preserve its bold flavor instead of boiling it off early.
Essential Equipment for Perfect Results
Essential Skillet
I always reach for my 12-inch stainless steel skillet—it’s the perfect size for 1.5 lb of beef with room to stir. The heavy base distributes heat evenly, preventing hot spots that can burn the onions. All-Clad makes my favorite, but any quality stainless works. 💪
Wooden Spoon
A sturdy wooden spoon is non-negotiable for breaking up the beef while browning. It won’t scratch your skillet and gives you the control to scrape up those flavorful browned bits. I keep mine by the stove at all times.
Sharp Chef’s Knife
For dicing the onion and mincing garlic, a sharp 8-inch chef’s knife makes quick work. I love my Victorinox Fibrox—it’s affordable and holds an edge well. Dull knives slip, and that’s when accidents happen.
Measuring Tools
Precise measurements matter here. I use OXO Good Grips measuring spoons for the dried herbs and Worcestershire sauce. A 1-cup liquid measure ensures your broth is exact. Eyeballing can lead to overly salty or weak broth.
Thermometer
While not strictly necessary, I like to verify the beef reaches 160°F internally. A instant-read thermometer gives peace of mind, especially with larger batches. ThermoWorks makes reliable, budget-friendly options. 🌡️
Colander
If you plan to drain the beef for sandwiches or other uses, a fine-mesh colander helps separate meat from broth while keeping all those delicious bits. I reserve the broth for gravy or soups—nothing goes to waste in my kitchen.
Nutrition Facts
Frequently Asked Questions
Why brown the beef first if you’re boiling it?
Browning creates a deep, caramelized crust that adds rich flavor to the final dish. This step builds complexity that simmering alone can’t achieve.
Can I use ground turkey instead?
Yes, but use dark meat turkey for best results. It stays moister than breast meat. Adjust cooking time to 15-20 minutes since turkey cooks faster than beef.
How do I keep the broth from getting greasy?
Skim excess fat with a spoon during simmering. For a clearer broth, chill the mixture first—the fat will solidify on top for easy removal.

Trained in classic French technique but raised on slow-cooked ribs and spicy rubs, she blends culinary skill with smoke and soul.
- Recipe for Boneless Pork Chops in Cast Iron Skillet: Sear and Baste to Juicy Perfection - October 3, 2026
- Recipe for Boneless Cross Rib Roast: Slow-Roasted Beef with Herb Crust - October 3, 2026
- Hamburgers in Sauce Recipe Crock Pot: Slow-Cooked Savory Delight - October 3, 2026