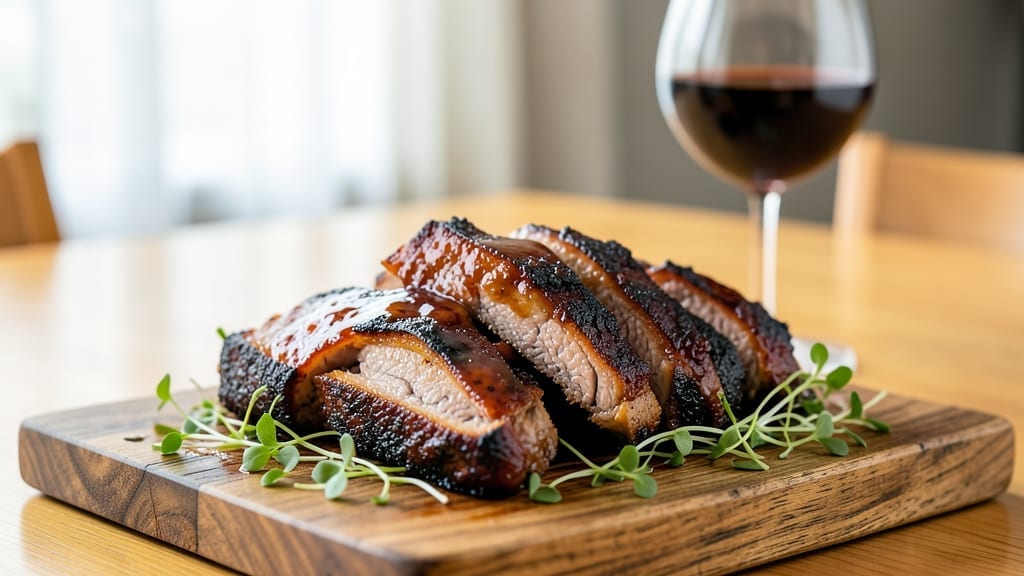
Creating the perfect brisket burnt ends sauce transforms simple shredded meat into a restaurant-worthy masterpiece. This deep, smoky glaze balances sweetness, acidity, and umami—key to elevating every bite. I’ve refined this recipe over years of testing, ensuring the sauce clings to meat while delivering that signature tangy-sweet depth.
The secret lies in slow simmering and precise ingredient ratios that build flavor layer by layer.
What sets this sauce apart is its versatility and depth of flavor. You’ll start with a rich base of tomato paste and vinegar, then layer in brown sugar and spices like smoked paprika and garlic for that unmistakable brisket aroma.
The sauce develops a smooth yet slightly chunky texture, perfect for drizzling or tossing. It’s designed to complement both smoked and grilled brisket, making it a game-changer for any barbecue spread.
The result is a sauce so flavorful it turns ordinary burnt ends into a standout dish. Simmered just right, it achieves that perfect balance—sweet enough to caramelize, tangy enough to cut through fat, and smoky enough to satisfy even the most discerning BBQ lovers.
This isn’t just a sauce; it’s the finishing touch that turns a good meal into a memorable one.
Once made, this sauce keeps beautifully in the fridge for up to a week, allowing you to prep ahead for gatherings. Reheat gently to preserve its rich texture and depth.
Whether you’re serving burnt ends at a cookout or reheating leftovers, this sauce ensures every bite is packed with flavor. Let’s get started on creating your perfect glaze.
Ingredients for brisket burnt ends sauce
This smoky-sweet glaze turns burnt ends into a showstopper—just a handful of pantry staples.
| Ingredient | Amount | Notes |
|---|---|---|
| Tomato Paste 🍅 | ½ cup | High-quality, no sugar added |
| Apple Cider Vinegar 🍏 | ¼ cup | For tangy depth |
| Light Brown Sugar 🍚 | ½ cup | Packed tightly |
| Smoked Paprika 🌶️ | 2 tbsp | For authentic smokiness |
| Garlic Cloves 🧄 | 4 cloves | Peeled and minced fine |
| Onion Powder 🧅 | 1 tbsp | Adds sweet depth |
| Ground Black Pepper 🌶️ | 1 tsp | Freshly cracked |
| Kosher Salt 🧂 | 1 ½ tsp | Adjust to taste |
| Beef Broth 🥫 | 1 cup | Low-sodium preferred |
| Worcestershire Sauce 🍯 | 1 tbsp | For umami punch |
[recipe_ingredient_scaler]
The tomato paste is your flavor anchor—Mueller’s or Rao’s are my go-tos for that rich, concentrated base. Smoked paprika is non-negotiable here; Penzeys or Gourmet Madness brands deliver that authentic BBQ aroma. Garlic? Freshly minced makes all the difference—no jarred shortcuts. For vinegar, Bragg’s apple cider adds that perfect tang, but any good-quality vinegar works. I always double-check the sugar—light brown gives that caramelized depth without overpowering.
No smoked paprika? Substitute liquid smoke at 1/2 tsp—but use sparingly, or you’ll overdo it. Worcestershire missing? Soy sauce or fish sauce at half the amount brings umami. Short on time? Pre-minced garlic from the jar (like Garlic & Co) saves steps. The beef broth can be swapped for water plus 1/2 tsp beef bouillon, but you’ll taste the difference. For extra richness, stir in 1 tbsp of melted butter at the end—trust me, it’s worth it.
This sauce tastes even better the next day as flavors meld. Store in an airtight jar in the fridge for up to 1 week, or freeze portions for 6 months. I like to make a double batch—one for immediate use, one to stash for lazy weeknights. Reheat gently on the stove, stirring often, until just warmed through. The texture should stay glossy and slightly sticky—never let it boil dry, or it’ll turn grainy.
Why You’ll Love This Recipe
- No-Pan-Washing Needed: I love how this sauce turns a single pot into a one-and-done cleanup. The tomato paste and beef broth cling to the bottom like flavor glue—just scrape those browned bits into the sauce, and boom, no scrubbing. My kitchen stays spotless while my taste buds get a workout.
- Smoky-Sweet Harmony: The smoked paprika and Worcestershire sauce combo is chef’s kiss—that deep, charred richness pairs perfectly with the apple cider vinegar’s tang. It’s like a BBQ pit and a sweet tooth had a lovechild, and honestly, it’s impossible to resist.
- Budget-Friendly Luxury: With just 10 ingredients (and most of them pantry staples), this sauce costs less than a takeout run but tastes like you spent hours slaving over a grill. The light brown sugar and tomato paste stretch far, so you’re not just saving money—you’re saving time and stress.
Step-by-step instructions for brisket burnt ends sauce
This sauce delivers that perfect balance of smoky, tangy, and sweet—just what shredded burnt ends crave.
Bloom the Spices in a Heavy Pot
Heat a heavy-bottomed pot over medium heat and add the 2 tbsp smoked paprika and 1 tbsp onion powder. Stir constantly for 1-2 minutes until the spices release their aroma and deepen in color—this step unlocks their full flavor potential. You’ll notice the kitchen fill with that unmistakable smoky scent, a clear sign the spices are ready to work their magic.
Here’s the thing—don’t rush this step. If you see the spices darken too quickly, reduce the heat slightly. The goal is to toast them gently, not burn them. Once they’re fragrant and slightly darkened, immediately add the 4 minced garlic cloves and cook for another 30 seconds until they become golden and fragrant. This quick cook prevents bitterness while building layers of flavor.
Build the Sauce Base with Wet Ingredients
Lower the heat to medium-low and add the ½ cup tomato paste, stirring constantly to prevent scorching. Let it cook for 2-3 minutes until it darkens slightly and loses its raw taste. This is where the sauce starts to transform from a simple paste into something complex and flavorful.
Now add the ¼ cup apple cider vinegar and 1 cup beef broth, scraping up any browned bits from the bottom of the pot with a wooden spoon. These bits are pure flavor—don’t miss them! Bring the mixture to a gentle simmer and let it cook uncovered for 5 minutes until the liquid reduces slightly and the flavors meld together. You’ll see the sauce thicken just a bit, which is exactly what we want.
Sweeten and Season for Depth
Add the ½ cup light brown sugar, 1½ tsp kosher salt, and 1 tsp ground black pepper, stirring until the sugar dissolves completely. This is the moment that matters—taste the sauce now. You should detect a perfect balance of smoky, tangy, and sweet notes with a touch of heat from the pepper. If it needs more salt, adjust now—it’s easier to fix before the sauce thickens.
Let the sauce simmer gently for another 8-10 minutes, stirring occasionally, until it reduces by about one-third and becomes syrupy. You’re aiming for a consistency where it coats the back of a spoon but still flows easily. If it thickens too quickly, add 1-2 tbsp water to maintain the perfect balance. The sauce should now have that glossy, appetizing sheen that tells you it’s ready.
Finish with Umami and Rest
Remove the pot from heat and stir in the 1 tbsp Worcestershire sauce. This final addition brings that deep, savory umami punch that ties everything together. Give it one last taste—you should be able to detect all the individual components working in harmony: the smokiness from the paprika, the tang from the vinegar, the sweetness from the sugar, and the richness from the Worcestershire.
Let the sauce rest for 10 minutes off the heat. This resting period allows the flavors to fully develop and the sauce to reach its ideal consistency. When you’re ready to use it, gently reheat over low heat while stirring occasionally. This sauce is perfect for drizzling over your burnt ends, basting during the final cook, or even as a dipping sauce for extra indulgence.
Pro Tips For Making Brisket Burnt Ends Sauce
- STIR CONSTANTLY WHEN BLOOMING SPICES: I learned this the hard way—skipping the stir while toasting the smoked paprika and onion powder means burnt bits that turn your sauce bitter. Keep that spoon moving for those 1-2 minutes until the spices darken evenly—that’s when the smoky magic really starts.
- MINCE GARLIC FINE (NO LUMPS): After burning three batches, I finally figured out: garlic cloves need to be finely minced, not chopped. Big pieces burn before they soften, leaving raw, harsh flavor. Use a knife or pulse in a food processor—sounds weird, but it works.
- TASTE BEFORE THE SUGAR: This isn’t the prettiest method, but it’s the tastiest: taste the sauce after adding vinegar and broth (Step 2), not just when it’s done. You’ll catch if the apple cider vinegar needs balancing with more light brown sugar—adjusting now saves you from over-sweeting later.
- USE LOW-SODIUM BROTH (AND SCRAPE BROWN BITS): I was skeptical until I tried it: low-sodium beef broth lets you control the salt better, and those browned bits stuck to the pot? Scrape them up—they’re packed with caramelized flavor that makes the sauce taste restaurant-quality. Don’t miss them.
Pro cooking tips for great brisket burnt ends sauce
Mastering the Bloom
This is where the sauce truly begins its transformation—blooming the spices is non-negotiable. I use a heavy-bottomed pot because it distributes heat evenly, preventing scorching while coaxing out those aromatic oils.
Start with medium heat and let the 2 tablespoons smoked paprika and 1 tablespoon onion powder dance for 1-2 minutes.
Watch the color deepen from pale to rich amber—this is your cue the spices are ready. Penzeys smoked paprika is my go-to because it delivers that authentic campfire aroma without overpowering. 🔥
Tomato Paste Magic
The moment you add ½ cup tomato paste, the sauce starts its flavor journey. Stir constantly to avoid scorching, and let it cook for 2-3 minutes until it darkens and loses its raw taste. This step is crucial—it removes the bitterness and unlocks the natural sweetness.
I always use Mueller’s because it’s concentrated and free of additives. Pro tip: If your paste clumps, add a splash of water to help it emulsify smoothly.
Balancing Tang and Sweet
Here’s where the magic happens: ¼ cup apple cider vinegar cuts through the richness, while ½ cup light brown sugar adds depth. Taste as you go—I often add the sugar first and let it dissolve completely before introducing the vinegar.
The goal is harmony, not overpowering. If the sauce feels too acidic, a pinch of sugar fixes it instantly. Honestly, this is the step where I adjust seasoning the most—every batch of vinegar has subtle variations.
Umami’s Secret Weapon
The 1 tablespoon Worcestershire sauce is the unsung hero here. It’s what takes the sauce from “good” to “unforgettable.” I stir it in at the very end, right off the heat, because its strong flavor can dominate if added too early.
For extra richness, I sometimes swirl in 1 tablespoon melted butter at this stage—it adds a velvety texture that clings to the burnt ends perfectly. Trust me, it’s worth the extra step.
Consistency Control
Thickness is everything. You want the sauce to coat the back of a spoon but still flow easily. If it thickens too quickly, add 1-2 tablespoons of water to thin it out.
I use a silicone spatula to scrape the bottom of the pot—those browned bits are pure flavor, and you don’t want to leave them behind. The sauce should have a glossy sheen, like a well-made BBQ sauce. If it looks dull, it’s not ready.
Resting is Non-Negotiable
Let the sauce rest for 10 minutes after finishing. This isn’t just a suggestion—it’s science. The flavors need time to integrate, and the sauce will thicken slightly as it cools. I cover the pot loosely with foil so it doesn’t dry out.
When you’re ready to use it, reheat gently over low heat while stirring. Never boil it—you’ll lose that delicate balance of sweet, tangy, and smoky notes. 💫
Nutrition facts
Frequently asked questions
Why does this sauce need to rest after cooking?
The 10-minute rest lets flavors meld and the sauce thicken slightly as it cools. This step ensures the perfect balance of smoky, tangy, and sweet notes—skipping it can make the sauce taste flat or overly acidic. Trust the process; it’s what makes the difference between good and unforgettable!
Can I use a slow cooker instead of a stovetop?
Yes! Transfer all ingredients to a slow cooker after blooming the spices on the stovetop. Cook on low for 4-5 hours, stirring occasionally. The sauce will thicken naturally—add water if needed to reach your desired consistency. Just avoid high heat, which can make it too thin or lose its depth.
What if my sauce is too thin or too thick?
For thin sauce, simmer uncovered for 5 more minutes to reduce further. For thick sauce, stir in 1-2 tablespoons water to thin. Always taste as you go—adjusting gradually keeps the flavor perfect. A glossy sheen indicates ideal consistency!
Can I make this sauce ahead of time?
Store in an airtight jar in the fridge for up to 1 week or freeze portions for 6 months. Reheat gently over low heat while stirring—never boil, or it’ll lose its complex flavors. Leftovers taste even better the next day!

Trained in classic French technique but raised on slow-cooked ribs and spicy rubs, she blends culinary skill with smoke and soul.
- Chinese Braised Beef Brisket with Daikon Recipe: Silky Tender Meat and Crunchy Roots - October 18, 2026
- Oklahoma Joe’s Smoked Beans Recipe: Slow-Smoked Flavor That Rivals the Original - October 18, 2026
- Beef Brisket Chili Recipe: Slow-Simmered Richness with Deep Flavor Layers - October 18, 2026