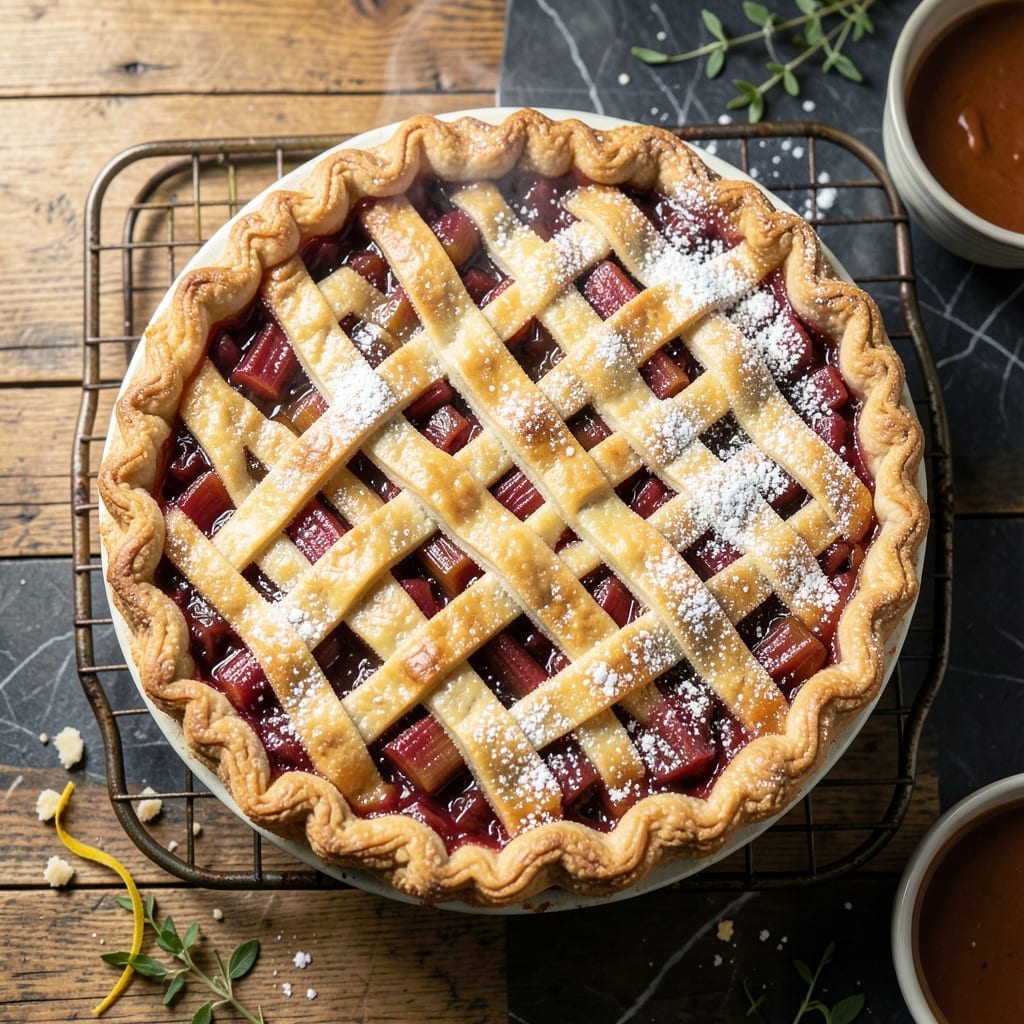
I developed this pie to prove that flaky crust and tart rhubarb filling can come from pantry staples. The canned rhubarb delivers consistent tangy flavor without seasonal limitations.
The crust is the star here, requiring precise handling to achieve that coveted flaky texture. I use a standard double-crust method that works with both homemade and store-bought dough.
What emerges from the oven is a golden pie with a filling that’s perfectly balanced between sweet and tart. The rhubarb softens beautifully while maintaining its signature bright flavor.
Serve warm with vanilla ice cream for the complete experience. The crust remains flaky even after baking with the canned fruit.
Ingredients for Canned Rhubarb Pie
Pantry staples transform into a golden double-crust masterpiece with bright tart filling.
| Ingredient | Amount | Notes |
|---|---|---|
| Canned Rhubarb 🍒 | 4 cups | Drained, liquid reserved |
| Granulated Sugar 🍚 | 1 ½ cups | Divided for filling and crust |
| All-Purpose Flour 🌾 | 2 ½ cups | Plus extra for dusting |
| Unsalted Butter 🧈 | 1 cup | Cold, cubed for crust |
| Cornstarch 🌽 | ¼ cup | For thickening filling |
| Lemon Juice 🍋 | 1 tbsp | Freshly squeezed preferred |
| Vanilla Extract 🌿 | 1 tsp | Pure for best flavor |
| Ground Cinnamon 🌶️ | ½ tsp | Optional for warmth |
| Salt 🧂 | ½ tsp | Fine sea salt |
| Store-Bought Pie Crust 🥧 | 2 sheets | Or homemade double-crust |
| Large Egg 🥚 | 1 whole | For egg wash finish |
[recipe_ingredient_scaler]
The rhubarb is the hero here. Canned works perfectly—just drain it well and reserve that liquid for adjusting thickness later. I grab Oregon Fruit Products at Whole Foods when I can find it, but any brand without added sugar keeps the tartness pure. The butter needs to be ice cold (I stash mine in the freezer for 15 minutes), and European-style unsalted gives the flakiest layers.
No canned rhubarb? Frozen works too—thaw and drain, but expect slightly more liquid. Out of cornstarch? Instant tapioca at the same amount does the trick. The vanilla is worth the splurge—Nielsen-Massey if you’re feeling fancy, but store brand is fine. For the crust, if you’re making it from scratch, King Arthur Flour is my go-to for consistency.
The dough can rest in the fridge for up to 2 days, or freeze for 3 months. Baked pie keeps at room temp for 2 days (if it lasts that long). Reheat slices in a toaster oven to keep the crust crisp—microwave makes it soggy, but we won’t judge if you’re desperate.
Why You’ll Love This Recipe
- No Chopping Needed: I just dump the canned rhubarb straight in—no peeling, no dicing, and zero mess.
- Tart Meets Sweet: The rhubarb’s zing balances perfectly with the buttery crust, and that cornstarch trick keeps it thick, not runny.
- Feeds the Freezer: I bake two at once and freeze one for when company pops over unexpectedly.
- Pocket-Friendly Dessert: Canned rhubarb costs pennies compared to fresh, and I always have the rest of the ingredients on hand.
Step-by-Step Instructions for Canned Rhubarb Pie
Here’s the method I use to get that perfect flaky crust with a tangy-sweet filling that never fails.
Step 1: Prepare the Flaky Crust Base
Unroll the first sheet of store-bought pie crust and press it gently into a 9-inch pie dish. I always let the crust sit at room temperature for 10-15 minutes first—this prevents cracking. Trim the edges to leave a ½-inch overhang, then fold this under to create a thick rim.
For extra flakiness, brush the bottom crust lightly with some of the reserved canned rhubarb liquid before adding the filling. This creates a subtle barrier that prevents the crust from becoming soggy. Crimp the edges with your fingers or a fork to seal.
Step 2: Mix the Tart Rhubarb Filling
In a large bowl, combine the 4 cups Canned Rhubarb with 1 cup Granulated Sugar, the 0.25 cup Cornstarch, 1 tbsp Lemon Juice, 1 tsp Vanilla Extract, 0.5 tsp Ground Cinnamon, and 0.5 tsp Salt. Stir until the cornstarch is fully dissolved and the rhubarb is evenly coated.
The filling should look thick and slightly sticky—this means the cornstarch is properly distributed. Let it sit for 5 minutes while you preheat the oven to 375°F. This resting time helps the filling thicken slightly before baking.
Step 3: Assemble and Top the Pie
Pour the rhubarb mixture into the prepared crust, spreading it evenly. Cut the 1 cup Unsalted Butter into small cubes and dot the top of the filling with about 2 tablespoons of these—this adds richness to the filling as it bakes.
Unroll the second sheet of store-bought pie crust and place it over the filling. Trim and crimp the edges to seal completely. Cut 4-5 slits in the top crust to allow steam to escape. This prevents the pie from bursting open during baking.
Step 4: Bake to Golden Perfection
Beat the large egg lightly and brush it over the entire top crust. This egg wash gives the pie that beautiful golden-brown finish. Sprinkle the remaining 0.5 cups Granulated Sugar lightly over the top for extra crunch and sweetness.
Bake for 45-50 minutes until the crust is deep golden brown and the filling is bubbly. I check at 40 minutes—if the crust is browning too quickly, I cover the edges with foil. The pie is done when the center filling bubbles through the slits.
Step 5: Cool and Serve
Let the pie cool on a wire rack for at least 2 hours before slicing. Real talk: this is the hardest part, but it’s crucial. The filling needs time to set completely—cutting too soon will give you a runny mess instead of perfect slices.
Serve warm or at room temperature. Each slice should have that ideal contrast: crisp, flaky crust on the outside and a tangy, thick filling that holds its shape. The cinnamon adds just a hint of warmth that complements the rhubarb’s natural tartness beautifully.
Pro Tips For Making Canned Rhubarb Pie
- Drain the Rhubarb: Rinse and drain the canned rhubarb well—about 5 minutes in a colander—to prevent a watery pie filling. I learned this the hard way after my first attempt turned into soup.
- Chill the Dough: Let your flour-butter crust rest in the fridge for at least 30 minutes before rolling. It’s the thing that matters most for a flaky crust that doesn’t shrink.
- Thicken with Cornstarch: Mix 2 tablespoons of cornstarch into the sugar before combining with rhubarb—it binds better than flour alone and gives that perfect pie-filling consistency.
- Pre-Bake the Crust: Blind-bake the bottom crust for 10 minutes at 375°F to avoid the dreaded soggy bottom. Sounds weird, but it works.
Make-Ahead Tips for Leftovers
Dough Prep Ahead
If making homemade crust, prepare the dough up to 2 days in advance. Wrap it tightly in plastic and refrigerate. The cold rest actually improves flakiness—I learned this after too many tough crusts in my tiny Boston kitchen. 💪
Pre-Assemble the Pie
You can fully assemble the pie (crust and filling) and refrigerate it overnight before baking. Just add 5-10 extra minutes to the baking time since it’ll start cold. Cover with plastic wrap to prevent drying.
Freeze Unbaked Pie
Assemble the entire pie, wrap tightly in heavy-duty foil, and freeze for up to 2 months. Bake straight from frozen, adding 15-20 minutes to the time. No thawing needed—this works perfectly with store-bought crust too.
Baked Pie Storage
Once cooled, store the pie at room temperature for 2 days or refrigerate for up to 5 days. I prefer room temp for that authentic pie-shop feel. Just cover loosely with foil to keep the crust crisp.
Reheating Slices
For the best texture, warm slices in a toaster oven at 350°F for 8-10 minutes. The microwave works in a pinch but makes the crust soggy—ask me how I know. 🔥
Make-Ahead Filling
Mix the rhubarb filling up to 1 day ahead and refrigerate. The cornstarch may settle, so give it a good stir before using. This saves time on baking day.
Nutrition Facts
Frequently Asked Questions
Can I use fresh rhubarb instead?
Use 5 cups chopped fresh rhubarb. It may release more liquid, so increase cornstarch to ⅓ cup to compensate. Fresh rhubarb often has a brighter tartness too.
Why did my filling turn out runny?
This usually happens if the pie wasn’t cooled long enough. The filling needs 2 full hours to set completely. Also, ensure you used ⅓ cup cornstarch and drained the rhubarb well.
How do I prevent a soggy bottom crust?
Brush the bottom crust with a thin layer of reserved rhubarb liquid or beaten egg white before adding filling. Also, bake on the lower oven rack at 375°F for even heat.
Can I make this gluten-free?
Yes! Use a gluten-free pie crust and swap the all-purpose flour in the filling for 1:1 gluten-free flour blend. The texture will be slightly different but still delicious.

Trained in classic French technique but raised on slow-cooked ribs and spicy rubs, she blends culinary skill with smoke and soul.
- Recipe for Boneless Pork Chops in Cast Iron Skillet: Sear and Baste to Juicy Perfection - October 3, 2026
- Recipe for Boneless Cross Rib Roast: Slow-Roasted Beef with Herb Crust - October 3, 2026
- Hamburgers in Sauce Recipe Crock Pot: Slow-Cooked Savory Delight - October 3, 2026