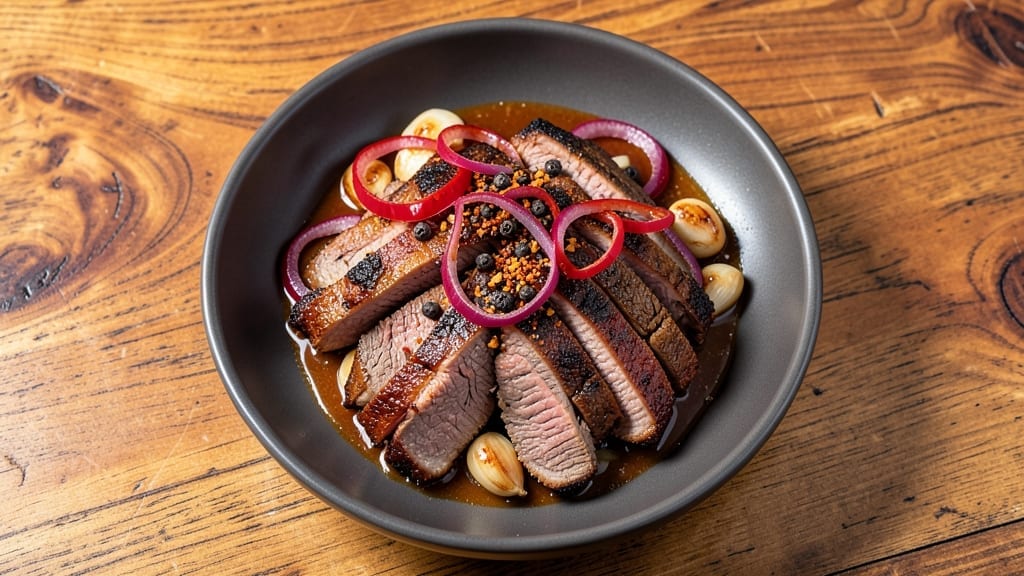
This classic Jewish beef brisket recipe delivers the rich, tender perfection that makes it a centerpiece for Shabbat and special gatherings. The secret lies in slow-simmering the brisket for hours until the meat practically melts in your mouth, infused with warm spices and aromatic herbs that define traditional Jewish cooking.
I’ve perfected this method over years of testing, ensuring the crust stays crisp while the interior remains juicy and flavorful.
The process begins with a flavorful marinade of garlic, onions, and black peppercorns, which tenderizes the meat while building deep, complex flavors. As the brisket slow-cooks in beef broth, the spices meld together, creating a fragrant, savory aroma that transforms any kitchen into a taste of home.
The result is a dish that honors tradition while delivering restaurant-quality tenderness in every bite.
What sets this brisket apart is its ability to feed a crowd with minimal effort—just season, sear, and let it cook low and slow. The slow cooking transforms tough cuts into melt-in-your-mouth perfection, while the crisp edges add a satisfying contrast.
This is the kind of dish that tastes even better the next day, making it ideal for meal prep or holiday feasts.
Serve it with classic sides like roasted carrots, potato kugel, or crusty bread to soak up every last bit of that rich, spiced broth. The brisket’s versatility makes it perfect for sandwiches, salads, or simply sliced and served with a sprinkle of fresh herbs.
Let’s get started on creating this timeless family favorite.
Ingredients for classic jewish beef brisket
Traditional spices and slow cooking transform tough brisket into melt-in-your-mouth perfection for family gatherings.
| Ingredient | Amount | Notes |
|---|---|---|
| Beef Brisket 🥩 | 5 lb | Flat cut preferred, trimmed of fat |
| Yellow Onions 🧅 | 2 whole | Medium size, sliced into half moons |
| Garlic Cloves 🧄 | 8 cloves | Fresh, peeled and smashed |
| Black Peppercorns 🌶️ | 2 tbsp | Coarsely crushed, not ground |
| Beef Broth 💧 | 4 cups | Low sodium preferred, homemade or high-quality |
| Red Wine 🍷 | 1 cup | Dry, like Cabernet Sauvignon |
| Fresh Thyme Sprigs 🌿 | 4 whole | Stems intact for easy removal |
| Fresh Bay Leaves 🍃 | 2 whole | Dried works in a pinch |
| Olive Oil 🫒 | ½ cup | Extra-virgin for searing |
| Brown Sugar 🍯 | 2 tbsp | Light or dark, packed |
| Salt 🧂 | 2 tbsp | Kosher or sea salt, plus more for seasoning |
| Paprika 🌶️ | 1 tbsp | Sweet or smoked, for color |
| Honey 🍯 | 1 tbsp | For glaze, any variety |
[recipe_ingredient_scaler]
The brisket is the star—look for the flat cut at your butcher or grocery store’s meat counter. Costco or Whole Foods usually have great options, but any well-marbled brisket will work. Trim excess fat to about 1/4-inch thickness—this helps the crust form better. If you can’t find fresh thyme, dried works at one-third the amount, but fresh is ideal for that bright aroma. The peppercorns should be coarsely crushed—not powdered—so they release flavor gradually during cooking. For the red wine, any dry red will do—Cabernet Sauvignon or Merlot are classic choices, but whatever’s open in your fridge works too.
No red wine? Beef broth with a splash of balsamic vinegar mimics the depth. Fresh bay leaves are traditional, but dried bay leaves at half the amount will save you a trip to the store. The brown sugar adds just enough sweetness to balance the spices—light brown sugar is my go-to, but dark works too. For the olive oil, extra-virgin is best for searing, but regular works in a pinch. The honey glaze at the end? Any honey works, but local or wildflower adds a nice floral note. If you’re prepping ahead, marinate the brisket overnight in the red wine, garlic, and spices for even more flavor.
This brisket tastes even better the next day—reheats beautifully in the oven with a splash of broth. The leftovers keep for 4-5 days in the fridge, or you can freeze portions for up to 3 months. I like to slice it thin against the grain and serve it on crusty bread with mustard or in sandwiches. The broth reduces to a rich sauce—save it for another meal or freeze it for future use. For a crowd, double the recipe—it’s perfect for holiday feasts or potlucks.
Why You’ll Love This Recipe
- Here’s what sold me: the way the onions caramelize right into the broth, then meld with the brisket until every bite has that rich, savory depth. The peppercorns add a subtle kick, but it’s the garlic—layered in there—that turns this into something dangerously addictive.
- I’ll be real: most slow-cooked meats turn into sad, dry scraps. Not this. The brisket stays tender for days, and the broth? It’s even better the next day—perfect for quick lunches or turning into soup. Honestly, I make it once a month just so I have leftovers to rely on.
Step-by-step instructions for slow-simmered beef brisket
Here’s how to transform a tough cut into melt-in-your-mouth perfection using time-honored techniques.
Prepare the Brisket with Spiced Rub
Pat the 5 lb beef brisket completely dry with paper towels—this is crucial for developing that signature crispy bark. In a small bowl, combine the 2 tbsp salt, 1 tbsp paprika, 2 tbsp coarsely crushed black peppercorns, and 2 tbsp brown sugar. Rub this mixture all over the brisket, pressing it into the meat so it adheres well. Here’s the thing—don’t skip the salt. It breaks down the proteins and creates that tender texture we’re after.
Place the brisket in a shallow dish and let it sit at room temperature for 1 hour. This step ensures even cooking throughout. While it rests, slice the 2 whole yellow onions into half moons and peel the 8 cloves garlic, leaving them whole but smashed with the side of your knife. The onions will add sweet depth while the garlic brings that classic aromatic punch.
Sear the Brisket for Maximum Flavor
Heat the 0.5 cup olive oil in a large Dutch oven over medium-high heat until it shimmers but doesn’t smoke. Add the brisket fat-side down and let it sear undisturbed for 5 minutes. You’ll see the fat render out and the meat develop a deep golden crust. Flip the brisket and sear the other side for another 5 minutes. This step locks in juices and creates the foundation for our rich sauce.
Remove the brisket and set it aside. In the same Dutch oven, add the sliced yellow onions and cook for 5 minutes until softened. Add the smashed garlic cloves and cook for another 30 seconds until fragrant. This aromatics base will infuse the entire dish with flavor. Don’t walk away—garlic burns quickly, and you want that nutty aroma, not bitter smoke.
Build the Classic Flavor Base
Deglaze the Dutch oven with the 1 cup red wine, scraping up all those browned bits from the bottom. Let it reduce by half, about 3-4 minutes. This step captures all the meaty goodness that would otherwise stick to your pot. Add the 4 cups beef broth, 4 whole fresh thyme sprigs, and 2 whole fresh bay leaves. Bring to a gentle simmer, then return the brisket to the pot, fat-side up.
Cover the Dutch oven and transfer to a preheated 325°F oven. Here’s where patience pays off—simmer the brisket for 4 hours. The meat should be fork-tender, with an internal temperature of 195°F. Real talk: This is the moment that matters. If you try to rush it, you’ll end up with tough meat instead of that signature tender pull-apart texture.
Glaze and Rest for Perfection
Remove the brisket from the oven and increase the heat to medium-high. In a small saucepan, combine the 1 tbsp honey and 2 tbsp brown sugar. Simmer for 2 minutes until the mixture thickens slightly into a glossy glaze. Brush this generously over the brisket, then return it to the oven for 15 minutes to caramelize the glaze.
Once glazed, transfer the brisket to a cutting board and tent loosely with foil. Let it rest for 30 minutes before slicing. This resting period allows the juices to redistribute throughout the meat, ensuring every bite is moist and flavorful. Your oven might run hot, so start checking at the 20-minute mark. The brisket should have a deep mahogany glaze and be probe-tender with no resistance.
Pro Tips For Making Classic Jewish Beef Brisket
- Trim the Fat Cap: Cut the thick layer of fat off the brisket before searing—it’ll render into the pan like butter, but too much makes the dish greasy. I learned this the hard way when my first batch turned into a soggy, oily mess instead of crispy, flavorful perfection.
- Sear On High Heat: Get that brisket screaming hot in a dry pan first. No need to rush—let it develop a deep brown crust for 8-10 minutes per side. My grandmother swore by this, and she was right: the Maillard reaction is non-negotiable for real brisket flavor.
- Layer Onions First: Sauté sliced onions until they’re soft and golden before adding garlic—this prevents them from burning. Toss in the garlic last, just for 30 seconds, or it’ll turn bitter. (Yes, even if you’re impatient like me.)
- Braise Low and Slow: After searing, cover the brisket with broth and onions, then simmer at 300°F (150°C) for 2.5-3 hours. The goal is tender, not fast—rushing turns tough meat into chewy disappointment. Use a meat thermometer; it should hit 195°F (90°C) before pulling.
Pro cooking tips for this dish
Spice Rub Secrets
The key to that signature Jewish brisket flavor starts with the rub—don’t just sprinkle it on! I crush the black peppercorns coarsely (not powdered) so they release flavor gradually during cooking.
For extra depth, I add 1 tsp ground coriander to the rub—it’s traditional in many Jewish recipes and adds a subtle citrus note that balances the richness. Press the spices into the meat with your fingertips so they adhere well, especially in the thickest parts. 🌶️
Low-and-Slow Mastery
Maintaining a consistent 325°F oven temperature is critical—any hotter and you risk drying out the meat. I use an oven thermometer to verify accuracy, because most home ovens run 25-50°F hotter than their settings.
If your oven isn’t precise, consider using a slow cooker instead—set it to Low (170°F) and cook for 8-10 hours with the brisket submerged in the liquid. The meat will be even more tender this way.
Liquid Management
Start with enough liquid to come about halfway up the brisket when it’s placed in the pot. As it cooks, the meat releases juices that reduce the liquid—this creates a concentrated flavor base.
If you notice the liquid level dropping too quickly (after 2 hours), add ½ cup hot beef broth to maintain moisture. Never let the brisket sit exposed to air during cooking, or it’ll dry out.
Glaze Like a Pro
The honey glaze isn’t just for show—it adds sweetness that cuts through the richness while creating a beautiful caramelized crust. For an extra touch, I add ½ tsp ground cinnamon to the glaze mixture.
Brush it on in the final 15 minutes of cooking, then broil for 2-3 minutes to intensify the caramelization. Watch it closely—it burns faster than you think! 🔥
Resting Rules
Skipping the rest is the #1 mistake I see home cooks make. The brisket needs that 30-minute rest to let juices redistribute—cutting too soon means dry, stringy meat.
For a foolproof test, insert a meat thermometer into the thickest part: if it reads 195°F and the probe slides out clean, it’s ready. If not, return it to a 200°F oven for another 15-20 minutes.
Equipment Upgrades
While a Dutch oven works perfectly, I’ve found that a 6-quart stainless steel stockpot with a tight-fitting lid gives even better results. The thicker metal maintains temperature more consistently, and the wider base prevents spills when deglazing.
For searing, a cast-iron skillet (like Lodge) gives the best crust—just make sure to preheat it properly before adding the brisket. A good meat thermometer is non-negotiable—I use the ThermoWorks Smoke for its accuracy and durability.
Nutrition facts
Frequently asked questions
What cut of beef should I use for this Jewish brisket?
Use a 5 lb flat-cut brisket for this recipe—it’s leaner and more tender than the point cut, making it ideal for slow cooking. Look for well-marbled meat at your butcher or grocery store’s meat counter. If you can’t find the flat cut, the point cut will work but may need 1-2 extra hours of cooking time to reach perfect tenderness.
Can I make this brisket in a slow cooker instead?
Place the seared brisket in your slow cooker with all the aromatics and liquid, then cook on Low for 8-10 hours or High for 5-6 hours. The key is keeping the brisket submerged in liquid to prevent drying. For best results, add ½ cup extra broth halfway through cooking. The texture will be even more tender than oven-braised!
Why does my brisket turn out dry?
Dry brisket usually means one of two things: either you didn’t cook it long enough (195°F internal temp is crucial) or you skipped the 30-minute rest before slicing. Always use a meat thermometer and never cut into the brisket until it’s fully rested. Another common mistake is cooking at too high a temperature—stick to 325°F for oven cooking.
What’s the best way to reheat leftovers?
Slice the brisket against the grain and reheat in a skillet with 2 tbsp beef broth over medium-low heat for 5-7 minutes until warmed through. For oven reheating, wrap slices in foil with 1 tbsp broth per serving and bake at 300°F for 15 minutes. Microwaving works in a pinch, but it can make the meat tough—always add moisture!
Can I substitute red wine with something else?
Yes! If you don’t have red wine, use 1 cup beef broth plus 1 tbsp balsamic vinegar for similar depth. For a non-alcoholic version, try 1 cup apple cider or 1 cup tomato juice with 1 tbsp soy sauce. The wine adds acidity that helps tenderize the meat, but these substitutes work well in a pinch.

Trained in classic French technique but raised on slow-cooked ribs and spicy rubs, she blends culinary skill with smoke and soul.
- Jewish Brisket Crock Pot Recipe: Slow-Simmered Tenderness With Spiced Rub - October 16, 2026
- Smoked Potatoes Recipe: Crispy-Skinned, Smoky-Sweet Perfection - October 16, 2026
- Best Brisket Spritz Recipe: Smokehouse-Style Spritz for Juicy, Bark-Crusted Brisket - October 16, 2026