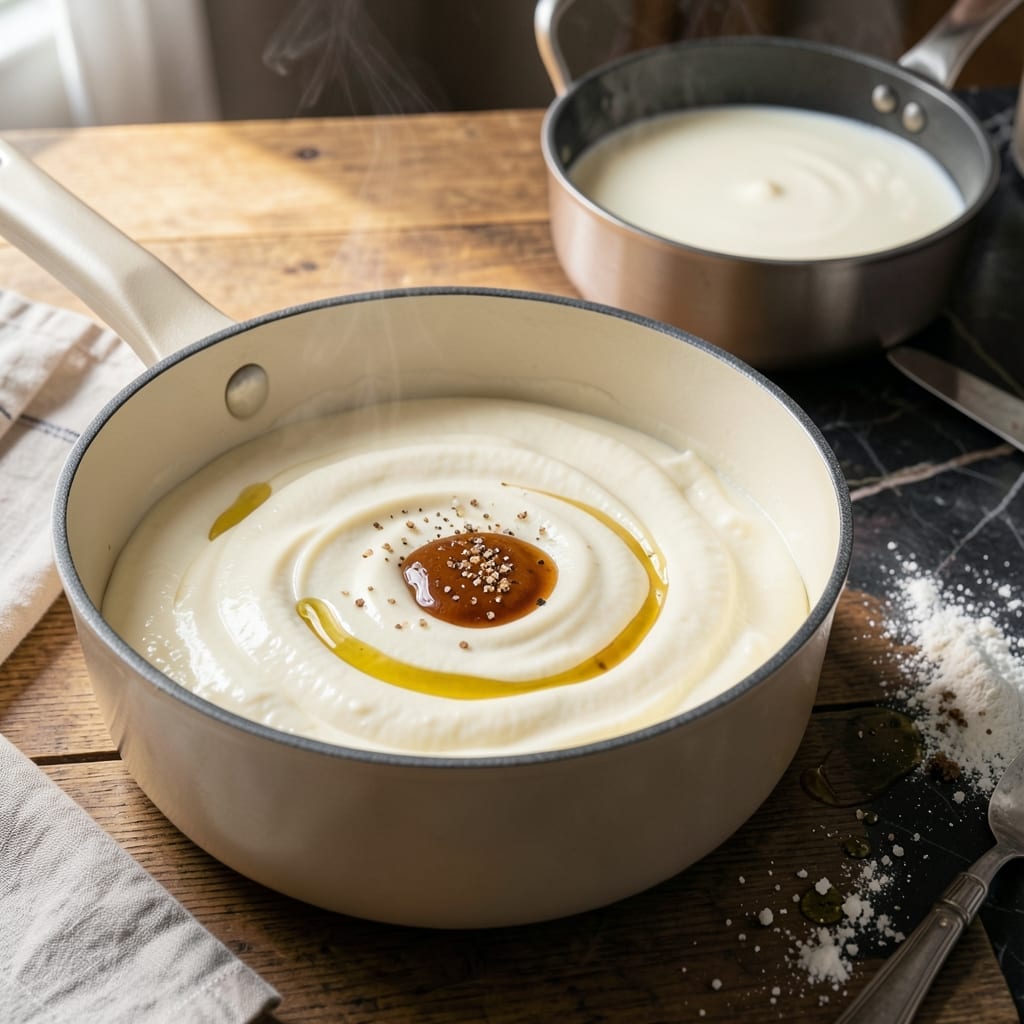
This homemade cooking cream serves as the perfect foundation for countless sauces and dishes. I’ve developed this recipe to deliver consistent, velvety results every time you cook.
The process is straightforward, using simple ingredients you likely already have on hand. What makes this different is the technique that ensures a smooth, lump-free consistency that won’t separate when heated.
You’ll create a rich, versatile base that elevates pasta dishes, soups, and casseroles. The cream maintains its body even after simmering, unlike many store-bought alternatives.
Store in the refrigerator for up to 5 days or freeze for longer keeping. This recipe will become your go-to for professional-quality results.
Ingredients for Cooking Cream
Eight simple ingredients transform into a rich, velvety cooking base you’ll reach for constantly.
| Ingredient | Amount | Notes |
|---|---|---|
| Heavy Whipping Cream 🥛 | 2 cups | Full-fat, cold for best results |
| Whole Milk 🥛 | 1 cup | Cold, whole fat preferred |
| Unsalted Butter 🧈 | ½ cup | Cut into small cubes |
| All-Purpose Flour 🌾 | 2 tbsp | For thickening consistency |
| Salt 🧂 | ¼ tsp | Fine sea salt preferred |
| White Pepper 🌶️ | 0.125 tsp | Freshly ground for subtle heat |
| Nutmeg 🌰 | 0.125 tsp | Freshly grated for depth |
| Vanilla Bean Paste 🌿 | ½ tsp | Or pure vanilla extract |
[recipe_ingredient_scaler]
The cream is non-negotiable here—full-fat heavy whipping cream from Organic Valley or Darigold gives the best body. Whole milk adds fluidity without thinning it out (skip the skim, it won’t work). The butter should be European-style if you can swing it—higher fat, less water. I grab mine from Trader Joe’s (cheap and reliable) or Whole Foods for the organic stuff.
No whole milk? Half-and-half at the same volume works in a pinch. Out of white pepper? Black pepper’s fine, just strain it out after. The nutmeg is subtle but freshly grated makes a difference—pre-ground tastes dusty. If you’re avoiding alcohol in vanilla extract, the paste version has a richer flavor. The flour can be swapped for cornstarch at 1 tbsp per 2 tbsp flour.
This keeps 5 days in the fridge (stir before using, it thickens as it chills) or 3 months frozen. Freeze in ice cube trays for easy portions. Always bring it to room temp before adding to hot dishes—cold cream can curdle. (worth the extra minute)
Why You’ll Love This Recipe
- 5-Ingredient Magic: I just dump heavy cream, milk, butter, flour, and salt in a pot—no chopping, no fuss.
- Velvety Dream: The butter and cream melt into this rich, smooth sauce that clings to pasta like it was made for it.
- Endless Meal Base: I stretch one batch across pasta night, soup thickener, and even a quick Alfredo for unexpected guests.
- Pantry Hero: Between us, I always have these staples, so I can make it whenever the craving hits without a special grocery run.
Step-by-Step Instructions for Cooking Cream
This method delivers a silky, professional-quality base with foolproof technique.
Step 1: Create the Roux Foundation
Melt the 0.5 cup Unsalted Butter in a heavy saucepan over medium heat. I prefer a light-colored pan so I can monitor the color change easily. Once melted, add the 2 tbsp All-Purpose Flour all at once and whisk constantly for 1-2 minutes.
You’re looking for a pale golden color and a slightly nutty aroma – this is your visual cue that the flour has cooked through properly. The mixture should bubble gently but not brown. Undercooked flour gives a raw taste, while overcooked flour makes the final product grainy.
Step 2: Temper the Dairy Mixture
In a separate saucepan, gently warm the 2 cups Heavy Whipping Cream and 1 cup Whole Milk over medium-low heat until just steaming – don’t let it boil. Meanwhile, slowly pour about ¼ cup of the warm dairy mixture into your roux while whisking vigorously.
This tempering step prevents lumps from forming. The mixture will thicken noticeably as you add the warm liquid. Continue adding the dairy in ¼-cup increments, whisking constantly until smooth. The key is slow addition – rushing this creates lumps that are nearly impossible to whisk out.
Step 3: Thicken and Infuse with Flavor
Once all the dairy is incorporated, reduce the heat to low and continue cooking, stirring frequently with a wooden spoon or silicone spatula. After about 5-7 minutes, you’ll notice the mixture coating the back of your spoon – this is your signal it’s thickening properly.
Now add the 0.25 tsp Salt, 0.125 tsp White Pepper, 0.125 tsp Nutmeg, and 0.5 tsp Vanilla Bean Paste. I add the salt first, then the other seasonings to taste as I go. The nutmeg adds warmth, while the white pepper gives a subtle heat without the visual specks of black pepper.
Step 4: Achieve the Perfect Consistency
Continue cooking for another 3-5 minutes on low heat, stirring constantly. The cooking cream should reach a consistency similar to thick paint – it should ribbon off your spoon and hold its shape briefly before dissolving back into the mixture.
If it’s too thick, whisk in a splash of warm milk. If too thin, let it cook a bit longer. Remember that it will thicken slightly as it cools. The final product should be rich and velvety, with a glossy appearance that clings to your spoon.
Remove from heat immediately once it reaches the desired consistency to prevent over-thickening.
Pro Tips For Making Cooking Cream
- Warm the Milk: Heat the whole milk gently before mixing with cream—about 1 minute in the microwave or until just lukewarm. I learned this the hard way after my first batch separated because the cold milk shocked the warm cream.
- Toast the Flour: Cook the flour in melted butter for 1-2 minutes until bubbly and pale golden. Sounds weird, but it removes the raw taste and thickens the cream properly.
- Skip Boiling: Resist the urge to crank the heat—keep it at a gentle simmer or the cream will curdle. After ruining two batches, I now use medium-low and stir constantly.
- Salt Last: Add salt only after the cream thickens, about 5 minutes in. Salting too early can slow the thickening process, and you won’t know the true seasoning until it’s done.
Storing and Reheating This Recipe
Refrigerator Storage
Let your cooking cream cool completely at room temperature for no more than 2 hours before transferring. I use glass mason jars with tight-fitting lids—they’re perfect for keeping this fresh. Store at 40°F or below for up to 5 days. ❄️
Freezer Storage
For longer storage, freeze in ice cube trays for easy portioning. Once solid, transfer the cubes to a freezer-safe bag or container. This keeps well for up to 3 months without losing texture or flavor. Label with the date so you can track freshness.
Thawing Properly
When ready to use, thaw overnight in the refrigerator. For a quicker method, place the sealed container in a bowl of cold water, changing the water every 30 minutes. Avoid microwaving, as it can cause separation or curdling.
Reheating Gently
Warm your cooking cream over low heat in a saucepan, stirring constantly. If it seems too thick, whisk in a splash of warm milk to restore the creamy consistency. Never boil—this can cause the mixture to break or develop a grainy texture. 🔥
Reviving Separated Cream
If your cream separates after storage, don’t worry. Simply whisk vigorously while warming over low heat until smooth. A hand blender works great for stubborn cases. The emulsion will come back together with patience and gentle heat.
Nutrition Facts
Frequently Asked Questions
Can I use half-and-half instead of cream?
Yes, but it will be thinner. Use 3 cups half-and-half to replace the cream and milk combo. The result works but lacks the same richness.
Why does my mixture have lumps?
Lumps form if the dairy is added too quickly to the roux. Always temper by adding warm liquid in ¼-cup increments while whisking. A fine sieve can remove lumps after cooking.
How do I fix separated cream?
Whisk vigorously while warming over low heat until smooth. For stubborn cases, a hand blender works best. Avoid high heat which worsens separation.
Can I make this dairy-free?
Substitute coconut cream for heavy cream and unsweetened almond milk for whole milk. Use vegan butter and ensure all ingredients are plant-based.

Trained in classic French technique but raised on slow-cooked ribs and spicy rubs, she blends culinary skill with smoke and soul.
- Recipe for Boneless Pork Chops in Cast Iron Skillet: Sear and Baste to Juicy Perfection - October 3, 2026
- Recipe for Boneless Cross Rib Roast: Slow-Roasted Beef with Herb Crust - October 3, 2026
- Hamburgers in Sauce Recipe Crock Pot: Slow-Cooked Savory Delight - October 3, 2026