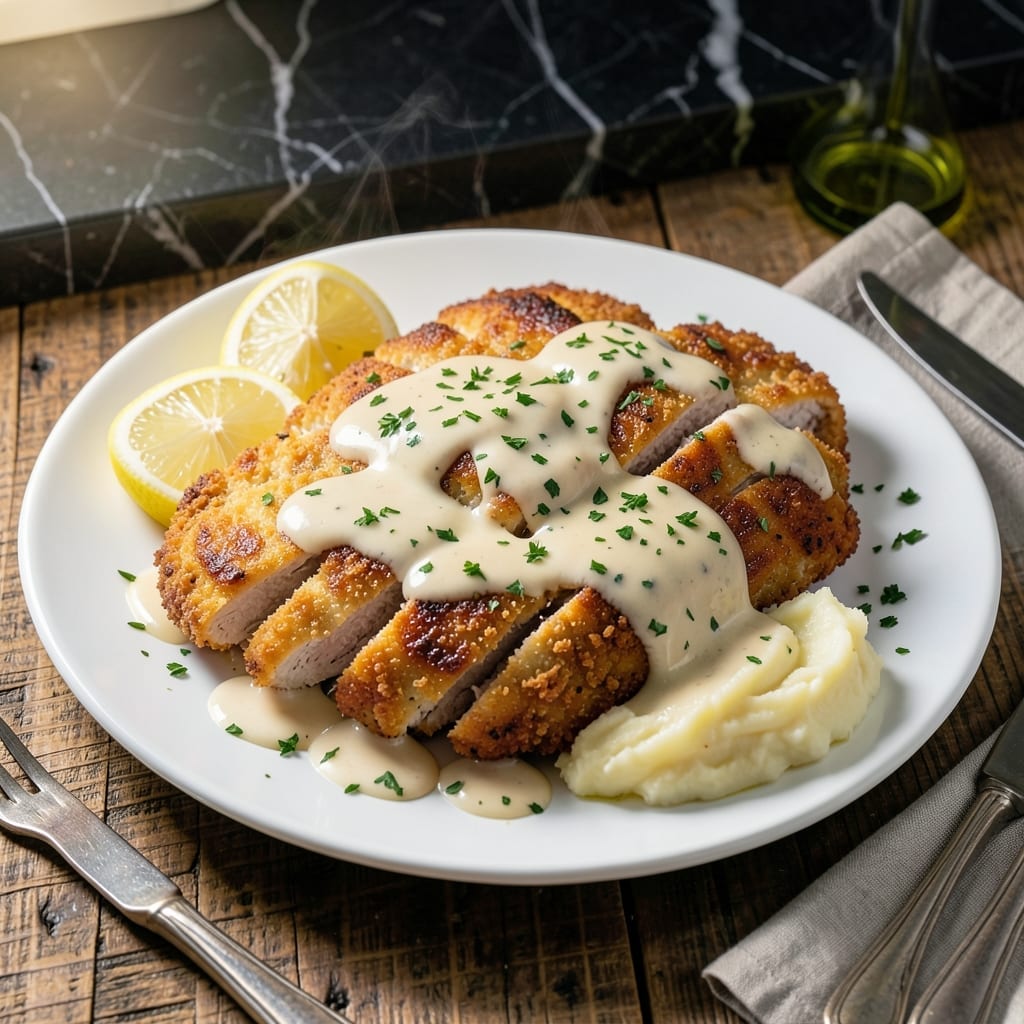
I first experienced family-style chicken at a roadside diner in Michigan, where the aroma of roasted poultry filled the air. This dish brings that same hearty satisfaction to your table with minimal effort.
The secret lies in the simple preparation—tender chicken baked with a golden crust that locks in juices. I’ve perfected the method to ensure every bite delivers that classic comfort-food taste.
What you’ll love most is how this meal brings people together. Serve it with mashed potatoes and gravy for a true Frankenmuth experience.
Ready in under an hour, it’s a foolproof way to feed a crowd or enjoy a cozy family dinner.
Ingredients for Frankenmuth Chicken
Pantry staples plus chicken create this crispy, golden-brown family-style classic.
| Ingredient | Amount | Notes |
|---|---|---|
| Chicken Breast Cutlets 🍗 | 1 ½ lb | Boneless, skinless, pounded to 1/4-inch thickness |
| All-Purpose Flour 🌾 | 1 cup | For initial dredging coat |
| Buttermilk 🥛 | 1 ½ cups | Full-fat for best adhesion |
| Plain Breadcrumbs 🍞 | 2 cups | Panko for extra crunch |
| Large Eggs 🥚 | 2 whole | Beaten, added to buttermilk |
| Kosher Salt 🧂 | 1 tsp | Diamond Crystal preferred |
| Freshly Ground Black Pepper 🌶️ | ½ tsp | Coarse grind for texture |
| Garlic Powder 🧄 | 1 tsp | Adds depth to breading |
| Onion Powder 🧅 | 1 tsp | Balances savory notes |
| Paprika 🌶️ | 1 tsp | Sweet variety for color |
| Vegetable Oil 🫒 | 2 cups | For deep-frying, high smoke point |
| Unsalted Butter 🧈 | 2 tbsp | Optional, for extra richness |
[recipe_ingredient_scaler]
The chicken needs to be thin and even for perfect cooking—pound it yourself or ask the butcher to do it. Whole Foods has great pre-cut chicken breast cutlets, but any supermarket works. For the buttermilk, full-fat gives the best coating (the low-fat kind can be watery). Panko breadcrumbs are in the Asian aisle at most stores—Kikkoman is the brand I grab most often.
No buttermilk? Milk with 1 tbsp vinegar or lemon juice per cup works in a pinch. Swap panko for regular breadcrumbs if needed, but the texture won’t be as crisp. Out of paprika? Cayenne for heat or skip it entirely. The oil amount seems like a lot, but you’ll need enough for the chicken to float—peanut oil is traditional (and has a higher smoke point).
Fry in batches so the oil stays hot. Drain on a rack, not paper towels, to keep it crisp. Leftovers? 2-3 days max in the fridge—they’ll lose some crunch. Reheat in the oven at 375°F to revive the coating (microwave = soggy).
Why You’ll Love This Recipe
- 30-Minute Meal: I can have this Frankenmuth chicken ready faster than takeout arrives—just dip, coat, and pan-fry.
- Crispy Perfection: The buttermilk soak keeps the chicken juicy while the breadcrumbs give it that irresistible crunch.
- Crowd Pleaser: It’s my go-to for family dinners, potlucks, or even a quick lunch—everyone cleans their plate.
- Budget Friendly: Chicken cutlets stretch far, and the pantry staples mean I’m not buying extra ingredients I’ll never use again.
Step-by-Step Instructions for Frankenmuth Chicken
This method delivers that signature crispy coating and tender meat that made this dish famous.
Step 1: Season and Dredge the Chicken
Pat the 1.5 lb chicken breast cutlets dry with paper towels—they should be pounded to 1/4-inch thickness already. Season both sides evenly with the 1 tsp kosher salt, 0.5 tsp freshly ground black pepper, 1 tsp garlic powder, 1 tsp onion powder, and 1 tsp paprika. I rub the spices in gently so they adhere well.
Dredge each cutlet in the 1 cup all-purpose flour, shaking off any excess. This first coat helps the next layer stick properly. You’ll notice the flour clings better to the seasoned, dry surface.
Step 2: Create the Buttermilk Egg Wash
In a shallow dish, whisk together the 1.5 cups buttermilk and 2 whole large eggs until fully combined. The full-fat buttermilk gives the best adhesion for the breading. I like to beat the eggs first before adding the buttermilk for a smoother mixture.
Dip each floured cutlet into the buttermilk mixture, letting any excess drip off. The cutlet should be fully coated but not dripping. This wet layer is what makes the breadcrumbs stick and creates that perfect crust.
Step 3: Bread with Plain Breadcrumbs
Press each cutlet into the 2 cups plain breadcrumbs (Panko works great here for extra crunch). Turn to coat completely, pressing gently so the crumbs adhere well to all sides. I find it helps to use one hand for wet ingredients and one for dry to avoid clumping.
Place the breaded cutlets on a wire rack set over a baking sheet. This allows air circulation so the coating stays crisp during the brief rest. Let them sit for 5-10 minutes while you heat the oil—this helps the breading set.
Step 4: Fry to Golden Perfection
Heat the 2 cups vegetable oil in a large, deep skillet over medium-high heat to 350°F. Use a deep-fry thermometer for accuracy. When the oil is ready, it should shimmer but not smoke. For extra richness, you can add the 2 tbsp unsalted butter to the oil just before frying.
Fry the cutlets in batches to avoid crowding, 3-4 minutes per side until golden brown and the internal temperature reaches 165°F. The breading should be deeply colored and crisp. Drain on a wire rack or paper towels to maintain crispiness.
Pro Tips For Making Frankenmuth Chicken
- Pound the Cutlets: Use a meat mallet to flatten the chicken breast cutlets to an even ½-inch thickness—I learned this the hard way after my first batch cooked unevenly, with burnt edges and raw centers.
- Chill the Coated Chicken: After dredging in flour, buttermilk, and breadcrumbs, let the cutlets rest in the fridge for 15-20 minutes. Sounds weird, but it works: the coating stays put and fries up crispier.
- Skip the Cold Oil: Make sure your oil is hot (350-375°F) before adding the chicken—after burning three batches, I finally figured out that cold oil means soggy, greasy breading.
- Use Panko Swap: My grandmother swore by this, and she was right: swap plain breadcrumbs for panko if you want extra crunch without changing the flavor.
Troubleshooting frankenmuth chicken
Breading Won’t Stick
This usually happens with wet chicken. Pat cutlets completely dry with paper towels before seasoning. I also let the floured pieces rest 5 minutes before dipping in buttermilk to help the coating adhere better.
Oil Temperature Drops
Frying too many cutlets at once cools the oil. Use a thermometer to maintain 350°F and fry in small batches. If the oil dips below 325°F, your chicken will absorb oil and turn greasy instead of crisp. 🌡️
Breading Falls Off
Press breadcrumbs firmly into each cutlet so they’re fully embedded. I use a downward motion with my palm to ensure maximum contact. Also, let breaded pieces rest 5-10 minutes before frying so the coating sets.
Uneven Cooking
Pound cutlets to an even 1/4-inch thickness so they cook uniformly. If some pieces are thicker, they’ll be undercooked inside while the breading burns. I check internal temp with a meat thermometer for 165°F.
Greasy Results
Drain on a wire rack, not paper towels. This allows air circulation so the breading stays crisp. If your chicken sits in oil on paper towels, it’ll steam and lose its crunch. 💡
Soggy Leftovers
Reheat in a 375°F oven for 10-12 minutes to revive the crust. Microwaving turns the breading soft—avoid it if possible. Store leftovers in a single layer to prevent moisture buildup.
Nutrition Facts
Frequently Asked Questions
Can I bake this instead of frying?
Yes! Bake at 400°F for 20-25 minutes on a rack for crispiness. Brush with oil first for golden color.
What sides pair well with this dish?
Mashed potatoes and gravy are classic. Green beans or corn complement the crispy chicken too.
How do I keep the coating crispy longer?
Drain on a wire rack and keep warm in a 200°F oven until serving. Avoid stacking.
Can I use chicken thighs instead?
Yes, bone-in thighs work well. Adjust cooking time to 5-6 minutes per side for 165°F.

Trained in classic French technique but raised on slow-cooked ribs and spicy rubs, she blends culinary skill with smoke and soul.
- Recipe for Boneless Pork Chops in Cast Iron Skillet: Sear and Baste to Juicy Perfection - October 3, 2026
- Recipe for Boneless Cross Rib Roast: Slow-Roasted Beef with Herb Crust - October 3, 2026
- Hamburgers in Sauce Recipe Crock Pot: Slow-Cooked Savory Delight - October 3, 2026