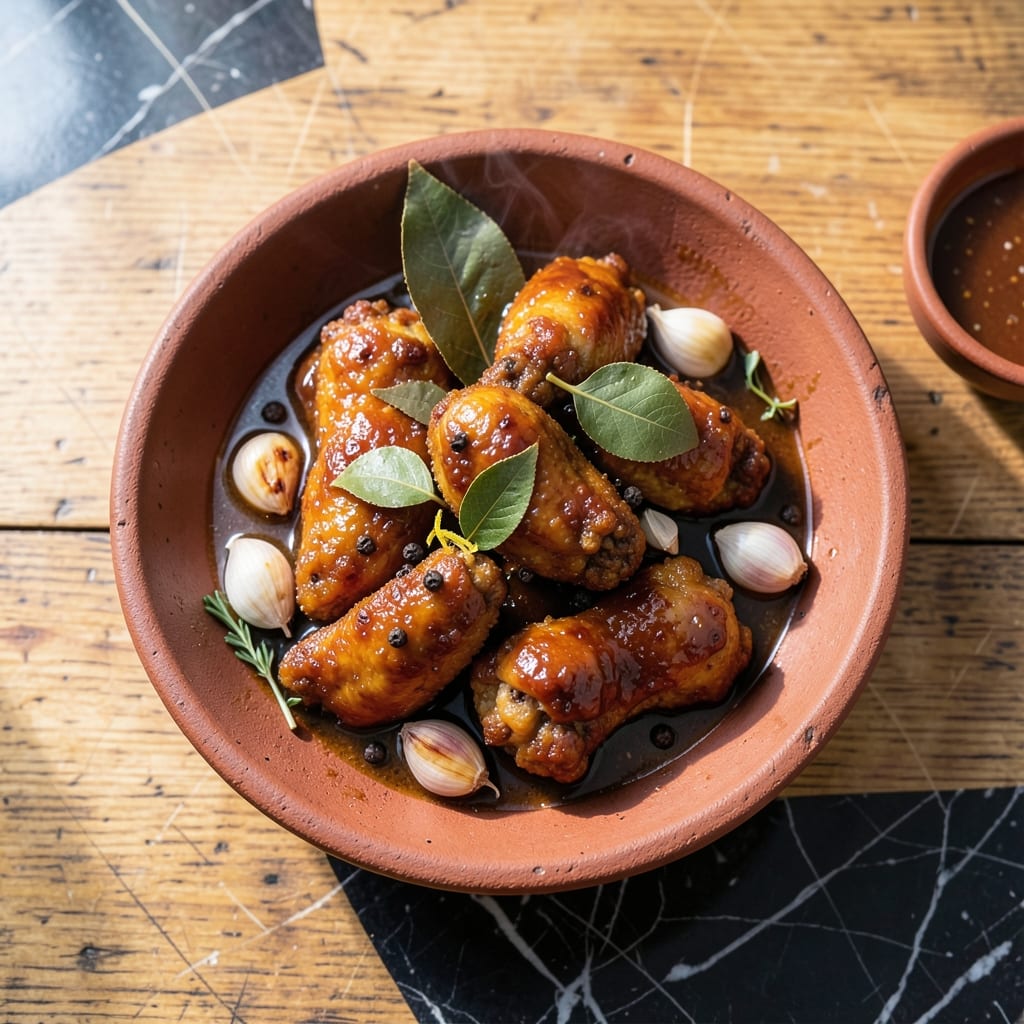
This Filipino-style fried chicken adobo brings crispy perfection to a beloved classic. The balance of vinegar, soy sauce, and garlic creates deep flavor before frying.
I developed this method after years of testing to achieve authentic taste with a satisfying crunch. The chicken marinates in adobo sauce, then gets coated and fried for maximum texture.
Each bite delivers tender meat inside a crispy exterior, with that signature tangy adobo flavor. The vinegar in the marinade also helps break down the meat for extra tenderness.
Serve with steamed rice to soak up every drop of flavor. This fusion technique stays true to Filipino roots while adding irresistible texture.
Ingredients for Fried Chicken Adobo Recipe Filipino Style
Classic Filipino flavors meet crispy perfection with these well-balanced ingredients for a crowd-pleasing dish.
| Ingredient | Amount | Notes |
|---|---|---|
| Chicken Thighs 🍗 | 2 lb | Boneless, skin-on preferred |
| Soy Sauce 🥣 | ½ cup | Low-sodium recommended |
| White Vinegar 🍶 | ½ cup | Cane vinegar for authenticity |
| Garlic Cloves 🧄 | 8 cloves | Minced for marinade |
| Bay Leaves 🍃 | 3 whole | Dried, for marinade |
| Black Peppercorns 🌶️ | 1 tsp | Whole, crushed |
| All-Purpose Flour 🌾 | 1 ½ cups | For dredging chicken |
| Cornstarch 🌾 | ½ cup | For extra crispiness |
| Eggs 🥚 | 2 whole | Beaten for coating |
| Vegetable Oil 🫒 | 4 cups | For deep frying |
| Salt 🧂 | 1 tsp | Adjust to taste |
| Brown Sugar 🍚 | 1 tbsp | Optional for balance |
| Green Onions 🧅 | ¼ cup | Sliced, for garnish |
[recipe_ingredient_scaler]
The chicken thighs are non-negotiable here—bone-in, skin-on yields the juiciest results, but boneless works in a pinch. Filipino brands like Silver Swan or Datu Puti for the vinegar and soy sauce deliver authentic taste. I source my bay leaves from Penzeys for consistent quality. Don’t skip the marinating time; it’s what gives the meat that signature tenderness and depth.
No white vinegar? Apple cider vinegar at a 1:1 ratio works, though the flavor profile shifts slightly. For a gluten-free version, swap all-purpose flour for rice flour. The cornstarch is key for that extra crunch, so don’t omit it. If you’re out of fresh garlic, garlic powder at one-third the amount can substitute, but fresh is always better for adobo.
This dish reheats well—store leftovers in an airtight container for up to 3 days. For best results, reheat in the oven to maintain crispiness. The marinade can be prepped a day ahead, making this perfect for weeknight dinners with a little planning.
Why You’ll Love This Recipe
- One Pan Magic: I toss the chicken thighs in soy sauce and vinegar, fry them up, and the bay leaves do their thing—minimal mess, maximum flavor.
- Garlic Bomb: The garlic cloves caramelize in the sauce, giving every bite that deep, savory punch I crave.
- Feeds the Crew: I make a big batch for Sunday lunch, and it’s just as good stuffed in a sandwich the next day.
- Budget Winner: Chicken thighs stay cheap, and a little soy sauce and vinegar stretch a long way—my wallet thanks me.
Step-by-Step Instructions for Filipino-Style Fried Chicken Adobo
This method delivers tender, flavorful meat with an irresistibly crispy exterior every time.
Step 1: Marinate the Chicken in Adobo Mixture
In a large bowl, combine the 2 lb Chicken Thighs with 0.5 cup Soy Sauce, 0.5 cup White Vinegar, minced 8 cloves Garlic Cloves, 3 whole Bay Leaves, crushed 1 tsp Black Peppercorns, 1 tsp Salt, and 1 tbsp Brown Sugar. Mix thoroughly to ensure every piece is well coated.
The vinegar will tenderize the meat while the soy sauce infuses it with umami depth. Cover and refrigerate for at least 4 hours, preferably overnight. The longer it marinates, the more pronounced the adobo flavor becomes.
Step 2: Prepare the Breading Station
In a shallow dish, whisk together the 2 whole Eggs until smooth. In a separate large bowl, combine 1.5 cups All-Purpose Flour and 0.5 cup Cornstarch. The cornstarch is the secret to achieving that ultra-crispy coating that stays crunchy even after frying.
Remove the chicken from the marinade (reserve the marinade for potential sauce later) and pat each piece dry with paper towels. This crucial step ensures the breading adheres properly and prevents splattering during frying.
Step 3: Dredge and Double-Coat the Chicken
Dip each piece of chicken into the beaten eggs, letting any excess drip off. Then dredge it in the flour-cornstarch mixture, pressing gently to adhere. For maximum crispiness, repeat the egg and flour coating process. Place the breaded pieces on a wire rack set over a baking sheet.
Let the breaded chicken rest for 10-15 minutes before frying. This allows the coating to set, which prevents it from falling off during cooking and creates a thicker, crunchier crust.
Step 4: Deep-Fry to Golden Perfection
Heat 4 cups Vegetable Oil in a deep, heavy pot to 350°F. Use a deep-fry thermometer for accuracy. Carefully lower the chicken into the hot oil in batches, being careful not to overcrowd the pot. Fry for 8-10 minutes per side until deep golden brown and the internal temperature reaches 165°F.
Drain the fried chicken on a wire rack or paper towels. The rack method keeps the coating crispy by allowing air to circulate underneath instead of steaming on a plate.
Step 5: Garnish and Serve Immediately
Transfer the crispy fried chicken to a serving platter and sprinkle with sliced 0.25 cup Green Onions. The vibrant green color provides a beautiful contrast to the golden-brown chicken.
Serve immediately while hot and crispy. The combination of the tangy adobo marinade and the crunchy exterior creates a perfect balance of flavors and textures that defines this Filipino classic.
Pro Tips For Making Fried Chicken Adobo Recipe Filipino Style
- Fry Twice: I learned this the hard way—first fry at 325°F until cooked through, then crank it to 375°F for that golden, crispy finish. Sounds fussy, but it’s how you get tender inside and crunchy outside without drying the thighs.
- Marinate Longer: After burning a few batches, I now let the chicken soak in the soy-vinegar-garlic mix for at least 30 minutes. The vinegar tenderizes, and the flavors actually sink in instead of just sitting on the surface.
- Skip the Crowding: Resist the urge to overload the pan—give each thigh space, or the oil temp drops and you’ll end up with soggy, steamed chicken. I use a thermometer now to keep it at 350°F.
- Use Thigh Skin: My grandmother swore by this, and she was right: leave the skin on the thighs for extra crispiness and flavor. It renders down beautifully and soaks up the adobo marinade like a sponge.
Creative Variations of This Dish
Spicy Adobo Kick
Add 1-2 chopped siling labuyo (Filipino bird’s eye chili) to your marinade for authentic heat. I also mix in 1 tsp chili flakes with the flour coating. This variation pays homage to the spicy adobo styles from Bicol region. The heat builds beautifully with each crispy bite. 🌶️
Coconut Milk Version
Replace ½ cup of vinegar with coconut milk for a creamier adobo base. This creates a richer, slightly sweeter profile that pairs wonderfully with the crispy coating. I learned this trick from a friend who grew up in Quezon province.
Honey-Glazed Twist
After frying, toss the chicken in a glaze of 2 tbsp honey and 1 tbsp soy sauce. The sweet-savory combination creates an irresistible sticky coating. This variation is perfect for those who prefer a touch of sweetness with their adobo.
Air Fryer Adaptation
For a lighter version, cook at 375°F for 15-18 minutes, flipping halfway. Spray with olive oil before air frying for extra crispiness. I use my Ninja Foodi for this method. The texture won’t be identical to deep-frying, but it’s still delicious.
Pork Adobo Style
Swap chicken thighs for pork belly slices for a richer variation. Marinate for 6-8 hours to ensure the pork absorbs all the adobo flavors. This version is especially popular in Filipino households for special occasions.
Extra Crispy
Add ½ cup crushed pork rinds to your flour mixture for next-level crunch. This is my secret for when I really want to impress guests. The pork rinds create an incredibly crispy exterior that stays crunchy longer. 💪
Nutrition Facts
Frequently Asked Questions
Can I use chicken breasts instead of thighs?
Thighs stay juicier, but breasts work if pounded to even thickness. Reduce frying time to 6-7 minutes per side to prevent dryness. Brining the breasts first helps maintain moisture.
Why does my coating fall off during frying?
Pat the chicken completely dry before breading and let it rest 10-15 minutes after coating. Use a double-dredge method for better adhesion. The rest time is crucial for the coating to set properly.
Can I bake this instead of frying?
Yes! Bake at 400°F for 25-30 minutes on a wire rack. Spray with oil first for crispiness. The texture won’t be identical, but it’s a healthier alternative.

Trained in classic French technique but raised on slow-cooked ribs and spicy rubs, she blends culinary skill with smoke and soul.
- Recipe for Boneless Pork Chops in Cast Iron Skillet: Sear and Baste to Juicy Perfection - October 3, 2026
- Recipe for Boneless Cross Rib Roast: Slow-Roasted Beef with Herb Crust - October 3, 2026
- Hamburgers in Sauce Recipe Crock Pot: Slow-Cooked Savory Delight - October 3, 2026