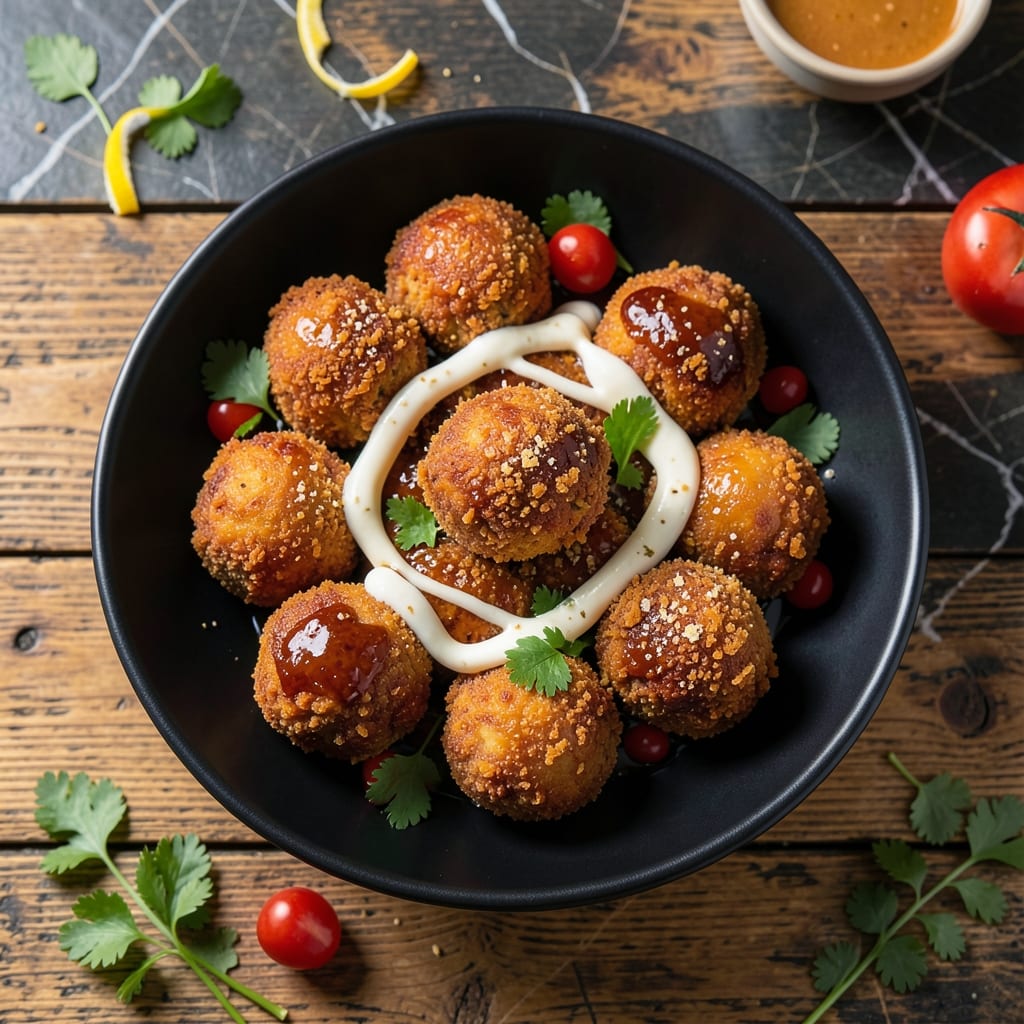
I’ve tested countless methods to achieve the ideal balance of crispy exterior and juicy interior in these chicken balls. The solution lies in the right flour blend and precise frying temperature.
Ground chicken, seasoned simply, forms the base for tender centers. A two-step breading process—flour, then egg wash, then seasoned coating—ensures maximum crunch without excess grease.
The key is maintaining oil at 350°F during frying. This temperature cooks the chicken through while creating that golden, shatteringly crispy shell we all love.
Serve immediately while hot for the best texture contrast. These bite-sized delights disappear fast, so make extra for seconds.
Ingredients for Fried Chicken Balls
Pantry staples and ground chicken transform into these irresistibly crispy, juicy chicken balls.
| Ingredient | Amount | Notes |
|---|---|---|
| Ground Chicken 🍗 | 1 ½ lb | Preferably dark meat for juiciness |
| All-Purpose Flour 🌾 | 1 cup | For initial dredging step |
| Cornstarch 🌾 | ½ cup | Mixed with flour for crispiness |
| Large Eggs 🥚 | 2 whole | Beaten for egg wash |
| Panko Breadcrumbs 🍞 | 2 cups | For final breading layer |
| Garlic Powder 🧄 | 1 tbsp | For seasoning the chicken |
| Onion Powder 🧅 | 1 tbsp | For seasoning the chicken |
| Paprika 🌶️ | 1 tsp | Sweet or smoked variety |
| Salt 🧂 | 1 tsp | Diamond Crystal preferred |
| Black Pepper 🌶️ | ½ tsp | Freshly ground for best flavor |
| Vegetable Oil 🫒 | 4 cups | For deep frying at 350°F |
| Buttermilk 🥛 | ½ cup | For soaking chicken (optional) |
[recipe_ingredient_scaler]
The ground chicken quality is non-negotiable. Dark meat stays juicier than breast—look for 85/15 ratio at your butcher or Whole Foods. The cornstarch in the flour blend is the secret to that shatteringly crisp shell. Panko breadcrumbs (find them in the Asian aisle) are mandatory; regular breadcrumbs just won’t deliver the same crunch. If you’re grinding your own chicken, keep it cold to avoid a mushy texture.
No buttermilk? Thin plain yogurt with water or use milk with a splash of vinegar. For extra crispiness, swap cornstarch for rice flour in the initial dredge. The paprika can be smoked for deeper flavor, but sweet works too. If you’re frying for a crowd, peanut oil has a higher smoke point than vegetable oil. And yes, you absolutely need a thermometer to maintain that 350°F.
Fry in batches to avoid oil temperature drops. Drain on a rack (not paper towels) to keep them crisp. Leftovers? Reheat in a 400°F oven for 10 minutes—they’ll never be as good fresh, but it’s close. Best eaten within 2 days.
Why You’ll Love This Recipe
- One Bowl Wonder: I just dump everything in a single bowl, roll, and fry—no fancy prep or multiple dishes to wash.
- That Crunch: Panko and cornstarch give it this ridiculous snap, then the juicy ground chicken hits you like a flavor wave.
- Party or Lunchbox: I serve these at game night or pack them cold for school lunches—kids and adults both devour them.
- Stretches Far: A pound of ground chicken makes way more than I expect, and leftovers reheat crispy in the toaster oven.
Step-by-Step Instructions for Fried Chicken Balls
Here is my method for achieving that perfect balance of crispy exterior and juicy interior every time.
Step 1: Season and Shape the Chicken Mixture
In a large bowl, combine the 1.5 lb ground chicken with 1 tbsp garlic powder, 1 tbsp onion powder, 1 tsp paprika, 1 tsp salt, and 0.5 tsp black pepper. I like to get my hands in there and mix thoroughly to ensure the seasoning is evenly distributed throughout every bite.
Once seasoned, form the mixture into 1.5-inch balls—about the size of a golf ball. You should get roughly 24 pieces. Press firmly but gently; you want them to hold together without becoming dense. Place the formed balls on a plate and refrigerate for 15 minutes to firm up before breading.
Step 2: Set Up the Breading Station
Create a breading assembly line with three shallow bowls. In the first, whisk together the 1 cup all-purpose flour and 0.5 cup cornstarch—this combo gives that extra crispy texture. In the second, beat the 2 whole large eggs with the 0.5 cup buttermilk until smooth. In the third, place the 2 cups panko breadcrumbs.
I’ve found that using panko instead of regular breadcrumbs creates a lighter, crunchier coating. The cornstarch in the flour mix is the secret weapon here—it absorbs moisture and enhances that golden, shatteringly crisp finish we’re after.
Step 3: Bread the Chicken Balls Thoroughly
Working with one piece at a time, dredge each chicken ball in the flour mixture, coating completely and shaking off any excess. Then dip it into the egg wash, letting any excess drip off. Finally, roll it in the panko breadcrumbs, pressing gently to ensure an even, thick coating that will crisp up beautifully.
Place the breaded balls on a plate lined with parchment paper. Don’t stack them—they’re delicate at this stage. Let them rest for 5 minutes while you heat the oil. This resting period helps the coating adhere better during frying.
Step 4: Fry to Golden Perfection
Heat the 4 cups vegetable oil in a deep, heavy-bottomed pot to 350°F. Use a thermometer for accuracy—this temperature is crucial for achieving that perfect golden-brown color without overcooking the interior. I maintain the oil at this temperature throughout frying by adjusting the heat as needed.
Fry the chicken balls in batches to avoid crowding the pot, which would lower the oil temperature. Cook for 3-4 minutes per batch, turning occasionally, until they’re deep golden brown and the internal temperature reaches 165°F. Drain on a wire rack set over a baking sheet to keep them crispy.
Step 5: Serve Immediately While Hot
Transfer the fried chicken balls to a serving platter as soon as they’re done. These are best enjoyed fresh from the fryer when they’re at their crispest. The contrast between the crunchy exterior and the juicy, flavorful center is what makes these so irresistible.
Let them cool for just 2-3 minutes before serving—they’ll be too hot to eat straight from the oil. Serve with your favorite dipping sauce, though I often find they’re so flavorful they don’t need anything extra. The key is that perfect crispy-juicy balance in every bite.
Pro Tips For Making Fried Chicken Balls
- Chill the Balls: After shaping, refrigerate the chicken balls for 20-30 minutes before breading—I learned this the hard way when my first batch kept falling apart in the oil.
- Double Coat: Dip in egg, then flour-cornstarch mix, then egg again, and finally panko. Sounds tedious, but it actually changes the outcome, giving that extra-crispy crust.
- Skip Crowding: Fry in small batches with space between each ball. Resist the urge to overfill the pan, or the temperature drops and you’ll end up with greasy, undercooked centers.
- Use Cold Chicken: Start with cold ground chicken straight from the fridge—it holds together better when forming and doesn’t turn mushy during frying.
Troubleshooting Great fried chicken balls
Oil Temperature Drops
If your oil temperature falls below 325°F while frying, the chicken will absorb excess oil and turn greasy. I use a candy thermometer clipped to the pot and adjust my burner between batches. Frying in small batches prevents this issue. 🌡️
Breading Falls Off
This usually happens when the chicken balls aren’t chilled before breading. My solution: refrigerate the shaped balls for at least 15 minutes before dredging. Also ensure each breading layer has 5 minutes to set between steps.
Dry or Dense Centers
Overworking the ground chicken mixture can create tough, dry balls. Mix just until combined—no more. Also, don’t press too firmly when shaping. The 1.5-inch size ensures even cooking without drying out.
Uneven Browning
Hot spots in your oil cause uneven cooking. I rotate my pot 90 degrees halfway through frying each batch. Also, maintain consistent oil depth—aim for 2-3 inches to fully submerge the balls.
Soggy After Draining
Draining on paper towels steams the coating. Use a wire rack over a baking sheet instead—this allows air circulation to maintain crispiness. I keep my drained balls in a 200°F oven while finishing batches.
Undercooked Centers
If the outside browns before the inside cooks, your oil is too hot. Lower the temperature to 325°F and extend cooking time to 5-6 minutes. Always check internal temp with a meat thermometer for 165°F. 💡
Nutrition Facts
Frequently Asked Questions
Can I use ground turkey instead of chicken?
Yes, but use dark meat turkey for best results. It stays juicier than white meat. Adjust cooking time slightly as turkey can dry out faster than chicken.
How do I keep them crispy for longer?
Drain on a wire rack, not paper towels. Keep finished batches warm in a 200°F oven while frying the rest. Avoid covering them.
What dipping sauces pair well?
Classic choices include honey mustard, sweet chili, or ranch. For something different, try a spicy sriracha mayo or tangy barbecue sauce.
Can I bake these instead of frying?
Yes, but results differ. Bake at 400°F for 18-20 minutes, flipping halfway. They’ll be healthier but less crispy than fried.

Trained in classic French technique but raised on slow-cooked ribs and spicy rubs, she blends culinary skill with smoke and soul.
- Recipe for Boneless Pork Chops in Cast Iron Skillet: Sear and Baste to Juicy Perfection - October 3, 2026
- Recipe for Boneless Cross Rib Roast: Slow-Roasted Beef with Herb Crust - October 3, 2026
- Hamburgers in Sauce Recipe Crock Pot: Slow-Cooked Savory Delight - October 3, 2026