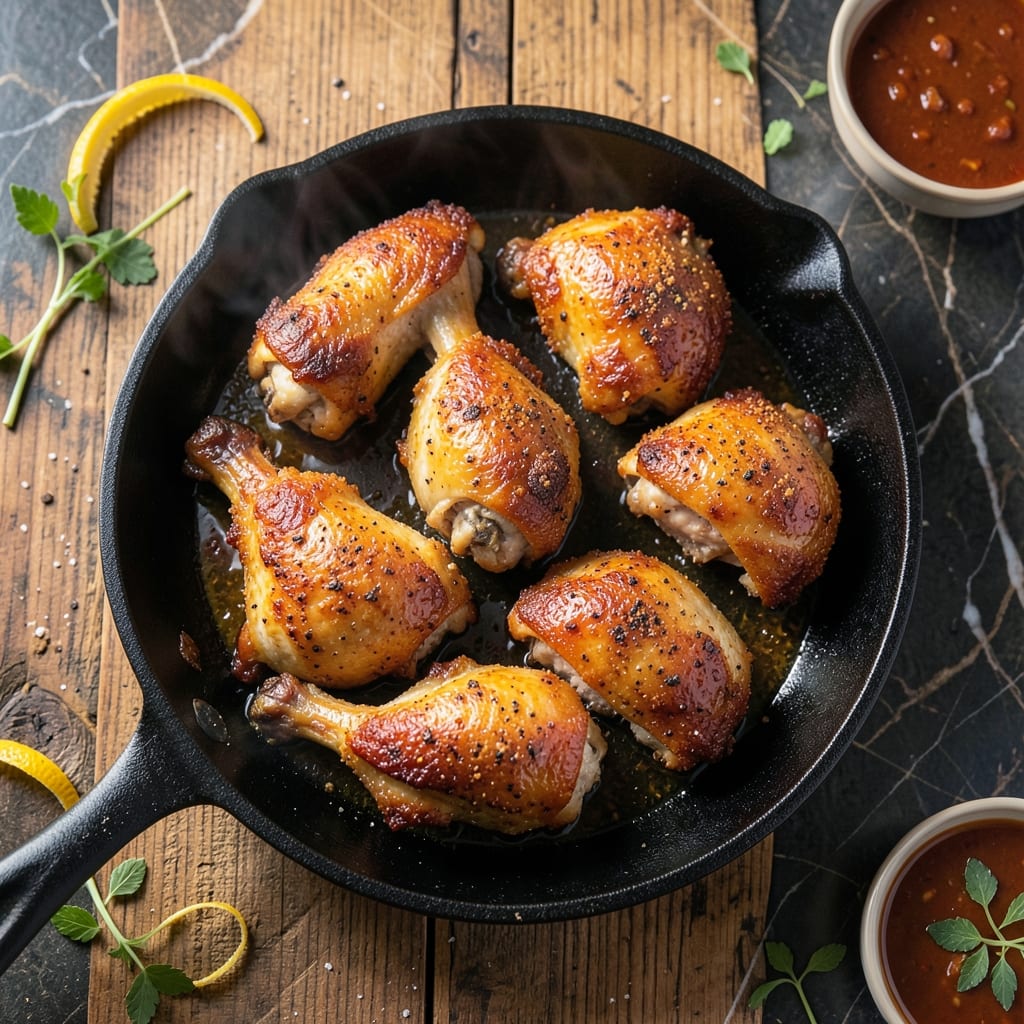
There’s an art to achieving golden, crispy fried chicken that stays juicy inside. This method delivers restaurant-quality results with a perfect balance of crunch and tenderness.
The secret lies in a two-step process: a flavorful buttermilk marinade followed by a well-seasoned flour coating. Frying at the right temperature ensures the exterior becomes shatteringly crisp while locking in moisture.
You’ll end up with pieces that are evenly golden with a crust that crackles at the slightest touch. The meat remains succulent and tender, with every bite offering that ideal contrast of textures.
Mastering this technique means you’ll never settle for mediocre fried chicken again. Here’s how to do it right every time.
Ingredients for Fried Chicken Recipe Deep Fried
Restaurant-quality crispy coating starts with these carefully selected ingredients for perfect texture and flavor.
| Ingredient | Amount | Notes |
|---|---|---|
| Chicken Pieces 🍗 | 3 lb | Mixed thighs and drumsticks preferred |
| Buttermilk 🥛 | 2 cups | Full-fat for best marinade |
| All-Purpose Flour 🌾 | 3 cups | For crispy coating |
| Kosher Salt 🧂 | 2 tbsp | Diamond Crystal preferred |
| Black Pepper 🌶️ | 1 tbsp | Freshly ground for best flavor |
| Paprika 🌶️ | 1 tbsp | Sweet or smoked variety |
| Garlic Powder 🧄 | 1 tbsp | Not garlic salt |
| Onion Powder 🧅 | 1 tbsp | Fresh ground preferred |
| Cayenne Pepper 🔥 | ½ tsp | Adjust for heat preference |
| Vegetable Oil 💧 | 4 cups | For deep frying at 350°F |
| Large Eggs 🥚 | 2 whole | Beaten for flour wash |
| Hot Sauce 🌶️ | 1 tbsp | Optional for marinade kick |
[recipe_ingredient_scaler]
The chicken selection is critical for optimal results. Thighs and drumsticks remain juicier than breasts during frying. Source from Whole Foods or Costco for consistent quality and size. For the buttermilk, full-fat provides the best tenderizing effect—organic if available. The flour should be all-purpose with a fine texture for even coating adhesion.
For the seasoning blend, freshly ground black pepper and smoked paprika elevate the flavor profile. No buttermilk? Whole milk with 1 tbsp vinegar works as a substitute. For heat lovers, increase cayenne to 1 tsp. The hot sauce in the marinade can be Tabasco or Crystal—both provide the right tang without overpowering.
Marinated chicken keeps 24 hours in the fridge. The coating can be prepared 1 day ahead and stored at room temperature. Fried chicken is best served immediately but holds well in a 200°F oven for up to 30 minutes.
Why You’ll Love This Recipe
- One Bowl Wonder: That buttermilk marinade and flour coating come together in a single bowl—no fancy prep or piles of dishes.
- Crispy Perfection: Honestly, the salt and pepper in the flour crust make every bite ridicuously good, with that ideal crunch.
- Weeknight Hero: I toss it together for Sunday suppers or quick weeknight dinners (yes, even on a Tuesday night).
- Budget Stretcher: A whole chicken cut into pieces means this feeds my family for less than takeout, with leftovers for sandwiches.
Step-by-Step Instructions for Fried Chicken
This method ensures a crisp exterior while maintaining the promised tender, juicy interior every time.
Step 1: Marinate the Chicken in Buttermilk
Combine the 3 lb chicken pieces with 2 cups buttermilk and 1 tbsp hot sauce in a large bowl. I prefer using a mix of thighs and drumsticks for optimal texture and flavor. Ensure each piece is fully submerged in the marinade.
Cover and refrigerate for at least 4 hours, or ideally overnight. This buttermilk marinade tenderizes the meat and infuses it with moisture, which is crucial for achieving that juicy interior. The acidity in the buttermilk also helps the coating adhere better during frying.
Step 2: Prepare the Seasoned Flour Coating
In a shallow dish, whisk together the 3 cups all-purpose flour, 2 tbsp kosher salt, 1 tbsp black pepper, 1 tbsp paprika, 1 tbsp garlic powder, 1 tbsp onion powder, and 0.5 tsp cayenne pepper. I like to use a fork to break up any lumps in the flour for an even coating.
Remove the chicken from the marinade, allowing excess buttermilk to drip off. Dredge each piece in the seasoned flour, pressing firmly to ensure the coating adheres well. Shake off any excess flour—this prevents clumping and ensures an even, crispy crust.
Step 3: Apply the Egg Wash for Extra Crispiness
Beat the 2 whole large eggs in a separate shallow dish. Dip each floured chicken piece into the egg wash, turning to coat completely. Then, dredge the chicken back into the seasoned flour mixture, pressing again to create a thick, textured coating.
Place the coated chicken on a wire rack set over a baking sheet. Let it rest for 10-15 minutes to allow the coating to set. This resting step is critical—it helps the flour adhere better and prevents it from falling off during frying.
Step 4: Deep Fry to Golden Perfection
Heat the 4 cups vegetable oil in a deep, heavy-bottomed pot to 350°F. Use a deep-fry thermometer to monitor the temperature accurately. The oil is ready when a small piece of flour sizzles and browns within 30 seconds.
Carefully lower the chicken into the hot oil, working in batches to avoid overcrowding. Fry for 12-15 minutes, turning occasionally, until the chicken is golden brown and the internal temperature reaches 165°F. Dark meat may take slightly longer than white meat.
Drain the fried chicken on a wire rack or paper towels to remove excess oil. This step preserves the crispiness of the crust while allowing the juices to redistribute within the meat.
Pro Tips For Making Fried Chicken Recipe Deep Fried
- Double Fry for Crisp: I learned this the hard way—fry once at 325°F until cooked through, then rest 5 minutes before a second dip in 375°F oil. That second fry is what actually gives you that shatter-crisp crust.
- Dry the Chicken: Pat those buttermilk-soaked pieces completely dry before dredging—sounds tedious, but it keeps the flour from sliding off into the oil.
- Skip Cold Chicken: After burning three batches, I finally figured out that room-temperature chicken fries more evenly. Pull it from the fridge 30 minutes before cooking.
- Season the Flour: Mix 1 tablespoon kosher salt and 1 teaspoon black pepper into your flour dredge—more than you think, especially if your buttermilk wasn’t salted.
Pro Cooking Tips for fried chicken recipe deep fried
Oil Temperature Control
Maintaining 350°F oil temperature is crucial for even cooking and that perfect golden-brown crust. I use a Taylor digital deep-fry thermometer for precision. If the oil smokes, it’s too hot—reduce heat immediately.
Batch Frying Strategy
Never overcrowd your pot—fry in batches with at least 2 inches between pieces. Overcrowding lowers oil temperature, causing greasy, unevenly cooked chicken. I typically fry 4-5 pieces at once in my 5-quart Dutch oven.
Double-Frying Secret
For extra crispiness, try double-frying: cook at 325°F for 10 minutes, rest for 5 minutes, then finish at 375°F for 3-4 minutes. This Korean-inspired method creates an ultra-crispy exterior while keeping the meat juicy. 🔥
Draining Properly
Always drain on a wire rack rather than paper towels to prevent steam from making the crust soggy. Elevating the pieces allows air circulation on all sides. I place a sheet pan underneath to catch drips.
Rest Before Serving
Let your chicken rest for 5-10 minutes after frying. This allows the juices to redistribute and the crust to set. Serve immediately for maximum crispiness—the coating loses its crunch after 30 minutes.
Thermometer Check
Always verify doneness with a meat thermometer—165°F in the thickest part. Dark meat can safely go to 175°F for extra tenderness. I use a ThermoWorks instant-read for accuracy.
Nutrition Facts
Frequently Asked Questions
What oil works best for deep frying?
Use oils with a high smoke point like vegetable, peanut, or canola. Vegetable oil is most common and affordable. Avoid olive oil—it burns at frying temps.
How do I keep the coating from falling off?
Pat chicken dry before dredging, and let the coated pieces rest for 10-15 minutes before frying. The rest time helps the flour adhere properly.
Can I use boneless chicken?
Yes, but bone-in pieces stay juicier during frying. If using boneless, reduce cooking time to 8-10 minutes to prevent dryness.
How do I store leftovers?
Keep in an airtight container in the fridge for up to 3 days. Reheat in a 375°F oven for 10-12 minutes to restore crispiness.

Trained in classic French technique but raised on slow-cooked ribs and spicy rubs, she blends culinary skill with smoke and soul.
- Recipe for Boneless Pork Chops in Cast Iron Skillet: Sear and Baste to Juicy Perfection - October 3, 2026
- Recipe for Boneless Cross Rib Roast: Slow-Roasted Beef with Herb Crust - October 3, 2026
- Hamburgers in Sauce Recipe Crock Pot: Slow-Cooked Savory Delight - October 3, 2026