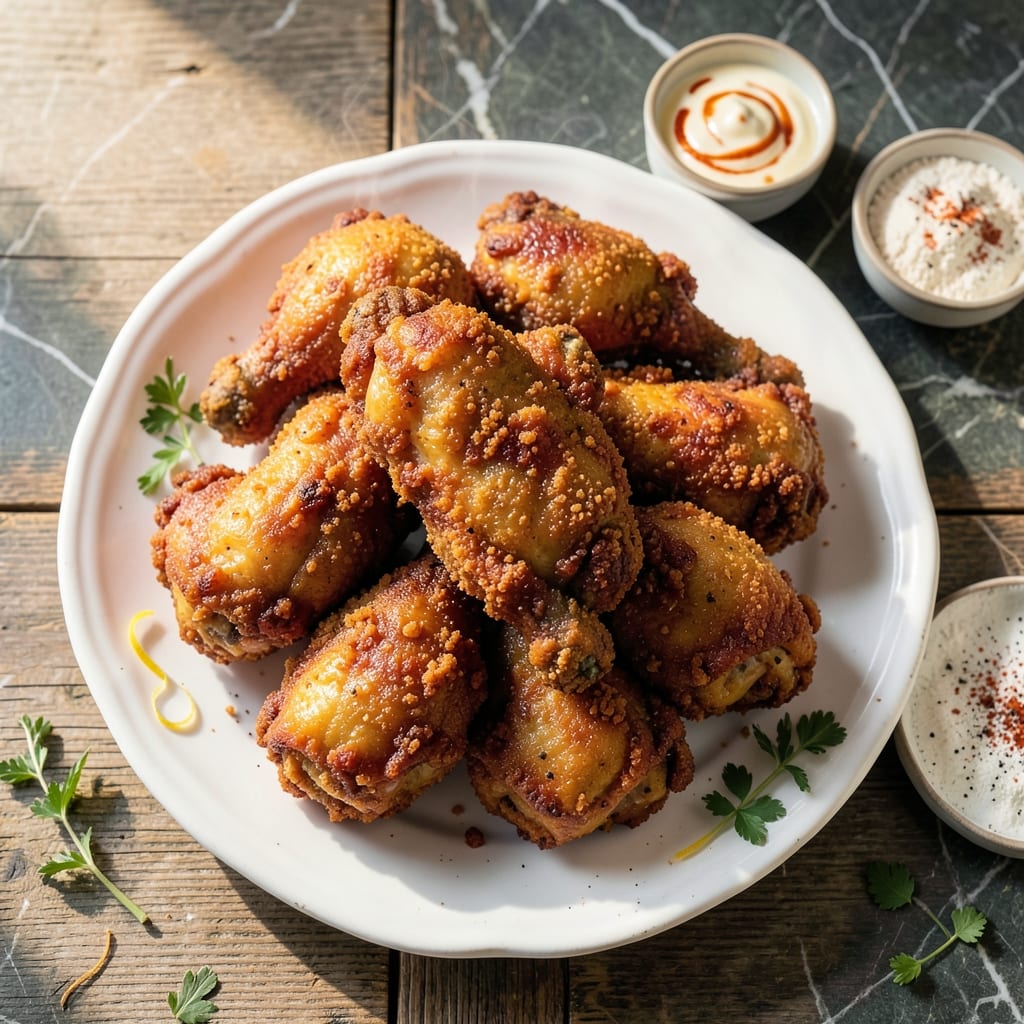
Achieving crispy, golden fried chicken at home is absolutely possible with the right technique. My grandmother’s method—refined through years of trial and error—delivers perfect results every time without complicated steps.
This approach focuses on a well-seasoned flour coating and precise frying temperature to ensure even cooking. The key is maintaining 350°F oil, which creates that signature shatteringly crispy crust while keeping the meat incredibly juicy inside.
You’ll find the process surprisingly straightforward once you understand the timing and visual cues. The transformation from raw chicken to golden-brown perfection happens faster than you might expect.
Each step builds on the last, with clear visual markers to guide you through the frying process. The result is worth every minute of attention.
Ingredients for Fried Chicken Recipe Step by Step Pictures
Classic fried chicken starts with these pantry staples and a few fresh picks. Nothing complicated here.
| Ingredient | Amount | Notes |
|---|---|---|
| Chicken Thighs and Drumsticks 🍗 | 3 lb | Bone-in, skin-on for crispiness |
| Buttermilk 🥛 | 2 cups | Full-fat for maximum tenderness |
| All-Purpose Flour 🌾 | 3 cups | Divided for dredging and coating |
| Kosher Salt 🧂 | 2 tbsp | Diamond Crystal preferred for even seasoning |
| Ground Black Pepper 🌶️ | 1 tbsp | Freshly ground for best flavor |
| Paprika 🌶️ | 2 tbsp | Sweet or smoked variety |
| Garlic Powder 🧄 | 2 tsp | Not garlic salt for pure flavor |
| Onion Powder 🧅 | 2 tsp | Adds depth to the crust |
| Cayenne Pepper 🔥 | ½ tsp | Adjust for heat preference |
| Vegetable Oil 🫒 | 4 cups | For frying, high smoke point |
| Large Egg 🥚 | 1 whole | Helps coating adhere to chicken |
| Hot Sauce 🌶️ | 1 tbsp | Optional, adds tang to buttermilk |
[recipe_ingredient_scaler]
The chicken matters most here. Bone-in, skin-on thighs and drumsticks give you that crispy, golden exterior with juicy meat inside. I get mine from Whole Foods or the local butcher—look for pieces that are similar in size so they cook evenly. The buttermilk (use full-fat if you can find it) is what makes the meat so tender, so don’t skip it.
No buttermilk? Mix 2 cups milk with 2 tbsp vinegar or lemon juice and let it sit for 5 minutes. Swap the flour for self-rising if you want extra lift in the crust. Want more heat? Double the cayenne or add 1 tsp red pepper flakes. The oil can be peanut or canola if that’s what you’ve got (same smoke point as vegetable).
Store raw chicken in the coldest part of your fridge—use within 2 days. The buttermilk marinade keeps 1 day. Leftovers? They’ll soften but still taste great—reheat in the oven at 375°F for 10-15 minutes to crisp them back up.
Why You’ll Love This Recipe
- One Bowl Wonder: I just dump flour, salt, and pepper in one bowl—no fancy prep, no extra dishes to wash.
- Crispy Perfection: The buttermilk soak makes the chicken so juicy inside while the crust stays shatteringly crisp.
- Crowd Pleaser: I’ve served this at picnics, game nights, and lazy Sundays—everyone from kids to picky uncles devours it.
- Budget Stretcher: A bag of thighs and drumsticks feeds my whole family for less than takeout, with leftovers for sandwiches.
Step-by-Step Instructions for Crispy Fried Chicken
Here’s my tested method for achieving that perfect golden crust and juicy interior every time.
Step 1: Marinate the Chicken in Buttermilk
In a large bowl, whisk together the 2 cups Buttermilk, 1 whole Large Egg, and 1 tbsp Hot Sauce until fully combined. This buttermilk mixture acts as both a tenderizer and flavor enhancer, breaking down proteins in the chicken for maximum juiciness.
Add the 3 lb Chicken Thighs and Drumsticks to the mixture, ensuring each piece is fully coated. I like to press the chicken down into the liquid so it’s completely submerged. Cover and refrigerate for at least 4 hours, or overnight for even better flavor penetration and tenderness.
Step 2: Prepare the Seasoned Flour Dredge
In a wide, shallow dish, combine 3 cups All-Purpose Flour, 2 tbsp Kosher Salt, 1 tbsp Ground Black Pepper, 2 tbsp Paprika, 2 tsp Garlic Powder, 2 tsp Onion Powder, and 0.5 tsp Cayenne Pepper. Whisk until evenly distributed.
The paprika gives that classic fried chicken color, while the garlic and onion powders add depth to the crust. I always use a wide dish for dredging—it makes coating the chicken much easier and less messy. This is where your crispy exterior starts to take shape.
Step 3: Dredge and Coat the Chicken
Remove the chicken from the buttermilk mixture, letting excess drip off for 10-15 seconds. This prevents the coating from becoming too thick and gummy. Immediately dredge each piece in the seasoned flour, pressing firmly to ensure the coating adheres well to every crevice.
Place the coated chicken on a wire rack set over a baking sheet. This setup allows air to circulate around the chicken, helping the coating set properly. Let it rest for 10-15 minutes—this is crucial for creating that perfect crispy texture when fried. You’ll notice the coating starts to look slightly dry, which is exactly what you want.
Step 4: Fry to Golden Perfection
In a deep, heavy pot or Dutch oven, heat the 4 cups Vegetable Oil to 350°F over medium-high heat. Use a deep-fry thermometer to monitor the temperature—this is non-negotiable for consistent results. The oil is ready when a pinch of flour dropped in sizzles immediately.
Carefully lower the chicken into the hot oil, working in batches to avoid crowding the pot. Fry for 12-15 minutes for drumsticks and 14-17 minutes for thighs, turning occasionally, until the coating is deep golden brown and the internal temperature reaches 165°F. The chicken should sizzle steadily but not violently—if it’s smoking or popping excessively, your oil is too hot.
Transfer the fried chicken to a wire rack or paper towels to drain. The rack prevents the crust from becoming soggy on the bottom. Let it rest for 5 minutes before serving—the internal temperature will continue to rise slightly, and the juices will redistribute for maximum tenderness.
Pro Tips For Making Fried Chicken Recipe Step By Step Pictures
- Double-Dredge Coating: Dip the buttermilk-soaked chicken back into the flour mixture a second time for an extra-crispy crust—this is what gives it that golden, crackly texture in the pictures.
- Hot Oil Test: Drop a pinch of flour into the oil first; if it sizzles immediately, it’s ready for the chicken. I learned this the hard way after too many greasy, undercooked batches.
- Pat Dry First: Blot the chicken pieces with paper towels before the buttermilk soak so the coating sticks properly instead of sliding off.
- Rest Before Frying: Let the dredged chicken sit for 10 minutes on a wire rack—it keeps the crust from falling apart when it hits the oil. Sounds tedious, but it works.
Common Mistakes When Making Perfect Results
Oil Temperature Issues
If your oil isn’t hot enough, the chicken will absorb too much grease and end up soggy. I learned this the hard way—my first attempts looked pale and greasy. Use a deep-fry thermometer and maintain 350°F consistently. If it drops below 325°F, let it reheat before adding more chicken. 🌡️
Overcrowding the Pot
Adding too many pieces at once lowers the oil temperature drastically. Fry in batches with at least 1 inch between pieces. This ensures even cooking and prevents steaming. I use a Dutch oven for better heat retention.
Skipping the Rest
Let the coated chicken rest for 10-15 minutes after dredging. This step helps the flour adhere properly. Without it, the coating might fall off during frying. My grandmother’s handwritten cards just said “let it sit”—I learned the exact timing through trial and error.
Uneven Coating
Press the flour mixture firmly into every crevice of the chicken. Don’t just dip—use your hands to ensure full coverage. For extra crispiness, I double-dredge: dip in buttermilk again, then flour once more. This creates that signature shatteringly crisp crust.
Insufficient Drying
After marinating, let excess buttermilk drip off for 10-15 seconds before dredging. Too much liquid makes the coating gummy. I place a wire rack over a baking sheet to catch drips and allow air circulation.
Rushing the Process
Don’t rush the marinating time—4 hours minimum is essential for tenderness. The buttermilk works its magic slowly. I often marinate overnight when I
Nutrition Facts
Frequently Asked Questions
What’s the best oil for frying?
Use vegetable, peanut, or canola oil for their high smoke points. Avoid olive oil—it burns at frying temps. Always maintain 350°F for crispy results.
Can I use chicken breasts instead of thighs?
Yes, but they cook faster (10-12 minutes) and dry out more easily. Thighs stay juicier. If using breasts, brine first or pound to even thickness.
How do I keep it crispy after frying?
Drain on a wire rack, not paper towels, to prevent steam buildup. Serve immediately for peak crispiness. For leftovers, reheat in a 375°F oven for 10 minutes.
Why did my coating fall off?
Common causes: skipping the 10-15 minute rest after dredging, not pressing flour into crevices, or marinating less than 4 hours. Double-dredging helps.

Trained in classic French technique but raised on slow-cooked ribs and spicy rubs, she blends culinary skill with smoke and soul.
- Recipe for Boneless Pork Chops in Cast Iron Skillet: Sear and Baste to Juicy Perfection - October 3, 2026
- Recipe for Boneless Cross Rib Roast: Slow-Roasted Beef with Herb Crust - October 3, 2026
- Hamburgers in Sauce Recipe Crock Pot: Slow-Cooked Savory Delight - October 3, 2026