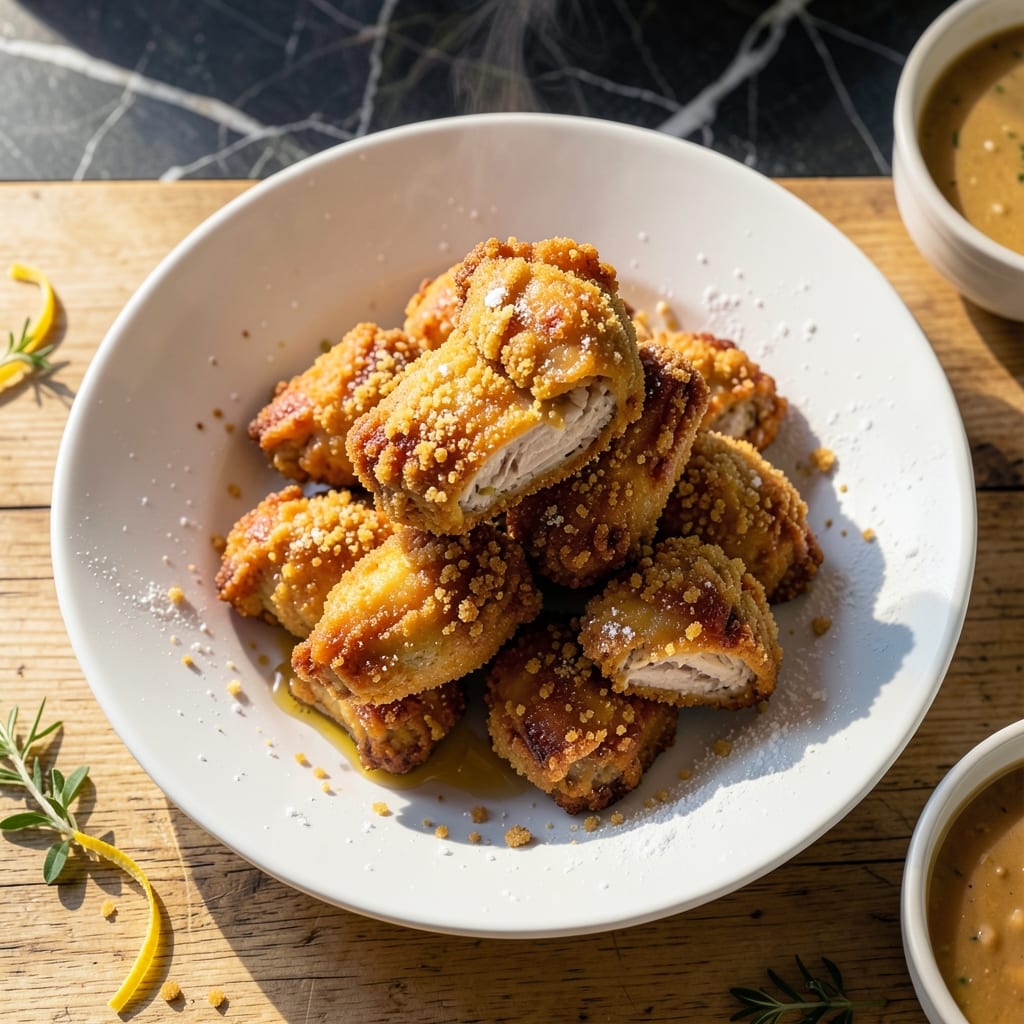
Double-coating chicken creates an unmatched crunch that single-dredging simply can’t achieve. This method locks in moisture while building layers of texture that shatter with every bite.
Using both panko and flour delivers the ideal balance of crispiness and structure. The flour creates a sturdy base layer, while panko’s coarse texture adds airy, golden crunch that stays intact even after frying.
I developed this technique after years of testing different breading combinations in my Portland kitchen. The result is chicken that’s crispy outside and juicy inside, with a coating that never turns soggy.
Perfect for weeknight dinners or weekend gatherings. This recipe will change how you think about fried chicken.
Ingredients for Fried Chicken Recipe with Panko and Flour
Quality chicken and a dual breading station create that signature shatter with every bite.
| Ingredient | Amount | Notes |
|---|---|---|
| Chicken Thighs 🍗 | 2 lb | Boneless, skinless, patted dry |
| All-Purpose Flour 🌾 | 1 ½ cups | Divided for dredging layers |
| Panko Breadcrumbs 🍞 | 2 cups | Japanese-style for maximum crunch |
| Large Eggs 🥚 | 2 whole | Beaten for binding coating |
| Buttermilk 🥛 | 1 cup | Full-fat for tenderness |
| Kosher Salt 🧂 | 1 ½ tsp | Diamond Crystal preferred |
| Black Pepper 🌶️ | 1 tsp | Freshly ground for best flavor |
| Garlic Powder 🧄 | 1 tsp | For depth in breading |
| Onion Powder 🧅 | 1 tsp | Balances savory profile |
| Paprika 🌶️ | 1 tsp | Sweet or smoked variety |
| Cayenne Pepper 🔥 | ¼ tsp | Adjust for heat preference |
| Vegetable Oil 🫒 | 4 cups | For deep frying, high smoke point |
| Baking Powder 🧂 | ½ tsp | Adds airiness to coating |
[recipe_ingredient_scaler]
For the chicken, bone-in, skin-on thighs deliver superior flavor and moisture, but boneless works if you prefer convenience. Panko from a Japanese market or Kikkoman brand at regular supermarkets gives the best texture. The buttermilk is non-negotiable—its acidity tenderizes while the fat promotes browning. Diamond Crystal kosher salt is ideal for its clean flavor and even distribution.
No buttermilk? Whole milk with 1 tbsp vinegar per cup works in a pinch. Swap panko for crushed cornflakes or saltines if needed, though texture will differ. The flour can be half all-purpose, half cornstarch for extra crisp. For spice variations, add 1 tsp mustard powder or 1/2 tsp celery salt to the breading mix.
The raw chicken can marinate in buttermilk for up to 24 hours for extra tenderness. Fried chicken keeps 3-4 days in the fridge but is best eaten immediately. Reheat in a 350°F oven for 10-12 minutes to restore crispness.
Why You’ll Love This Recipe
- Minimal Effort: I just dip, coat, and fry—no fancy techniques, just panko and flour doing the heavy lifting.
- Crispy Perfection: That panko crust shatters with every bite, while the buttermilk keeps the chicken juicy inside.
- Feeds a Crowd: I made this for game night and everyone went back for seconds—chicken thighs stretch further than breasts.
- Budget Friendly: Panko and flour are pantry staples, and thighs cost less than other cuts. Honestly, it’s my wallet’s favorite meal.
Step-by-Step Instructions for Fried Chicken With Panko and Flour
Master the double-coating technique for maximum crunch and juicy interiors every time.
Step 1: Season and Marinate the Chicken
Pat the 2 lb chicken thighs completely dry with paper towels—this is crucial for the coating to adhere properly. In a large bowl, whisk together the 1 cup buttermilk, 1.5 tsp kosher salt, 1 tsp black pepper, 1 tsp garlic powder, 1 tsp onion powder, 1 tsp paprika, and 0.25 tsp cayenne pepper until fully combined.
Add the chicken to the buttermilk mixture, ensuring each piece is fully submerged. Let it marinate for at least 30 minutes at room temperature, or up to 4 hours in the refrigerator. The longer it marinates, the more tender and flavorful the chicken will be.
Step 2: Prepare the Double-Coating Stations
In a shallow dish, combine 1.5 cups all-purpose flour and 0.5 tsp baking powder. The baking powder adds a subtle lightness to the coating. In a second shallow dish, beat the 2 whole large eggs until well combined. In a third dish, place the 2 cups panko breadcrumbs.
This three-step breading station ensures each piece gets an even, thorough coating. The flour creates a base layer, the egg acts as a binder, and the panko provides that signature crunch. Arrange the dishes in this order for efficiency: flour, egg, panko.
Step 3: Coat the Chicken Thoroughly
Remove the chicken from the buttermilk, allowing any excess to drip off. Dredge each piece in the flour mixture, pressing gently to adhere. Shake off any excess flour, then dip it into the beaten eggs, ensuring full coverage. Finally, press the chicken into the panko breadcrumbs, coating all sides completely.
Place the coated chicken on a wire rack set over a baking sheet. Let it rest for 10-15 minutes to allow the coating to set. This resting period prevents the breading from falling off during frying. Real talk: don’t skip this step—it makes all the difference.
Step 4: Fry to Golden Perfection
In a large, heavy-bottomed pot or Dutch oven, heat the 4 cups vegetable oil to 350°F. Use a deep-fry thermometer to monitor the temperature accurately. Carefully lower 2-3 pieces of chicken into the hot oil, being careful not to overcrowd the pot. Overcrowding lowers the oil temperature and leads to greasy chicken.
Fry the chicken for 6-8 minutes per side until the coating is deep golden brown and the internal temperature reaches 165°F. The panko will create an audibly crispy crust when it’s done. Transfer the fried chicken to a wire rack or paper towels to drain excess oil.
Let the chicken rest for 5 minutes before serving to allow the juices to redistribute. The coating should remain crispy, and the meat inside should be juicy and tender. Serve immediately for the best texture.
Pro Tips For Making Fried Chicken Recipe With Panko And Flour
- Double Dredge: Dip the chicken in the buttermilk-egg mix, then flour, then back in the wet mix, then panko—this gives you that extra-crispy crust that actually stays put.
- Dry the Thighs: Pat the chicken thighs bone-dry with paper towels before dredging; I learned this the hard way after my first batch had a sad, soggy coating.
- Skip the Crowding: Fry in batches with at least an inch between pieces—steam from crowded pans turns panko into a sad, chewy mess.
- Rest Before Frying: Let the dredged chicken rest 10-15 minutes before frying; the coating sets better and you’ll lose less of it in the oil.
Creative Variations of fried chicken recipe with panko and flour
Spicy Nashville Hot
Transform your creation into Nashville hot chicken by adding 2 tbsp cayenne pepper and 1 tbsp brown sugar to the flour mix. After frying, brush with ½ cup hot oil infused with 3 tbsp cayenne and 1 tbsp honey. I learned this trick from a Nashville chef at the Portland farmers market. 🌶️
Honey Mustard Glaze
Whisk together ¼ cup honey, 3 tbsp Dijon mustard, and 1 tbsp apple cider vinegar. Brush this glaze over the chicken during the last 2 minutes of frying. The sweet-tangy flavor pairs perfectly with the crispy panko coating.
Parmesan Herb Crust
Add ½ cup grated Parmesan and 2 tbsp dried Italian herbs to your panko mixture. The Parmesan adds a salty depth while the herbs bring freshness. I use New Seasons Market Parmesan for its sharp, nutty flavor.
Air Fryer Method
For a lighter version, spray coated chicken with avocado oil and air fry at 400°F for 12-15 minutes, flipping halfway. The panko still gets crispy without deep frying. My daughter Lily loves this version—she calls it “crunchy chicken nuggets.”
Check internal temp reaches 165°F before serving. The texture won’t be identical to deep-fried, but it’s a great weeknight option.
Asian-Inspired Twist
Swap 1 tsp garlic powder for 1 tbsp grated fresh ginger in the marinade. Replace paprika with 1 tsp five-spice powder in the flour. Serve with sweet chili sauce for dipping. This variation reminds me of the Pacific Northwest’s love for fusion flavors. 💫
Nutrition Facts
Frequently Asked Questions
Why use both panko and flour?
The flour creates a sturdy base layer that helps the coating adhere. The panko adds airy, extra-crispy texture that stays crunchy longer than regular breadcrumbs.
Can I bake instead of fry?
Yes! Bake at 400°F for 20-25 minutes on a wire rack. Spray with oil first for extra crispiness. The texture won’t be identical but still delicious.
How do I keep the coating from falling off?
Pat the chicken completely dry first. Let the coated pieces rest for 10-15 minutes before frying. This helps the breading set properly.
Can I use chicken breasts instead of thighs?
Yes, but thighs stay juicier. If using breasts, pound to even thickness and reduce frying time to 5-6 minutes per side to prevent dryness.

Trained in classic French technique but raised on slow-cooked ribs and spicy rubs, she blends culinary skill with smoke and soul.
- Recipe for Boneless Pork Chops in Cast Iron Skillet: Sear and Baste to Juicy Perfection - October 3, 2026
- Recipe for Boneless Cross Rib Roast: Slow-Roasted Beef with Herb Crust - October 3, 2026
- Hamburgers in Sauce Recipe Crock Pot: Slow-Cooked Savory Delight - October 3, 2026