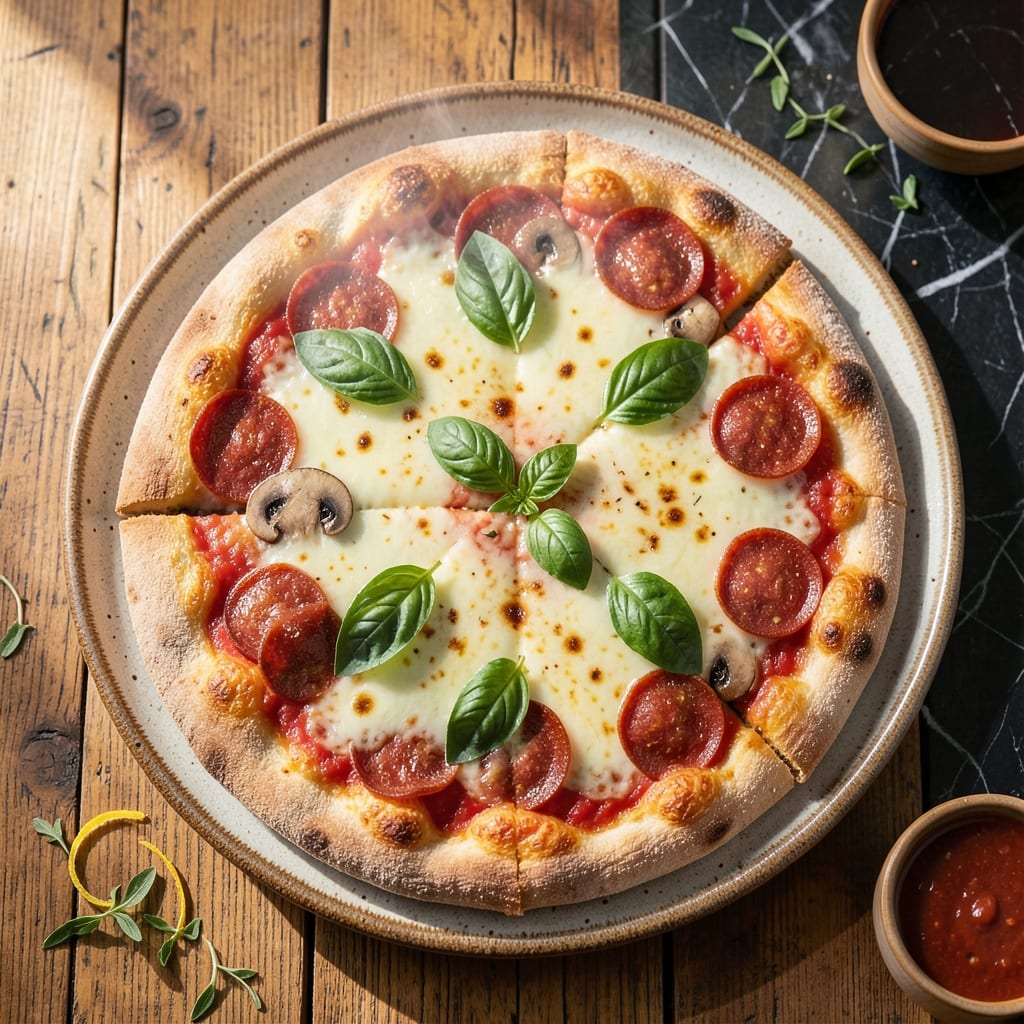
Achieving a crispy gluten-free pizza crust at home is absolutely possible with the right technique and ingredients. After years of testing, I’ve perfected a rice flour base that delivers the texture you’ve been missing.
This recipe uses a blend of rice flour and starches to create a sturdy yet tender crust that holds up to your favorite toppings. The key is pre-baking the crust before adding sauce, which prevents sogginess and ensures that coveted crispy finish.
You’ll love how this version rivals traditional pizza—golden edges, a satisfying snap, and a neutral flavor that lets toppings shine. No specialty flours or complicated steps, just reliable results every time.
Serve it hot for the best texture, and customize with your preferred sauce, cheese, and toppings. Here’s how to make it.
Ingredients for Gluten Free Pizza Recipe Rice Flour
A few specialty flours, some pantry staples, and you’re ready for crispy glory.
| Ingredient | Amount | Notes |
|---|---|---|
| White Rice Flour 🌾 | 2 cups | Fine, super-fine preferred |
| Tapioca Starch 🌾 | ½ cup | Also called tapioca flour |
| Potato Starch 🥔 | ¼ cup | Not potato flour |
| Xanthan Gum 🧪 | 1 tsp | Essential for binding |
| Salt 🧂 | 1 tsp | Fine sea salt preferred |
| Sugar 🍚 | 1 tsp | Granulated, balances yeast |
| Instant Yeast 🍞 | 1 tsp | Active dry works too |
| Warm Water 💧 | 1 ¼ cups | 110°F, not hotter |
| Olive Oil 🫒 | 2 tbsp | Extra-virgin for flavor |
| Large Egg 🥚 | 1 whole | Room temperature preferred |
| Pizza Sauce 🍅 | ¾ cup | Low-moisture for crispiness |
| Shredded Mozzarella Cheese 🧀 | 1 ½ cups | Full-fat for best melt |
| Fresh Basil Leaves 🌿 | ¼ cup | Chopped, for topping |
[recipe_ingredient_scaler]
The rice flour is the backbone here—Bob’s Red Mill white rice flour is my go-to (find it at Whole Foods or most grocery stores). The xanthan gum is non-negotiable for structure, but if you’re out, psyllium husk powder at the same amount works in a pinch. Tapioca starch adds that essential chew; don’t swap it for cornstarch. The yeast? Any instant variety, but check the expiration—old yeast means flat crust.
No egg? 1 tbsp ground flaxseed plus 3 tbsp water (let it sit 5 minutes). Out of potato starch? Arrowroot powder at one-to-one ratio works. For a vegan version, skip the egg and use vegan cheese (Miyoko’s melts beautifully). The sauce matters—low-moisture is key to avoiding sogginess. If using fresh tomatoes, strain out the seeds first (worth the extra minute).
Dough keeps in the fridge for 24 hours (let it warm up before shaping). Baked crusts freeze well—1 month max—just reheat in a dry skillet to recrisp. Pre-measure dry ingredients and store in a jar for next time. Basil wilts fast, so add it fresh right before serving.
Why You’ll Love This Recipe
- I’ll be real: I always make a double batch, bake a few, and freeze the rest for those no-time nights.
- One Bowl Wonder: I just dump the rice flour, tapioca starch, potato starch, xanthan gum, and salt in a bowl, mix, and it’s ready for toppings.
- Crispy Chewy Magic: The combo of rice flour and starches gives that ideal crispy edge with a chewy center I’ve been chasing.
- Freezer Friendly: I’ll be real: I always make a double batch, bake a few, and freeze the rest for those no-time nights.
Step-by-Step Instructions for Gluten Free Pizza with Rice Flour
Here’s the method I use to achieve a crispy crust that holds up to all your favorite toppings.
Step 1: Combine Dry Ingredients for the Base
In a large mixing bowl, whisk together the 2 cups White Rice Flour, 0.5 cup Tapioca Starch, 0.25 cup Potato Starch, 1 tsp Xanthan Gum, 1 tsp Salt, 1 tsp Sugar, and 1 tsp Instant Yeast until thoroughly combined. I always use a fine-mesh sieve for the rice flour to prevent any grainy texture in the finished crust.
The xanthan gum is non-negotiable here—it mimics the gluten’s elasticity that we’re missing. Without it, your dough will crumble. Make sure these dry ingredients are well incorporated before adding any liquids.
Step 2: Create the Dough and Let It Rise
Add the 1.25 cups Warm Water, 2 tbsp Olive Oil, and 1 whole Large Egg to your dry mixture. Using a stand mixer with the paddle attachment, beat on medium speed for 3-4 minutes until the dough becomes smooth and slightly sticky. The dough will be thicker than traditional pizza dough but should still be pliable.
Transfer the dough to a lightly greased bowl, cover with a damp towel, and let it rise in a warm place for 1 hour or until doubled in size. I like to turn my oven on to its lowest setting, then turn it off before placing the dough inside—this creates the perfect proofing environment.
Step 3: Shape and Pre-Bake the Crust
Preheat your oven to 425°F. Once the dough has risen, divide it into 4 equal portions for individual pizzas or use it all for one large pizza. Place each portion on parchment paper and press it out into a thin, even circle—aim for about ¼-inch thickness.
Transfer the shaped dough (still on the parchment) onto a baking sheet. Bake for 8-10 minutes until the edges start to turn light golden brown and the surface appears dry to the touch. This pre-baking step is crucial for achieving that crispy texture we promised.
Step 4: Add Toppings and Finish Baking
Remove the pre-baked crust from the oven and spread 0.75 cup Pizza Sauce evenly over the surface, leaving a small border for the crust. Sprinkle 1.5 cups Shredded Mozzarella Cheese over the sauce, covering it completely.
Return the pizza to the 425°F oven and bake for an additional 10-12 minutes until the cheese is fully melted and bubbling, and the crust edges are deep golden brown. Watch closely during these final minutes to prevent over-browning.
Step 5: Finish with Fresh Basil and Serve
Remove the pizza from the oven and let it cool on the baking sheet for 2-3 minutes. This brief rest allows the cheese to set slightly so it doesn’t all slide off when you slice it.
Sprinkle the 0.25 cup Fresh Basil Leaves over the hot pizza just before serving. The residual heat will lightly wilt the basil, releasing its aroma. Slice with a sharp knife or pizza cutter and serve immediately while the crust is at its crispiest.
Pro Tips For Making Gluten Free Pizza Recipe Rice Flour
- Pre-bake the crust: Rice flour crusts stay soggy if you load toppings right away—bake it alone at 425°F for 8-10 minutes first to set the base. I learned this the hard way after three gummy pizzas in a row.
- Chill the dough: After mixing, let the dough rest in the fridge for 30 minutes—xanthan gum needs time to hydrate properly, and cold dough is easier to shape.
- Skip the overmixing: Once the xanthan gum activates, the dough gets gummy fast—mix just until combined, about 20-30 seconds, then stop.
- Use parchment paper: Rice flour dough sticks like crazy to pans and stones—line your baking surface with parchment to guarantee a clean release and save yourself the headache of scraping.
Dietary Considerations for This gluten free pizza recipe rice flour
Gluten-Free Adaptations
This recipe naturally avoids gluten by using rice flour and starches instead of wheat. I’ve tested it with Bob’s Red Mill white rice flour, which gives the best texture. The xanthan gum replaces gluten’s binding properties, so don’t skip it. 💪
Dairy-Free Options
For a vegan version, use Miyoko’s or another meltable vegan cheese instead of mozzarella. Swap the egg for 1 tbsp ground flaxseed plus 3 tbsp water, letting it sit for 5 minutes to thicken. The crust’s flavor remains neutral, so it pairs well with any plant-based toppings.
Nut Allergies
This recipe is nut-free, but always check your xanthan gum label, as some brands process it in facilities with nuts. Bob’s Red Mill xanthan gum is a safe bet. Also, confirm your toppings are nut-free, especially if using store-bought sauces or cheeses.
Egg Substitutes
If you’re out of eggs, use 1 tbsp psyllium husk powder plus 3 tbsp water as a binder. The dough will be slightly denser but still crispy after pre-baking. I’ve also had success with ¼ cup unsweetened applesauce for a milder flavor.
Low-FODMAP Adjustments
For sensitive digestive systems, replace the tapioca starch with arrowroot powder and omit the garlic in your sauce. The rice flour base is naturally low-FODMAP, but double-check your toppings. A simple olive oil and herb combo works beautifully.
Cross-Contamination
Use separate utensils and prep surfaces to avoid gluten exposure. I keep a dedicated wooden cutting board for gluten-free baking. Also, ensure your oven is clean and free of wheat residues, especially if baking multiple items. 🌟
Nutrition Facts
Frequently Asked Questions
Can I use only rice flour without other starches?
No, the blend of starches is essential. Rice flour alone creates a crumbly texture. The tapioca and potato starch add elasticity and crispness that rice flour can’t provide by itself.
Why pre-bake the crust?
Pre-baking for 8-10 minutes at 425°F removes moisture and sets the structure. This prevents soggy bottoms when you add sauce and toppings. It’s the secret to that coveted crispy crust!
Can I make this dough ahead of time?
Yes! The dough keeps in the fridge for 24 hours. Let it warm to room temperature before shaping. Baked crusts can also be frozen for up to 1 month.
What if my crust isn’t crispy?
Ensure your oven is fully preheated to 425°F and pre-bake the crust until light golden brown. Too much sauce or toppings can also make it soggy.

Trained in classic French technique but raised on slow-cooked ribs and spicy rubs, she blends culinary skill with smoke and soul.
- Recipe for Boneless Pork Chops in Cast Iron Skillet: Sear and Baste to Juicy Perfection - October 3, 2026
- Recipe for Boneless Cross Rib Roast: Slow-Roasted Beef with Herb Crust - October 3, 2026
- Hamburgers in Sauce Recipe Crock Pot: Slow-Cooked Savory Delight - October 3, 2026