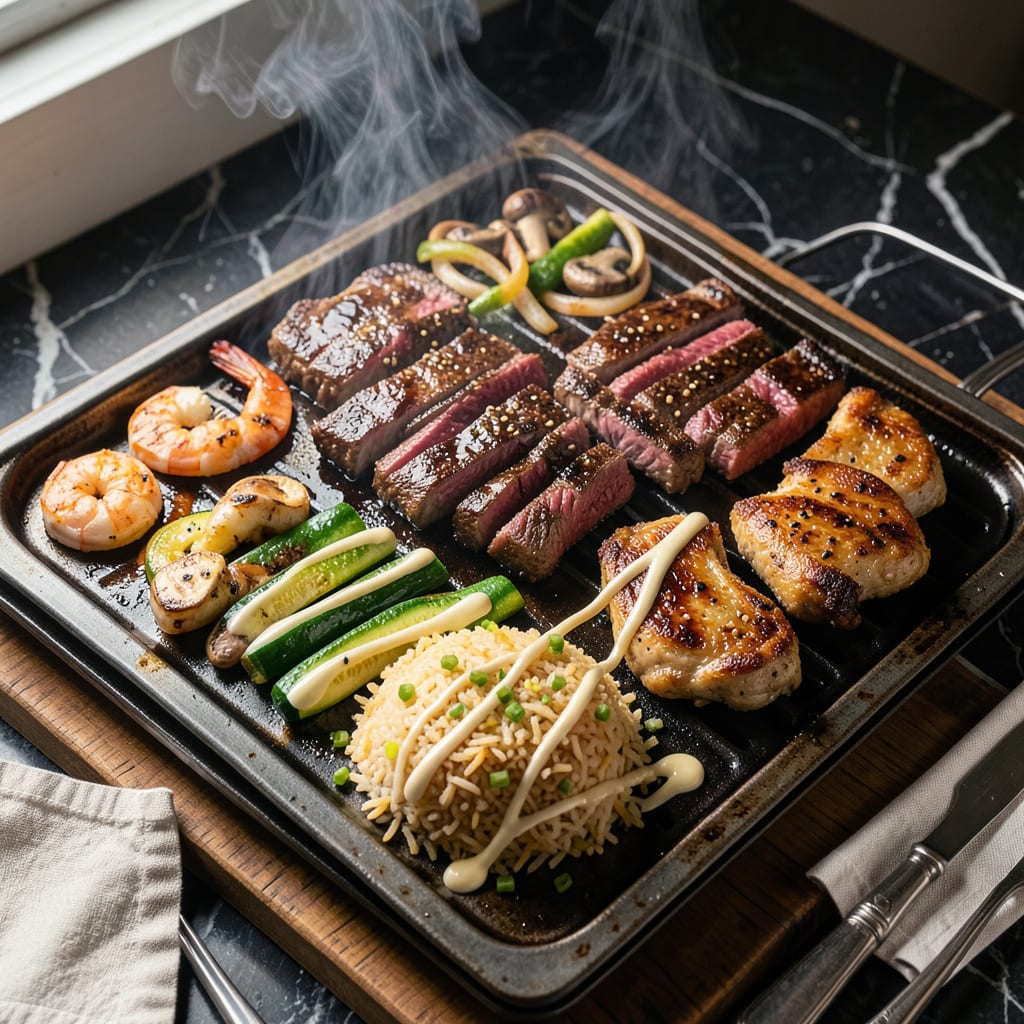
That first sizzle when meat hits a screaming-hot flat top grill? That’s the sound of restaurant-quality hibachi coming to life in your backyard. I’ve spent years perfecting this technique after too many disappointing attempts at recreating that signature smoky, savory magic at home. The key isn’t fancy equipment—it’s understanding how to work with what you’ve got.
What makes this different from just grilling? Everything happens on one surface at once—proteins searing, vegetables caramelizing, rice getting that perfect crispy bottom layer. I’ll show you exactly how to set up your flat top for maximum heat control, which proteins work best (spoiler: ribeye and shrimp are my go-tos), and the secret to getting those dramatic flame flares that make hibachi so theatrical.
By the time you’re done, you’ll have tender, smoky meat piled next to perfectly charred veggies, all crowned with that unmistakable yum yum sauce drizzle. The best part? That signature sizzle isn’t just for show—it locks in flavors that’ll make your taste buds think you’re sitting at a teppanyaki table. No passport required.
Whether you’re cooking for a crowd or just treating yourself to a weeknight upgrade, this method delivers that restaurant-style experience without the markup. Fire up that grill—we’re about to make some magic happen on steel.
📚 In This Guide
- What You’ll Need
- Instructions
- Tips and Common Mistakes
What Youll Need
- ● Flat top grill (minimum 24″ x 16″ cooking surface; propane or natural gas)
- ● Hibachi essentials: 1–2 lbs protein (chicken, steak, shrimp, or tofu—cut into ½” cubes)
- ● 2 cups white or fried rice (day-old works best!)
- ● 1 lb mixed veggies (zucchini, onions, mushrooms, carrots—julienned)
- ● 4 tbsp hibachi sauce (or mix ¼ cup soy sauce + 2 tbsp butter + 1 tbsp sugar)
- ● 2 tbsp sesame oil (for that authentic flavor!)
- ● Tools: 2 metal spatulas (1 for scraping, 1 for flipping)
- ● 1 grill scraper (or pumice stone for stubborn bits)
- ● Tongs (for handling protein)
- ○ Squeeze bottles (for oil/sauce—optional but handy!)
- ● Extras (for the full experience): Benihana-style onion volcano (1 large onion, halved)
- ● Lemon wedges & sriracha (for serving)
- ● Small bowls (for dipping sauces)
Step-by-Step Instructions for Hibachi on Flat Top Grill
Get ready to transform your backyard into a hibachi restaurant with these pro techniques!
Preheat and Prepare Your Flat Top Grill
Start by cranking up your flat top grill to high heat—you want it screaming hot, just like the pros use. Let it preheat for at least 10-15 minutes until you see faint wisps of smoke rising from the surface. This intense heat is what creates that signature hibachi sizzle and sear.
While the grill heats, gather all your ingredients and prep them exactly as you would for restaurant service. Have your proteins, vegetables, and sauces ready to go in separate bowls—hibachi cooking moves fast once you start! I like to arrange everything in the order I’ll cook it, left to right, for maximum efficiency.
Cook the Protein with Restaurant Flair
Begin with your protein—whether it’s chicken, steak, or shrimp—placing it on the hottest part of the grill. You’ll hear that satisfying sizzle immediately! Cook in a single layer without moving for 2-3 minutes until you see a beautiful golden crust forming. That’s the Maillard reaction working its magic.
Here’s the pro move: flip each piece only once using your spatula, then immediately create that classic hibachi “volcano” by stacking the protein pieces in a pyramid shape. This isn’t just for show—it helps cook the food evenly while building those gorgeous grill marks. For chicken or steak, cook until internal temperature reaches 165°F for chicken or 145°F for steak.
Create the Signature Vegetable Medley
Push your cooked protein to the cooler side of the grill (or remove it to a plate if space is tight). Now it’s time for the vegetables! Start with onions—spread them in a thin layer and let them caramelize for 2-3 minutes until translucent and just starting to brown. The smell alone will make your mouth water!
Add zucchini and mushrooms next, cooking them for 3-4 minutes until they develop color but still retain some crispness. The key is constant motion—keep those veggies moving with your spatula to prevent burning while developing that perfect char. Finish with a sprinkle of garlic butter for that unmistakable hibachi flavor that’ll have everyone asking for seconds.
Build the Famous Fried Rice
Clear a space on your grill and add a generous pat of butter. Let it melt completely, then add your cooked rice (day-old works best!) in a thin layer. The secret here is to let it sit undisturbed for 1-2 minutes to develop a crispy bottom layer—this is what gives hibachi rice its incredible texture.
Once you’ve got that crispy base, start chopping the rice with your spatula, mixing in soy sauce, sesame oil, and any additional vegetables or protein you want in your rice. Cook for another 2-3 minutes until everything is heated through and the rice has absorbed all those amazing flavors. The final touch? A drizzle of that magical yum yum sauce that makes hibachi rice irresistible!
Plate Like a Hibachi Chef
Now for the grand finale! Arrange your protein in a neat pile on one side of the plate, with the vegetable medley artfully fanned out beside it. Place a generous scoop of fried rice in the center—this is your canvas, so make it look as good as it tastes.
Don’t forget the finishing touches that make it restaurant-worthy: a sprinkle of sesame seeds, a drizzle of that creamy yum yum sauce, and maybe even a lemon wedge on the side. The presentation is half the fun of hibachi! Serve immediately while everything is piping hot and sizzling—your guests will feel like they’re getting the full teppanyaki experience right at your backyard table.
Tips and Common Mistakes for Restaurant-Style Hibachi at Home
Here’s what I’ve learned from countless backyard hibachi sessions—these little details make all the difference between good and spectacular!
Heat Control is Everything: That 10-15 minutes of preheating at high heat isn’t just a suggestion—it’s the foundation of perfect hibachi. You want to see those faint smoke wisps before you start cooking. If your grill isn’t screaming hot, you’ll miss that signature sizzle and those beautiful grill marks that make hibachi so special. Trust me, I’ve tried rushing this step, and the results just aren’t the same!
The Protein Pyramid Technique: When you stack your protein into that classic hibachi “volcano” shape after the initial 2-3 minutes of searing, you’re doing more than just showing off. This technique creates a mini oven effect that cooks the protein evenly while developing those gorgeous crosshatch grill marks. For chicken, I always check the internal temperature reaches exactly 165°F—no guesswork here!
Rice Crisp Secret: The 1-2 minutes you let the rice sit undisturbed in Step 4 is where the magic happens. This creates that coveted crispy bottom layer that makes hibachi rice so addictive. I use day-old rice because it’s drier and crisps up better than freshly cooked rice. When you hear that satisfying sizzle as the rice hits the hot butter, you’ll know you’re on the right track!
Vegetable Motion Matters: Those 3-4 minutes for zucchini and mushrooms might seem short, but constant motion is key. Keep those veggies moving with your spatula—it’s not just to prevent burning, but to develop that perfect char on multiple surfaces. I like to finish with garlic butter right at the end so it doesn’t burn but still infuses everything with that amazing aroma.
Pro Tips for Hibachi On Flat Top Grill
- Here’s what I’ve learned from countless backyard hibachi sessions—these little details make all the difference betwee…
- Heat Control is Everything: That 10-15 minutes of preheating at high heat isn’t just a suggestion—it’s the foundation…
- The Protein Pyramid Technique: When you stack your protein into that classic hibachi “volcano” shape after the initia…
Frequently Asked Questions
Got questions about cooking hibachi on a flat top grill? You’re not alone! Here are the most common queries—answered fast so you can get back to sizzling.
Can I use a regular flat top grill for hibachi, or do I need a special one?
No special grill needed! Any flat top (like a Blackstone or Camp Chef) works—just ensure it’s well-seasoned and heats evenly. Hibachi’s magic comes from high heat (400–450°F) and thinly sliced ingredients, not the grill itself. Pro tip: A griddle scraper helps mimic the teppanyaki “scrape-and-flip” action!
How long does it take to cook hibachi-style meals on a flat top?
Most hibachi dishes cook in 10–15 minutes total! Sear proteins (shrimp, chicken, or steak) for 2–3 minutes per side, then push them aside to cook veggies (onions, zucchini, mushrooms) for 3–5 minutes. Rice takes the longest—pre-cook it or use a fried rice shortcut with day-old grains.
What’s the best oil for hibachi on a flat top grill?
High-smoke-point oils like avocado, peanut, or refined sesame oil (450°F+) are ideal. Avoid olive oil—it burns at hibachi temps. For extra flavor, add a teaspoon of toasted sesame oil at the end. Bonus: Butter works for richness but can scorch—use sparingly!
My food sticks to the grill—how do I fix this?
Sticking = not enough heat or oil! Preheat the grill 10+ minutes on high, then add oil right before cooking. If food sticks, don’t force it—let it release naturally. For stubborn bits, deglaze with a splash of soy sauce or water and scrape clean between batches.
Can I make hibachi without a flat top grill? Alternatives?
Try these swaps:
- Cast-iron skillet: Gets screaming hot for searing (use a vent fan!).
- Electric griddle: Less smoky but great for indoor cooking.
- Outdoor grill grates: Use a grill mat or heavy pan for small ingredients.
Just crank the heat and keep ingredients moving!
Cooking hibachi on a flat top grill brings the thrill of a teppanyaki restaurant right to your backyard—without the hefty bill! 🍳 With the right prep, high heat, and a little flair, you can master those sizzling veggies, tender proteins, and iconic fried rice. Whether you’re hosting a crowd or just craving a fun weeknight meal, this method delivers big flavor with minimal fuss.
Ready to fire it up? Grab your spatula, pick a recipe (like garlic butter shrimp or teriyaki chicken), and turn your next cookout into an interactive experience. Don’t forget to snap a pic of that smoky sizzle—your followers will be begging for the secret! 📸

Trained in classic French technique but raised on slow-cooked ribs and spicy rubs, she blends culinary skill with smoke and soul.
- Recipe for Boneless Pork Chops in Cast Iron Skillet: Sear and Baste to Juicy Perfection - October 3, 2026
- Recipe for Boneless Cross Rib Roast: Slow-Roasted Beef with Herb Crust - October 3, 2026
- Hamburgers in Sauce Recipe Crock Pot: Slow-Cooked Savory Delight - October 3, 2026