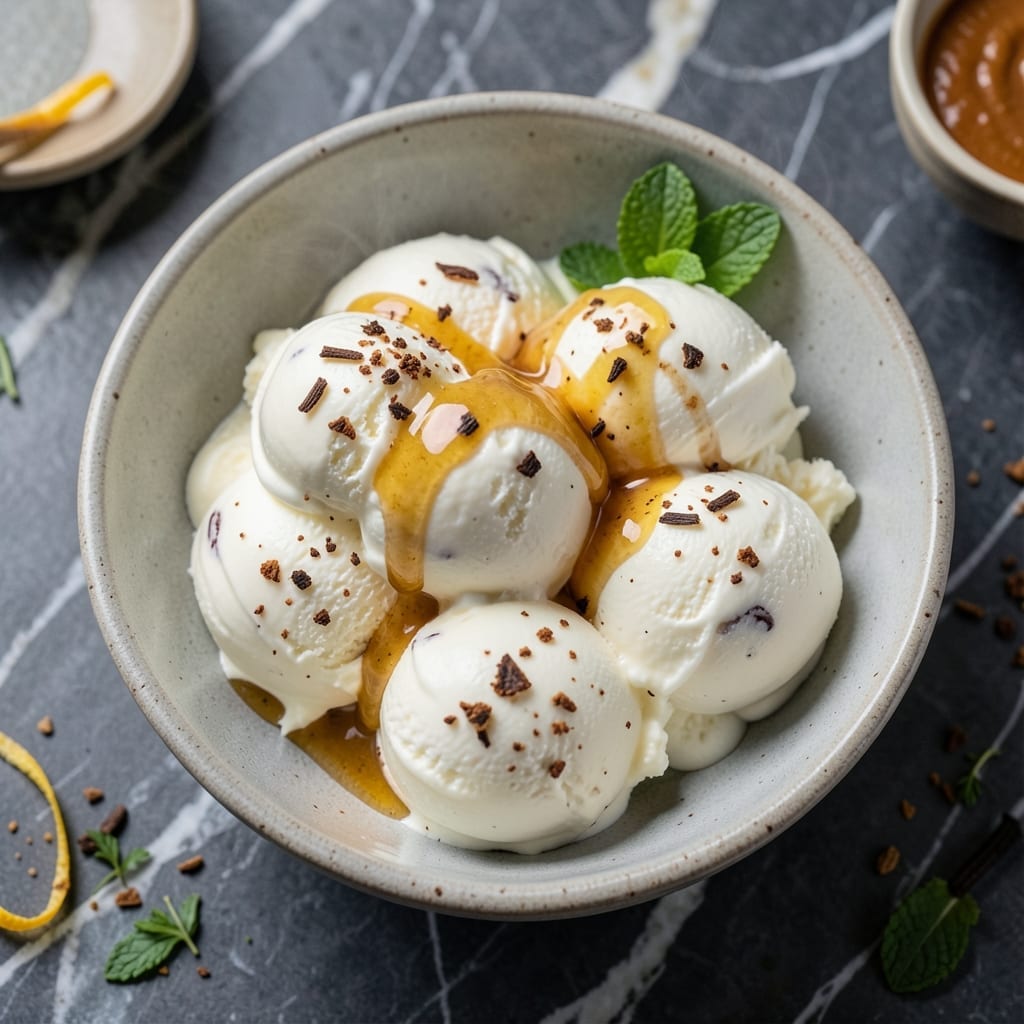
There’s nothing like the first bite of homemade vanilla ice cream, rich and velvety, with a depth of flavor that store-bought can’t match. This recipe is designed specifically for an electric maker, ensuring smooth, creamy results every time.
I developed this method to highlight the pure taste of vanilla while keeping the process simple and foolproof. The electric ice cream maker does most of the work, turning a basic custard into a luscious, scoopable dessert with minimal effort.
What you’ll get is a smooth and velvety treat that’s perfect on its own or as a base for mix-ins. The texture is what sets it apart—no icy crystals, just pure, creamy indulgence.
Serve it fresh or freeze for later. This is the kind of recipe that makes you wonder why you ever settled for less.
Ingredients for Homemade Vanilla Ice Cream Recipe for Electric Maker
Eight ingredients transform into creamy, dreamy ice cream magic. Probably have most already.
| Ingredient | Amount | Notes |
|---|---|---|
| Heavy Cream 🥛 | 2 cups | Full-fat for best texture |
| Whole Milk 🥛 | 1 cup | Cold, straight from fridge |
| Granulated Sugar 🍚 | ¾ cup | Fine white sugar preferred |
| Pure Vanilla Extract 🌿 | 1 tbsp | Real vanilla, not imitation |
| Vanilla Bean 🌿 | 1 whole | Split and scraped (optional) |
| Large Egg Yolks 🥚 | 6 whole | Room temperature preferred |
| Salt 🧂 | ¼ tsp | Fine table salt works |
| Whole Egg 🥚 | 1 whole | Room temperature preferred |
[recipe_ingredient_scaler]
The vanilla is non-negotiable here. Splurge on pure vanilla extract—imitation tastes like cheap perfume. A vanilla bean takes it next level (look for plump, moist pods at Whole Foods or specialty stores). The dairy needs to be full-fat—skip the 2%. I grab my heavy cream from Trader Joe’s (great quality, decent price). Eggs at room temp whisk up fluffier, but don’t stress if you forget.
No vanilla bean? Double the extract instead. Short on egg yolks? Whole eggs work at 1:1, but the texture won’t be quite as rich. Want it lighter? Swap some cream for half-and-half (but don’t go below 20% fat). The sugar can be reduced by a third without major issues. If using a vanilla bean paste, use 1 tablespoon to replace the extract.
Churned ice cream is best fresh—soft-serve texture straight from the maker. Harden in the freezer for 4 hours if you prefer scoops. Keeps 1 week in an airtight container (cover surface with parchment to prevent ice crystals). Freezes well for 2 months if you really need to save it.
Why You’ll Love This Recipe
- Set and Forget: I just pour the cream, milk, sugar, and vanilla into the electric maker and let it do the work—no stirring, no babysitting.
- Rich Vanilla Swirl: The combo of real vanilla bean and extract gives it that deep, speckled flavor that store-bought can’t touch.
- Sunday or Tuesday: Honestly, I make this for summer BBQs and random weeknights when the kids beg for dessert.
- Leftovers? Nope: Between us, there’s never any—my family polishes off the whole batch in one sitting.
Step-by-Step Instructions for Homemade Vanilla Ice Cream
Here’s how I make smooth, velvety ice cream in my electric maker every time.
Step 1: Infuse Cream with Vanilla Flavor
In a saucepan, combine the 2 cups Heavy Cream and the 1 cup Whole Milk over medium heat. While heating, split the 1 whole Vanilla Bean lengthwise and scrape out the seeds with the back of a knife. Add both the seeds and the pod to the cream mixture.
Heat until the mixture just begins to simmer at the edges—you’ll see tiny bubbles forming around the pan. Remove from heat, cover, and let the vanilla infuse for 15 minutes. This step draws out the deep, aromatic vanilla flavor that makes this ice cream so special.
Step 2: Whisk Egg Yolks and Sugar to Ribbon Stage
In a separate bowl, whisk together the 6 whole Large Egg Yolks, 1 whole Whole Egg, 0.75 cup Granulated Sugar, and 0.25 tsp Salt. I like to use a stand mixer for this, but a hand whisk works fine too. Beat until the mixture turns pale yellow and thickens slightly.
You’re aiming for the ribbon stage—when you lift the whisk, the mixture should fall in thick ribbons that hold their shape for a few seconds on the surface. This usually takes 3-5 minutes of vigorous whisking. The sugar helps stabilize the egg mixture, creating that signature creamy texture.
Step 3: Temper Eggs with Hot Cream Mixture
Slowly pour the warm cream mixture into the egg mixture while constantly whisking. This tempering process prevents the eggs from scrambling. Start with a thin stream, then gradually increase as the eggs warm up. I find that pouring from a measuring cup gives me better control.
Once fully combined, pour everything back into the saucepan and cook over medium-low heat. Stir constantly with a wooden spoon until the mixture thickens enough to coat the back of the spoon—this should take 5-8 minutes. Don’t let it boil or the eggs will curdle.
Step 4: Chill the Base Thoroughly
Strain the custard through a fine-mesh sieve into a clean bowl to remove any cooked bits of egg or vanilla pod pieces. Stir in the 1 tbsp Pure Vanilla Extract. This adds an extra layer of vanilla flavor to complement the infused bean.
Press plastic wrap directly onto the surface of the custard to prevent a skin from forming. Refrigerate until completely cold, at least 4 hours or overnight. Chilling is crucial for that ultra-smooth texture in your final ice cream.
Step 5: Churn in Electric Ice Cream Maker
Pour the chilled custard into your electric ice cream maker and churn according to the manufacturer’s instructions. This typically takes 20-25 minutes. The mixture will transform from liquid to a soft, creamy consistency, similar to soft-serve ice cream.
For the best texture, transfer to an airtight container and freeze for at least 4 hours to firm up. The result should be a rich, velvety ice cream with a perfect balance of sweetness and vanilla flavor in every scoop. Serve with your favorite toppings and enjoy!
Pro Tips For Making Homemade Vanilla Ice Cream Recipe For Electric Maker
- Chill the Base: Always refrigerate your cream, milk, and sugar mixture for at least 4 hours before churning—I learned this the hard way after ending up with soupy ice cream that took forever to set.
- Scrape the Bean: Split the vanilla bean lengthwise and scrape out every last speck of seeds; those tiny black flecks pack more flavor than the extract alone, and I was skeptical until I tried it.
- Skip the Overfill: Resist the urge to fill your electric maker past the max line, or you’ll end up with a messy, under-churned batch—my first three attempts taught me that lesson.
- Use Cold Bowls: Pop your mixing bowl and utensils in the freezer for 10 minutes before starting; it keeps the mixture colder longer, and after burning out my motor once, I never skip this step.
Troubleshooting Perfect Results
Too Icy Texture
If your ice cream turns out icy, the custard base likely wasn’t chilled enough before churning. I always refrigerate mine for at least 4 hours, but overnight is even better. Also, check your sugar content—0.75 cup is ideal for smoothness. 💡
Grainy Consistency
Graininess usually means the egg mixture curdled during cooking. To avoid this, temper the eggs slowly with the hot cream, pouring in a thin stream while whisking constantly. Keep the heat at medium-low and stir nonstop until it coats the back of a spoon.
Not Thick Enough
If your ice cream is too soft after churning, the custard might not have been thick enough before chilling. Cook it until it reaches 170-175°F—it should coat the spoon with a clear path when you run a finger through it. I use a ThermoWorks thermometer for precision.
Vanilla Flavor Weak
For deeper vanilla taste, don’t skip infusing the cream with the vanilla bean. If using only extract, increase to 2 tbsp. Also, let the custard chill longer—overnight allows the vanilla to fully develop. 🌟
Maker Overflows
Most electric makers have a max fill line—usually 1.5 quarts. This recipe makes about 1 quart, so you’re safe, but avoid overfilling. If scaling up, churn in batches to prevent spills.
Freezer Burn
To prevent freezer burn, press plastic wrap directly onto the ice cream’s surface before sealing the container. This minimizes air exposure. For long-term storage, use airtight containers and consume within 2 months.
Nutrition Facts
Frequently Asked Questions
Do I need to pre-chill the ice cream maker bowl?
Yes, most electric makers require the bowl to be completely frozen first. Check your manual, but typically it needs 12-24 hours in the freezer before use. A fully frozen bowl ensures proper churning.
Can I use imitation vanilla instead of pure extract?
Not recommended. Pure extract delivers the authentic flavor this recipe needs. Imitation can taste harsh and artificial. For best results, use 1 tbsp pure vanilla extract or a fresh bean.
How long does it keep in the freezer?
Properly stored in an airtight container, it stays fresh for up to 2 months. For best texture, enjoy within the first 2 weeks. Press plastic wrap on the surface to prevent ice crystals.

Trained in classic French technique but raised on slow-cooked ribs and spicy rubs, she blends culinary skill with smoke and soul.
- Recipe for Boneless Pork Chops in Cast Iron Skillet: Sear and Baste to Juicy Perfection - October 3, 2026
- Recipe for Boneless Cross Rib Roast: Slow-Roasted Beef with Herb Crust - October 3, 2026
- Hamburgers in Sauce Recipe Crock Pot: Slow-Cooked Savory Delight - October 3, 2026