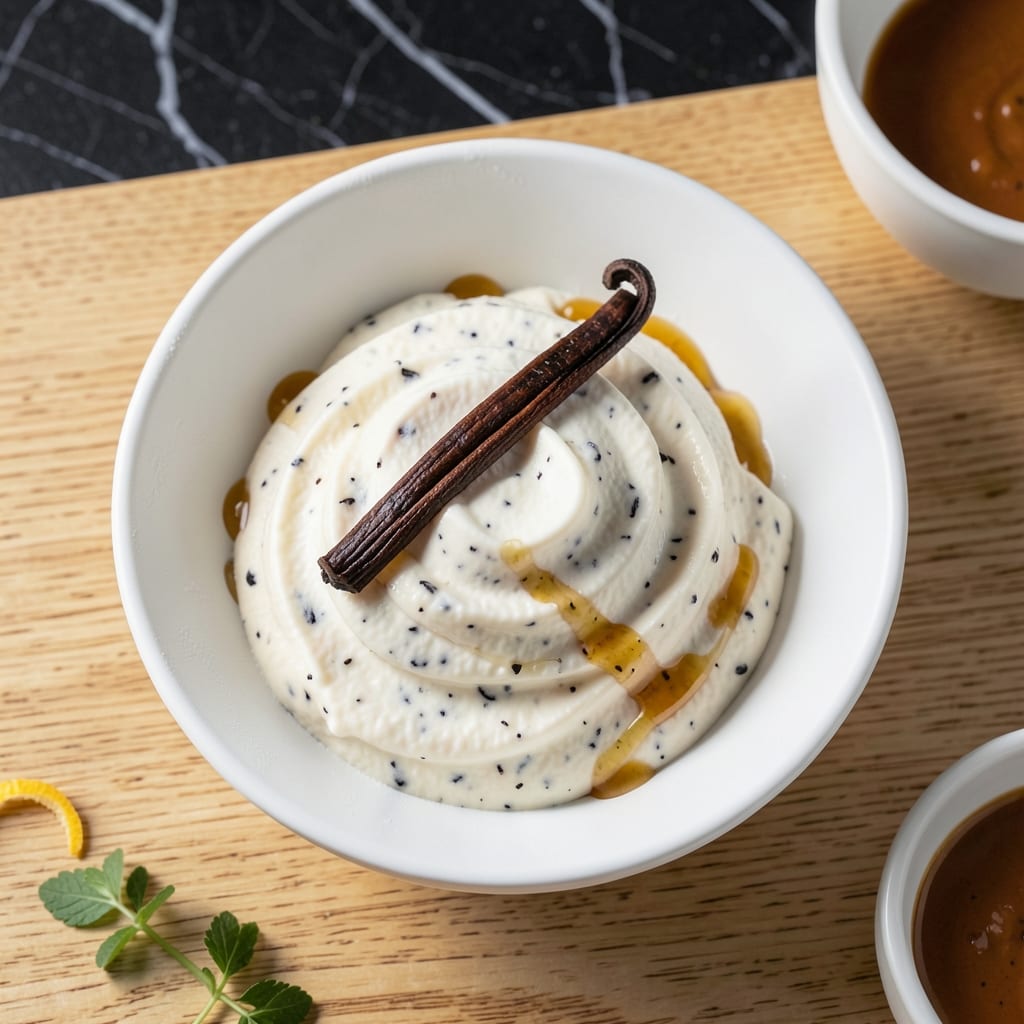
There’s nothing quite like the first taste of homemade vanilla ice cream—rich, velvety, and exactly how you remember it should be. I’ve refined this recipe over years of testing, ensuring it delivers that classic creamy texture every time.
The key lies in a simple custard base, properly chilled and churned in an ice cream freezer. This method guarantees a smooth, scoopable result without icy patches or graininess. David swears this version beats any store-bought pint.
What emerges from the freezer is pure comfort—sweet, aromatic vanilla in every bite, with a consistency that’s neither too hard nor too soft. It’s the kind of dessert that turns an ordinary evening into something special.
Perfect on its own, with fruit, or as a base for sundaes. Here’s how to make it right.
Ingredients for Ice Cream Freezer Recipe Vanilla
Rich custard base and real vanilla make this ice cream unforgettable. Simple, creamy perfection.
| Ingredient | Amount | Notes |
|---|---|---|
| Heavy Cream 🥛 | 2 cups | Full-fat for smooth texture |
| Whole Milk 🥛 | 1 cup | Cold, for custard base |
| Granulated Sugar 🍚 | ¾ cup | Fine white sugar works best |
| Vanilla Bean 🌿 | 1 whole | Split and scraped |
| Pure Vanilla Extract 💧 | 1 tbsp | High-quality for best flavor |
| Large Egg Yolks 🥚 | 6 pieces | Room temperature preferred |
| Salt 🧂 | ¼ tsp | Fine sea salt |
| Unsalted Butter 🧈 | 2 tbsp | Melted for richness |
| Vanilla Bean Paste 🌿 | 1 tsp | Optional for extra flavor |
| Heavy Whipping Cream 🥛 | ½ cup | Additional for lighter texture |
[recipe_ingredient_scaler]
The heavy cream is non-negotiable here. Look for ultra-pasteurized at Whole Foods or Trader Joe’s—it has a longer shelf life and churns beautifully. The vanilla bean? Madagascar bourbon beans are the gold standard (available at Penzeys or specialty stores). If you’re using a bean, split it lengthwise and scrape those tiny seeds out—they’re packed with flavor. Egg yolks add richness; the fresher, the better.
No vanilla bean? Pure vanilla extract at double the amount works fine. Swap heavy cream for full-fat coconut milk if you need a dairy-free option (though texture will differ). Sugar can be superfine for even smoother results, but regular granulated is fine. The butter adds depth—European-style unsalted has a higher fat content, which I prefer. Skip the vanilla bean paste if you’re already using a bean and extract.
The custard base keeps in the fridge for 24 hours before churning—actually improves flavor. Once churned, it’s best eaten within 1 week (though it won’t last that long). Store in an airtight container with parchment pressed directly on the surface to prevent ice crystals. Freezes well for up to 2 months if you must wait.
Why You’ll Love This Recipe
- 5-Minute Mix: No custard cooking, no fuss. Just whisk the cream, milk, sugar, and vanilla, then let the freezer do the work.
- Rich Vanilla Punch: The vanilla bean flecks and extract give it that deep, velvety sweetness you can’t get from store-bought.
- Party or Pajamas: Honestly, I’ve served this at summer BBQs and eaten it straight from the tub on a Tuesday night.
- Leftovers? Unlikely: But if there are any, they keep beautifully for weeks—though in my house, that’s wishful thinking.
Step-by-Step Instructions for Vanilla Ice Cream Freezer Recipe
Here’s the tested method that guarantees creamy, rich vanilla ice cream with perfect texture every time.
Step 1: Infuse Cream with Vanilla Bean
In a medium saucepan, combine the 2 cups Heavy Cream with the 1 cup Whole Milk. Split the 1 whole Vanilla Bean lengthwise, scrape out the seeds, and add both the seeds and pod to the cream mixture.
Heat over medium-low heat until the mixture just begins to simmer around the edges. You’ll see tiny bubbles forming—this should take about 5-7 minutes. Don’t let it boil. Remove from heat, cover, and let steep for 30 minutes to fully infuse the vanilla flavor.
Step 2: Temper Egg Yolks with Sugar
In a separate bowl, whisk together the 6 pieces Large Egg Yolks and 0.75 cup Granulated Sugar until the mixture turns pale yellow and slightly thickens. This should take about 2-3 minutes of vigorous whisking.
Slowly pour about 1 cup of the warm cream mixture into the egg yolks while whisking constantly. This tempering process prevents the eggs from curdling. Once combined, pour the tempered egg mixture back into the saucepan with the remaining cream.
Step 3: Cook Custard Base to Thicken
Return the saucepan to low heat and add the 0.25 tsp Salt and 2 tbsp Unsalted Butter. Stir constantly with a wooden spoon or silicone spatula for 8-10 minutes until the custard thickens enough to coat the back of the spoon.
You’ll know it’s ready when you can run your finger through the custard on the spoon and it leaves a clean path. Don’t let it boil, or the custard will curdle. Strain the mixture through a fine-mesh sieve into a clean bowl to remove the vanilla pod, then stir in the 1 tbsp Pure Vanilla Extract and 1 tsp Vanilla Bean Paste.
Step 4: Chill and Combine with Heavy Whipping Cream
Let the custard cool to room temperature, stirring occasionally to prevent a skin from forming. This takes about 20-30 minutes. Once cooled, cover and refrigerate for at least 4 hours or overnight until completely chilled.
Before churning, stir in the 0.5 cup Heavy Whipping Cream. This lightens the base slightly for an even creamier texture. The mixture should be very cold—cold enough that it’s almost slushy at the edges. This ensures smooth churning in your ice cream freezer.
Step 5: Churn and Freeze to Perfection
Pour the chilled custard into your ice cream freezer and churn according to the manufacturer’s instructions. This typically takes 20-25 minutes. The ice cream is ready when it resembles soft-serve and holds its shape when scooped.
Transfer to a freezer-safe container and freeze for at least 4 hours or until firm. For best texture, let it sit at room temperature for 5-10 minutes before scooping. The final product should be smooth, creamy, and rich with a beautiful vanilla flavor.
Pro Tips For Making Ice Cream Freezer Recipe Vanilla
- Chill the Base: I learned this the hard way—your custard needs at least 4 hours in the fridge before churning, otherwise it turns to soup in the freezer.
- Scrape the Bean: Don’t just toss in the vanilla bean—split it, scrape the seeds, and simmer them in the milk for maximum flavor.
- Skip the Shortcuts: Resist the urge to use imitation vanilla; the real extract and fresh bean make a noticeable difference in depth.
- Pre-Freeze the Bowl: Your ice cream maker’s bowl needs a solid 12-24 hours in the freezer—yes, even if you’re impatient like me.
Pro Cooking Tips for Perfect Results
Perfect Temperature Control
I always use a candy thermometer to monitor the custard base—aim for 170-175°F when thickening. This ensures the eggs are safely cooked without curdling. David insists this is the secret to my smooth texture every time. 🌡️
Chilling is Crucial
Don’t rush the chilling process. The custard must be completely cold (below 40°F) before churning. I often make the base the night before and let it chill overnight in the Cuisinart ice cream maker bowl pre-frozen for 24 hours.
Pre-Freeze the Bowl
Your ice cream freezer bowl needs at least 12-15 hours in the freezer before use. I keep mine in the freezer full-time during summer months. If you’re in a hurry, the Ninja Creami with its built-in freezing system is a great alternative.
Add Mix-Ins Slowly
If you’re adding extras like chocolate chips, fold them in during the last 2 minutes of churning. Too early and they’ll sink to the bottom. I learned this the hard way with crushed Oreos in my first batch!
Immediate Freeze for Best Texture
Transfer the churned ice cream to a loaf pan and press plastic wrap directly on the surface before freezing. This prevents ice crystals from forming. It’s firm enough to scoop after 4 hours.
Honestly, the first lick will transport you to Nana Mae’s diner counter. ❄️
Nutrition Facts
Frequently Asked Questions
Can I use vanilla extract instead of a vanilla bean?
Use 1 tbsp pure vanilla extract and skip the bean. For even better flavor, add 1 tsp vanilla bean paste as well.
Why does my ice cream turn icy?
This usually happens if the custard wasn’t chilled enough before churning. Ensure it’s below 40°F and your freezer bowl is fully frozen for 12-15 hours.
How long can I store homemade vanilla ice cream?
It stays fresh for up to 1 week in an airtight container. For longer storage, freeze for 2 months max. Let it sit at room temperature for 5-10 minutes before scooping.

Trained in classic French technique but raised on slow-cooked ribs and spicy rubs, she blends culinary skill with smoke and soul.
- Recipe for Fried Pork Chops With Flour: Crispy Crust and Juicy Centers - October 3, 2026
- Octopus Recipe Pan Fried: Crispy Edges With Tender Bites - October 3, 2026
- Recipe For Fried Pork Chops In An Iron Skillet: Crispy Crust With Juicy Centers - October 3, 2026