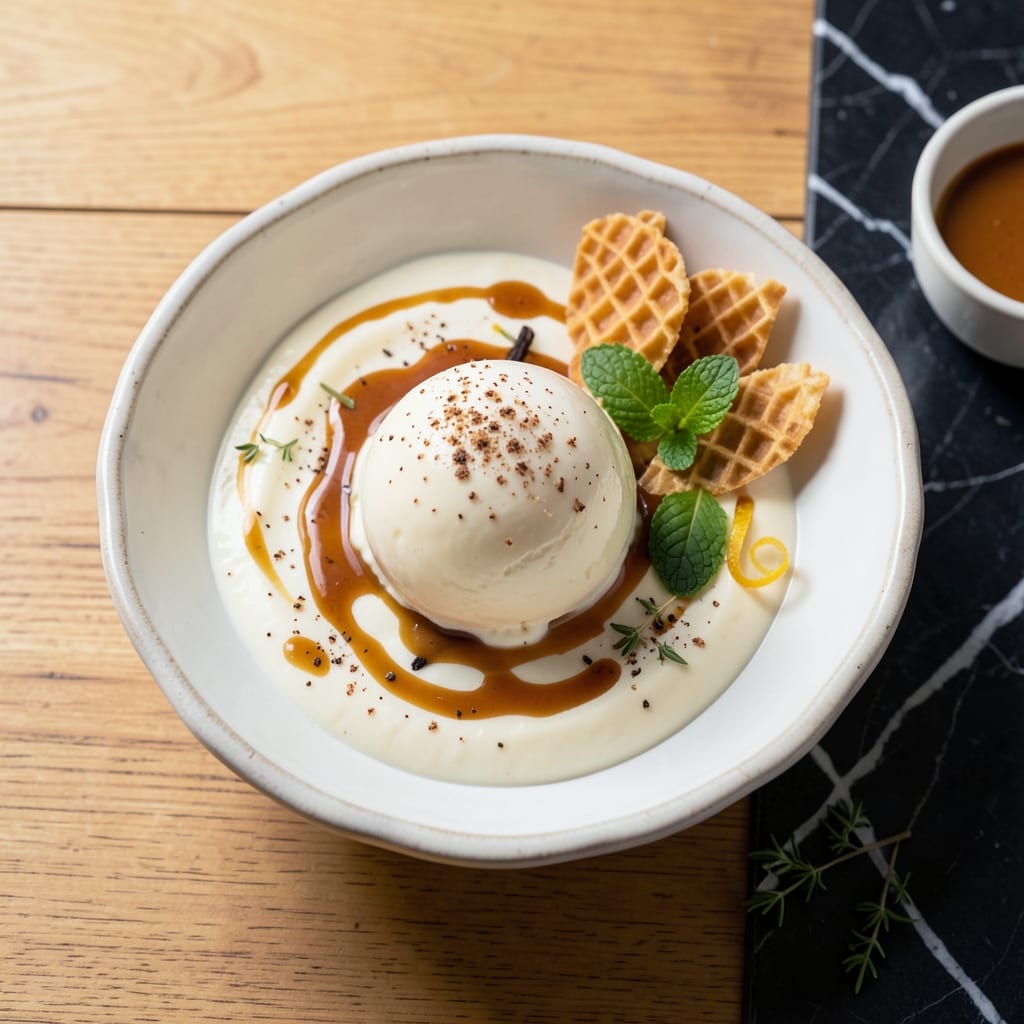
There’s nothing quite like the first bite of velvety homemade ice cream—rich, smooth, and perfectly balanced. This method delivers professional results with simple ingredients and a foolproof process.
I’ve refined this technique to ensure every batch turns out just right, without the need for expensive equipment. A little patience and attention to detail make all the difference.
The result is a creamy, dreamy treat that’s far superior to store-bought. Customize it with your favorite mix-ins or enjoy it in its pure, unadulterated form.
Here’s how to create this indulgent dessert in your own kitchen.
Ingredients for Ice Cream Recipe at Home Step by Step
Simple, quality ingredients transform into velvety homemade ice cream with ease.
| Ingredient | Amount | Notes |
|---|---|---|
| Heavy Cream 🥛 | 2 cups | Cold, full-fat for richness |
| Whole Milk 🥛 | 1 cup | Cold, full-fat preferred |
| Granulated Sugar 🍚 | ¾ cup | Fine white sugar for sweetness |
| Pure Vanilla Extract 🌿 | 1 tbsp | High-quality for best flavor |
| Large Egg Yolks 🥚 | 4 whole | Fresh, room temperature |
| Pinch of Salt 🧂 | 1 pinch | Balances sweetness |
| Vanilla Bean 🌱 | 1 whole | Split and scraped (optional) |
| Chocolate Chips 🍫 | ½ cup | Semi-sweet for mix-in |
| Crushed Nuts 🌰 | ¼ cup | Pecans or almonds (optional) |
| Rainbow Sprinkles 🎉 | 2 tbsp | For fun color (optional) |
[recipe_ingredient_scaler]
The heavy cream is non-negotiable here—organic from Whole Foods or Trader Joe’s has the best texture. I always grab Darigold if it’s available (that extra fat content makes a difference). The egg yolks should be fresh, and don’t skip the salt—it’s what makes that caramel flavor pop. For vanilla, Nielsen-Massey extract is worth the splurge, but any pure extract works fine.
No heavy cream? Full-fat coconut milk can work in a pinch (though the flavor changes). Swap granulated sugar for coconut sugar at 1:1, but expect a deeper color. Egg yolks are key for that custard base, but if you’re avoiding raw eggs, use pasteurized eggs. The vanilla bean is optional—extract alone gives great flavor. For mix-ins, any chocolate or nuts you have work.
The custard base keeps in the fridge for 24 hours before churning. Churned ice cream stays fresh for 1 week in an airtight container, but honestly it never lasts that long. Freeze for up to 3 months if you must (but texture suffers).
Why You’ll Love This Recipe
- No Churn Needed: I use just a whisk and a bowl—no fancy machine, and the egg yolks make it rich without extra effort.
- Vanilla Bean Magic: The pure vanilla extract gives it that deep, warm flavor you can’t get from store-bought tubs.
- Crowd-Pleasing Dessert: I’ve served this at birthdays and random Tuesday dinners—everyone always asks for the recipe.
- Leftovers? No Problem: Honestly, it keeps beautifully in the freezer, so I can scoop out a bowl whenever the craving hits.
Step-by-Step Instructions for Ice Cream
Here’s the method I use to create that ultra-creamy texture you crave.
Step 1: Heat Cream, Milk, and Half the Sugar
In a medium saucepan, combine the 2 cups Heavy Cream, 1 cup Whole Milk, and ½ of the 0.75 cup Granulated Sugar. Cook over medium heat until small bubbles form around the edges—this should take about 5-7 minutes.
Stir occasionally to prevent scorching at the bottom. You want the mixture hot but not boiling; look for that first sign of steam and tiny bubbles. I use a silicone spatula to scrape the bottom as I stir, ensuring even heating and preventing any sugar from burning.
Step 2: Temper the Egg Yolks with Hot Cream Mixture
In a separate bowl, whisk the 4 whole Large Egg Yolks, remaining 0.375 cup Granulated Sugar, and 1 pinch Pinch of Salt until the mixture lightens slightly. This usually takes about 2-3 minutes of vigorous whisking.
Slowly pour about 1 cup of the hot cream mixture into the egg yolks while whisking constantly. This tempering process prevents the eggs from curdling when exposed to heat. Once combined, pour the tempered egg mixture back into the saucepan with the remaining hot cream.
Step 3: Cook the Custard Base Until Thickened
Return the saucepan to low heat and cook, stirring constantly with a wooden spoon, until the custard thickens enough to coat the back of the spoon. This should take 8-10 minutes.
Watch for the mixture to reach 170-175°F on an instant-read thermometer. At this temperature, the custard will be thick enough that a line drawn with your finger on the back of a spoon leaves a clear path. Don’t rush this step—proper thickening is key to that velvety texture.
Step 4: Chill, Flavor, and Churn
Strain the custard through a fine-mesh sieve into a clean bowl to remove any cooked bits of egg. Stir in the 1 tbsp Pure Vanilla Extract and, if using, the seeds scraped from the 1 whole Vanilla Bean. Press plastic wrap directly onto the surface of the custard to prevent a skin from forming.
Refrigerate until completely chilled, at least 4 hours or overnight. Once cold, pour the custard into your ice cream maker and churn according to the manufacturer’s instructions, typically 20-25 minutes. The mixture should resemble soft-serve when done.
Step 5: Add Mix-Ins and Freeze Until Firm
During the last 2 minutes of churning, add the 0.5 cup Chocolate Chips, 0.25 cup Crushed Nuts, and 2 tbsp Rainbow Sprinkles if using. These mix-ins add texture and bursts of flavor throughout each scoop.
Transfer the ice cream to an airtight container and freeze for at least 4 hours or until firm. The result should be smooth, creamy, and packed with flavor. Scoop and serve with your favorite toppings for a truly indulgent treat.
Pro Tips For Making Ice Cream Recipe At Home Step By Step
- Temper the Yolks: Slowly drizzle about 1 cup of the hot cream mixture into the egg yolks while whisking constantly—I learned this the hard way after scrambling a batch.
- Chill Thoroughly: Let the custard base cool completely in the fridge, at least 4 hours or overnight. Sounds tedious, but it prevents ice crystals and gives a smoother texture.
- Use Full-Fat Dairy: Skip the low-fat milk or cream substitutes; the higher fat content in whole milk and heavy cream is non-negotiable for that rich, creamy result.
- Add Vanilla Last: Stir in the vanilla extract only after the custard has cooled slightly, around 170°F, to preserve its flavor—high heat can dull its aromatic punch.
Dietary Considerations for ice cream recipe at home step by step
Dairy-Free Version
Swap heavy cream and whole milk for full-fat coconut milk—use 2 cans (13.5 oz each). The flavor will have a tropical note, but the texture remains creamy. I’ve had great results with Thai Kitchen brand for its rich consistency. 🌱
Lower Sugar Option
Replace granulated sugar with ½ cup monk fruit sweetener or erythritol for a sugar-free version. Note that sugar alcohols can create a slightly icy texture, so add 1 tbsp vodka to lower the freezing point and keep it smooth.
Egg-Free Approach
Use 2 cups sweetened condensed milk and 2 cups heavy cream for a no-cook base. Skip the custard step entirely and simply whip the mixture before churning. This method works in a pinch, though the texture won’t be quite as rich.
Vegan Adaptation
Combine 2 cans coconut milk, ½ cup almond milk, and ¾ cup agave syrup. Use 2 tbsp cornstarch mixed with 2 tbsp water as a thickener instead of eggs. Cook the mixture until it thickens, then chill before churning. 💛
Lactose-Intolerant
Opt for lactose-free heavy cream and lactose-free whole milk—both are widely available in regular grocery stores. The process remains identical, and the flavor difference is minimal. I often use Organic Valley’s lactose-free line with excellent results.
Allergen Note
For nut allergies, omit crushed nuts and ensure your chocolate chips are processed in a nut-free facility. Enjoy Life brand makes great allergen-safe chocolate. Always check labels to be safe.
Nutrition Facts
Frequently Asked Questions
Do I need an ice cream maker?
You can make it without one! Freeze the custard in a shallow dish, stirring vigorously with a fork every 30 minutes for 3-4 hours. It won’t be as smooth but still delicious.
Why did my ice cream turn icy?
This usually happens if the custard wasn’t chilled enough before churning or if it sat too long in the freezer. Aim for 4 hours of churning time and store in an airtight container.
Can I use a different sweetener?
Yes! Maple syrup or honey work well—use ¾ cup and reduce other liquids slightly. For sugar substitutes, add 1 tbsp vodka to prevent iciness.
How long does homemade ice cream last?
It’s best enjoyed within 1 week for peak texture. After that, it may develop ice crystals. For longer storage, press plastic wrap directly on the surface.

Trained in classic French technique but raised on slow-cooked ribs and spicy rubs, she blends culinary skill with smoke and soul.
- Recipe for Boneless Pork Chops in Cast Iron Skillet: Sear and Baste to Juicy Perfection - October 3, 2026
- Recipe for Boneless Cross Rib Roast: Slow-Roasted Beef with Herb Crust - October 3, 2026
- Hamburgers in Sauce Recipe Crock Pot: Slow-Cooked Savory Delight - October 3, 2026