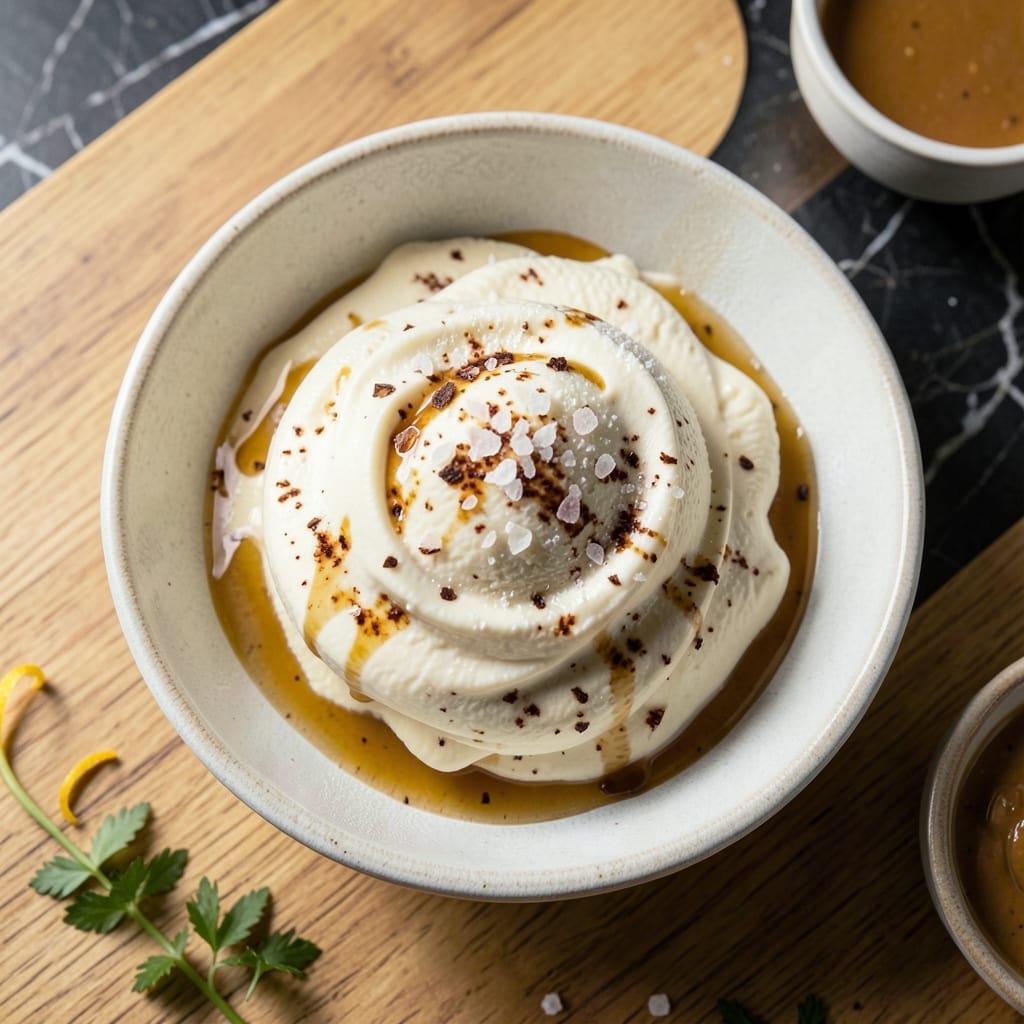
Homemade ice cream from a churner delivers a texture you simply can’t achieve any other way. I developed this recipe after years of testing ratios and techniques to perfect that ultra-smooth, creamy finish.
The key is balancing rich dairy with just enough sugar and air to create scoops that are velvety without being heavy. A 20-minute churn transforms the base into something far superior to store-bought versions.
What you’ll get is ice cream so smooth and luxurious, it rivals any artisanal shop. The churner does most of the work, while you control the flavors—vanilla bean, chocolate, or fruit swirls.
Serve it fresh for the best texture, or freeze for later. This method ensures consistent results every time.
Ingredients for Ice Cream Recipe for Churner
Rich dairy, sugar, and air create that luxurious, ultra-smooth texture you crave from a churner.
| Ingredient | Amount | Notes |
|---|---|---|
| Heavy Whipping Cream 🥛 | 2 cups | Full-fat for smooth texture |
| Whole Milk 🥛 | 1 cup | Cold, for balanced richness |
| Granulated Sugar 🍚 | ¾ cup | Fine grain for quick dissolving |
| Pure Vanilla Extract 🌿 | 2 tsp | Real vanilla, not imitation |
| Sea Salt 🧂 | ¼ tsp | Fine grain for even distribution |
| Large Egg Yolks 🥚 | 6 pieces | Room temperature for volume |
| Vanilla Bean 🌿 | 1 whole | Split and scraped (optional) |
| Unsalted Butter 🧈 | 2 tbsp | Melted, for richness |
| Light Corn Syrup 🧂 | 2 tbsp | Prevents ice crystals |
| Pure Almond Extract 🌰 | ½ tsp | Optional, for depth |
[recipe_ingredient_scaler]
The heavy cream is non-negotiable here. Look for at least 36% fat content—lower fat means less creaminess. I grab mine from Whole Foods or Trader Joe’s (their organic is reliable). Egg yolks add body and richness, so use fresh, high-quality eggs. The vanilla bean is optional but worth it if you want those pretty specks (and superior flavor). Splurge on Madagascar bourbon vanilla if you can find it.
No vanilla bean? Double the extract works fine. Short on cream? Half-and-half at a 1:1 swap but expect slightly less richness. The corn syrup helps with texture—agave or honey at the same amount can substitute. Want it even smoother? Vodka (1 tbsp) lowers the freezing point. And yes, the salt matters—Diamond Crystal dissolves perfectly.
Churn immediately after mixing for best texture. Stays fresh 1 week in an airtight container, but honestly it’s best within 3 days. Freeze leftovers for up to 3 months—just let it soften 10 minutes before scooping.
Why You’ll Love This Recipe
- Minimal Effort: I just dump the cream, milk, sugar, and vanilla in the churner and let it do the work. Honestly, it’s almost too easy.
- Classic Vanilla: The pure vanilla extract and sea salt make it taste like the premium stuff from the shop, but better.
- Crowd Pleaser: I serve this at summer BBQs and birthday parties—kids and adults alike go back for seconds.
- Budget Friendly: Heavy cream and milk are the only splurges, and it makes a whole batch for less than store-bought pints.
Step-by-Step Instructions for Ice Cream for Churner
This method delivers that ultra-smooth texture you expect from a homemade churned treat.
Step 1: Infuse the Cream with Vanilla
In a medium saucepan, combine the 2 cups Heavy Whipping Cream with the 1 whole Vanilla Bean (split and scraped). Heat over medium-low heat until the mixture reaches 175°F—you’ll see tiny bubbles forming at the edges and steam rising gently.
As it heats, stir occasionally to help distribute the vanilla seeds and prevent scorching. This infusion process extracts maximum flavor from the bean. Remove from heat once the temperature is reached and let it steep for 15 minutes to deepen the vanilla notes.
Step 2: Temper the Egg Yolks with the Sweetened Dairy
In a separate bowl, whisk together the 6 pieces Large Egg Yolks, 0.75 cup Granulated Sugar, and 0.25 tsp Sea Salt until the mixture turns pale yellow and thickens slightly, about 2 minutes. This step is crucial for achieving that rich, custard-like base.
Slowly pour in the 1 cup Whole Milk while continuing to whisk. Then, gradually add the warm cream mixture in a thin stream, whisking constantly to temper the eggs. This prevents them from scrambling and ensures a smooth, silky texture in your final product.
Step 3: Cook the Custard to Perfect Thickness
Return the mixture to the saucepan and cook over medium-low heat, stirring constantly with a wooden spoon or silicone spatula. You’re aiming for a thickness that coats the back of the spoon, reaching 170-175°F—this should take about 8-10 minutes.
If you run your finger along the spoon, it should leave a clean path that holds its shape briefly. This is your visual cue that the custard is ready. Immediately remove from heat to prevent overcooking, which can make the ice cream grainy.
Step 4: Add Final Flavorings and Chill Thoroughly
Strain the custard through a fine-mesh sieve into a clean bowl to remove any cooked bits of egg or vanilla bean. Stir in the 2 tbsp Unsalted Butter, 2 tbsp Light Corn Syrup, 2 tsp Pure Vanilla Extract, and 0.5 tsp Pure Almond Extract until fully melted and incorporated.
Press plastic wrap directly onto the surface of the custard to prevent a skin from forming. Refrigerate for at least 4 hours, but preferably overnight. This chilling step is essential for achieving that ultra-smooth, creamy texture once churned.
Step 5: Churn and Freeze to Perfection
Pour the chilled custard into your ice cream churner and process according to the manufacturer’s instructions, usually 20-25 minutes. The mixture should look like soft-serve when it’s ready—thick, creamy, and holding its shape with a slight sheen.
Transfer the churned ice cream to a freezer-safe container and freeze for at least 4 hours or until firm. For the best texture, let it sit at room temperature for 10 minutes before scooping. The result will be rich, velvety, and perfectly smooth.
Pro Tips For Making Ice Cream Recipe For Churner
- Chill the Base: Always refrigerate your cream-milk-sugar mixture for at least 4 hours before churning—I learned this the hard way after ending up with soupy ice cream that never firmed up.
- Use Full-Fat Dairy: Skip the low-fat milk or half-and-half; the high butterfat in whole milk and heavy cream is non-negotiable for that rich, creamy texture.
- Add Vanilla Last: Stir in the vanilla extract after the base cools, not while heating, to preserve its delicate flavor—my grandmother swore by this, and she was right.
- Pre-Freeze the Bowl: Pop your churner bowl in the freezer for 12+ hours beforehand, or the machine will struggle to freeze the mixture evenly (yes, even if you’re impatient like me).
Storing and Reheating Leftovers
Freezer Storage
Transfer your churned creation to an airtight container with parchment pressed directly on the surface. This prevents ice crystals from forming. It’ll keep beautifully for up to 3 months at 0°F or below. I always use Le Creuset containers for their tight seals. ❄️
Optimal Thawing
For the creamiest texture, move your container from freezer to fridge 20-30 minutes before serving. This softens it just enough for easy scooping while maintaining that perfect consistency. Never microwave—it creates a grainy texture.
Short-Term Fridge
If you’ll enjoy it within 3-4 days, store it in the coldest part of your fridge. The texture stays closest to fresh-churned. I find the back shelf works best in my Whirlpool model.
Reviving Leftovers
If it’s rock-hard from the freezer, let it sit at room temperature for 10-15 minutes. For quicker results, place the sealed container in a bowl of cold water for 5-7 minutes. Stir briefly before serving to restore creaminess.
Portion Control
Divide large batches into pint-sized containers before freezing. This lets you thaw only what you need. I reuse Ben & Jerry’s pint containers—they’re perfectly sized and free! 💡
Avoid Freezer Burn
Double-wrap your container in plastic wrap before freezing for extra protection. Squeeze out all air pockets. This simple step prevents that dreaded icy layer from developing on top.
Nutrition Facts
Frequently Asked Questions
Do I need to pre-chill the churner bowl?
Freeze the bowl for at least 12 hours before churning. This ensures the custard freezes evenly and achieves the right texture. Most models require this step for proper operation.
Can I make this without egg yolks?
You can, but the texture won’t be as rich. For an egg-free version, use 1 can (14 oz) of sweetened condensed milk mixed with 2 cups heavy cream and 1 tsp vanilla. Churn as directed.
Why did my ice cream turn icy?
This usually happens if the custard wasn’t cold enough before churning or if it sat too long in the freezer. Always chill the base for at least 4 hours and store in an airtight container with parchment on top.

Trained in classic French technique but raised on slow-cooked ribs and spicy rubs, she blends culinary skill with smoke and soul.
- Recipe for Boneless Pork Chops in Cast Iron Skillet: Sear and Baste to Juicy Perfection - October 3, 2026
- Recipe for Boneless Cross Rib Roast: Slow-Roasted Beef with Herb Crust - October 3, 2026
- Hamburgers in Sauce Recipe Crock Pot: Slow-Cooked Savory Delight - October 3, 2026