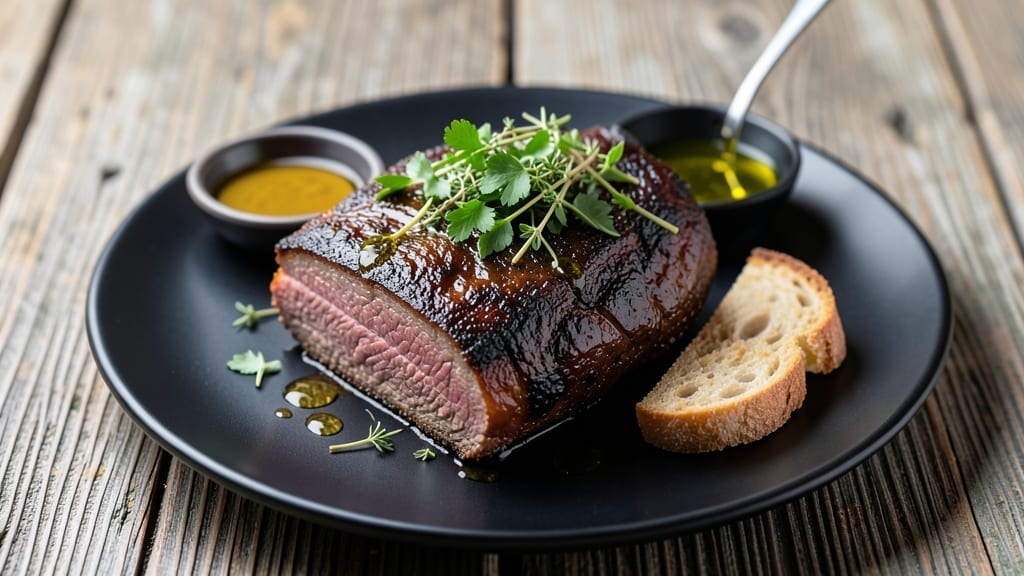
Transforming a tough cut of beef brisket into fall-apart tender perfection used to require hours in a smoker, but this Instant Pot beef brisket recipe proves you can achieve the same result with just a pressure cooker and minimal hands-on time.
The secret lies in a precise combination of searing, pressure cooking, and resting—techniques that mimic traditional slow-cooking while cutting hours off your schedule. After perfecting this method through countless test batches, I can confidently say this delivers restaurant-quality brisket without the fuss.
What sets this recipe apart is the balance of pressure cooking time and temperature, which breaks down connective tissue while preserving moisture. A proper sear before cooking builds deep, caramelized flavor, and the slow pressure release ensures the meat stays juicy.
Unlike traditional brisket methods, this approach requires no babysitting—just set it, forget it, and return to perfectly tender slices ready for serving. The result is meat that practically melts in your mouth, with a rich, smoky depth that rivals any smoked version.
By the time you’re done, you’ll have tender slices that separate easily against the grain, making every bite effortless. The method preserves all the natural juices while developing complex flavors, and the best part? You won’t need to monitor a smoker or wait all day for dinner.
This is ideal for busy weeknights when you still want a showstopping main course, or for meal prep when you can make a large batch and enjoy leftovers for days. The versatility of brisket means it pairs beautifully with classic sides like mashed potatoes, roasted vegetables, or crusty bread.
Whether you’re feeding a family or hosting a gathering, this recipe delivers professional results with minimal effort. The key steps—searing, pressure cooking, and proper resting—are simple but critical for achieving that signature tenderness.
Once you try it, you’ll never go back to traditional brisket methods again. Let’s get started on creating your most tender brisket yet.
Ingredients for instant pot beef brisket
Just a few pantry staples plus one key cut of beef. The secret to tender perfection lies in these simple ingredients.
| Ingredient | Amount | Notes |
|---|---|---|
| Beef Brisket 🥩 | 4 lb | Whole packer cut, trimmed of excess fat |
| Yellow Onion 🧅 | 1 whole | Yellow or red, sliced into half-moons |
| Garlic Cloves 🧄 | 6 cloves | Peeled, smashed for deeper flavor |
| Beef Broth 💧 | 2 cups | Low-sodium preferred, homemade or high-quality |
| Apple Cider Vinegar 🍎 | ¼ cup | For tenderizing and depth |
| Brown Sugar 🍚 | ¼ cup | Light or dark, packed |
| Smoked Paprika 🌶️ | 2 tbsp | For authentic smoky flavor |
| Ground Black Pepper 🌶️ | 1 ½ tsp | Freshly cracked for best flavor |
| Kosher Salt 🧂 | 1 ½ tsp | Diamond Crystal preferred |
| Olive Oil 🫒 | 2 tbsp | Extra-virgin for high-heat searing |
| Fresh Thyme 🌿 | ½ tsp | Leaves only, or 0.25 tsp dried |
| Fresh Rosemary 🌿 | ½ tsp | Chopped, or 0.25 tsp dried |
| Bay Leaves 🌿 | 2 whole | For aromatic depth |
[recipe_ingredient_scaler]
The brisket is non-negotiable here—whole packer cut from the grocery store’s butcher section is ideal. Look for good marbling, not too much fat, and ask for it to be trimmed of the thick fat cap. Costco or Whole Foods often have excellent quality, but any reputable grocery store’s meat department will do. The apple cider vinegar might surprise you, but it’s key for breaking down those tough fibers—Mott’s is my go-to brand, but any good-quality vinegar works. For the smoked paprika, Penzeys or McCormick are solid choices, but don’t overthink it if you’ve got a good jar at home.
No beef broth? Water plus 1 tbsp soy sauce gets you close, though you’ll lose some depth. Fresh thyme and rosemary are ideal, but dried works at half the amount if that’s what you’ve got. The bay leaves might seem like an afterthought, but they add a subtle complexity that takes this from good to restaurant-quality. For the brown sugar, light or dark doesn’t matter—just make sure it’s packed into the measuring cup. And if you’re short on time, pre-sliced onions from the produce section work perfectly for this recipe.
This brisket reheats beautifully—3-4 hours at 300°F in the oven with a splash of broth is ideal. Keeps for 5-6 days in the fridge, and freezes for up to 3 months if you want to make a big batch for meal prep. I like to slice it against the grain and portion it into containers right after cooking so it’s ready to grab for lunches. The leftovers actually get better the next day as the flavors meld together.
Why You’ll Love This Recipe
- I’ll be real: this recipe is exactly what you need when you want to feed a crowd without spending all weekend in the kitchen. The brisket keeps like a dream for 5-6 days in the fridge, and if you’re feeling ahead-of-the-game, it freezes beautifully for up to 3 months. Slice it up for tacos, sandwiches, or even just a big ol’ platter with mashed potatoes—it’s versatile enough to shine in any meal.
- No-Fuss Cooking: Honestly, this recipe is my secret weapon for nights when I’m too tired to stand over the stove for hours. Just sear that 4 lb brisket in batches with olive oil, dump in the aromatics, and let the Instant Pot do the heavy lifting for 90 minutes. The apple cider vinegar and brown sugar do all the tenderizing work while you’re doing something else—like watching TV or pretending to fold laundry.
- Smoky-Sweet Perfection: The smoked paprika and fresh rosemary give this brisket that deep, woodsy aroma that makes your kitchen smell like a Texas BBQ joint. But here’s what really sells it: the balance of flavors. The smokiness from the paprika, the tang from the vinegar, and the caramelized sweetness from the brown sugar? It’s the kind of dish where one bite has you reaching for another without thinking.
- Meal-Prep MVP: I’ll be real: this recipe is exactly what you need when you want to feed a crowd without spending all weekend in the kitchen. The brisket keeps like a dream for 5-6 days in the fridge, and if you’re feeling ahead-of-the-game, it freezes beautifully for up to 3 months. Slice it up for tacos, sandwiches, or even just a big ol’ platter with mashed potatoes—it’s versatile enough to shine in any meal.
Step-by-step instructions for Instant Pot beef brisket
Here’s how to transform a tough cut into melt-in-your-mouth perfection with minimal effort.
Sear the Brisket for Maximum Flavor
Heat the Instant Pot on the sauté function with the 2 tablespoons olive oil until shimmering. Working in batches if needed, sear the 4 lb beef brisket on all sides for about 3-4 minutes per side until developing a deep golden-brown crust. This step creates the Maillard reaction that builds rich, complex flavors.
While the brisket sears, slice the 1 yellow onion into half-moons and smash the 6 cloves garlic. Add them to the pot after removing the brisket, cooking for 1 minute until fragrant. This aromatic base will infuse the cooking liquid with depth. The reason we sear in batches is to maintain proper heat control—overcrowding steams instead of browns.
Build the Flavorful Liquid Base
Deglaze the Instant Pot with the ¼ cup apple cider vinegar, scraping up all those delicious browned bits from the bottom. This step captures all the flavor that would otherwise be lost. Add the 2 cups beef broth, ¼ cup brown sugar, 2 tablespoons smoked paprika, 1½ teaspoons kosher salt, and 1½ teaspoons ground black pepper, stirring to combine.
Return the seared brisket to the pot, fat-side up. Add the ½ teaspoon fresh thyme, ½ teaspoon fresh rosemary, and 2 bay leaves. The vinegar helps tenderize the meat while adding a subtle tang that balances the richness. Don’t skip adding all these spices—they work together to create that perfect brisket flavor profile.
Pressure Cook to Perfect Tenderness
Secure the lid and set the Instant Pot to high pressure for 90 minutes. This long cook time is crucial for transforming tough brisket into fork-tender meat. The pressure creates a moist environment that breaks down collagen while keeping the meat juicy. Real talk: don’t be tempted to check it early or you’ll lose pressure and extend cooking time.
Here’s the thing—after 90 minutes, let the pressure release naturally for 15 minutes, then quick-release the remaining pressure. This slow release prevents the meat from becoming dry. You’ll know it’s done when the brisket is fork-tender and easily pulls apart with minimal resistance. The internal temperature should reach about 205°F at this point.
Rest and Serve for Maximum Juiciness
Transfer the brisket to a cutting board and tent loosely with foil. Let it rest for at least 15 minutes before slicing—this resting period allows the juices to redistribute throughout the meat. The reason we wait is that brisket continues cooking slightly even after removing it from the pressure cooker, and resting prevents those precious juices from escaping.
Slice against the grain into ¼-inch thick pieces and serve immediately. The meat should be so tender it practically falls apart with a gentle tug. The cooking liquid can be reduced slightly on the stove if you prefer a thicker sauce, or served as-is for a lighter broth. Each bite should deliver that perfect balance of smoky, sweet, and savory flavors we worked so hard to create.
Pro Tips For Making Instant Pot Beef Brisket
- Sear in Batches: I used to rush this step and end up with steamed brisket instead of seared. The 4 lb brisket won’t fit all at once—work in batches, even if it means extra time. That golden crust? That’s where all the flavor hides, and skipping it means missing the point.
- Smash That Garlic: Don’t just chop those 6 cloves—smash them flat with the side of your knife. It releases more oils and flavor into the pot, and trust me, the difference in the final sauce is noticeable. Sounds weird, but it works.
- Don’t Rush the Release: After the 90-minute cook, let that pressure drop naturally for 15 minutes before quick-releasing. I learned this the hard way—skipping it turns your fork-tender brisket into something closer to shoe leather. The wait is worth it.
- Vinegar First, Always: Deglaze with the ¼ cup apple cider vinegar before adding the broth. It cuts through the browned bits better and starts tenderizing the brisket right away. Plus, it keeps the sauce from tasting flat—sounds simple, but it’s the thing that matters most.
Make-ahead tips for this recipe
Prep Ahead for Efficiency
I prep all my ingredients the night before to save time on cooking day. Trim the 4 lb brisket and pat it dry, then store it in an airtight container in the fridge.
Slice the 1 yellow onion and smash the 6 garlic cloves, keeping them in separate containers. This way, everything is ready to go when you’re. 🔥
Make the Flavor Base Early
Combine the 2 cups beef broth, ¼ cup apple cider vinegar, ¼ cup brown sugar, 2 tbsp smoked paprika, 1½ tsp kosher salt, and 1½ tsp black pepper in a bowl.
Add the ½ tsp fresh thyme, ½ tsp rosemary, and 2 bay leaves. Store this mixture in the fridge for up to 2 days—it’ll infuse with deeper flavor overnight.
Portion for Meal Prep
After cooking, slice the brisket against the grain into ¼-inch thick pieces and portion into meal prep containers. Store the cooking liquid separately to reheat with the brisket later.
This keeps everything fresh and ready for quick lunches or dinners. I like to freeze portions in quart-sized bags for up to 3 months.
Reheat Like a Pro
For the best texture, reheat brisket slices in the oven at 300°F for 3-4 hours with a splash of broth in a baking dish. Alternatively, use the Instant Pot’s sauté function with ½ cup broth for 10-15 minutes until heated through. This prevents drying out and keeps the meat juicy.
Save the Cooking Liquid
Don’t discard the brisket cooking liquid—it’s packed with flavor! Reduce it on the stove for 10 minutes to make a rich, savory sauce. Store it in the fridge for up to 5 days or freeze it for up to 3 months.
Drizzle it over brisket slices or use it as a base for gravies. ✨
Nutrition facts
Frequently asked questions
Why does the recipe call for a natural pressure release after cooking?
A natural pressure release for 15 minutes after the 90-minute cook time is key to keeping your brisket juicy. This gradual release prevents the meat from drying out by allowing the fibers to relax and retain moisture. Skipping this step can turn your tender brisket into a dry, tough slice—so don’t rush it!
Can I use a different type of vinegar instead of apple cider vinegar?
Apple cider vinegar is ideal for tenderizing, but white vinegar works in a pinch. Just note it may add a slightly sharper tang. The ¼ cup measurement is flexible—adjust to taste, but avoid vinegars with strong flavors like balsamic, as they can overpower the dish.
How do I know when the brisket is fully cooked?
Your brisket is done when it reaches an internal temperature of 205°F and easily pulls apart with a fork. The 90-minute pressure cook time is a good starting point, but always check with a meat thermometer. Overcooking is easy to do, so err on the side of slightly underdone if unsure.
What’s the best way to reheat leftovers without drying them out?
Reheat brisket slices in the oven at 300°F for 3-4 hours with a splash of broth in a baking dish. Alternatively, use the Instant Pot’s sauté function with ½ cup broth for 10-15 minutes. This keeps the meat moist and flavorful, just like the day it was cooked!
Can I skip the searing step and still get good results?
While possible, searing is essential for developing that rich, caramelized crust. Skip it, and you’ll miss out on the Maillard reaction—the chemical process that creates deep, complex flavors. Even if you’re short on time, sear for 2 minutes per side to capture some of that depth.

Trained in classic French technique but raised on slow-cooked ribs and spicy rubs, she blends culinary skill with smoke and soul.
- Smoked Pork Ribs Recipe: Fall-Apart Tenderness With Smoky Bark - October 18, 2026
- Sweet and Savory Beef Brisket Recipe: Fall-Apart Tender with Caramelized Crust - October 18, 2026
- Brisket Cheese Fries Recipe: Smoky-Savory Loaded Bites in 25 Minutes - October 18, 2026