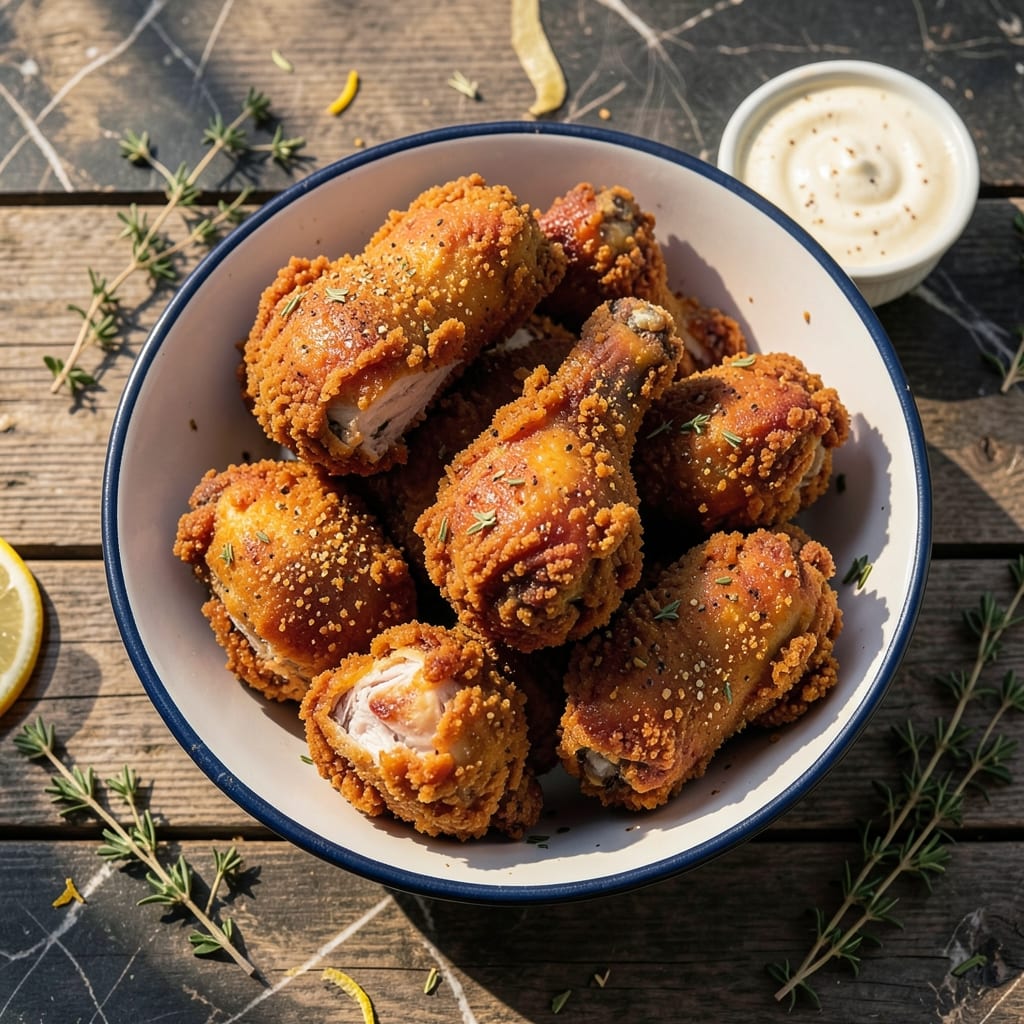
I’ve spent years perfecting this fried chicken to capture that signature crispy coating and juicy interior. This method delivers the iconic flavor and texture you know and love.
The secret lies in the 11-herb seasoning blend and a precise frying technique. I tested countless variations before landing on this foolproof approach that works in any home kitchen.
What you get is golden-brown chicken with a shatteringly crispy exterior and tender meat inside. The seasoning creates that unmistakable flavor profile that’s made this dish legendary.
Serve hot for the best experience. This recipe stays true to the original while being completely achievable at home.
Ingredients for Kentucky Fried Chicken Recipe Leaked
Eleven herbs, crispy coating, and that legendary flavor you know by heart.
| Ingredient | Amount | Notes |
|---|---|---|
| Chicken Thighs and Drumsticks 🍗 | 3 ½ lb | Bone-in, skin-on preferred |
| All-Purpose Flour 🌾 | 2 cups | For crispy coating |
| Buttermilk 🥛 | 2 cups | Full-fat for tenderness |
| Large Eggs 🥚 | 2 whole | For binding coating |
| Salt 🧂 | 1 tbsp | Diamond Crystal kosher |
| Black Pepper 🌶️ | 1 tbsp | Freshly ground coarse |
| Paprika 🌶️ | 1 tbsp | Sweet or smoked variety |
| Garlic Powder 🧄 | 2 tsp | Not garlic salt |
| Onion Powder 🧅 | 2 tsp | Fresh ground preferred |
| Dried Thyme 🌿 | 1 tsp | Crushed between fingers |
| Dried Basil 🍃 | 1 tsp | Rubbed to release oils |
| Dried Oregano 🍃 | 1 tsp | Mediterranean variety |
| Celery Salt 🧂 | 1 tsp | Essential for authentic flavor |
| Ground Ginger 🌿 | ½ tsp | Freshly ground preferred |
| White Pepper 🌶️ | ½ tsp | Milder than black pepper |
| Vegetable Shortening 🫒 | 4 cups | For frying, Crisco preferred |
[recipe_ingredient_scaler]
The seasoning blend is everything here. Penzeys or McCormick for the dried herbs—freshness matters more than brand. The paprika (go for Hungarian sweet if you can find it) gives that signature color. Celery salt is non-negotiable—Lawry’s is the classic choice. Chicken thighs and drumsticks stay juicier than breasts through the frying process, but use what you prefer.
No buttermilk? Whole milk plus 1 tbsp vinegar per cup works in a pinch. Missing a herb? Poultry seasoning can cover multiple bases (use half the amount). For the flour, self-rising adds extra crispiness if that’s your thing. The egg wash can be swapped for aquafaba if you need an egg-free version. Vegetable shortening is traditional, but peanut oil (higher smoke point) is a solid alternative.
The seasoned chicken can sit in the fridge for up to 24 hours before frying—improves flavor. Store leftovers in the fridge for 3-4 days (reheat in oven to maintain crispiness). The herb blend keeps in a cool, dark place for 6 months.
Why You’ll Love This Recipe
- I’ll be real: chicken thighs and drumsticks are cheap, and this recipe turns them into something restaurant-worthy. Leftovers? Still amazing cold the next day.
- No Fuss Coating: Honestly, the buttermilk and egg dip makes the flour cling effortlessly—no complicated steps, just dunk and coat.
- That Secret Crunch: The double-dredge in seasoned flour gives it that iconic crispy shell with juicy meat underneath. My kids fight over the dark meat pieces.
- Weekend or Wednesday: Between us, this tastes just as good for Sunday dinner as it does for a quick weeknight fix when I’m short on time.
Step-by-Step Instructions for this Fried Chicken
This method delivers that signature crispy coating and juicy meat you know and love.
Step 1: Prepare the Seasoned Flour Coating
In a large bowl, whisk together the 2 cups all-purpose flour with all the spices: 1 tbsp salt, 1 tbsp black pepper, 1 tbsp paprika, 2 tsp garlic powder, 2 tsp onion powder, 1 tsp dried thyme, 1 tsp dried basil, 1 tsp dried oregano, 1 tsp celery salt, 0.5 tsp ground ginger, and 0.5 tsp white pepper.
I crush the dried herbs between my fingers as I add them to release their oils and maximize flavor. The mixture should look uniformly speckled with the spices—this ensures every bite of coating delivers that perfect blend of seasoning.
Here’s the thing—this isn’t just flour, it’s the foundation of the signature taste. Set this aside while you prepare the chicken.
Step 2: Create the Buttermilk Egg Wash
In another large bowl, whisk together the 2 cups buttermilk and 2 whole large eggs until fully combined. The buttermilk should be full-fat for the best results—its acidity tenderizes the chicken while the fat adds richness.
I’ve found that letting the chicken soak in this mixture for at least 20 minutes makes a noticeable difference in tenderness. The proteins in the buttermilk also help the coating adhere better, preventing it from falling off during frying.
Real talk: don’t rush this step. Patience here rewards you with juicier, more flavorful chicken that stays crispy longer after cooking.
Step 3: Coat the Chicken Thoroughly
Working with one piece at a time, remove the chicken from the buttermilk mixture, letting any excess drip off. Dredge it in the seasoned flour, pressing firmly to ensure the coating adheres to every crevice. The 3.5 lb chicken thighs and drumsticks should be completely covered with no bare spots.
Place the coated chicken on a wire rack set over a baking sheet. This allows air to circulate underneath, preventing the coating from becoming soggy as it rests. Let the chicken rest for 10-15 minutes—this helps the coating set and adhere better during frying.
Don’t skip this (I learned the hard way)—resting creates a better crust and prevents the coating from falling off when it hits the hot oil.
Step 4: Fry to Golden Perfection
In a deep, heavy pot or Dutch oven, heat the 4 cups vegetable shortening to 350°F over medium-high heat. Use a deep-fry thermometer to monitor the temperature—it should maintain a steady 350°F throughout frying.
Carefully lower 3-4 pieces of chicken into the hot oil, being careful not to overcrowd the pot. Fry for 12-15 minutes for dark meat, turning occasionally, until the coating is deep golden brown and the internal temperature reaches 165°F.
The oil should bubble steadily around the chicken but not violently. If the oil smokes, it’s too hot—reduce the heat slightly. Maintain the oil temperature between 325-350°F for even cooking and perfect crispiness.
Step 5: Drain and Rest Before Serving
Using tongs, remove the fried chicken from the oil and transfer it to a clean wire rack set over a baking sheet. This allows excess oil to drain while keeping the coating crispy—paper towels can make the coating soggy.
Let the chicken rest for 5-10 minutes before serving. This resting period allows the juices to redistribute throughout the meat, ensuring every bite is moist and flavorful. The coating will also crisp up slightly as it cools.
Serve hot for the best experience. The coating should be shatteringly crisp with a beautiful golden-brown color, while the meat inside stays juicy and tender. Each piece should have that perfect crunch with every bite.
Pro Tips For Making Kentucky Fried Chicken Recipe Leaked
- Brine Overnight: Soak the chicken in buttermilk with an extra tablespoon of salt for at least 12 hours—this is the only way to get that signature juiciness without drying out the dark meat.
- Double-Dip the Flour: After the first dredge in flour, let the pieces rest 5 minutes, then dip again in buttermilk and flour for a thicker, crunchier crust that actually stays put.
- Skip Cold Oil: I learned this the hard way—always start frying in oil that’s already at 350°F or the coating absorbs grease and turns soggy instead of crisp.
- Use Thighs First: Fry the thighs first since they take longer, then add drumsticks after 2-3 minutes to prevent overcooking the smaller pieces while waiting for the thighs to finish.
Creative Variations of This Recipe
Extra Crispy Version
For an even crunchier coating, try the double-dredge method. After the first flour coating, dip back in the buttermilk wash, then dredge in flour again. I use self-rising flour for the second coating to add extra lift. Fry at 375°F for 14-16 minutes until deep golden. 💪
Spicy Nashville Hot
Add 2 tbsp cayenne and 1 tbsp brown sugar to the flour mix. After frying, brush with ½ cup hot oil mixed with 3 tbsp reserved spice blend and 2 tbsp honey. Serve on white bread with pickles—this Portland food truck favorite never disappoints.
Air Fryer Adaptation
Spray coated chicken lightly with avocado oil and air fry at 375°F for 20-22 minutes, flipping halfway. For extra crispiness, spritz with oil again after flipping. I use my Ninja Foodi for this when I want to avoid the deep fry mess.
Gluten-Free Option
Replace all-purpose flour with a 1:1 gluten-free blend like King Arthur’s. Add 1 tsp xanthan gum to help binding. The coating won’t be quite as crispy but still delivers great flavor. My cousin with celiac disease swears by this version.
Oven-Baked Alternative
Place coated chicken on a wire rack over a baking sheet. Bake at 400°F for 35-40 minutes, flipping halfway and spraying with oil before and after flipping. The texture differs from frying but still satisfies that fried chicken craving. 🔥
Honey Butter Glaze
Melt 4 tbsp butter with ¼ cup honey and 1 tsp vanilla. After frying, brush this glaze over the hot chicken. The sweetness balances the savory seasoning beautifully—Lily asks for this version every time.
Nutrition Facts
Frequently Asked Questions
What makes the coating so crispy?
The double-dredge method and resting time create that signature crunch. Using 350°F oil and a wire rack for draining prevents sogginess.
Can I use chicken breasts instead of thighs?
Yes, but reduce frying time to 10-12 minutes. Breasts cook faster and can dry out if overcooked. Thighs stay juicier.
How do I store leftovers?
Keep in an airtight container in the fridge for 3-4 days. Reheat in the oven at 375°F for 10 minutes to restore crispiness.
Why is celery salt essential?
It’s the secret flavor in the original blend. 1 tsp gives that authentic taste—skip it and the flavor won’t be the same.

Trained in classic French technique but raised on slow-cooked ribs and spicy rubs, she blends culinary skill with smoke and soul.
- Recipe for Boneless Pork Chops in Cast Iron Skillet: Sear and Baste to Juicy Perfection - October 3, 2026
- Recipe for Boneless Cross Rib Roast: Slow-Roasted Beef with Herb Crust - October 3, 2026
- Hamburgers in Sauce Recipe Crock Pot: Slow-Cooked Savory Delight - October 3, 2026