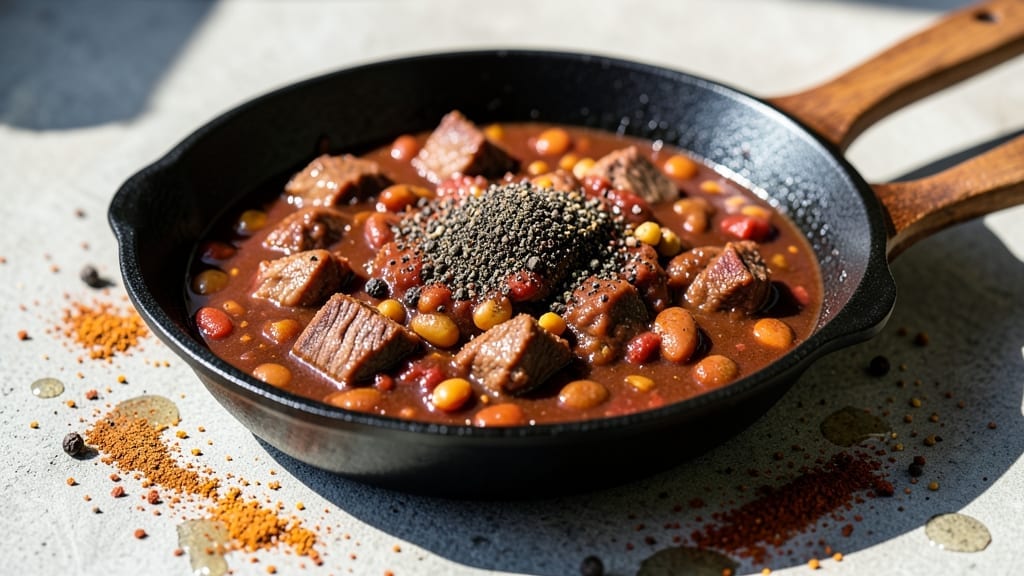
This Meat Church brisket chili recipe delivers the kind of deep, smoky flavor that turns weeknights into a celebration—where tender, fall-apart brisket meets a rich, spiced chili base that lingers long after the last bite.
The day I realized French technique could elevate my rubs changed everything, and this recipe is the proof. Slow-cooked brisket infused with bold spices becomes the heart of a chili so satisfying, it feels like a hug in a bowl.
The secret lies in the smoke-kissed brisket, which we’ll slow-cook until it practically melts at the touch, then shred it into the chili for layers of meaty depth.
No shortcuts here—just hours of low-and-slow cooking that transforms tough cuts into something so tender, you’ll want to eat it with a spoon. The chili base builds on that foundation with beans, tomatoes, and a blend of spices that warm the soul without overpowering the brisket’s natural richness.
By the time you’re done, you’ll have a pot of chili that’s restaurant-quality—thick, hearty, and packed with flavor in every spoonful. The brisket falls apart easily, soaking up the chili’s spices while adding a depth of meaty satisfaction.
Top it with cheese, onions, or jalapeños if you like, but the real magic is in how the flavors come together on their own. This is the kind of dish that disappears fast, leaving everyone asking for seconds.
Perfect for game day, chilly evenings, or whenever you crave a meal that feels like a warm embrace. The brisket’s smoky aroma fills the house long before it’s ready, and the chili keeps giving flavor even the next day.
Let’s get cooking—this is the brisket chili you’ll make again and again.
Ingredients for meat church brisket chili
Pantry staples meet smoky brisket magic—just 18 ingredients for a chili that tastes like a hug.
| Ingredient | Amount | Notes |
|---|---|---|
| Beef Brisket 🥩 | 3 lb | Flat cut, well-marbled |
| Yellow Onion 🧅 | 2 whole | Diced, medium size |
| Garlic Cloves 🧄 | 6 cloves | Peeled, rough chopped |
| Diced Tomatoes 🍅 | 28 oz | Canned, fire-roasted preferred |
| Tomato Paste 🍅 | ½ cup | Smooth, no sugar added |
| Chili Powder 🌶️ | 2 tbsp | Smoked paprika blend |
| Ground Cumin 🌿 | 1 tbsp | Toasted for depth |
| Dried Oregano 🍃 | 1 tbsp | Mexican preferred |
| Cayenne Pepper 🔥 | ½ tsp | Adjust for heat |
| Beef Broth 💧 | 2 cups | Low-sodium preferred |
| Dark Brown Sugar 🍚 | 1 tbsp | For depth, not sweetness |
| Black Beans 🌱 | 15 oz | Canned, drained and rinsed |
| Kidney Beans 🌱 | 15 oz | Canned, drained and rinsed |
| Apple Cider Vinegar 🍎 | 1 tbsp | Brightens flavors |
| Bay Leaves 🌿 | 2 whole | Dried, removed before serving |
| Salt 🧂 | 1 ½ tsp | Kosher or sea salt |
| Black Pepper 🌶️ | ½ tsp | Freshly ground |
| Olive Oil 🫒 | 2 tbsp | For searing brisket |
[recipe_ingredient_scaler]
The brisket is non-negotiable here. Look for a 3-pound flat cut with good marbling—Costco or Whole Foods usually have the best quality. Trim any hard fat, but leave the marbling intact. That’s where the flavor hides. If you can’t find brisket, chuck roast works in a pinch, but it won’t have the same tenderness. The beans? Low-sodium canned beans save time, but rinse them well to cut excess salt. For the tomatoes, fire-roasted canned tomatoes add natural smokiness that cuts prep time.
No smoked paprika? Mix chili powder with a pinch of liquid smoke—it’s a game-changer. Running low on cumin? Ground coriander at half the amount works in a bind. The apple cider vinegar might sound weird, but it brightens the whole dish—trust me. For the broth, low-sodium is key so you don’t over-salt later. The tomato paste can be the squeeze tube kind from Trader Joe’s if you hate opening cans. And if you’re worried about the cayenne, start with half the amount—you can always add more later.
This chili tastes even better the next day—make a double batch if you can. Store in airtight containers for 5 days in the fridge or freeze for 3 months. The brisket will keep for 3 days in the fridge before shredding, so plan ahead. Freeze the shredded brisket separately if you’re not using it all at once. Leftovers reheat beautifully—just add a splash of broth if it gets too thick.
Why You’ll Love This Recipe
- Let’s be real: brisket isn’t cheap, but this recipe stretches it into something legendary. The low-sodium beef broth and canned tomatoes keep costs down, while the toasted cumin and tomato paste elevate it to showstopper status. And if you’ve got leftovers? They taste even better the next day—5 days of fridge life, no stress.
- One-Pot Magic: Honestly, this isn’t just a chili—it’s a Dutch oven hug. You toss everything in that same pot, let it simmer while you do dishes, and boom, dinner’s done. No last-minute scrambling to clean three pans or stress over multiple burners. Just 2 hours of hands-off magic with the beef brisket and fire-roasted tomatoes doing all the heavy lifting.
- Smoky Brisket Bliss: That first bite? The dark brown sugar and smoked paprika in the chili powder turn the brisket into a smoky, meaty cloud. It’s not just tender—it’s fall-apart-tender, like someone gave it a back rub and told it to relax. The apple cider vinegar cuts through the richness just enough to keep it from feeling heavy, and the garlic and cumin? Chef’s kiss.
- Feed the Crowd: This isn’t your sad, single-serving chili. We’re talking 3 pounds of brisket and 30 oz of beans—enough to fill bowls for a game day, a family reunion, or even a last-minute potluck. Freeze half for later, and you’ve got a backup plan for when life gets chaotic. Plus, the kidney beans and black beans bulk it up so you’re not left with a sad, meaty puddle.
Step-by-step instructions for meat church brisket chili
Here’s how to create that legendary brisket chili with rich, smoky depth and melt-in-your-mouth brisket.
Sear the Brisket for Deep Flavor
Heat a heavy Dutch oven over medium-high heat and add the 2 tablespoons olive oil. Once shimmering, place the 3 lb beef brisket in the pan, fat-side down. Press down gently with a spatula for 30 seconds to ensure full contact with the hot oil. This creates that essential crust that carries all the chili’s flavors.
Sear for 8-10 minutes, turning occasionally, until the exterior develops a deep brown crust and the internal temperature reaches 145°F. You’ll know it’s ready when the meat releases easily from the pan. Remove the brisket and set aside on a plate – it’ll continue cooking in the chili.
Build the Chili Base
In the same Dutch oven, add the 2 diced yellow onion and cook for 5 minutes until softened. Add the 6 rough chopped garlic cloves and cook for another 30 seconds until fragrant. Here’s where it gets good – stir in the 2 tablespoons chili powder, 1 tablespoon ground cumin, 1 tablespoon dried oregano, and ½ teaspoon cayenne pepper. Cook for 30 seconds to toast the spices and release their aromas.
Pour in the 28 oz diced tomatoes (with juices) and ½ cup tomato paste, stirring well to combine. Add the 2 cups beef broth, 1 tablespoon dark brown sugar, 1 tablespoon apple cider vinegar, 1½ teaspoons salt, and ½ teaspoon black pepper. Bring to a simmer, then add the 2 bay leaves. Return the brisket to the pot, making sure it’s mostly submerged.
Simmer Until Tender
Cover the Dutch oven and simmer on low heat for 2 hours. This long cook time is crucial – it breaks down the brisket’s connective tissue, creating that legendary fall-apart texture. Stir occasionally to prevent sticking, but don’t worry if it doesn’t all come apart yet. The brisket will finish cooking in the chili.
After 2 hours, remove the brisket and shred it using two forks. Return the shredded brisket to the pot and add the 15 oz black beans and 15 oz kidney beans. Stir well to combine. The chili should now have a thick, rich consistency with the brisket fully integrated into the sauce.
Finish and Serve
Continue simmering uncovered for another 30-45 minutes until the chili reaches your desired thickness. Taste and adjust seasoning – you might need an additional ½ teaspoon salt or pinch of cayenne pepper. The chili should be rich with brisket flavor, not just tomato-based.
Remove and discard the bay leaves before serving. This chili tastes even better the next day as the flavors meld together. Serve with cornbread or crusty bread to soak up all that delicious chili juice. The brisket should be completely tender, falling apart at the touch, with a deep, smoky flavor that makes every bite worth it.
Pro Tips For Making Meat Church Brisket Chili
- Press That Brisket: The 30-second press with a spatula isn’t just about even browning—it’s what gets that meat clinging to the sear. Skip it, and you’ll end up with a brisket that releases too easily (and lacks that smoky crust that carries the chili’s soul). I used to rush this, and my chili always tasted like it was missing something—turns out, it was the flavor locked in that crust.
- Toast Those Spices: That 30-second toast of the chili powder, cumin, oregano, and cayenne isn’t optional—it’s where the magic happens. I learned this the hard way when I added them straight to the tomatoes and wondered why my chili tasted flat. The spices need to bloom and release their oils first, or you’re just stirring in dust.
- Don’t Rush the 2-Hour Simmer: Low and slow isn’t just a cliché—this brisket needs those 2 hours covered to break down properly. I once cut it to 90 minutes for a dinner rush, and the meat was still chewy. The connective tissue needs time, and there’s no shortcut. Trust the process, even if it means your kitchen smells like heaven for hours.
- Use Fire-Roasted Tomatoes: The recipe says “fire-roasted” for a reason—those charred, caramelized tomatoes add depth the regular canned ones can’t match. I used plain diced once, and the chili tasted one-dimensional. If you’re stuck with regular, add a pinch of smoked paprika to the pot to compensate. The difference is noticeable.
Pro cooking tips for this dish
Mastering the Sear
That initial sear on your 3 lb brisket is where the magic starts. I swear by using a heavy Dutch oven for even heat distribution—no flimsy pots here. Press down on that fat side for 30 seconds to create a crust that’ll hold up to the chili’s long simmer.
The moment it releases easily from the pan at 145°F, you know you’ve got that perfect balance of color and texture. This isn’t just about searing; it’s about building flavor layers that’ll infuse into every bite.
Spice Toasting Secrets
Don’t skip toasting your spices! After cooking the onions and garlic, stir in the 2 tbsp chili powder, 1 tbsp cumin, and 1 tbsp oregano for 30 seconds until fragrant. This releases their essential oils, which will transform your chili from good to legendary.
I like to use Mexican dried oregano from specialty spice shops—it’s got that earthy depth that cuts through the richness of the brisket. Trust me, toasted spices taste completely different!
The Two-Hour Rule
The 2-hour simmer is non-negotiable for that fall-apart texture. I’ve tried rushing it, but the brisket just won’t cooperate. Use a low heat setting and cover your pot—this creates a moist environment that tenderizes the meat without drying it out.
If your stove struggles with low heat, consider using an oven set to 200°F for more consistent results. The key is patience—this isn’t a race, it’s a transformation.
Bean Timing Trick
Add your beans in the final 30 minutes of cooking to avoid mushiness. The 15 oz black beans and 15 oz kidney beans should be warm but still hold their shape. This timing gives them just enough time to absorb the chili’s flavors without turning into a paste.
I like to give them a quick rinse before adding to remove any excess starch that could make the chili too thick. It’s a small step that makes a big difference!
Finishing Touches
Before serving, always taste and adjust. That 1 tbsp apple cider vinegar I mentioned earlier brightens everything up—add a splash if it tastes too heavy. The chili should sing with brisket flavor, not just tomato acidity.
I also recommend letting it rest for 10 minutes after cooking—it’ll thicken slightly as the juices redistribute. This is when you know you’ve created something special.
Equipment Upgrades
If you’re serious about this recipe, invest in a Meater Plus for precise temperature control. I use mine to monitor the brisket’s internal temp during the simmer phase, ensuring it never exceeds 203°F.
For the Dutch oven, I swear by Le Creuset—it’s an investment, but it lasts forever. And if you’re cooking for a crowd, double the recipe and use a 6-quart pot to avoid overcrowding.
Nutrition facts
Frequently asked questions
Why does this brisket chili need such a long simmer time?
The 2-hour simmer is key to breaking down the brisket’s tough connective tissue, turning it into tender, fall-apart meat. This slow cooking process infuses the brisket with the chili’s bold spices, creating layers of flavor that develop over time. Patience here makes all the difference for that legendary texture!
Can I substitute other meats for the brisket?
While you can use chuck roast, it won’t achieve the same tenderness. The brisket’s fat marbling creates that melt-in-your-mouth consistency. If you must substitute, opt for slow-cooked pork shoulder—it holds up better to the long simmer but won’t have the same depth of beefy flavor.
How do I know when the brisket is fully cooked?
After the 2-hour simmer, remove the brisket and check if it shreds easily with a fork. The internal temperature should reach 203°F when properly cooked. If it resists, return it to the pot for another 30 minutes. The brisket should be fork-tender and falling apart naturally.
What if my chili is too thin after cooking?
Simmer uncovered for another 15-20 minutes to reduce the liquid. If needed, mash 1-2 mashed potatoes or stir in 1 tablespoon cornstarch mixed with water. Avoid over-thickening—this chili should still be saucy and rich. The beans will help absorb excess liquid as it cools.

Trained in classic French technique but raised on slow-cooked ribs and spicy rubs, she blends culinary skill with smoke and soul.
- Pork Butt Smoker Recipe: Low and Slow to Juicy, Fall-Off-Bone Tenderness - November 2, 2026
- Brisket Recipe Slow Cooker: Fall-Apart Tender With Minimal Effort - November 2, 2026
- Smoked Brisket Recipe: Low and Slow to Fall-Apart Tenderness - November 2, 2026