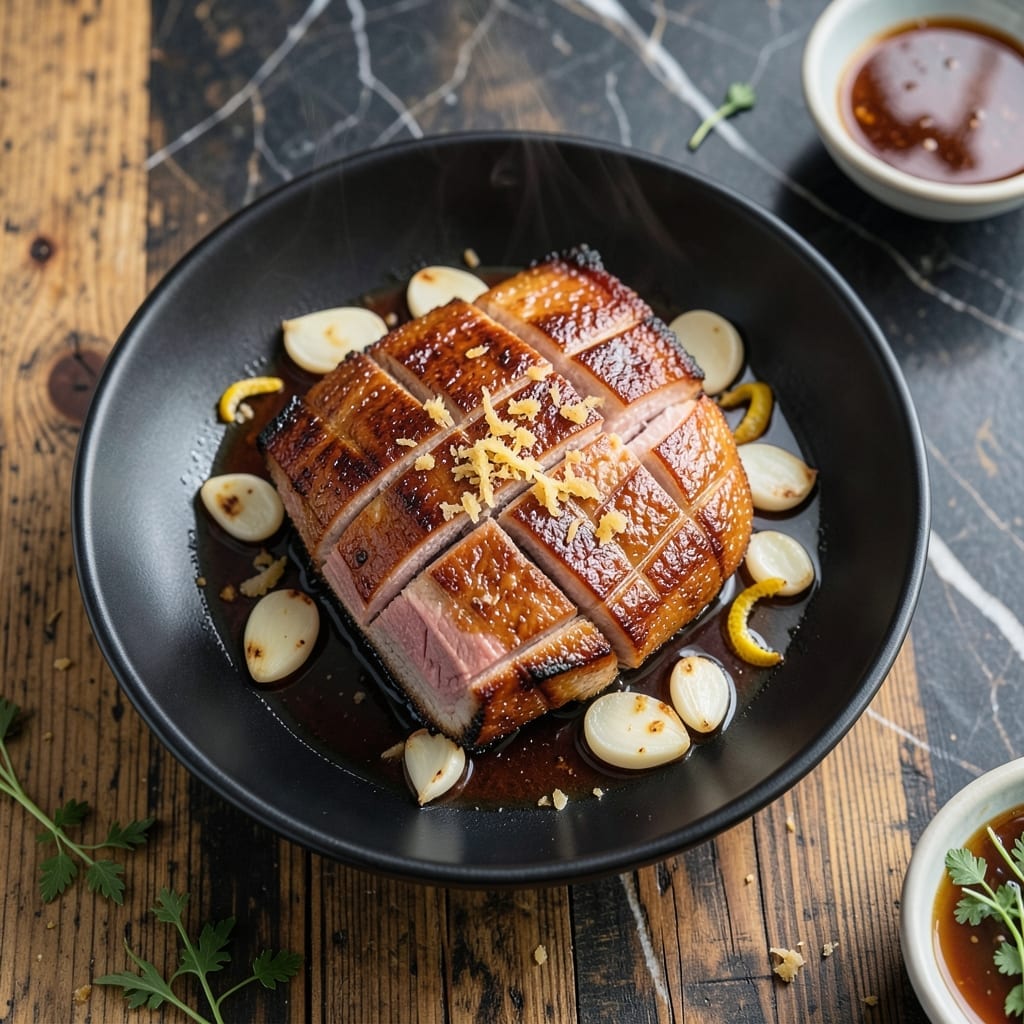
This oven-baked pork belly delivers that signature crispy skin and tender layers you’d expect from Momofuku, without the fancy equipment. Honestly, I was shocked how well this method works at home.
The secret is a two-step cooking process: first low and slow to render the fat, then high heat to achieve that shatteringly crispy exterior. It’s the kind of dish that makes you look like a pro with minimal effort.
What you’ll get is pork belly that falls apart at the touch, with a caramelized crust that crackles with every bite. The meat stays juicy while the skin transforms into something magical.
Serve it sliced over rice with pickled veggies for the full experience. This technique never fails to impress.
Ingredients for Momofuku Pork Belly Recipe Oven
Pantry staples plus a quick stop at the butcher. Nothing exotic, just good stuff.
| Ingredient | Amount | Notes |
|---|---|---|
| Pork Belly 🥓 | 2 lb | Skin-on, evenly cut slab |
| Kosher Salt 🧂 | 2 tbsp | Diamond Crystal preferred for texture |
| Granulated Sugar 💧 | 1 ½ tbsp | For skin caramelization |
| Black Pepper 🌶️ | 1 tsp | Freshly ground for best flavor |
| Garlic Cloves 🧄 | 6 cloves | Minced for rub |
| Fresh Ginger 🌿 | 1 tbsp | Grated, peeled first |
| Soy Sauce 🫒 | ¼ cup | Low-sodium for control |
| Rice Vinegar 🍋 | 2 tbsp | For balancing richness |
| Sesame Oil 🫒 | 1 tsp | Toasted variety for aroma |
| Jasmine Rice 🍚 | 2 cups | Uncooked, for serving |
| Cucumber 🥒 | 1 whole | Thinly sliced for pickles |
| Carrot 🥕 | 1 whole | Julienned for pickles |
| Rice Wine Vinegar 🍋 | ½ cup | For quick pickling |
| Sugar 💧 | 2 tbsp | For pickle brine |
| Salt 🧂 | 1 tsp | For pickle brine balance |
[recipe_ingredient_scaler]
The pork belly is the star—look for a 2-pound slab with even fat marbling at your butcher or Whole Foods. Skin-on is non-negotiable for that shatteringly crisp finish. Ask them to keep the skin intact if they try to trim it. I’ve had luck with Snake River Farms online when local options are slim. The fat cap should be thick but not excessive (about 1 inch is ideal).
No pork belly? Pork shoulder won’t give you the same layers, but it’s a decent backup (just don’t expect the crispy skin). Out of rice vinegar? Apple cider vinegar works in a pinch. For the pickles, swap cucumber for daikon radish or skip them entirely—though they really cut through the richness. The soy sauce can be tamari for gluten-free needs.
This keeps 5 days in the fridge (reheat in the oven to recrisp the skin). The pickles? 2 weeks in a jar. Pork belly freezes raw for 3 months—just thaw it overnight before cooking. Always slice against the grain for the best texture.
Why You’ll Love This Recipe
- Set It and Forget: I just mix salt, sugar, and pepper, rub it on the pork belly, and let the oven do the work.
- Sweet-Savory Magic: The sugar caramelizes while the garlic and pepper add depth—it’s that perfect balance I crave.
- Crowd-Pleasing Centerpiece: Between us, this is my go-to for dinner parties since it feels fancy but couldn’t be simpler.
- Leftovers? Yes Please: Honestly, the slices reheat beautifully for sandwiches or ramen toppings the next day.
Step-by-Step Instructions for Momofuku Pork Belly Oven
Here’s how to achieve that signature crispy skin with tender, flavorful layers right at home.
Step 1: Season and Cure the Pork Belly
Score the skin of the 2 lb Pork Belly in a crosshatch pattern, cutting just through the fat without slicing into the meat. This helps the fat render and the skin crisp evenly.
Rub the pork belly all over with the 2 tbsp Kosher Salt, 1.5 tbsp Granulated Sugar, and 1 tsp Black Pepper, pressing the mixture into the scored skin and sides. Place it skin-side up in a roasting pan and refrigerate uncovered for 12-24 hours to dry out the skin for maximum crispiness.
Step 2: Create the Aromatic Marinade
In a small bowl, combine the 6 cloves Garlic Cloves (minced), 1 tbsp Fresh Ginger (grated), 0.25 cup Soy Sauce, 2 tbsp Rice Vinegar, and 1 tsp Sesame Oil. Stir until everything is well incorporated.
After curing, pat the pork belly dry with paper towels—this removes excess moisture so the skin crisps up beautifully. Brush the marinade generously over the meat side (not the skin) of the pork belly, ensuring every inch is coated. Let it sit at room temperature for 30 minutes before roasting.
Step 3: Roast Low and Slow for Tenderness
Preheat your oven to 300°F. Place the pork belly skin-side up on a wire rack set over a baking sheet (to allow air circulation). Roast for 1.5 hours, basting with the pan juices every 30 minutes to keep it moist.
You’ll notice the fat rendering and the meat becoming fork-tender. The skin won’t be crispy yet—that happens in the next step. If the pan juices start to burn, add a splash of water to deglaze.
Step 4: Finish with High Heat for Crispy Skin
Increase the oven temperature to 425°F and roast for an additional 15-20 minutes, watching closely. The skin should puff up and turn a deep golden brown with a crackling texture.
Remove the pork belly from the oven and let it rest for 10 minutes before slicing. This allows the juices to redistribute, ensuring each bite is juicy and flavorful. Slice into thick pieces and serve over steamed 2 cups Jasmine Rice for a complete meal.
Step 5: Prepare Quick Pickles for Serving
While the pork belly roasts, thinly slice the 1 whole Cucumber and julienne the 1 whole Carrot. Combine the 0.5 cup Rice Wine Vinegar, 2 tbsp Sugar, and 1 tsp Salt in a bowl, stirring until the sugar dissolves.
Add the sliced vegetables to the brine and let them sit for at least 30 minutes before serving. These quick pickles add a refreshing crunch and tangy contrast to the rich pork belly.
Pro Tips For Making Momofuku Pork Belly Recipe Oven
- Score the Skin: Use a sharp knife to cut 1/4-inch crosshatches in the pork belly skin before seasoning—this lets the fat render out and gives you that crispy finish.
- Overnight Dry Cure: Rub the salt-sugar mix on the pork belly the night before, then leave it uncovered in the fridge; I learned this the hard way—skipping this step means less flavor penetration.
- Low and Slow First: Start at 300°F for 2 hours to render the fat gently, then crank it to 425°F for the last 20 minutes to crisp the skin without burning the garlic.
- Rest Before Slicing: After roasting, let the pork belly rest 10 minutes under foil—sounds tedious, but it keeps the juices from running all over the cutting board.
Best Sauces and Condiments for This Dish
Sweet and Spicy Glaze
Mix ¼ cup gochujang with 2 tbsp honey and 1 tbsp soy sauce for a sticky, sweet-spicy glaze. Brush it on during the last 5 minutes of high-heat roasting. The heat from the oven caramelizes the sugars beautifully. 🌶️
Classic Hoisin Sauce
Thin ½ cup hoisin sauce with 1 tbsp rice vinegar and 1 tsp sesame oil for a glossy finish. Drizzle it over sliced pork belly just before serving. I love how it complements the crispy skin without overpowering it.
Garlic Soy Dipping Sauce
Combine 3 tbsp soy sauce, 1 tbsp rice vinegar, 1 minced garlic clove, and ½ tsp grated ginger. This simple sauce enhances the pork’s natural flavors. Serve it on the side for dipping each bite.
Sriracha Mayo
Whisk ½ cup mayonnaise with 2 tbsp sriracha and 1 tsp lime juice for a creamy, spicy kick. It’s perfect for balancing the richness of the pork belly. I always keep a jar in my fridge for this exact purpose.
Quick Pickle Juice
Use the leftover brine from your quick pickles as a tangy drizzle. The acidity cuts through the fat beautifully. Just strain out the veggies and drizzle lightly over the pork. It’s a zero-waste trick that adds brightness. ✨
Nutrition Facts
Frequently Asked Questions
Why do I need to score the skin?
Scoring helps render fat evenly and creates more surface area for crisping. Without it, the skin won’t puff or crackle properly. Use a sharp knife and cut just through the fat layer.
Can I skip the overnight drying step?
No, this is crucial for ultra-crispy skin. The 12-24 hours in the fridge dries the surface, allowing it to blister in the oven. Skipping it risks chewy skin.
How do I prevent the skin from burning during the high-heat finish?
Watch closely during the final 15-20 minutes at 425°F. If it darkens too quickly, tent loosely with foil. The skin should be deep golden, not black.
What if my pork belly isn’t crispy after roasting?
Return it to the 425°F oven for 5-10 minutes more. Ensure the rack allows airflow underneath. Patience is key—it will crisp!

Trained in classic French technique but raised on slow-cooked ribs and spicy rubs, she blends culinary skill with smoke and soul.
- Stewed Beef Brisket Recipe: Deep-Rich Flavor After 8 Hours of Slow Simmering - October 15, 2026
- Beef Brisket Rolls Recipe: Flaky Layers and Smoky Sweet Filling - October 15, 2026
- Masterbuilt Smoker Beef Brisket Recipe: Bark-To-Meat Ratio Hack for Unmatched Flavor - October 15, 2026