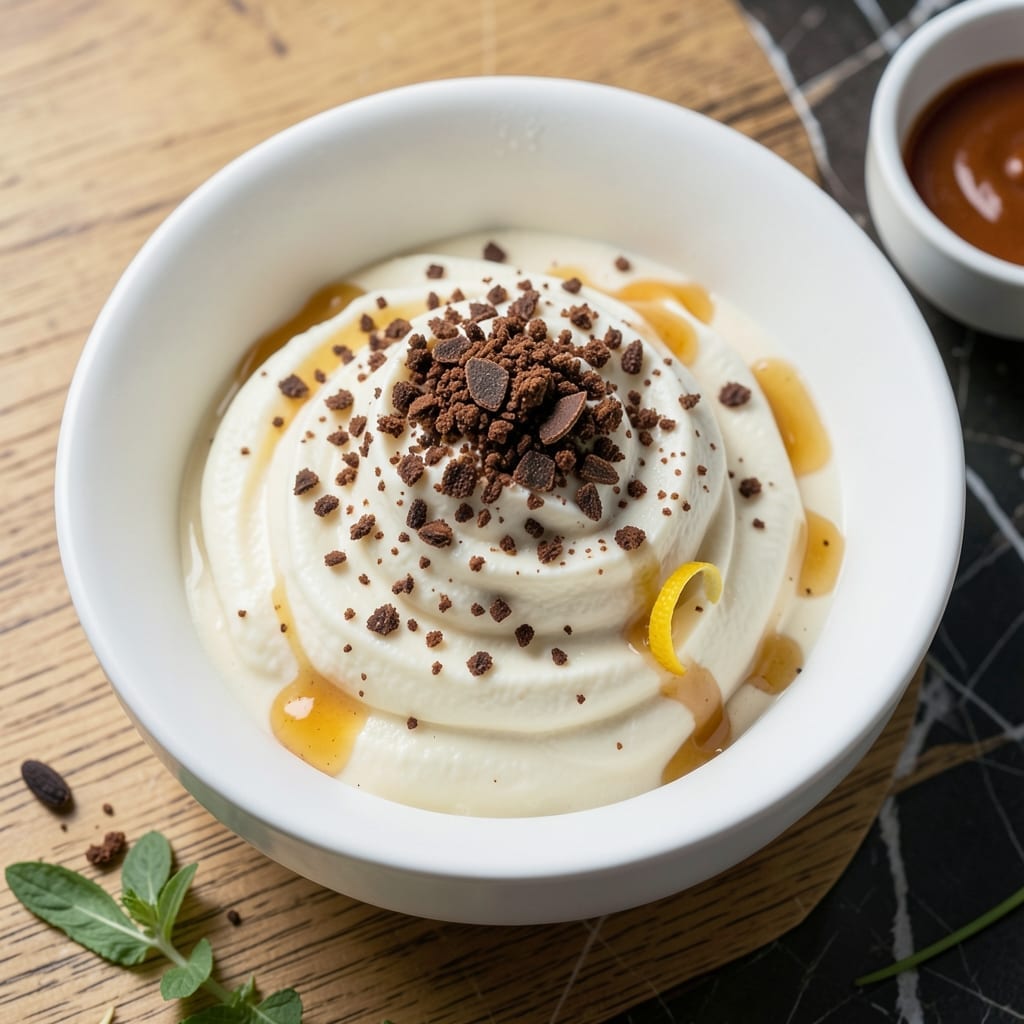
Creamy homemade ice cream without the churn? My Ninja appliance makes it effortless. This recipe transforms simple ingredients into ultra-smooth, rich ice cream that rivals any parlor treat.
The secret lies in sweetened condensed milk, which creates a velvety base without requiring custard cooking. Combined with whipping cream and vanilla, it develops that perfect creamy texture every scoop should have.
After blending, a short freeze sets this into the creamiest dessert imaginable. The Ninja handles the heavy lifting, ensuring consistent results with minimal effort on your part.
Customize with mix-ins or enjoy it plain. This method proves that exceptional ice cream doesn’t demand complicated techniques or special equipment.
Ingredients for Ninja Ice Cream Recipe with Condensed Milk
Ultra-smooth ice cream comes from simple, rich ingredients your pantry likely already holds.
| Ingredient | Amount | Notes |
|---|---|---|
| Sweetened Condensed Milk 🥛 | 14 oz | Full-fat for creamiest texture |
| Heavy Whipping Cream 🥛 | 2 cups | Cold, at least 35% fat |
| Pure Vanilla Extract 🌿 | 2 tsp | High-quality for best flavor |
| Granulated Sugar 🍚 | ¼ cup | Optional, for extra sweetness |
| Sea Salt 🧂 | ¼ tsp | Fine grain preferred |
| Crushed Chocolate Wafers 🍫 | 1 cup | For mix-in texture (optional) |
| Chopped Fresh Strawberries 🍓 | 1 cup | Pitted, for fruit variation (optional) |
| Chopped Nuts 🌰 | ½ cup | Pecans or almonds recommended (optional) |
| Rainbow Sprinkles 🎉 | ¼ cup | For fun color (optional) |
| Caramel Sauce 🍯 | ½ cup | For swirls (optional) |
[recipe_ingredient_scaler]
The condensed milk is non-negotiable here—Eagle Brand is the gold standard for consistent thickness and sweetness. Heavy cream must be cold and full-fat; Organic Valley or Darigold deliver reliable quality. For vanilla, Nielsen-Massey or Rodelle offer superior depth. Avoid imitation extracts—they lack the complexity needed for this recipe’s simplicity to shine.
No condensed milk? Caramelized sweetened milk (dulce de leche) can substitute at one-to-one ratio, though flavor shifts slightly. Out of whipping cream? Full-fat coconut milk (canned) works in a pinch (texture varies). For mix-ins, any cookie crumb, fruit puree, or candy bits work—just fold in post-freeze to avoid clumping. The base recipe is forgiving.
Base keeps 1 week in an airtight container, though best consumed within 3 days for peak texture. Freeze mix-ins separately and add when serving. For longer storage, portion into pint containers and freeze up to 2 months.
Why You’ll Love This Recipe
- Five-Minute Magic: I dump everything in the Ninja, hit pulse, and boom—creamy vanilla ice cream without churning or waiting.
- Rich Creamy Dream: The condensed milk and heavy cream blend into this ridiculously smooth, sweet base that tastes like a premium parlor scoop.
- Endless Flavor Play: I stir in crushed Oreos one day, fresh berries the next—this blank canvas adapts to whatever I’m craving.
- Freezer Lifesaver: Honestly, it keeps for weeks, so I always have a pint ready for surprise guests or midnight cravings.
Step-by-Step Instructions for Ninja Ice Cream With Condensed Milk
This method guarantees ultra-creamy texture without the need for churning or special equipment.
Step 1: Whip the Heavy Whipping Cream to Stiff Peaks
In a large mixing bowl, combine the 2 cups Heavy Whipping Cream with the 0.25 cup Granulated Sugar and 0.25 tsp Sea Salt. Using a hand mixer or stand mixer with the whisk attachment, beat on medium-high speed until soft peaks form.
Increase the speed to high and continue whipping for 1-2 minutes until the cream reaches stiff peaks—you’ll know it’s ready when you can lift the whisk and the cream holds a sharp peak without drooping. Be careful not to over-whip, as this can cause the cream to turn grainy.
Step 2: Fold in the Sweetened Condensed Milk and Vanilla
Gently pour the 14 oz Sweetened Condensed Milk and 2 tsp Pure Vanilla Extract into the whipped cream mixture. Using a silicone spatula, fold everything together with a gentle, sweeping motion from the bottom of the bowl to the top.
This step requires patience to maintain the air you’ve incorporated. Rotate the bowl as you fold to ensure the Sweetened Condensed Milk is evenly distributed throughout the cream. The mixture should be smooth, thick, and glossy with no streaks of condensed milk remaining.
Step 3: Incorporate Mix-ins for Texture and Flavor
Now add your chosen mix-ins. For a classic version, gently fold in the 1 cup Crushed Chocolate Wafers, 0.5 cup Chopped Nuts, and 0.25 cup Rainbow Sprinkles. If you prefer a fruity variation, replace the chocolate wafers with 1 cup Chopped Fresh Strawberries.
Distribute the mix-ins evenly throughout the base, but avoid overmixing, which can cause the sprinkles to bleed color or the strawberries to break down. For a swirled effect, pour 0.5 cup Caramel Sauce over the top and use a butter knife to gently ripple it through the mixture.
Step 4: Freeze Until Firm
Transfer the ice cream mixture to a loaf pan or airtight container, smoothing the top with your spatula. Cover the surface directly with plastic wrap to prevent ice crystals from forming. Freeze for at least 6 hours, or preferably overnight, until completely firm.
The texture will be slightly soft after 4 hours, but for the best scoopable consistency, patience is key. Once fully set, the ice cream should hold its shape when scooped and have a velvety smoothness that melts beautifully on the tongue.
Pro Tips For Making Ninja Ice Cream Recipe With Condensed Milk
- Chill the Cream First: I learned this the hard way—warm heavy whipping cream won’t whip properly, so stash it in the fridge for at least 2 hours before using.
- Fold, Don’t Stir: After mixing the sweetened condensed milk with vanilla, gently fold in the whipped cream to keep it light and airy, not dense.
- Skip the Overmixing: Once combined, stop mixing—overworking the cream deflates it and turns your ice cream into a sad, flat pudding.
- Add Salt Last: Sprinkle the sea salt right before freezing; it enhances the sweetness without making the mix taste salty early on.
Essential Equipment for Perfect Results
Ninja Foodi Cold & Hot
My Ninja Foodi Cold & Hot is the workhorse for this recipe. The 7-in-1 functionality means I can blend, mix, and freeze all in one appliance. The 16-ounce capacity is perfect for this batch size. 💪
Mixing Bowl Set
A good stainless steel mixing bowl set is essential for whipping the cream. I use Cuisinox bowls with non-slip bases. The 5-quart size gives plenty of room for the cream to expand as it whips to stiff peaks.
Hand Mixer
For the creamiest texture, a reliable hand mixer is key. My KitchenAid 5-Speed handles the heavy cream without straining. The whisk attachments incorporate air efficiently, creating that perfect light and fluffy base.
Silicone Spatula
A high-quality silicone spatula ensures you scrape every last bit of mixture from the bowl. I prefer OXO Good Grips for its comfortable handle and flexible head. It folds mix-ins gently without deflating the whipped cream.
Loaf Pan
Transfer your mixture to a standard 9×5-inch loaf pan for freezing. I use USA Pan with a non-stick coating. The rectangular shape makes scooping easier and helps the ice cream set evenly.
Air-Tight Container
For storage, an airtight container prevents freezer burn. I recommend Rubbermaid Brilliance—it’s leak-proof and keeps the ice cream fresh for up to 2 months. Always press plastic wrap directly on the surface before sealing. ❄️
Nutrition Facts
Frequently Asked Questions
Can I use regular milk instead of condensed?
No, regular milk won’t work—it lacks the sugar and thickness needed. Condensed milk creates the creamy base and sweetness. For a substitute, try dulce de leche in the same amount.
How long does it need to freeze?
Freeze for at least 6 hours, but overnight is ideal. The texture will be soft after 4 hours, but full firmness develops with more time.
Why did my ice cream turn icy?
This usually happens if the cream wasn’t whipped to stiff peaks or the mixture wasn’t covered tightly. Press plastic wrap directly on the surface before freezing to prevent ice crystals.
Can I make this without a Ninja appliance?
Yes! The Ninja simplifies blending, but a hand mixer and freezer-safe container work just as well. The key is properly whipping the cream first.

Trained in classic French technique but raised on slow-cooked ribs and spicy rubs, she blends culinary skill with smoke and soul.
- Stewed Beef Brisket Recipe: Deep-Rich Flavor After 8 Hours of Slow Simmering - October 15, 2026
- Beef Brisket Rolls Recipe: Flaky Layers and Smoky Sweet Filling - October 15, 2026
- Masterbuilt Smoker Beef Brisket Recipe: Bark-To-Meat Ratio Hack for Unmatched Flavor - October 15, 2026