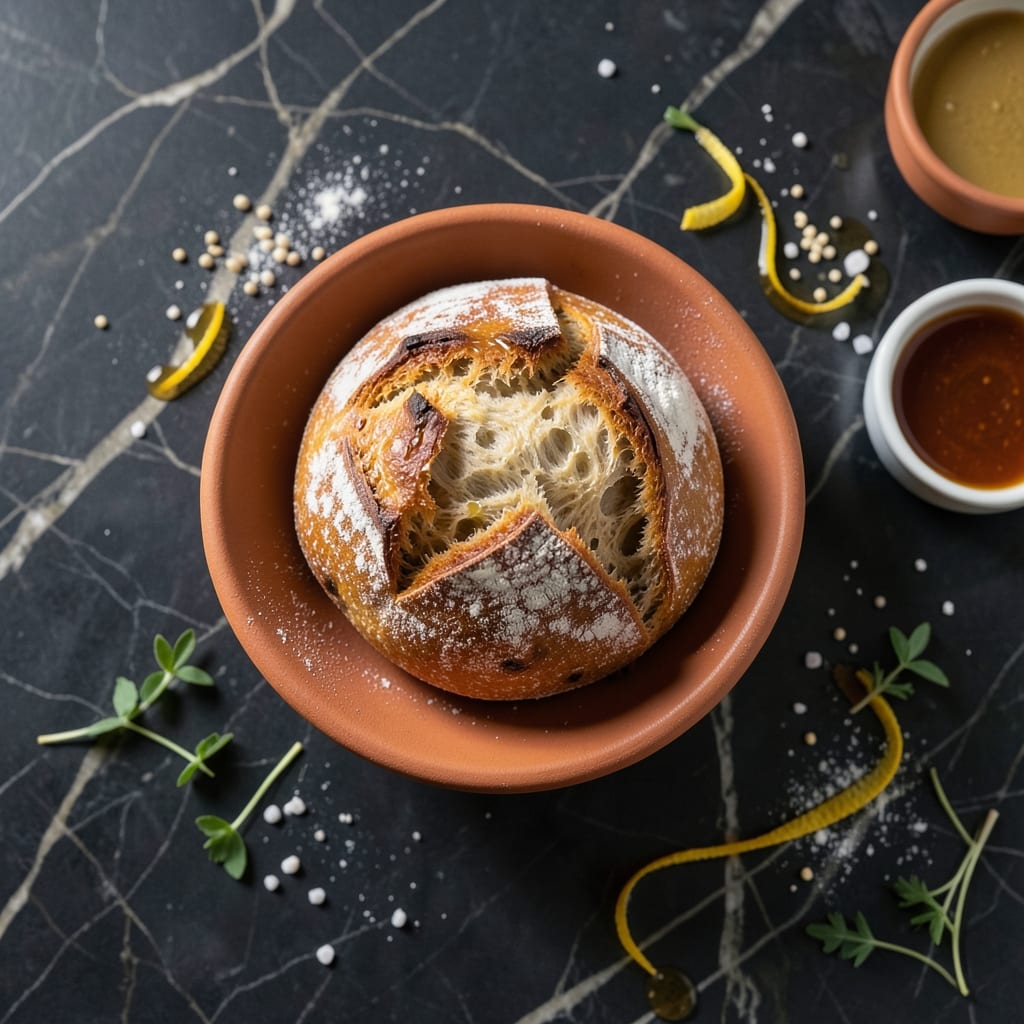
I’ve burned more loaves than I’d like to admit in my tiny Boston kitchen, but this one finally nailed it. No fancy gadgets, just a bowl, flour, and patience.
This artisan loaf delivers a rustic crust and airy crumb that puts store-bought to shame. The secret? Letting the dough rise slow and steady overnight.
You’ll pull a golden, crackling loaf from the oven that sounds hollow when tapped. The smell alone will have neighbors knocking.
Between you and me, it’s the kind of bread that makes you look like a pro without the fuss. Let’s get baking.
Ingredients for Not Your Average Joe’s Bread
Simple ingredients, extraordinary bread. No stand mixer required, just time and a Dutch oven.
| Ingredient | Amount | Notes |
|---|---|---|
| Bread Flour 🌾 | 3 ½ cups | High protein for structure |
| Active Dry Yeast 🍞 | 1 tsp | Proofed in warm water |
| Kosher Salt 🧂 | 1 ½ tsp | Diamond Crystal preferred |
| Lukewarm Water 💧 | 1 ½ cups | About 105-110°F |
| Olive Oil 🫒 | 1 tbsp | For bowl and dough |
| Honey 🍯 | 1 tbsp | Feeds the yeast |
| All-Purpose Flour 🌾 | ½ cup | For dusting work surface |
| Cornmeal 🌽 | 2 tbsp | For dusting baking surface |
| Ice Cubes ❄️ | 4 pieces | For steam in Dutch oven |
| Whole Wheat Flour 🌾 | ¼ cup | Optional for depth |
[recipe_ingredient_scaler]
The flour matters here. King Arthur Bread Flour is my go-to for the high protein content—gives that perfect chew. Yeast should be fresh and foamy after proofing (if it’s not bubbly, start over). I grab my yeast and flour in the bulk section at Whole Foods, but any grocery store with a baking aisle works. Salt is non-negotiable—Diamond Crystal kosher salt is the baker’s standard (don’t use table salt, it’s too dense).
No bread flour? All-purpose in a pinch, but the texture won’t be as sturdy. Swap honey for maple syrup or sugar—same yeast-activating effect. Dutch oven is ideal for that rustic crust, but a heavy baking sheet with a metal bowl on top works too (just add ice cubes for steam). The cornmeal prevents sticking—semolina works equally well if that’s what you’ve got.
Dough rises best overnight in the fridge (up to 18 hours). Baked loaf stays fresh for 3-4 days in a paper bag. Freeze slices for up to 3 months—toast straight from frozen. The smell alone will have everyone asking for seconds.
Why You’ll Love This Recipe
- Five Ingredients Only: I love that this comes together with just bread flour, yeast, salt, water and olive oil—no fancy additions.
- Crispy Golden Crust: The olive oil gives it this beautiful, crackly crust with a soft, airy inside that’s honestly hard to resist.
- Sandwich to Toast: It’s my go-to for everything from hearty sandwiches to garlic toast, and yes, it even makes killer croutons.
- Budget Friendly: A loaf costs pennies compared to store-bought, and I’ll be real: it tastes way better.
Step-by-Step Instructions for Artisan Loaf With Rustic Crust
Here’s how I create this bakery-style loaf with a crackling crust and airy interior.
Step 1: Activate the Yeast and Mix the Dough
In a large bowl, whisk together the 1.5 cups lukewarm water, 1 tbsp honey, and 1 tsp active dry yeast. Let it sit for 5-7 minutes until the mixture becomes foamy and the yeast is visibly activated.
Add the 3.5 cups bread flour, 0.25 cup whole wheat flour, and 1.5 tsp kosher salt to the yeast mixture. Stir with a wooden spoon until a shaggy dough forms. The dough will look rough at this stage—that’s perfectly fine.
Drizzle in the 1 tbsp olive oil and continue mixing until it’s fully incorporated. The dough should pull away from the sides of the bowl but still stick slightly to the bottom.
Step 2: Knead and First Rise
Lightly dust your work surface with the 0.5 cup all-purpose flour. Turn out the dough and knead for 8-10 minutes by hand, pushing and folding until it becomes smooth and elastic. You’ll notice the dough transforms from sticky to silky as the gluten develops.
Form the dough into a ball and place it in a clean bowl lightly coated with olive oil. Cover with a damp towel and let it rise in a warm spot for 1-2 hours, or until it has doubled in size. I like to place mine near a sunny window for consistent warmth.
Step 3: Shape and Second Rise
Once doubled, punch down the dough to release the air. Shape it into a round loaf by folding the edges toward the center and rolling it gently on the counter. This creates surface tension for that perfect domed shape.
Place the shaped dough on a parchment-lined baking sheet dusted with the 2 tbsp cornmeal. The cornmeal adds texture and prevents sticking. Cover again and let it rise for another 30-45 minutes until puffy and nearly doubled.
About 20 minutes before baking, preheat your oven to 450°F with a Dutch oven inside. This ensures the pot is screaming hot when you add the dough.
Step 4: Score and Bake with Steam
Carefully transfer your risen dough, still on the parchment, into the preheated Dutch oven. Using a sharp knife or razor, make a ½-inch deep slash across the top of the loaf. This allows the bread to expand without cracking.
Drop the 4 pieces ice cubes into the Dutch oven alongside the dough to create steam, which gives you that professional bakery crust. Quickly cover with the lid and bake for 20 minutes.
After 20 minutes, remove the lid and bake for an additional 20-25 minutes until the crust is a deep golden brown and the internal temperature reaches 205-210°F.
Step 5: Cool Completely Before Slicing
Transfer the loaf to a wire rack and let it cool for at least 1 hour. I know it’s tempting to slice into that warm, fragrant bread, but cooling allows the crumb structure to set properly.
You’ll hear the crust crackling as it cools—that’s the sound of success. When you finally slice into it, you should see an open, airy crumb with a thick, crispy crust that shatters slightly when you bite into it.
Pro Tips For Making Not Your Average Joe’S Bread
- Test Your Yeast: I learned this the hard way—proof your active dry yeast in the lukewarm water with a pinch of sugar first. If it doesn’t bubble within 5 minutes, your bread won’t rise, no matter how long you wait.
- Weigh Your Flour: Scooping flour with a cup always packs it down—use a scale for 100% accuracy. My first few loaves were dense bricks until I switched to 500g of bread flour, measured properly.
- Skip Cold Water: Lukewarm water should feel like a baby’s bath, around 105-110°F. Any colder and the yeast stays asleep; any hotter and you’ll kill it—both ruin the rise.
- Oil the Bowl: Coat your rising bowl with about 1 teaspoon of olive oil before the first proof. Sounds small, but it keeps the dough from sticking and makes punching it down way easier.
Serving Suggestions for This Recipe
Fresh and Simple
Slice this loaf thick and serve warm with high-quality butter—I grab Cabot from my local Boston market. The crust stays crisp while the crumb soaks up the butter beautifully. Perfect for a lazy Sunday breakfast with coffee. 💛
Soup Pairings
This bread shines alongside hearty soups. Tear chunks directly into a bowl of minestrone or New England clam chowder—the rustic texture holds up to dipping. I love how the crust adds a satisfying crunch to every spoonful.
Charcuterie Board
Create a simple spread with aged cheddar, prosciutto, and olives. The bread’s mild flavor lets the other ingredients shine. I often add a drizzle of olive oil and balsamic for extra flair.
Sandwich Upgrade
Use slices for grilled cheese or Caprese sandwiches—the sturdy crumb won’t fall apart. Add fresh basil and tomato for a taste of summer. Honestly, it turns a simple lunch into something special.
Bruschetta Base
Toast slices and top with diced tomatoes, garlic, and fresh mozzarella. The crust’s crispness contrasts perfectly with the soft toppings. I always make extra for seconds. ✨
French Toast
Day-old loaf makes the best French toast—soak thick slices in a mix of eggs, milk, and cinnamon. Cook until golden and serve with maple syrup. Nonna would approve of this breakfast twist.
Nutrition Facts
Frequently Asked Questions
Why do I need to preheat the Dutch oven?
Preheating ensures the pot is screaming hot for that perfect rise and crust formation. Without it, your loaf won’t develop the signature crackling crust. Think of it as the secret to bakery-quality bread at home.
Can I skip the overnight rise?
Yes, but the flavor and texture won’t be as deep. The slow, cold fermentation develops complex flavors you can’t rush. If short on time, let it rise at room temp for 1-2 hours instead.
What if my dough didn’t double in size?
Check your yeast first—it should be foamy after proofing. If your kitchen is cold, place the bowl near a warm spot (like an oven with the light on). Patience is key; even slow rises can yield great bread.
How do I know when it’s fully baked?
The crust should be deep golden brown, and the internal temp should hit 205-210°F. Tap the bottom—it should sound hollow, like a drum. This ensures it’s baked through, not just on the outside.

Trained in classic French technique but raised on slow-cooked ribs and spicy rubs, she blends culinary skill with smoke and soul.
- Recipe for Boneless Pork Chops in Cast Iron Skillet: Sear and Baste to Juicy Perfection - October 3, 2026
- Recipe for Boneless Cross Rib Roast: Slow-Roasted Beef with Herb Crust - October 3, 2026
- Hamburgers in Sauce Recipe Crock Pot: Slow-Cooked Savory Delight - October 3, 2026