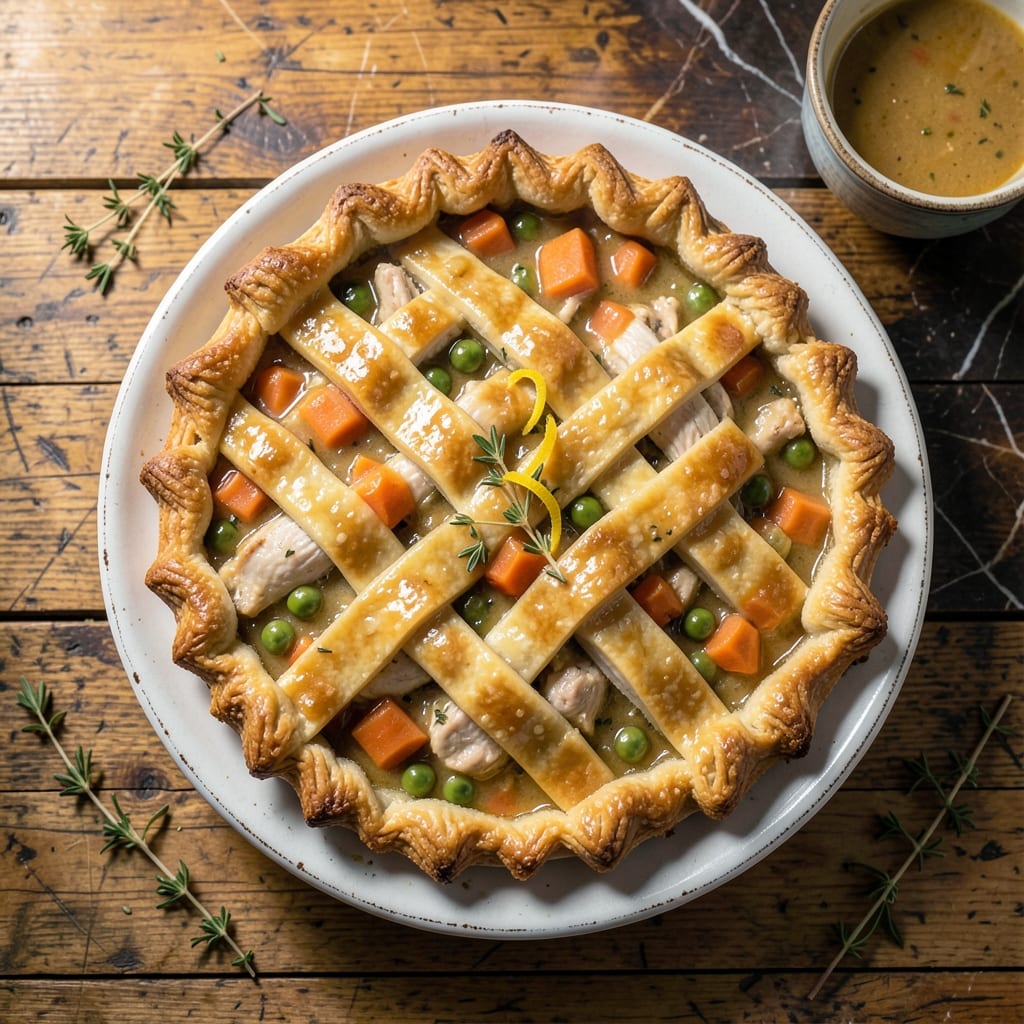
There’s nothing like the comfort of a homemade chicken pot pie with its flaky crust and creamy filling. This is the recipe I perfected while working in Nana Mae’s diner, where we served it daily to hungry customers.
The secret lies in making everything from scratch – the buttery crust that shatters with each bite, and the rich filling packed with tender chicken and vegetables. I’ve tested this on different ovens to ensure it works perfectly every time.
What you’ll get is a golden-brown pie with a filling so creamy it clings to the crust, creating that perfect contrast of textures. David always requests seconds when I make this for dinner.
It’s the kind of dish that turns a simple meal into something special. Here’s how to make this classic from my Southern kitchen to yours.
Ingredients for Old Fashioned Chicken Pot Pie Recipe from Scratch
Buttery crust, tender chicken, and creamy veggies. That’s the magic of this comfort classic.
| Ingredient | Amount | Notes |
|---|---|---|
| All-Purpose Flour 🌾 | 3 cups | Divided for crust and filling |
| Unsalted Butter 🧈 | 1 ½ cups | Cold, cubed for crust |
| Ice Water 💧 | ½ cup | For pie dough |
| Salt 🧂 | 1 tsp | Divided for crust and filling |
| Boneless Skinless Chicken Breast 🍗 | 1 ½ lb | Diced into bite-sized pieces |
| Carrots 🥕 | 2 whole | Peeled and diced |
| Yellow Onion 🧅 | 1 whole | Finely chopped |
| Celery Stalks 🥬 | 2 whole | Diced small |
| Frozen Peas 🌱 | 1 cup | Thawed before using |
| Chicken Broth 💧 | 2 cups | Low-sodium preferred |
| Heavy Cream 🥛 | 1 cup | Full-fat for creaminess |
| Garlic Cloves 🧄 | 3 cloves | Minced finely |
| Fresh Thyme Leaves 🌿 | 2 tsp | Chopped, or 1 tsp dried |
| Black Pepper 🌶️ | ½ tsp | Freshly ground preferred |
| Large Egg 🥚 | 1 whole | For egg wash on crust |
[recipe_ingredient_scaler]
The crust is everything here. Cold butter and ice water are non-negotiable for that flaky texture—don’t even think about skipping the chilling step. I use Land O’Lakes unsalted butter (it’s what Nana Mae swore by), but any good brand works. For the flour, King Arthur is my go-to, but the store brand is fine too. Just make sure it’s all-purpose, not self-rising.
No thyme? Dried rosemary at half the amount works in a pinch. Swap the peas for corn or green beans if that’s what’s in your freezer. For the chicken, thighs stay juicier than breasts (and they’re usually cheaper at Walmart or Kroger). The heavy cream can be half-and-half, but the filling won’t be quite as rich. Fresh garlic is worth it—pre-minced tastes harsh.
The pie dough can chill overnight, or freeze it for up to 3 months. Cooked filling keeps 3-4 days in the fridge—perfect for making ahead. Leftovers? They reheat beautifully. Just cover with foil to keep the crust from browning too much.
Why You’ll Love This Recipe
- One Bowl Crust: I mix the flour, butter, and ice water right in the same bowl—no extra dishes, just flaky layers with barely any effort.
- Rich Chicken Flavor: The boneless chicken breast soaks up the buttery crust and savory filling, making every bite taste like home.
- Feeds a Hungry Table: This pot pie stretches easily for four or doubles for a crowd, and it’s just as good fresh out of the oven or reheated the next day.
- Leftovers? Even Better: Honestly, the filling thickens overnight, and that crust stays crisp—if there’s any left, that is.
Step-by-Step Instructions for Old Fashioned Chicken Pot Pie
Here’s how I make this comforting classic with a golden crust and rich, velvety filling.
Step 1: Prepare the Flaky Pie Crust
In a large bowl, combine 3 cups all-purpose flour and ½ tsp salt. Cut in 1.5 cups cold, cubed unsalted butter using a pastry cutter or your fingers until the mixture resembles coarse crumbs with pea-sized butter pieces. I work quickly to keep the butter cold—this creates those flaky layers.
Gradually add ½ cup ice water 1 tablespoon at a time, mixing just until the dough comes together. Don’t overwork it or the crust will be tough. Divide the dough into two equal portions, flatten into discs, wrap in plastic, and refrigerate for 1 hour or until firm.
Step 2: Cook the Chicken and Vegetable Filling
While the dough chills, heat a large skillet over medium heat. Add the 1.5 lb diced boneless skinless chicken breast and cook for 6-8 minutes until no longer pink. Remove the chicken and set aside.
In the same skillet, sauté 1 finely chopped yellow onion, 2 diced carrots, and 2 diced celery stalks for 5 minutes until softened. Add 3 minced garlic cloves and 2 tsp fresh thyme leaves, cooking for 30 seconds until fragrant. Stir in ¼ cup all-purpose flour (reserved from the 3 cups) to create a roux.
Step 3: Create the Creamy Sauce and Assemble
Slowly whisk in 2 cups chicken broth and 1 cup heavy cream, then add the cooked chicken, 1 cup thawed frozen peas, and ½ tsp black pepper. Simmer for 5-7 minutes until the sauce thickens and coats the back of a spoon. Taste and adjust seasoning with the remaining ½ tsp salt.
Roll out one disc of dough to fit a 9-inch pie dish. Pour in the filling, then roll out the second disc for the top crust. Crimp the edges, cut a few slits for steam to escape, and brush with a beaten large egg for a golden finish.
Step 4: Bake to Golden Perfection
Preheat your oven to 375°F. Place the pie on a baking sheet to catch any drips and bake for 40-45 minutes until the crust is deep golden brown and the filling is bubbling.
If the edges brown too quickly, cover them with foil. Let the pie rest for 10 minutes before serving—this allows the filling to set slightly. Each slice should reveal a flaky, buttery crust over a creamy, hearty filling packed with tender chicken and vegetables.
Pro Tips For Making Old Fashioned Chicken Pot Pie Recipe From Scratch
- Chill the Dough: After mixing the flour, butter, and ice water, let the dough rest in the fridge for at least 30 minutes—I learned this the hard way when my crust shrank in the oven.
- Poach Chicken First: Simmer the chicken breasts in salted water until just done (165°F), then shred. It keeps the meat moist and makes it easier to handle than trying to cube raw chicken.
- Vent the Top: Cut a few small slits in the top crust before baking—my grandmother swore by this, and she was right: it lets steam escape so the pie doesn’t get soggy.
- Use Cold Butter: Keep your butter ice-cold when cutting it into the flour. Sounds weird, but it works: the flaky layers in the crust actually depend on it.
Storing and Reheating This Recipe
Refrigerator Storage
Let the pie cool completely—about 2 hours—before storing. Wrap tightly in plastic or transfer to an airtight container. It keeps well in the fridge for up to 4 days. The flavors actually deepen overnight, just like Nana Mae always said. ❄️
Freezer Storage
For longer storage, wrap the cooled pie in heavy-duty foil then plastic wrap. It freezes beautifully for up to 3 months. I always label with the date—I once forgot a pie in the freezer for 6 months and it still tasted great.
Oven Reheating
Preheat to 350°F and place the pie on a baking sheet. Cover loosely with foil and heat for 20-25 minutes. Remove foil the last 5 minutes to crisp the crust. David swears this tastes almost as good as fresh. 🔥
Microwave Reheating
For single servings, microwave on 50% power for 2-3 minutes, checking every 30 seconds. The crust will soften, but the filling stays creamy. Add a damp paper towel over the top to prevent drying.
Crust Protection
To keep the crust crisp when storing, place a paper towel over the pie before wrapping. This absorbs excess moisture. For reheating, a quick 5-minute broil at the end restores that golden crunch.
Nutrition Facts
Frequently Asked Questions
Can I use store-bought pie crust instead?
Yes, but the texture won’t be as flaky. If using pre-made, opt for all-butter versions and still brush with egg wash before baking for that golden finish.
How do I prevent a soggy bottom crust?
Pre-bake the bottom crust for 8-10 minutes before adding filling. Also, let the filling cool slightly to reduce steam during baking.
Can I make this with chicken thighs?
Thighs stay juicier than breasts. Use 1.75 lb boneless thighs and cook the same 6-8 minutes until done.
Why did my filling turn out runny?
Likely the roux didn’t thicken enough. Simmer the sauce for the full 5-7 minutes until it coats a spoon. If needed, mix 1 tbsp cornstarch with water and stir in.

Trained in classic French technique but raised on slow-cooked ribs and spicy rubs, she blends culinary skill with smoke and soul.
- Stewed Beef Brisket Recipe: Deep-Rich Flavor After 8 Hours of Slow Simmering - October 15, 2026
- Beef Brisket Rolls Recipe: Flaky Layers and Smoky Sweet Filling - October 15, 2026
- Masterbuilt Smoker Beef Brisket Recipe: Bark-To-Meat Ratio Hack for Unmatched Flavor - October 15, 2026