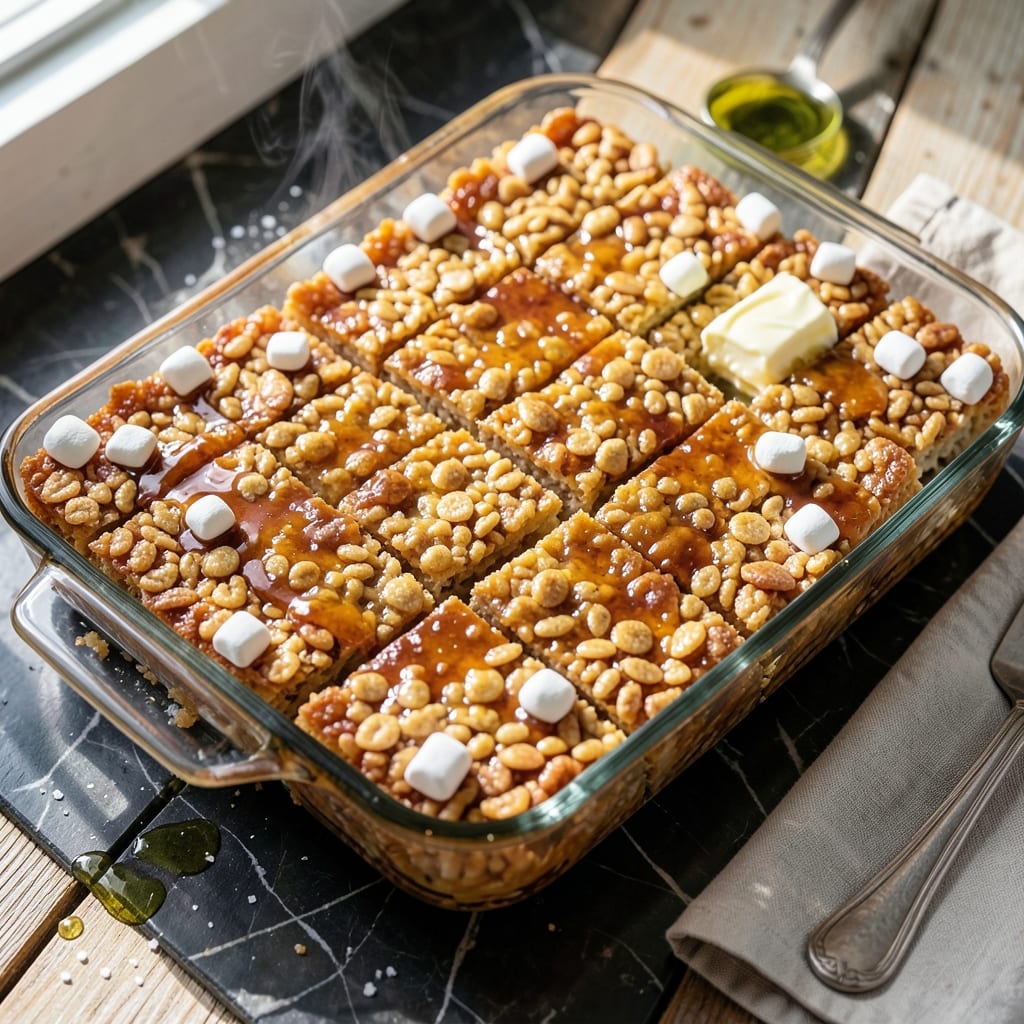
This classic recipe brings back the simple joy of homemade treats with crispy texture and rich buttery flavor. I remember making these in my grandmother’s kitchen, where the aroma of melting marshmallows filled the air.
The secret lies in the perfect ratio of marshmallows to cereal, ensuring every bite delivers that signature crispy crunch. Using a wooden spoon, just like Nonna taught me, helps mix everything evenly without crushing the cereal.
What you get is a batch of golden squares with a satisfying snap, coated in that irresistible buttery marshmallow layer. These disappear faster than you can make them.
Perfect for gatherings or a nostalgic snack, this timeless recipe never fails to delight.
Ingredients for Old Fashioned Recipe for Rice Crispy Treats
Six simple ingredients deliver that nostalgic buttery crunch everyone loves. Nothing complicated here.
| Ingredient | Amount | Notes |
|---|---|---|
| Rice Krispies Cereal 🥣 | 6 cups | Classic variety preferred |
| Mini Marshmallows 🍬 | 10 oz | Standard size bag |
| Unsalted Butter 🧈 | ½ cup | Cut into pieces for even melting |
| Vanilla Extract 🌿 | 1 tsp | Pure extract for best flavor |
| Salt 🧂 | ¼ tsp | Fine grain for even distribution |
| Cooking Spray 🫒 | 1 whole | For greasing the pan |
[recipe_ingredient_scaler]
The cereal is key to that signature snap—Kellogg’s Rice Krispies are the gold standard (generic brands can be hit or miss). Mini marshmallows melt faster and more evenly than large ones, so don’t swap sizes. For the butter, I always use Land O’Lakes unsalted—it’s got that rich, clean flavor without overpowering. A wooden spoon really does help distribute the mixture without crushing the cereal (Nonna was right).
Out of mini marshmallows? Large marshmallows cut into quarters work in a pinch, but they take longer to melt. No vanilla extract? Skip it—these still taste great. Want a salty-sweet twist? Add an extra pinch of salt to the melted butter. For a festive touch, stir in a handful of sprinkles after mixing. The cooking spray can be replaced with butter for greasing if you prefer.
These keep well at room temperature in an airtight container for 2-3 days (if they last that long). For longer storage, freeze for up to 6 weeks—just thaw at room temperature before serving. Cut into squares once completely cool to prevent smudging that crispy coating.
Why You’ll Love This Recipe
- One Pot Wonder: I melt the butter, toss in marshmallows, and stir—everything comes together in a single saucepan.
- Buttery Vanilla Magic: The vanilla extract mixed with melted butter gives these treats a depth that store-bought versions just can’t match.
- Bake Sale MVP: I’ve brought these to school events, picnics, and even a last-minute dessert swap—always the first to disappear.
- Stays Fresh for Days: Leftovers? No problem. They keep perfectly in an airtight container, so I can make a batch on Sunday and snack all week.
Step-by-Step Instructions for Old Fashioned Rice Crispy Treats
Here’s the method I’ve relied on for years—simple, foolproof, and always delicious.
Step 1: Grease the Pan and Measure the Cereal
Start by liberally coating a 9×13-inch baking dish with the cooking spray. I like to spray it twice to ensure complete coverage—this prevents sticking and makes cleanup easier. Make sure to get into all the corners and up the sides of the pan.
Next, measure out the 6 cups Rice Krispies Cereal and set it aside in a large bowl. Using the classic variety is important here, as other cereals may not give you that signature crispy texture when combined with the marshmallow mixture.
Step 2: Melt the Butter and Marshmallows
In a large saucepan, melt the 0.5 cup Unsalted Butter over low heat. I cut the butter into pieces beforehand so it melts evenly without hot spots. Once fully melted, add the 10 oz Mini Marshmallows and stir constantly with a silicone spatula.
Continue stirring until the marshmallows are completely melted and the mixture is smooth. This usually takes 5-7 minutes. Here’s the thing—this step requires patience. If you rush it with high heat, the marshmallows can burn, giving your treats a bitter taste instead of that sweet, buttery flavor we’re after.
Step 3: Add Flavorings and Combine
Once the marshmallows are fully melted, remove the saucepan from heat and immediately stir in the 1 tsp Vanilla Extract and 0.25 tsp Salt. The vanilla adds depth of flavor, while the salt enhances the sweetness and prevents the treats from tasting flat.
I always use pure vanilla extract for the best flavor. Now, pour the marshmallow mixture over the 6 cups Rice Krispies Cereal in the large bowl. Using a silicone spatula, fold everything together until the cereal is evenly coated. You’ll notice the mixture starts to thicken as it cools—work quickly but gently to avoid crushing the cereal.
Step 4: Press into Pan and Let Set
Transfer the mixture to your prepared 9×13-inch baking dish. Using the same spatula (or lightly greased hands), press the mixture evenly into the pan. I press down firmly to ensure the treats hold together well when cut.
Don’t compact it too tightly, though—you still want that light, crispy texture. Let the treats cool at room temperature for 30-45 minutes until fully set. You’ll know they’re ready when you can touch the top without any stickiness transferring to your fingers.
For the cleanest cuts, I use a sharp knife dipped in hot water between each slice. This gives you those perfect squares with crisp edges that define a truly old-fashioned Rice Krispies treat.
Pro Tips For Making Old Fashioned Recipe For Rice Crispy Treats
- Melt Butter Low: Use medium-low heat when melting the butter for the marshmallows—high heat will cause the sugar in the marshmallows to caramelize too quickly, giving your treats a burnt taste.
- Use Fresh Marshmallows: I learned this the hard way—stale mini marshmallows won’t melt as smoothly, leaving your treats lumpy instead of that perfect gooey texture.
- Press Gently Only: Resist the urge to pack the mixture into the pan too firmly; pressing too hard crushes the Rice Krispies and turns your treats dense and hard instead of light and crispy.
- Add Vanilla Last: Stir in the vanilla extract after removing the marshmallow mixture from the heat—adding it too early can cause the alcohol to evaporate, dulling the flavor.
Troubleshooting This Recipe
Too Sticky to Handle
If your mixture sticks to your hands or utensils, lightly grease them with cooking spray or butter. I keep a small bowl of water nearby to dip my fingers in—this prevents sticking without adding extra fat. Work quickly before the mixture cools and hardens. 💡
Hard or Dry Treats
Overcooking the marshmallows is often the culprit. Melt them over low heat and remove from heat as soon as they’re smooth. If they’ve already hardened, press a damp paper towel over the top and let sit for 5 minutes to soften slightly.
Soggy Bottom Layer
This happens when the pan isn’t properly greased or the treats aren’t pressed evenly. Use a 9×13-inch baking dish and spray it thoroughly, including the sides. Press the mixture firmly but don’t compact it too tightly—balance is key.
Uneven Coating
If some cereal pieces aren’t coated, the mixture likely cooled too much before combining. Work fast once you remove the marshmallows from heat. I use a silicone spatula to fold everything together gently but thoroughly in the large bowl.
Cutting Difficulties
For clean squares, let the treats cool completely—30-45 minutes at room temperature. Use a sharp knife dipped in hot water between cuts. If they’re still crumbling, press the mixture more firmly into the pan before it sets.
Real talk, even Nonna had to troubleshoot sometimes. The wooden spoon she gave me still has a few battle scars from early attempts. 💛
Nutrition Facts
Frequently Asked Questions
Can I use regular marshmallows instead?
Yes, but cut them into quarters for even melting. They’ll take 2-3 minutes longer to dissolve completely. Mini marshmallows are preferred for quicker, more consistent results.
Why do my treats get hard?
Overheating the marshmallows causes this. Always use low heat and remove from the stove as soon as they’re smooth. Stir constantly to prevent burning.
How do I store leftovers?
Keep in an airtight container at room temperature for 2-3 days. For longer storage, freeze for up to 6 weeks and thaw before serving.
Can I add chocolate chips?
Stir in 1 cup of chips after mixing the cereal. Press firmly so they stick. The extra chocolate makes them even more irresistible.

Trained in classic French technique but raised on slow-cooked ribs and spicy rubs, she blends culinary skill with smoke and soul.
- Best Smoked Oxtail Recipe: Deep-Rich Flavor After Low-and-Slow Cooking - October 14, 2026
- Pit Boss Smoked Prime Rib Roast Recipe: Bark-to-Bone Crispness in 4 Hours - October 14, 2026
- Smoked Tuna Steak Recipe: Seared Crust Meets Silky Centers - October 14, 2026