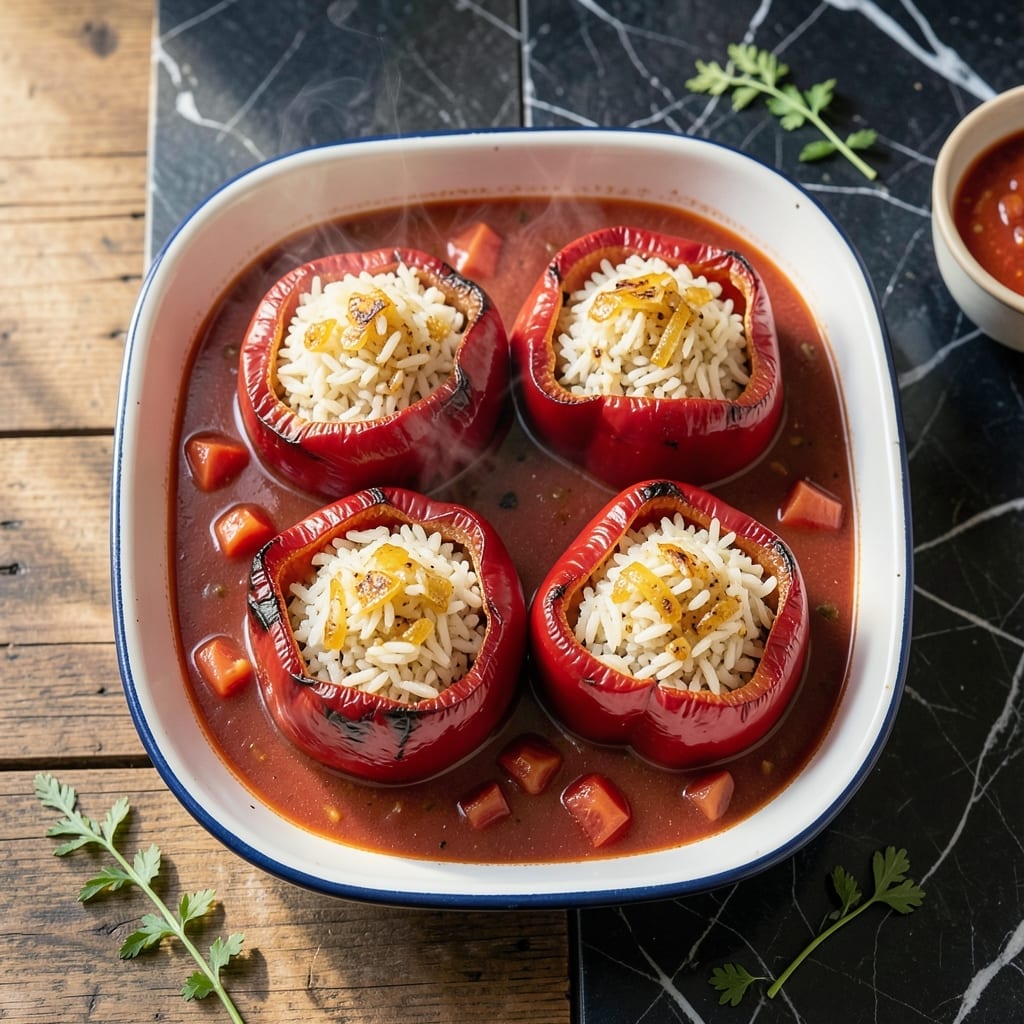
This dish brings classic comfort to your table with a nostalgic twist. The combination of tender stuffed peppers and rich tomato soup creates a meal that feels like home.
I developed this method to honor traditional flavors while simplifying the process. The peppers bake until perfectly soft, while the tomato soup adds a saucy depth that ties everything together.
You’ll get a satisfying balance of textures and tastes—savory filling, sweet peppers, and velvety soup. It’s a complete meal that delivers on warmth and flavor.
Perfect for family dinners or cozy nights in. Here’s how to make it.
Ingredients for Old Fashioned Stuffed Bell Peppers Recipe with Tomato Soup
Classic comfort meets nostalgic flavors with these simple, hearty ingredients ready for your table.
| Ingredient | Amount | Notes |
|---|---|---|
| Bell Peppers 🌶️ | 4 whole | Large, any color, halved lengthwise |
| Uncooked Long-Grain White Rice 🌾 | 1 cup | Rinsed until water runs clear |
| Vegetable Broth 💧 | 2 cups | Low-sodium preferred for control |
| Canned Diced Tomatoes 🍅 | 1 can | 14.5 oz, undrained for liquid |
| Tomato Soup 🍲 | 1 can | 10.5 oz, condensed or ready-to-serve |
| Yellow Onion 🧅 | 1 whole | Medium, finely diced for filling |
| Garlic Cloves 🧄 | 3 cloves | Minced for aromatic depth |
| Cheddar Cheese 🧀 | 1 ½ cups | Shredded sharp for bold flavor |
| Olive Oil 🫒 | 2 tbsp | Extra-virgin for sautéing base |
| Dried Oregano 🌿 | 1 tsp | Mediterranean variety preferred |
| Dried Basil 🍃 | 1 tsp | Crushed for even distribution |
| Salt 🧂 | 1 tsp | Diamond Crystal kosher for precision |
| Black Pepper 🌶️ | ½ tsp | Freshly ground for best aroma |
| Worcestershire Sauce 💧 | 1 tbsp | Vegetarian version required |
[recipe_ingredient_scaler]
The bell peppers are the foundation here—look for firm, glossy skins without wrinkles or soft spots. Whole Foods or your local farmers market will have the best selection in summer, but standard grocery store peppers work fine year-round. For the rice, jasmine or basmati adds a subtle floral note, though any long-grain variety does the job. The cheddar should be freshly shredded (Cabot or Tillamook are reliable) to avoid the anti-caking agents in pre-shredded that can make the filling grainy.
No long-grain rice? Quinoa or bulgur work in a pinch, though they’ll change the texture slightly. Swap the cheddar for Monterey Jack or pepper jack if you want a milder or spicier profile. The tomato soup can be homemade (simmer crushed tomatoes with broth and butter), but Campbell’s or Progresso are solid store-bought options. For the Worcestershire, Annie’s or Edward & Sons make vegetarian versions that skip the anchovies.
Assemble peppers up to a day ahead and refrigerate—bake when ready. Leftovers keep 4-5 days in the fridge or freeze for 3 months. The filling actually improves overnight as the rice soaks up more flavor. Just reheat gently to avoid drying out the peppers.
Why You’ll Love This Recipe
- Set and Forget: The rice cooks right in the tomato soup and broth inside the peppers, so I just pop them in the oven and walk away.
- Nostalgic Comfort: That tomato soup base gives it the same cozy, slightly sweet-tangy flavor I remember from my grandma’s kitchen.
- Feeds the Freezer: I double the batch and freeze half—reheats beautifully for those nights I’d rather not cook.
- Pantry Superhero: Between canned tomatoes, soup, and rice, I can make this when my fridge is nearly bare. Honestly, it’s saved dinner more than once.
Step-by-Step Instructions for Stuffed Bell Peppers With Tomato Soup
This method delivers that nostalgic comfort you remember, with a saucy twist that elevates every bite.
Step 1: Prepare the Bell Peppers and Rice
Cut the tops off the 4 whole Bell Peppers and remove the seeds and membranes. I like to make a small slice at the base so they sit flat in the baking dish. Set them aside while you start the filling.
Rinse the 1 cup Uncooked Long-Grain White Rice under cold water until the water runs clear. This removes excess starch and prevents the rice from becoming gummy during cooking. In a saucepan, combine the rinsed rice with the 2 cups Vegetable Broth, bring to a boil, then reduce heat to low, cover, and simmer for 15 minutes until the liquid is absorbed and the rice is tender.
Step 2: Sauté the Aromatic Base
While the rice cooks, heat the 2 tbsp Olive Oil in a large skillet over medium heat. Add the finely diced 1 whole Yellow Onion and cook for 4-5 minutes until softened and translucent. Stir in the minced 3 cloves Garlic Cloves and cook for 30 seconds until fragrant—just until you catch that rich, savory aroma.
Add the undrained 1 can Canned Diced Tomatoes, 1 tsp Dried Oregano, 1 tsp Dried Basil, 1 tsp Salt, 0.5 tsp Black Pepper, and 1 tbsp Worcestershire Sauce. Simmer for 5 minutes to let the flavors meld, stirring occasionally. The mixture should look thick and glossy, with the tomatoes breaking down slightly.
Step 3: Combine Filling and Stuff the Peppers
In a large bowl, mix the cooked rice with the tomato-onion mixture until well combined. Stir in 1 cup of the 1.5 cups Cheddar Cheese, reserving the rest for topping. The filling should be moist but hold its shape when pressed—this ensures it stays put during baking.
Stuff each bell pepper with the rice mixture, pressing down gently to fill them completely. Place the stuffed peppers in a baking dish just large enough to hold them snugly, which helps them stay upright. Pour the 1 can Tomato Soup around the peppers in the dish, diluting it slightly with ¼ cup water to create a pourable sauce.
Step 4: Bake to Perfection
Preheat your oven to 375°F. Cover the baking dish loosely with foil and bake for 30 minutes. This initial covered bake steams the peppers, softening them while preventing the filling from drying out.
Remove the foil and sprinkle the remaining 0.5 cup Cheddar Cheese over the tops of the peppers. Return to the oven and bake uncovered for another 15-20 minutes until the peppers are tender and the cheese is melted and lightly golden. The tomato soup in the dish will have transformed into a rich, savory sauce—perfect for spooning over each serving.
Pro Tips For Making Old Fashioned Stuffed Bell Peppers Recipe With Tomato Soup
- Parboil the Rice: Cook the uncooked rice in vegetable broth for 10 minutes before stuffing—it’ll finish perfectly in the peppers without turning mushy.
- Cut Pepper Tops Flat: Slice the tops off the bell peppers horizontally so they stand upright in the baking dish; uneven cuts mean uneven cooking.
- Drain the Tomatoes: Drain and press the canned diced tomatoes to remove excess liquid, or your stuffed peppers will end up watery and the tomato soup topping too thin.
- Warm the Tomato Soup: Heat the tomato soup before pouring it over the peppers—cold soup slows down the baking and can make the rice undercooked at the center.
Dietary Considerations for This Dish
Gluten-Free Friendly
This dish is naturally gluten-free if you use certified gluten-free Worcestershire sauce. I recommend Annie’s or Edward & Sons brands, which I always keep stocked from Central Market. The rice, vegetables, and cheese are all inherently safe for gluten-sensitive diets. 💪
Vegetarian Adaptation
The recipe as written uses vegetarian Worcestershire sauce, making it suitable for meat-free diets. Just double-check your cheddar cheese label—some brands use animal rennet. Cabot or Tillamook are reliable vegetarian options I trust.
Dairy-Free Version
Swap the cheddar for 1.5 cups dairy-free shredded cheese like Violife or Daiya. I’ve tested both in my Austin kitchen with great results. The texture stays creamy, and the flavor blends beautifully with the tomato soup. 🌱
Lower-Sodium Option
Use low-sodium vegetable broth and no-salt-added canned tomatoes to reduce sodium by about 50%. You’ll still get rich flavor from the garlic, herbs, and natural sweetness of the peppers. Taste before adding extra salt.
Nut Allergy Safe
This recipe contains no nuts or nut-derived ingredients. However, always verify your cheddar cheese label, as some processing facilities handle nuts. I prefer Central Market’s in-house shredded cheddar for allergy safety.
Meal Prep Friendly
Assemble peppers up to 24 hours ahead and refrigerate. Bake when ready, adding 5-10 minutes to the covered time if cooking straight from the fridge. David always requests these for his workweek lunches. ⏰
Nutrition Facts
Frequently Asked Questions
Can I use a different type of rice?
Yes! Jasmine or basmati add a nice floral note, though any long-grain works. Just rinse well first to prevent gumminess.
Why cover with foil during baking?
Covering for 30 minutes steams the peppers, keeping them tender while the filling cooks through. Remove it later for that perfect golden cheese topping.
How do I prevent the filling from drying out?
Mix the rice well with the tomato-onion base and add ¼ cup water to the soup in the dish. This creates extra moisture for baking.
Can I make this ahead of time?
Assemble peppers up to 24 hours ahead and refrigerate. Add 5-10 minutes to baking time if starting cold.

Trained in classic French technique but raised on slow-cooked ribs and spicy rubs, she blends culinary skill with smoke and soul.
- Stewed Beef Brisket Recipe: Deep-Rich Flavor After 8 Hours of Slow Simmering - October 15, 2026
- Beef Brisket Rolls Recipe: Flaky Layers and Smoky Sweet Filling - October 15, 2026
- Masterbuilt Smoker Beef Brisket Recipe: Bark-To-Meat Ratio Hack for Unmatched Flavor - October 15, 2026