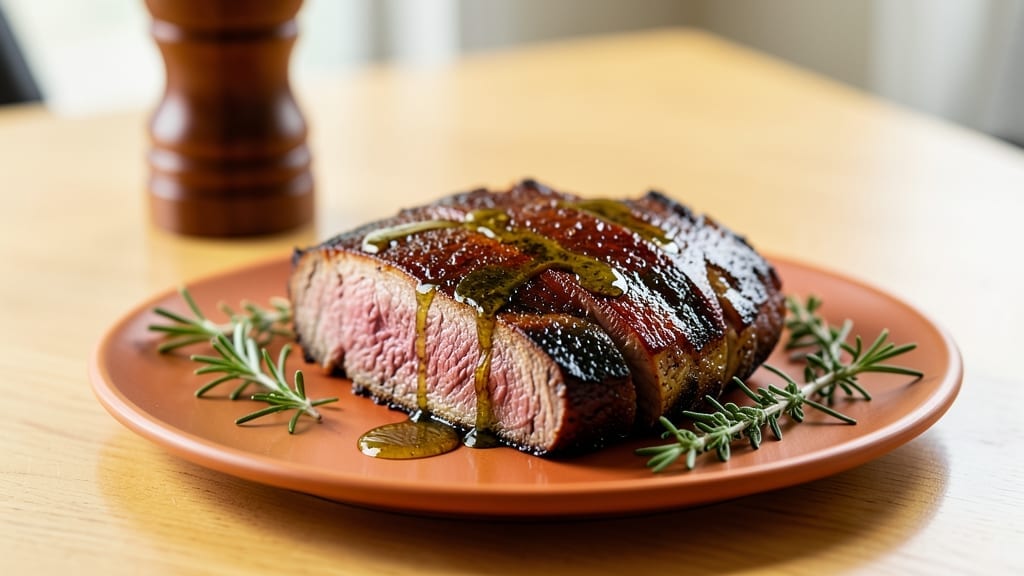
Oven-cooked brisket delivers restaurant-quality tenderness without requiring a smoker or endless hours at the grill. After years of testing, I’ve perfected a method that transforms tough cuts into fork-tender slices using just your oven and a few key techniques.
The secret lies in slow, even cooking and precise temperature control—no special equipment needed.
This recipe focuses on dry-heat roasting, which creates a deep, caramelized crust while keeping the meat impossibly juicy inside. You’ll start with a simple salt-and-pepper rub, then let the oven do the work while you monitor internal temperatures like a pro.
The result? Brisket so tender it practically falls apart at the touch, with a flavor profile that rivals traditional smoked versions.
By the time you pull this brisket from the oven, you’ll have a centerpiece dish that’s perfect for gatherings or a special weeknight dinner.
The method ensures foolproof tenderness, and I’ll share my exact timing cues—including when to wrap it in foil for the final hour—to guarantee perfect results every time. No smoker? No problem.
Pair it with classic sides like creamy mashed potatoes, tangy pickles, or a rich au jus for the full experience. This technique works with any brisket cut, making it versatile enough for holidays or impromptu meals. Let’s get started—your taste buds will thank you.
Ingredients for oven cooked brisket
A few essential ingredients transform tough brisket into melt-in-your-mouth perfection using just your oven.
| Ingredient | Amount | Notes |
|---|---|---|
| Packer Brisket 🥩 | 4 lb | Whole packer cut, fat cap intact |
| Kosher Salt 🧂 | 2 tbsp | Diamond Crystal preferred |
| Freshly Ground Black Pepper 🌶️ | 1 tbsp | Cracked peppercorns preferred |
| Yellow Onion 🧅 | 1 whole | Yellow or red, sliced thick |
| Garlic Cloves 🧄 | 8 cloves | Peeled, smashed for rub |
| Beef Tallow or Vegetable Oil 🫒 | 2 tbsp | For fat cap rendering |
| Butcher's Twine 🧵 | 1 package | For tying if needed |
| Aluminum Foil 📄 | 1 sheet | Heavy-duty, 18×12 inches |
| Beef Broth 💧 | 1 cup | Low-sodium preferred |
| Apple Cider Vinegar 🍎 | 2 tbsp | For tenderizing |
| Brown Sugar 🍚 | 1 tbsp | Light or dark |
| Smoked Paprika 🌶️ | 1 tsp | For depth of flavor |
| Instant-Read Meat Thermometer 🌡️ | 1 whole | Critical for accuracy |
[recipe_ingredient_scaler]
The brisket cut makes all the difference—Packer brisket with its thick fat cap is ideal, but flat cuts work too. Most butchers will trim it for you, but leave that fat cap if you can—it renders down during cooking, keeping the meat juicy. I always buy from local butchers or Costco for the best quality. Look for bright red color and good marbling. If you’re buying pre-cut, Whole Foods or Trader Joe’s carry excellent options. The fat cap should be at least 1/4-inch thick—that’s what creates the crust and moisture during cooking.
No beef tallow? Vegetable oil or bacon fat works just as well. The apple cider vinegar might sound odd, but it tenderizes the meat beautifully—white vinegar works in a pinch. For the rub, I like to mix the salt, pepper, brown sugar, and smoked paprika right on the brisket. If you’re using pre-ground pepper, freshly cracked peppercorns make a world of difference (trust me, it’s worth the extra 30 seconds). The beef broth can be homemade or store-bought—just make sure it’s low-sodium. For extra flavor, I sometimes add a bay leaf or two to the broth before using it.
This brisket reheats like a dream—wrapped in foil and warmed at 300°F for 20 minutes keeps it juicy. Store it in the fridge for up to 5 days or freeze for 3 months (portion it into individual servings for easy reheating). The fat cap makes it perfect for freezing—just wrap it tightly in butcher paper first. Leftovers? Shred it for tacos or sandwiches—it’s even better the second day. And save those juices! Strain them and use as a base for gravy or au jus.
Why You’ll Love This Recipe
- No Fuss Feast: Honestly, I used to dread brisket—until I realized this method is unfussy magic. Just a quick rub with kosher salt, black pepper, smoked paprika, and brown sugar, a sear in beef tallow, and off to the oven at 275°F for 5-6 hours. The butcher’s twine keeps it neat, and the apple cider vinegar tenderizes while you nap. No fancy equipment, no stress.
- Crispy Outside, Creamy Inside: That sear? Chef’s kiss. You’re browning the brisket in vegetable oil for 3-4 minutes per side before it hits the oven, so you get that perfect crispy bark with a juicy, fall-apart center. And the garlic cloves, smashed into the rub, infuse the meat with warmth—no overpowering, just rich, savory depth. Trust me, this isn’t your grandma’s brisket.
- Leftovers That Shame No One: Between us, this recipe is my secret weapon for busy weeks. Cook it Sunday, and you’ve got 5 days of meals—sandwiches, tacos, or just straight-up slices with the pan sauce (made from beef broth and that vinegar fond). Reheat it at 300°F for 20 minutes, and it’s still moist and magical. No sad, dry leftovers here.
- Budget-Friendly Beast: A 4 lb Packer Brisket feeds a crowd for peanuts—especially when you’re using onion and garlic as sides instead of pricey garnishes. The low-sodium beef broth and kosher salt keep costs down, and the smoked paprika adds flavor without breaking the bank. It’s the kind of dish that makes you feel fancy and frugal at the same time.
Step-by-step instructions for oven-cooked brisket
Here’s how to transform a tough brisket into melt-in-your-mouth perfection using just your oven.
Prepare the Brisket with Dry Rub and Tie
Begin by trimming any excess fat from the brisket, leaving about ¼-inch fat cap intact. This preserves moisture while allowing for flavorful rendering. In a small bowl, combine the 2 tablespoons kosher salt, 1 tablespoon freshly ground black pepper, 1 teaspoon smoked paprika, and 1 tablespoon brown sugar. Rub this mixture generously over the entire surface of the brisket, pressing firmly so it adheres well.
Next, use the 1 package butcher’s twine to tie the brisket into a compact shape. This ensures even cooking and helps maintain the shape during the long cook. Place the brisket fat-side up on a rack set inside a roasting pan, and let it sit at room temperature for 1 hour before cooking. This step is crucial for even heat distribution and prevents cold spots in the meat.
Sear and Sear the Brisket for Depth of Flavor
Preheat your oven to 275°F. Before placing the brisket in the oven, heat a large skillet over medium heat and add the 2 tablespoons beef tallow or vegetable oil. Once the oil is shimmering, carefully sear the brisket on all sides until deeply browned, about 3-4 minutes per side. This step develops a rich crust and adds layers of flavor that the slow cook won’t achieve alone.
Transfer the seared brisket to the roasting pan, fat-side up. Pour the 2 tablespoons apple cider vinegar into the skillet and scrape up any browned bits from the bottom. This vinegar will tenderize the meat further during the long cook, and the fond adds umami depth to the final result.
Slow Cook with Moisture and Rest
Place the brisket in the preheated 275°F oven and cook for approximately 5-6 hours, or until the internal temperature reaches 195°F when measured with the instant-read meat thermometer. About 30 minutes before the brisket reaches this temperature, remove it from the oven and tent loosely with the 1 sheet aluminum foil. This helps prevent overcooking while allowing the bark to set.
While the brisket rests, prepare a simple pan sauce by combining the 1 cup beef broth, the reserved vinegar fond, and any accumulated juices from the roasting pan. Simmer this mixture over medium heat until reduced by half, about 5-7 minutes. This sauce will complement the tender meat beautifully.
Rest and Slice for Maximum Tenderness
Let the brisket rest for at least 30 minutes before slicing. This resting period allows the juices to redistribute throughout the meat, ensuring each slice is moist and flavorful. During this time, slice the 1 yellow onion into thick rounds and the 8 garlic cloves in half. These can be served on the side or used to enhance the brisket’s presentation.
Once rested, slice the brisket against the grain into ¼-inch thick slices. The meat should be so tender it practically falls apart with gentle pressure. Serve immediately with the pan sauce drizzled over the top, accompanied by the sliced onions and garlic for added flavor and texture.
Pro Tips For Making Oven Cooked Brisket
- Preheat the Skillet Right: I used to rush the sear by throwing the brisket in before the oil was really hot—big mistake. Heat that skillet until the tallow or oil shimmers like a desert mirage, then sear for those 3-4 minutes per side. The crust you get from a proper sear is the difference between good brisket and “I actually cooked this” brisket.
- Salt the Onions Too: That sliced yellow onion is just hanging out in the background until serving, but if you toss it with a pinch of the same kosher salt and smoked paprika from your rub while the brisket rests, it becomes a flavorful side instead of a forgettable garnish. Do it while the pan sauce simmers—no extra effort, just better flavor.
- Don’t Skip the Vinegar Fond: That browned scrapings from the skillet after searing? Don’t wipe them out—deglaze with the apple cider vinegar and pour it into the roasting pan with the brisket. The acid tenderizes the meat further, and the fond adds depth that dry vinegar alone can’t match. I learned this the hard way after serving brisket that tasted like it was missing something.
- Check Temp Early: Start checking the brisket’s internal temp with that meat thermometer around the 4-hour mark—yes, even if it feels cold to the touch. Ovens run hot or cold, and hitting 195°F at 5 hours is better than waiting until 6 hours and ending up with dry, overcooked meat. Trust the thermometer, not your instincts.
Dietary considerations for oven cooked brisket
Gluten-Free Adaptation
This brisket recipe is naturally gluten-free—no breadcrumbs, thickeners, or sauces with hidden gluten! The dry rub of kosher salt, pepper, brown sugar, and smoked paprika keeps it safe for gluten-sensitive diets. Just double-check your beef broth label—opt for certified gluten-free brands like Imagine Foods or Kettle & Fire if needed.
I always keep a bottle of gluten-free Worcestershire sauce on hand for gravy-making emergencies. 💛
Low-Carb Option
Skip the 1 cup beef broth and 2 tbsp apple cider vinegar pan sauce to reduce carbs. Instead, brush the cooked brisket with olive oil mixed with 1 tsp garlic powder and ½ tsp onion powder for flavor.
The natural fat cap renders down beautifully, keeping the dish rich without added carbs. This version works perfectly for keto or low-carb lifestyles.
Dairy-Free Considerations
This recipe is already dairy-free, but if you’re adding sides like mashed potatoes or cheese sauces, opt for dairy-free alternatives. My favorite is cashew-based sour cream from Forager or almond milk-based gravy thickened with arrowroot powder.
The brisket itself stays pure, so you can focus on keeping complementary sides dairy-free without compromising flavor.
Vegetarian Substitutes
While this recipe is meat-centric, you can create a “brisket-style” vegetarian version using portobello mushrooms or seitan. Marinate them in the same apple cider vinegar and brown sugar mix, then roast at 275°F for 4-5 hours until tender.
The texture won’t be identical, but the smoky-sweet flavors will satisfy! I’ve even tried jackfruit in a pinch—it holds up surprisingly well when cooked low and slow. 🌱
Allergen-Free Adjustments
For nut allergies, swap any nut-based alternatives for sunflower seed butter in sauces or tapioca starch for thickening. If you’re avoiding soy, check your butcher’s twine—some brands contain soy-based coatings. I always opt for 100% cotton twine from my local butcher shop.
The key is to focus on the brisket itself—it’s naturally free of top allergens like dairy, nuts, and gluten when prepared as written.
Nutrition facts
Frequently asked questions
Why does my oven-cooked brisket need to rest before slicing?
The 30-minute rest lets juices redistribute evenly throughout the meat. Slicing too soon causes them to spill out, leaving dry slices. Think of it like letting dough rise—patience ensures every bite is juicy and tender. This step is especially critical for brisket’s tough connective tissues to fully break down.
Can I use a different cut of beef instead of packer brisket?
Yes! While packer brisket works best, flat-cut brisket also succeeds with this method. Just ensure it has at least ¼-inch fat cap for moisture. Trim excess fat but keep enough for flavor rendering. The key is thickness—aim for 1.5-2 inches at its thickest point for even cooking.
What if my oven temperature fluctuates during cooking?
Use an oven thermometer to verify accuracy—many ovens run hot or cold. If temps vary by more than 25°F, adjust your cook time slightly. For example, if your oven runs 20°F hotter, reduce time by 30-45 minutes. The 195°F internal temp is your true target, not the clock.
How do I know when the brisket is done without a meat thermometer?
Press the thickest part gently—it should feel like firm but yielding jelly. The fat cap should render down to ¼-inch thickness, and the meat should pull away from the bone easily. If unsure, pierce with a knife: juices should run clear, not pink. This method works but thermometers guarantee foolproof results.

Trained in classic French technique but raised on slow-cooked ribs and spicy rubs, she blends culinary skill with smoke and soul.
- Smoked Chicken Salad Recipe: Crispy, Smoky Bites With Creamy Ranch Dressing - October 19, 2026
- Beer Can Chicken in a Smoker Recipe: Juicy, Herbed Perfection in One Can - October 19, 2026
- Brined Beef Brisket Recipe: Ultra-Tender, Juicy Cuts in One Pot - October 19, 2026