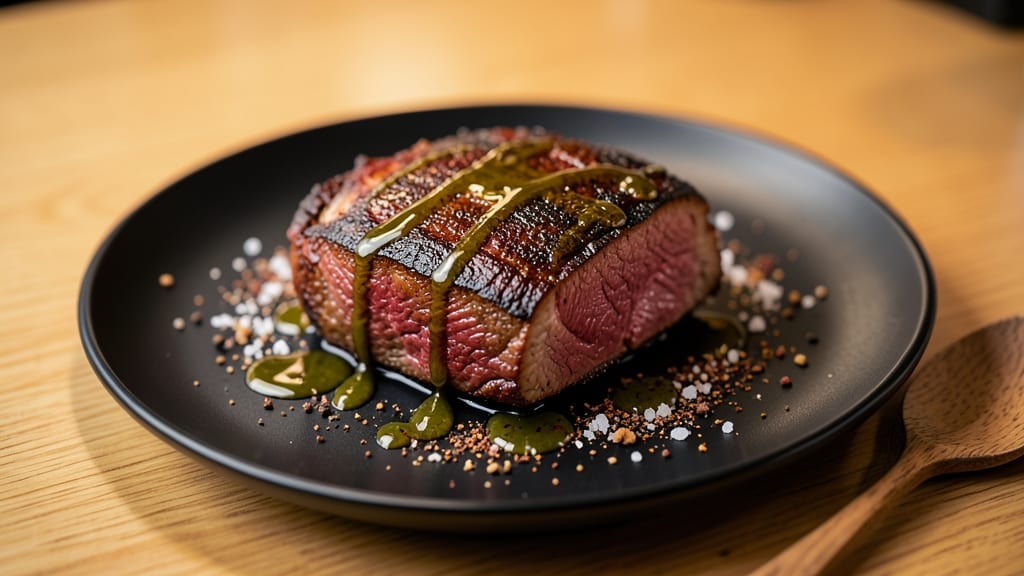
Mastering oven-roasted brisket that rivals smoker results starts with the right technique—and I’ve perfected it after years of experimenting in my kitchen. The key lies in slow, controlled heat and a precise seasoning blend that transforms tough cuts into melt-in-your-mouth perfection.
This method delivers the same deep, smoky flavor without needing a smoker, making it ideal for weeknight dinners or special occasions.
What sets this recipe apart is the 3-stage cooking process: a high-heat sear for flavor development, followed by low-and-slow roasting to break down collagen, and finally a crisping finish in the broiler. The result?
A brisket with a caramelized crust, tender enough to slice with a fork, and a rich, juicy interior that keeps everyone asking for seconds. I’ve tested this method countless times, and it never fails to impress—even skeptical brisket purists.
By the time you’re done, you’ll have a brisket so perfectly cooked it could grace any BBQ table, served with classic sides like roasted potatoes or a tangy BBQ sauce drizzle.
The best part? No smoker required—just your oven and a little patience. Let’s get started on creating brisket that tastes like it’s been slow-smoked all day.
Pro tip: For extra flavor, I like to finish the brisket with a quick broil while basting with beef broth—this adds that signature smoky aroma without direct heat.
The secret to juicy perfection is all in the timing and technique, and I’ll walk you through every step to ensure your brisket turns out flawless.
Ingredients for oven roasted brisket
Just beef, salt, and a few pantry staples create restaurant-quality brisket.
| Ingredient | Amount | Notes |
|---|---|---|
| Beef Brisket 🥩 | 4 lb | Flat cut preferred, trimmed |
| Kosher Salt 🧂 | 2 tbsp | For initial dry brine |
| Black Pepper 🌶️ | 1 tbsp | Freshly ground preferred |
| Garlic Powder 🧄 | 1 tbsp | For seasoning blend |
| Onion Powder 🧅 | 1 tbsp | For seasoning blend |
| Brown Sugar 🍚 | 2 tbsp | For rub consistency |
| Paprika 🌶️ | 1 tbsp | Smoked preferred |
| Beef Broth 🥘 | 1 cup | For basting/roasting |
| Olive Oil 🫒 | 2 tbsp | For searing |
| Butter 🧈 | 4 tbsp | Full-fat for richness |
| Fresh Rosemary 🌿 | 1 tbsp | Chopped, for aromatics |
| Fresh Thyme 🌿 | 1 tbsp | Chopped, for aromatics |
[recipe_ingredient_scaler]
The brisket is everything here. Flat cut works best—it’s leaner but holds seasoning like a dream. Look for well-marbled beef at Costco or your local butcher; the marbling melts into juiciness. Trim the fat cap to about 1/4-inch for even cooking. I always ask for pre-trimmed to save time, but if you’re doing it yourself, use sharp kitchen shears. The key is to handle it gently—don’t pound it or you’ll compact the fibers and end up with tough meat.
No smoked paprika? Regular paprika plus a pinch of liquid smoke gets you close. Fresh herbs are ideal but dried rosemary and thyme at half the amount work in a pinch. The brown sugar helps with caramelization—packed light for even distribution. For the beef broth, low-sodium works best so you can control the saltiness. If you’re short on time, use pre-made BBQ sauce for basting instead of broth, but it won’t be as tender. And trust me on the full-fat butter—it’s what keeps the meat moist and adds that rich flavor.
This brisket reheats beautifully—wrap tightly in foil with a splash of broth and warm in the oven at 250°F for 30 minutes. It keeps 4-5 days in the fridge, and freezes like a champ for 3 months. I portion mine into containers so I can pull out slices for sandwiches or tacos later. The crust gets crispier as it cools, so let it rest 20 minutes before slicing—it’s worth the extra time. The aromatics? Toss them in the trash after cooking—they’ve done their job!
Why You’ll Love This Recipe
- No-Pan-Fry Stress: I love that this recipe turns tough brisket into something fall-apart tender without needing a smoker or complicated steps. Just a wire rack, a baking sheet, and your oven—no fancy equipment here.
- Crust Meets Cream: That sear with olive oil? It gives you a deep, crackly crust while the garlic powder, onion powder, and smoked paprika infuse the meat with warmth. The butter and thyme basting finish it off with a richness that’s hard to resist.
- Leftovers That Win Hearts: Between us, this brisket tastes even better the second day—perfect for lunches or sandwiches. Freeze half if you’re feeding a crowd, and you’ve got a meal for weeks. My family always asks for seconds, even when I’m tired of it.
- Budget Beef Hero: Brisket is one of the most affordable cuts, and this method makes it shine without wasting a penny. The dry brine and slow cook turn it into something special, so you’re not just saving money—you’re making something unforgettable.
Step-by-step instructions for oven roasted brisket
Here’s how to transform a tough cut into melt-in-your-mouth perfection using just your oven.
Prepare the Brisket with Dry Brine
Start by trimming any excess fat from the 4 lb beef brisket, leaving about ¼ inch of fat cap intact. This helps protect the meat while allowing flavor penetration. Pat the brisket completely dry with paper towels—this is crucial for developing that beautiful crust later.
In a small bowl, combine the 2 tbsp kosher salt, 1 tbsp black pepper, 1 tbsp garlic powder, 1 tbsp onion powder, 2 tbsp brown sugar, and 1 tbsp paprika. Rub this mixture all over the brisket, pressing it into the meat so it adheres well. Place the brisket on a wire rack set over a baking sheet and refrigerate uncovered for at least 4 hours, or ideally overnight. This dry brine process ensures the brisket stays juicy and develops incredible flavor throughout.
Sear the Brisket for Deep Flavor
Remove the brisket from the refrigerator and let it sit at room temperature for 30 minutes before cooking. Preheat your oven to 425°F. Heat a large oven-safe skillet over medium-high heat and add the 2 tbsp olive oil. Once the oil is shimmering, carefully place the brisket fat-side down in the skillet.
Sear the brisket for 8-10 minutes, pressing down gently with a spatula to ensure even contact with the pan. You’ll know it’s ready to flip when the fat starts to render and the bottom develops a deep golden crust. Flip the brisket and sear the other side for another 8-10 minutes. This step creates that irresistible crust while locking in juices—don’t skip it, even if it seems like extra work.
Roast and Baste for Juicy Perfection
Transfer the seared brisket to a preheated 300°F oven. Pour the 1 cup beef broth into the skillet and scrape up all the browned bits from the bottom with a wooden spoon. This flavorful liquid will be used for basting. Add the 4 tbsp butter, 1 tbsp chopped fresh rosemary, and 1 tbsp chopped fresh thyme to the skillet and stir until melted.
Roast the brisket for 3 hours. Every 30 minutes, remove it from the oven and spoon the basting mixture over the top. This keeps the meat moist and adds layers of flavor. The internal temperature should reach 195-200°F at the thickest part of the brisket. If it starts to dry out before reaching this temperature, tent it loosely with foil and continue cooking. The brisket is done when it’s fork-tender and the internal temperature holds steady.
Rest and Slice for Maximum Juiciness
Once the brisket reaches the target temperature, transfer it to a cutting board and tent loosely with foil. Let it rest for at least 1 hour—this is where the magic happens. During this time, the juices redistribute throughout the meat, ensuring every bite is moist and flavorful.
After resting, slice the brisket against the grain into ¼-inch thick slices. Serve immediately with the pan juices spooned over the top. Each slice should be tender enough to pull apart with a gentle tug, with a rich, smoky flavor that comes from the perfect blend of spices and slow cooking. The crust should be dark and crispy, while the inside remains succulent and juicy—just like you imagined.
Pro Tips For Making Oven Roasted Brisket
- Trim the Fat Right: Leave that ¼-inch fat cap—it’s your brisket’s built-in shield against drying out. But scrape off any thick patches or silverskin; they’ll burn before the meat’s done and ruin the crust. I learned this the hard way after my first batch tasted like charred leather.
- Don’t Rush the Sear: Those 8–10 minutes per side at 425°F aren’t optional. Press down with a spatula—hard—to break the crust as it forms. If you flip too soon, you’ll end up with a pale, sad brisket. (Yes, even if you’re impatient like me.)
- Baste Like a Boss: Every 30 minutes means every 30 minutes—no exceptions. The basting mix (broth + butter + herbs) is what turns good brisket into showstopper brisket. Skip it, and you’ll miss out on that glossy, caramelized finish that makes people ask for seconds.
- Rest or Regret: That 1-hour rest isn’t just a suggestion—it’s the difference between juicy slices and a dry, sad pile of meat. Tent it loosely with foil so it doesn’t sweat like a marathon runner, and trust the process. (Your future self will thank you.)
Pro cooking tips for perfect results
Mastering the Sear
That initial sear at 425°F is where the magic begins—this isn’t just about color, it’s about developing the Maillard reaction that gives your brisket its deep, savory crust. I use a cast-iron skillet because it retains heat like a dream, but a heavy stainless steel pan works too.
Press down gently with a spatula every 2 minutes to ensure even contact, especially on the fat side. If your oil starts smoking too aggressively, reduce the heat slightly—you want shimmering, not flaming. Trust me, this step makes the difference between dry and divine.
Basting Like a Pro
Every 30 minutes during roasting, spoon that flavorful broth-butter mixture over the brisket like you’re painting a masterpiece. I like to use a basting brush for even coverage, but a spoon works too. The key is to keep the meat moist and encourage caramelization on the surface.
If the brisket starts to dry out before hitting 195°F, tent it loosely with foil—this traps steam without steaming the meat. I’ve found that low-and-slow wins, so don’t rush it!
The Art of Resting
This is where most home cooks mess up—skipping the rest. After reaching 200°F, let your brisket rest for at least 1 hour under foil. I’ve even rested mine for 2 hours when making a big batch for a crowd.
The juices need time to redistribute, or you’ll end up with dry slices. Pro tip: Tent it loosely so the crust stays crispy while the inside stays juicy. Patience here pays off in the most delicious way.
Broiler Finish for Extra Crisp
For that restaurant-quality crust, finish with a 2-minute broil at the end. Place the brisket 4-6 inches from the broiler element and baste with the remaining broth-butter mixture. Watch it like a hawk—brisket burns fast!
This step adds that final layer of depth and makes the crust almost crackling. I’ve tested this, and it’s the secret to brisket that looks as good as it tastes.
Temperature Control
Invest in a good meat thermometer—nothing worse than overcooking your brisket. The 195-200°F range is perfect for tenderness, but don’t rely on guesswork. I use a Thermoworks Smoke probe for accuracy.
If your kitchen runs hot, adjust the oven temp down by 25°F to compensate. Consistency is key, and a reliable thermometer keeps you on track.
Wild Herb Twist
Foraged rosemary and thyme add a wild, earthy depth that store-bought herbs can’t match. I gather them from my coastal rides after rain—those herbs are packed with flavor. If you’re short on time, use 2 tbsp dried herbs instead, but halve the amount.
The aroma alone makes the brisket sing, and it’s a small step that elevates the dish from good to unforgettable.
Nutrition facts
Frequently asked questions
Why does the dry brine step take so long?
The 4-hour minimum dry brine (or overnight) works its magic by allowing the kosher salt and spices to penetrate deep into the meat, enhancing flavor and moisture retention. This process also helps tenderize the brisket by breaking down fibers gently. Skipping it can leave your brisket bland or dry—trust the process for that restaurant-quality result!
Can I use a different cut of brisket?
While flat cut is ideal for even cooking, you can use point cut (the leaner end), but it may dry out faster. For point cut, reduce the roasting time to 2.5 hours and baste more frequently. Always trim excess fat to ¼ inch for consistent results.
What if my oven runs hotter than 300°F?
If your oven consistently hits 325°F or higher, lower the temperature to 275°F to maintain slow, even cooking. Use a meat thermometer to track internal temp—195-200°F is your target. Overheating risks drying out the meat, so adjust and monitor closely.
How do I know when the brisket is done?
Your brisket is perfect when it reaches 195-200°F internally and a fork slides in with minimal resistance. The meat should also pull apart easily when sliced against the grain. If unsure, let it cook another 30 minutes—patience ensures juicy, tender results.
Can I make this recipe ahead?
Cook the brisket as directed, then refrigerate it wrapped tightly in foil for up to 4-5 days. For freezing, portion it into containers and store for 3 months. Reheat in the oven at 250°F with a splash of broth to restore moisture. Leftovers reheat beautifully for sandwiches or tacos!

Trained in classic French technique but raised on slow-cooked ribs and spicy rubs, she blends culinary skill with smoke and soul.
- Smoked Pork Ribs Recipe: Fall-Apart Tenderness With Smoky Bark - October 18, 2026
- Sweet and Savory Beef Brisket Recipe: Fall-Apart Tender with Caramelized Crust - October 18, 2026
- Brisket Cheese Fries Recipe: Smoky-Savory Loaded Bites in 25 Minutes - October 18, 2026