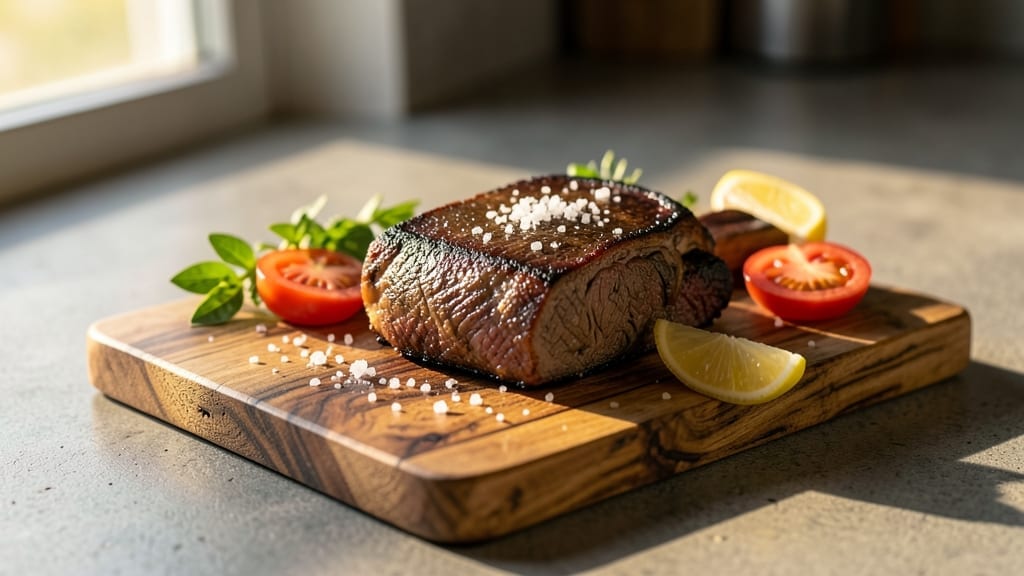
Smoked beef cheeks deliver melt-in-your-mouth tenderness with deep, smoky richness that transforms any meal into an experience. I first discovered their potential at a family cookout where my grandfather slow-smoked them over hickory—now I’ve perfected a method that guarantees fall-apart texture every time.
The secret lies in low-and-slow cooking with precise temperature control, creating layers of flavor that penetrate through thick connective tissue.
This recipe requires just three essential components: quality beef cheeks, a simple dry rub, and your smoker’s patience. The process begins with trimming excess fat and applying a blend of spices that enhances the natural beefiness without overpowering it.
We’ll smoke the cheeks at 225°F for 8-10 hours, using hickory or cherry wood for that signature smoky depth that becomes the star of the dish.
By the time they emerge from the smoker, your beef cheeks will be so tender they’ll practically fall apart at the touch. The exterior develops a beautiful bark while maintaining juicy, flavorful meat inside.
This dish pairs beautifully with roasted root vegetables or a crisp green salad to balance the richness. The aroma alone will have everyone anticipating dinner.
What makes this recipe truly special is its versatility—serve it sliced thin over toasted bread for open-faced sandwiches, or shred it into tacos for a smoky, meaty filling.
The leftovers reheat beautifully, making this an excellent meal prep option for busy weeks. Let’s get started on creating this restaurant-quality centerpiece for your table.
Ingredients for smoked beef cheeks
Three core components: quality beef cheeks, a smoky spice blend, and your smoker’s patience.
| Ingredient | Amount | Notes |
|---|---|---|
| Beef Cheeks 🥩 | 2 lb | Fresh, trimmed of excess fat |
| Yellow Onion 🧅 | 1 whole | Yellow or red, sliced |
| Garlic Cloves 🧄 | 6 cloves | Peeled, minced |
| Dry Mustard 🌶️ | 2 tbsp | Yellow or Dijon |
| Smoked Paprika 🌶️ | 1 tbsp | For smoky depth |
| Ground Black Pepper 🌶️ | 1 tbsp | Freshly cracked |
| Kosher Salt 🧂 | 1 ½ tbsp | Diamond Crystal preferred |
| Brown Sugar 🍯 | 1 tbsp | Light or dark |
| Apple Cider Vinegar 🍏 | 2 tbsp | For tangy balance |
| Hickory Wood Chips 🌳 | 1 package | Or cherry wood chips |
| Beef Broth 💧 | ½ cup | Low-sodium preferred |
| Unsalted Butter 🧈 | 2 tbsp | Full-fat for richness |
[recipe_ingredient_scaler]
The beef cheeks are non-negotiable here—look for thick, meaty cuts with good marbling. Local butchers or specialty meat counters often carry them, but if your grocery store doesn’t, check the freezer section. Trim any visible fat before applying the rub, but leave a thin layer for flavor. For the best texture, buy the freshest possible—frozen cheeks work too, just thaw overnight in the fridge. Hickory wood chips add that signature smoky depth, but cherry or pecan work beautifully if you want something fruitier.
No smoked paprika? Regular paprika plus a pinch of liquid smoke gets you close. The mustard adds tang—Dijon works best, but yellow mustard is fine in a pinch. Short on beef broth? Water plus a bouillon cube keeps things flavorful. The vinegar is key for balance, so don’t skip it. For the rub, mix everything in a bowl—wet your fingers slightly to help it stick to the meat. If you’re prepping ahead, the dry rub can be stored in an airtight container for up to 3 months.
The leftovers reheat beautifully—warm in a skillet with a splash of broth for that restaurant-quality finish. Store smoked cheeks in an airtight container for 4-5 days in the fridge or 3 months frozen. For meal prep, slice them thin and pack with the cooking juices. The bark gets crispy when reheated, so a quick broil or stovetop sear brings it back to life. Portion into single servings for easy grab-and-go meals.
Why You’ll Love This Recipe
- I’ll be real: this isn’t just for Sunday dinners. The shredded beef keeps like a dream for up to 5 days in the fridge, and honestly, it tastes even better the next day—just reheat gently with a splash of broth to revive that sauce. Toss it in tacos, mix it into pasta, or layer it on a sandwich. It’s that kind of versatile, no-fuss protein.
- No-Fuss Prep: Honestly, the secret’s in how little you actually do—just trim the beef cheeks, toss them with that onion, garlic, and dry mustard, and let the fridge handle the rest for at least 4 hours. No chopping marathon, no standing over the stove. Just set it, forget it, and come back to a smoker doing all the heavy lifting.
- Smoky, Tangy, Addictive: Between the hickory wood chips and that 2 tbsp of apple cider vinegar, you get this perfect balance—deep, charred smokiness that meets a bright, vinegary kick. The smoked paprika and brown sugar? They caramelize just enough to make every bite taste like a slow-simmered secret. Trust me, it’s the kind of flavor that makes you want seconds and thirds.
- Leftovers That Shine: I’ll be real: this isn’t just for Sunday dinners. The shredded beef keeps like a dream for up to 5 days in the fridge, and honestly, it tastes even better the next day—just reheat gently with a splash of broth to revive that sauce. Toss it in tacos, mix it into pasta, or layer it on a sandwich. It’s that kind of versatile, no-fuss protein.
Step-by-step instructions for smoked beef cheeks
Here’s how to transform tough beef cheeks into melt-in-your-mouth perfection using just your smoker.
Prepare the Beef Cheeks for Smoking
Begin by trimming any remaining fat from the 2 lb beef cheeks, leaving about ¼ inch thickness. This ensures even cooking and prevents grease fires in your smoker. Place the cheeks in a large bowl and add the sliced yellow onion, 6 minced garlic cloves, 2 tbsp dry mustard, 1 tbsp smoked paprika, 1 tbsp ground black pepper, 1½ tbsp kosher salt, and 1 tbsp brown sugar. Mix thoroughly with your hands, pressing the spices into the meat so they adhere well.
Transfer the seasoned beef cheeks to a resealable plastic bag and refrigerate for at least 4 hours, preferably overnight. This dry-brining step enhances flavor penetration and helps tenderize the meat. When ready to smoke, remove the beef cheeks from the fridge and let them sit at room temperature for 1 hour before cooking. This ensures even heat distribution throughout the smoking process.
Set Up the Smoker and Add Wood Chips
Preheat your smoker to 225°F using the 1 package of hickory wood chips. Maintain this temperature consistently throughout the entire cooking process. Once the smoker reaches temperature and you see clean, blue smoke (not white), you’re ready to begin. Place the beef cheeks fat-side up in the smoker, leaving space between each piece for proper air circulation.
Add 2 tbsp apple cider vinegar to the smoker tray to create a slightly acidic environment that helps tenderize the meat. Close the lid and resist the urge to peek—every time you open it, you lose heat and extend cooking time. Let the beef cheeks smoke undisturbed for 6 hours, or until they reach an internal temperature of 160°F. You’ll notice the meat beginning to pull away slightly from the bone and develop a beautiful mahogany color.
Wrap and Finish the Beef Cheeks
When the beef cheeks reach 160°F, they’ll hit “the stall,” where the internal temperature stops rising. This is normal and indicates the meat is releasing moisture. At this point, wrap each piece tightly in aluminum foil along with 2 tbsp unsalted butter and ½ cup beef broth. The butter adds richness while the broth helps break down collagen for maximum tenderness.
Return the wrapped beef cheeks to the smoker and continue cooking until they reach an internal temperature of 205°F, approximately 2-3 additional hours. The meat should now be fork-tender and falling apart easily. Remove from the smoker and let the beef cheeks rest for 15 minutes before serving. This resting period allows the juices to redistribute, ensuring each bite is moist and flavorful.
Shred and Serve with Smoky Sauce
Using two forks, shred the beef cheeks directly in the foil pan, allowing the juices and butter to create a rich, smoky sauce. The meat should separate easily with minimal effort. Transfer the shredded beef cheeks to a serving platter, reserving the sauce in the foil pan. You can thin the sauce with additional beef broth if needed, but it should naturally coat the back of a spoon.
Serve the smoked beef cheeks immediately, spooning the smoky sauce over the top. Each bite should deliver a perfect balance of smoky depth from the hickory wood, tangy brightness from the apple cider vinegar, and rich umami from the slow-cooked meat. Pair with crusty bread or roasted vegetables to soak up every last drop of that irresistible sauce.
Pro Tips For Making Smoked Beef Cheeks
- Trim the Fat Right: Leave that ¼-inch fat layer on the beef cheeks—it’s what keeps them juicy and prevents the smoker from turning into a grease fire. I learned this the hard way after watching my first batch of cheeks turn into a smoky mess because I trimmed too aggressively.
- Press the Rub Hard: When mixing the dry rub (onion, garlic, mustard, paprika, and all), don’t just sprinkle—dig your fingers into the meat and work the spices into every crevice. The first time I skipped this, the flavor was weak and uneven. Your hands are the best tool here.
- Stall? Wrap Fast: Hit the stall at 160°F? That’s your cue to wrap those cheeks in foil with the butter and broth immediately. The longer you wait, the more moisture you lose—no one wants dry, tough meat, even if it’s smoked to perfection.
- Vinegar on the Tray: Drizzle the apple cider vinegar directly onto the smoker tray before adding the beef. It’s not just for flavor—it creates a slightly acidic environment that helps break down the collagen faster. I used to pour it over the meat, but this method makes a real difference in tenderness.
Regional styles of these flavors
Southern Smoky Tradition
In the deep South, beef cheeks are often slow-smoked over hickory until they develop that signature charred bark and melt-in-your-mouth texture.
My family’s recipe calls for a dry rub of 1 tbsp smoked paprika, 1 tbsp brown sugar, and 1½ tbsp kosher salt, rubbed directly onto the meat before smoking. The key is patience—cooking at 225°F for 8-10 hours until the internal temp hits 205°F. The result?
A dish that’s rich, smoky, and perfect with buttery cornbread. I remember my granddaddy always served it with a side of pickled okra for that tangy contrast. 🌿
French-Inspired Bark
My French technique training taught me to embrace the Maillard reaction—that beautiful crust that forms on the surface of the meat. For this version, I add 2 tbsp apple cider vinegar to the smoker tray to create an acidic environment that enhances browning.
After smoking, I wrap the cheeks in foil with 2 tbsp butter and ½ cup beef broth to finish cooking and add richness. The result? A dish that feels both rustic and refined—like a cross between a French bistro and a Southern BBQ joint.
This method is my secret weapon for impressing guests. 🥖
Texas-Style Rub
Down in Texas, they love their rubs spicy and bold. I swap out half the smoked paprika for 1 tbsp chili powder and add ½ tsp cayenne to the mix. The result is a dish with serious kick—perfect for those who love heat.
I pair it with a side of smoky black beans and charro beans for a full Texas feast. The vinegar in the rub cuts through the fat, keeping the dish light but flavorful. This version is my go-to for cookouts with friends who can handle the spice. 🌶️
Coastal Foraging Twist
When I’m riding my vintage motorcycle along the coast, I often stop at local farmers markets to forage for fresh herbs. For this variation, I add 1 tbsp chopped rosemary and 1 tbsp fresh thyme to the rub, along with the yellow onion and garlic.
The herbs add a bright, herbal note that balances the smokiness. I serve it with a side of grilled asparagus and a light balsamic glaze. This coastal-inspired version is lighter but still packed with flavor—ideal for summer gatherings. 🌊
Mexican-Inspired Smoky Shreds
For a Mexican twist, I wrap the smoked cheeks in foil with 1 tbsp adobo sauce and ½ cup tomato sauce during the final hour of smoking. This adds a tangy, slightly sweet depth that pairs perfectly with warm tortillas and toppings like pico de gallo and avocado crema.
The result is a dish that’s both hearty and vibrant—great for a casual dinner or a family feast. I often make this version for my friends who love bold, spicy flavors. 🌮
Nutrition facts
Frequently asked questions
Why do I need to dry-brine the beef cheeks for 4+ hours?
The dry-brine step is crucial for two reasons: it enhances flavor penetration so the spices fully infuse into the meat, and it helps tenderize the tough connective tissue. This process transforms tough beef cheeks into melt-in-your-mouth perfection. The longer you brine (up to overnight), the more flavorful and tender the result.
What if my smoker temperature fluctuates during cooking?
Fluctuations are normal, but try to keep your smoker as close to 225°F as possible. If it drops below 200°F, your cooking time will extend significantly. Use a reliable meat probe thermometer to monitor internal temps and adjust wood chip additions as needed. Consistency is key for that perfect bark and tender meat.
Can I skip wrapping the beef cheeks in foil?
Wrapping is essential for the final tenderness stage. Without it, the meat may dry out during the stall phase. The foil trap with 2 tbsp butter and ½ cup beef broth creates steam that breaks down collagen, ensuring fork-tender results. Think of it as your secret weapon for that restaurant-quality texture.
How do I know when the beef cheeks are done?
Use a meat thermometer to check internal temperature – aim for 205°F when wrapped. The meat should pull away from the bone and feel very tender when poked. If unsure, check at 200°F and let it rest – it’ll continue cooking slightly from residual heat. The bark should be deep mahogany with a crispy edge.
What’s the best way to reheat leftovers?
Warm leftovers in a skillet over medium-low heat with a splash of broth to revive the sauce. Alternatively, use your smoker at 250°F for 1-2 hours wrapped in foil. The bark will crisp up beautifully, and the meat will stay juicy. Never reheat dry – moisture is key!

Trained in classic French technique but raised on slow-cooked ribs and spicy rubs, she blends culinary skill with smoke and soul.
- Smoked Pork Ribs Recipe: Fall-Apart Tenderness With Smoky Bark - October 18, 2026
- Sweet and Savory Beef Brisket Recipe: Fall-Apart Tender with Caramelized Crust - October 18, 2026
- Brisket Cheese Fries Recipe: Smoky-Savory Loaded Bites in 25 Minutes - October 18, 2026