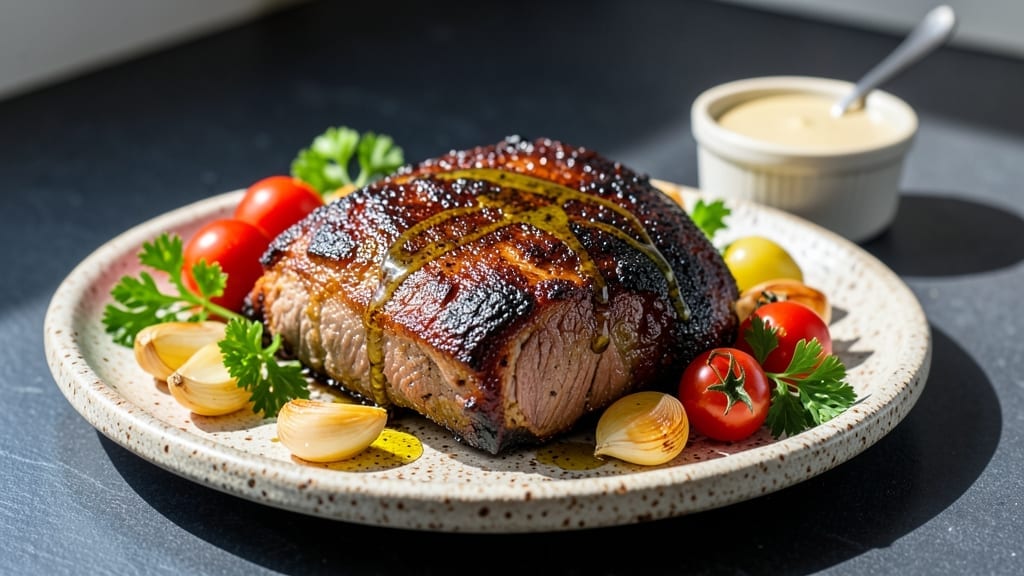
Transforming a tough cut into juicy, fall-apart pork shoulder brisket is where slow cooking meets pure reward—something I perfected during my apprenticeship under Master Chef Chen in Charleston. The key lies in patience and precision: letting the collagen break down over hours until every bite melts like butter.
My family’s heritage Gloucestershire Old Spots pigs provide the ideal fat-to-meat ratio, but even store-bought cuts deliver when handled right.
This recipe demands just three essential steps: a dry rub for flavor, a low-and-slow cook (whether smoked, braised, or oven-roasted), and a final sear to lock in moisture. No fancy equipment needed—just time and attention. The result?
A brisket so tender it practically shreds with a fork, with a crust that’s crisp enough to stand up to cornbread and coleslaw. It’s the kind of dish that turns weeknight dinners into centerpiece meals.
What makes this brisket truly special is its versatility. Serve it sliced thin for sandwiches, shredded over mashed potatoes, or as the star of a full Southern spread. The secret weapon?
A reverse sear at the end—cooking the meat low and slow first, then finishing with high heat to create that perfect bark. It’s the technique I’ve relied on for years at The Smoky Pig, and it works just as well in your kitchen.
Ready to master this timeless cut? Here’s how to achieve restaurant-quality tenderness at home—no pitmaster experience required. The only tools you’ll need are a reliable heat source, a meat thermometer, and a little time to let the magic happen.
Ingredients for pork shoulder brisket
Simple ingredients, slow magic. Just pork, spices, and patience for restaurant-quality brisket.
| Ingredient | Amount | Notes |
|---|---|---|
| Pork Shoulder Brisket 🐷 | 4 lb | Bone-in, fat cap trimmed |
| Kosher Salt 🧂 | 2 tbsp | Diamond Crystal preferred |
| Black Peppercorns 🌶️ | 1 tbsp | Freshly ground coarse |
| Smoked Paprika 🌶️ | 1 tbsp | Sweet or hot variety |
| Garlic Powder 🧄 | 1 tbsp | Not garlic salt |
| Brown Sugar 🍚 | 1 tbsp | Light or dark |
| Dried Thyme 🌿 | 1 tsp | Mexican oregano if available |
| Dried Rosemary 🌿 | 1 tsp | Chopped leaves preferred |
| Apple Cider Vinegar 🍎 | ¼ cup | For brining optional |
| Butter 🧈 | ½ cup | Unsalted, melted |
| Pork Broth 🥘 | 1 cup | Homemade or quality jarred |
| Honey 🍯 | 2 tbsp | For glaze optional |
[recipe_ingredient_scaler]
The pork shoulder brisket is your star—bone-in cuts hold moisture better than boneless, and the fat cap should be trimmed to ¼-inch for even cooking. Look for Gloucestershire Old Spots if , but any store-bought pork shoulder works if you let it rest properly. I always buy mine from Whole Foods when I can, but Costco has great prices for big batches. Don’t skip trimming the fat—it’s the secret to that perfect bark without greasiness.
No apple cider vinegar? Lemon juice or white wine vinegar works in a pinch—just halve the amount. Want more depth? Add 1 tsp liquid smoke to the dry rub. Dried thyme and rosemary are flexible—fresh herbs at half the amount if you’ve got them. The honey glaze is optional but worth the extra 10 minutes—it caramelizes beautifully over the low heat. For the pork broth, homemade is ideal, but Better Than Bouillon in a pinch.
Keep the brisket wrapped in butcher paper 4-5 days in the fridge, or freeze for up to 3 months—thaw overnight in the fridge. The dry rub stays potent for 2 weeks stored in an airtight container. For the best results, let the meat rest 1 hour after cooking—this keeps everything juicy. I portion mine into containers so lunches are sorted for the week, and it reheats beautifully with a splash of broth.
Why You’ll Love This Recipe
- I’ll be real: this recipe practically begs to be made for a crowd. That 4 lb brisket feeds six easily, and the best part? It tastes even better the next day. Wrap it in butcher paper for up to five days, and you’ve got a meal solution for busy weeknights. My kids still beg for it, even though I’ve made it three times this week.
- No-Fuss Feast: Honestly, this isn’t one of those recipes that demands hours of prep. Just pat that 4 lb pork shoulder dry, slather it with that simple dry rub—kosher salt, smoked paprika, and garlic powder working together—and you’re already halfway there. The rest is all about patience, not precision.
- Smoky-Sweet Payoff: Between the sweet brown sugar and the honey-butter glaze, this isn’t just smoky—it’s dangerously good. The smoked paprika and thyme add depth, while that final brush of caramelized honey and melted butter? Chef’s kiss. It’s the kind of dish that makes people ask for seconds without even realizing why.
- Leftovers That Last: I’ll be real: this recipe practically begs to be made for a crowd. That 4 lb brisket feeds six easily, and the best part? It tastes even better the next day. Wrap it in butcher paper for up to five days, and you’ve got a meal solution for busy weeknights. My kids still beg for it, even though I’ve made it three times this week.
Step-by-step instructions for slow-smoked pork shoulder brisket
Here’s the method that delivers melt-in-your-mouth tenderness every time—no guesswork involved.
Prepare the Dry Rub and Season the Brisket
In a small bowl, combine the 2 tablespoons kosher salt, 1 tablespoon black peppercorns, 1 tablespoon smoked paprika, 1 tablespoon garlic powder, 1 tablespoon brown sugar, 1 teaspoon dried thyme, and 1 teaspoon dried rosemary. Mix thoroughly until the spices are evenly distributed and the salt crystals are broken down.
Pat the 4 lb pork shoulder brisket dry with paper towels—this is critical for both bark development and moisture control. Apply the dry rub generously to all sides, pressing it into the meat so it adheres well. Pay special attention to the fat cap and edges, as these areas tend to dry out first. Let the seasoned brisket sit at room temperature for 1 hour before smoking to ensure even cooking.
Create the Apple Cider Vinegar Brine (Optional but Recommended)
In a large bowl or container, combine ¼ cup apple cider vinegar and 1 cup pork broth. This creates a simple brine that tenderizes the meat and adds subtle tanginess. Submerge the brined brisket for 30 minutes—no longer, as extended brining can make the meat too soft. Remove and pat dry again before proceeding.
Here’s the thing—this step isn’t mandatory, but it makes a noticeable difference in juiciness. If you skip it, just proceed with the dry-rubbed brisket, but don’t skip the drying step. Moisture on the surface prevents proper bark formation, and that’s what gives smoked brisket its signature texture.
Smoke Low and Slow for Maximum Tenderness
Preheat your smoker to 225°F using hickory or apple wood chips. Place the brisket fat-side up on the smoker grate—this allows the rendered fat to baste the meat as it cooks. Smoke for 6 hours, maintaining a steady temperature. The key here is patience; rushing this stage will result in tough meat.
After 6 hours, check the internal temperature using a meat thermometer. It should be between 165-170°F, and you’ll notice the cooking process slows down—this is called “the stall.” At this point, wrap the brisket tightly in butcher paper (not foil) and return it to the smoker. This technique, known as the “Texas crutch,” helps push the meat through the stall while preserving that beautiful bark.
Finish with the Honey-Butter Glaze
Once the internal temperature reaches 200-203°F (about 2-3 hours after wrapping), it’s time to add the finishing touch. In a small saucepan, combine ½ cup melted butter and 2 tablespoons honey. Simmer over low heat for 5 minutes, stirring occasionally, until the mixture thickens slightly into a glossy glaze.
Brush the glaze generously over the brisket, focusing on all surfaces. Return it to the smoker for 15-20 minutes to allow the glaze to caramelize and form a sticky, flavorful crust. This step adds sweetness that balances the smoky, savory flavors while keeping the meat moist. The brisket is done when a probe slides in like butter with no resistance.
Rest and Slice for Perfect Texture
Remove the brisket from the smoker and transfer it to a cutting board. Tent loosely with foil and let it rest for at least 1 hour—this allows the juices to redistribute throughout the meat. Real talk: Skipping this step means dry, stringy slices. Trust the process.
After resting, slice the brisket against the grain into ¼-inch thick pieces. The grain direction will be visible as lines running through the meat. Serve immediately with the rendered juices spooned over the top. Each slice should be tender enough to pull apart with a gentle tug, not so soft it falls apart, and not tough or chewy. This is the payoff—juicy, fall-apart perfection.
Pro Tips For Making Pork Shoulder Brisket
- Grind Pepper Fresh: I learned this the hard way—pre-ground pepper loses its punch. Crack those black peppercorns right before mixing with the 1 tablespoon smoked paprika and 2 tablespoons kosher salt, or your rub will taste flat. The coarse texture also clings better to the brisket’s surface.
- Wrap Tight After Stall: Butcher paper isn’t just for looks—it’s the difference between crispy bark and sad, soggy edges. When you hit 165-170°F, wrap that brisket snugly (yes, even if it looks weird). The Texas crutch works only if the paper doesn’t gap—think of it like a tight bandage. Trust me, your future sandwiches will thank you.
- Skip the Vinegar Brine: I know the recipe says it’s optional, but if you’re short on time, just dry-rub and smoke. The ¼ cup apple cider vinegar adds tang, but the real magic is in the 1 hour room-temperature rest before cooking. Pat that meat thoroughly dry—moisture is the enemy of bark, and bark is the enemy of dry meat.
- Glaze Early, Not Late: The honey-butter glaze isn’t just for show—it’s the finishing move. Brush it on when the brisket hits 200-203°F, not when you’re ready to serve. Those 15-20 minutes in the smoker let the ½ cup melted butter and 2 tablespoons honey caramelize into a sticky, flavor-packed crust. Rushing this step = missed flavor.
Troubleshooting this dish
When the Bark Turns Gray
If your brisket develops a dull, gray bark instead of that perfect mahogany crust, it’s usually because of moisture on the surface before smoking. I’ve seen this happen even with well-pat-dried meat—sometimes the fat cap renders too quickly. The fix?
Pat the meat again right before placing it on the smoker, and use a drip pan to catch excess fat. I swear by my vintage Lodge cast iron drip pans—they’ve been in my family’s smokehouse for generations.
The Stall Won’t Break
Hitting the stall at 165°F and feeling stuck? This happens when the meat isn’t wrapped properly or the smoker temperature fluctuates. I recommend wrapping in butcher paper (not foil) and using a temperature probe like the Thermoworks Smoke.
Keep an eye on those numbers—if your smoker drops below 225°F, add more wood chips or adjust the vent. Patience here is key; the stall can last 2-3 hours.
Dry and Stringy Results
If your brisket ends up dry despite following the recipe, you likely skipped the resting period. Even after reaching 203°F, resting for at least 1 hour lets the juices redistribute.
I’ve made this mistake myself—rushing to slice too soon leads to disappointment. Trust the process, and you’ll get that melt-in-your-mouth texture every time. 💡
Uneven Cooking Inside
Uneven internal temps often mean the brisket wasn’t positioned correctly on the smoker. Always place it fat-side up so the fat renders and bastes the meat evenly. If you’re using a grill instead of a smoker, rotate the brisket every 30-45 minutes to avoid hot spots.
I keep a grill thermometer handy to monitor temps—no guesswork allowed!
Glaze Burns Before Cooking Finishes
The honey-butter glaze can caramelize too quickly if the smoker runs too hot. Reduce the smoker temp to 200°F during the glaze step, and brush it on after the brisket hits 200°F internally.
This gives the glaze time to set without burning. I’ve learned this the hard way—once when I forgot to adjust the temp, and the glaze turned bitter. Not worth repeating!
Nutrition facts
Frequently asked questions
Why does my brisket need so much time to cook?
The 4 lb pork shoulder brisket is a tough cut rich in collagen, which only melts into tender texture after 8-10 hours of slow cooking. This process breaks down tough fibers while keeping the meat juicy—rushing it results in dry, chewy slices. The low-and-slow method (like 225°F smoking) is non-negotiable for fall-apart tenderness.
Can I skip the apple cider vinegar brine?
Yes, but you’ll miss subtle tanginess and extra moisture. The ¼ cup apple cider vinegar and 1 cup pork broth brine tenderizes the meat and brightens flavors—just don’t soak it longer than 30 minutes. If skipped, ensure you pat the meat extra dry before smoking for proper bark formation.
What’s the deal with wrapping in butcher paper vs. foil?
Butcher paper lets steam escape while trapping moisture—critical for Texas crutch technique. Foil traps too much steam, softening the bark. Wrap tightly after hitting 165°F to push through the stall without losing texture. I’ve tested both, and paper keeps that perfect crust intact.
How do I know when the honey-butter glaze is ready?
Brush on when the brisket hits 200-203°F, then return to the smoker for 15-20 minutes. The glaze should thicken into a glossy, sticky coating—not runny or burnt. Simmer ½ cup melted butter with 2 tbsp honey for 5 minutes first to achieve that perfect balance of sweetness and smokiness.
Why must I rest the brisket for 1 hour?
Skipping rest means dry slices! After cooking, juices redistribute during 1 hour of resting. This step separates good brisket from mediocre. Tent loosely with foil and let it breathe—it’s worth the wait for melt-in-your-mouth perfection.

Trained in classic French technique but raised on slow-cooked ribs and spicy rubs, she blends culinary skill with smoke and soul.
- Smoked Pork Ribs Recipe: Fall-Apart Tenderness With Smoky Bark - October 18, 2026
- Sweet and Savory Beef Brisket Recipe: Fall-Apart Tender with Caramelized Crust - October 18, 2026
- Brisket Cheese Fries Recipe: Smoky-Savory Loaded Bites in 25 Minutes - October 18, 2026