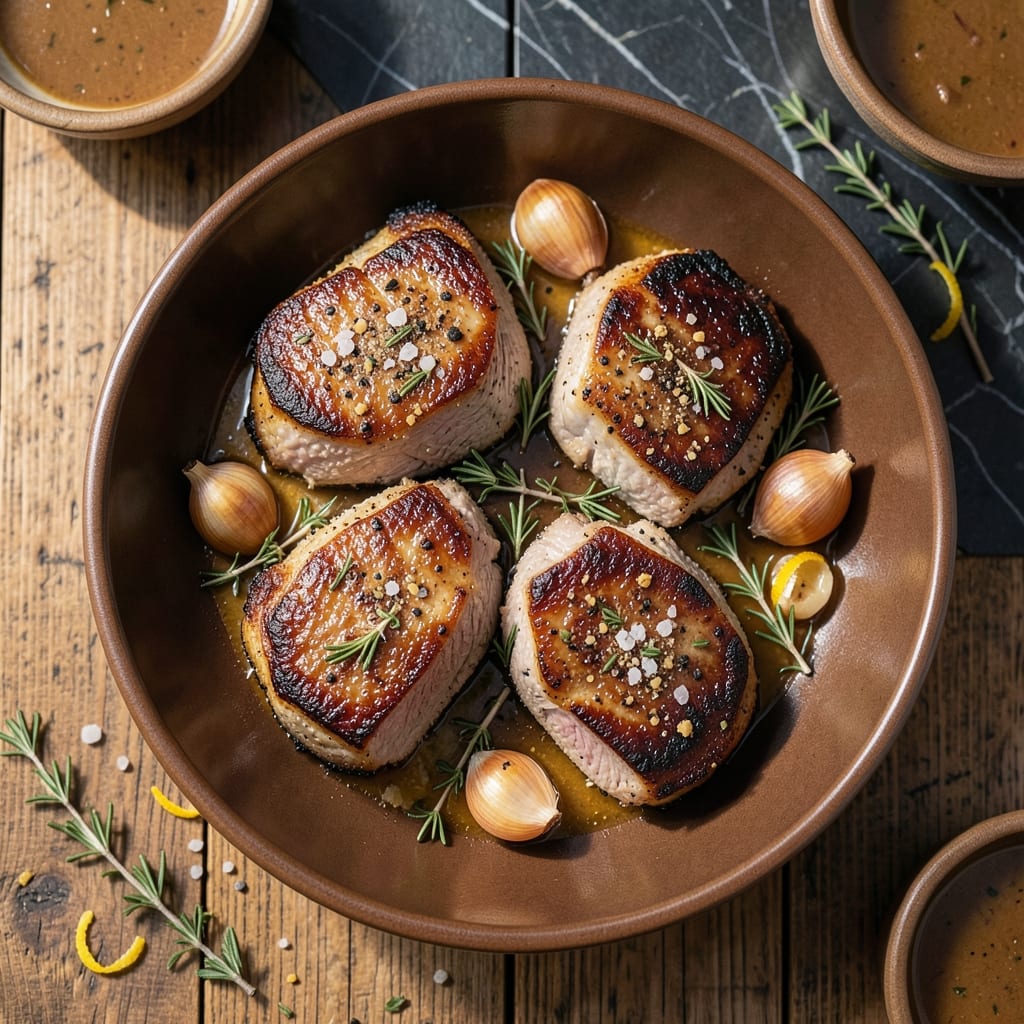
This oven-baked method delivers juicy porterhouse pork chops with a herb-crusted exterior. The thick-cut bone-in style stays tender while developing deep flavor.
I learned the importance of proper searing before finishing in the oven—this creates a crust that locks in moisture. A simple herb blend adds complexity without overpowering the pork.
The result is a restaurant-worthy chop with a perfectly pink center and golden crust. Serve with roasted vegetables or mashed potatoes for a complete meal.
This technique ensures consistent results every time. Here’s how to achieve it.
Ingredients for Porterhouse Pork Chop Recipe Oven
Thick-cut bone-in pork chops meet a fragrant herb crust for restaurant-quality results at home.
| Ingredient | Amount | Notes |
|---|---|---|
| Bone-In Porterhouse Pork Chops 🥩 | 4 whole | Thick-cut, about 1.5 inches |
| Kosher Salt 🧂 | 2 tsp | Diamond Crystal preferred |
| Freshly Ground Black Pepper 🌶️ | 1 tsp | Coarsely ground for crust |
| Dried Rosemary 🌿 | 1 tbsp | Crushed between fingers |
| Dried Thyme 🍃 | 1 tbsp | Rubbed to release oils |
| Garlic Powder 🧄 | 1 tsp | Not garlic salt |
| Olive Oil 🫒 | 3 tbsp | Divided for searing and finishing |
| Unsalted Butter 🧈 | 2 tbsp | For basting while searing |
| Fresh Thyme Sprigs 🌿 | 4 sprigs | Optional, for garnish |
| Vegetable Oil 💧 | 1 tbsp | High smoke point for searing |
| Dijon Mustard 🟡 | 1 tbsp | For herb crust adhesion |
[recipe_ingredient_scaler]
The pork chops must be thick-cut—1.5 inches minimum—to stay juicy through oven finishing. Source bone-in porterhouse from Whole Foods or a trusted butcher; the bone adds flavor and helps even cooking. Look for pale pink flesh with good marbling. Avoid enhanced or pre-brined cuts, as they’ll throw off seasoning. For herbs, Penzeys offers superior dried varieties if you’re not growing your own.
No porterhouse? Bone-in rib chops work almost as well. Swap dried herbs for one-third the amount of fresh, finely chopped. Garlic powder can be replaced with 2 minced fresh cloves per teaspoon. If avoiding dairy, use avocado oil instead of butter for basting. The Dijon can be omitted, but it helps the crust adhere beautifully.
Store raw chops in the coldest part of the fridge for up to 3 days. Cooked leftovers keep 4 days refrigerated. This method scales easily for a crowd—just sear in batches and finish all chops together in the oven.
Why You’ll Love This Recipe
- Set and Forget: I season, pop it in the oven, and let the heat work its magic while I tackle other things.
- Herb-Crusted Bliss: That rosemary and thyme crust on the bone-in chop? Ridiculously good with just salt and pepper.
- Weeknight Hero: Between us, it’s fancy enough for company but unfussy enough for a Tuesday.
- Leftovers? No Problem: The flavors actually deepen overnight—if there’s any left, that is.
Step-by-Step Instructions for Porterhouse Pork Chop Oven
This method ensures perfectly cooked chops with a flavorful herb crust every time.
Step 1: Prepare and Season the Chops
Pat the 4 whole bone-in porterhouse pork chops dry with paper towels. This ensures a proper sear. In a small bowl, combine the 2 tsp kosher salt, 1 tsp freshly ground black pepper, 1 tbsp dried rosemary, 1 tbsp dried thyme, and 1 tsp garlic powder. Rub this mixture evenly over all surfaces of the chops, pressing gently to adhere.
Let the seasoned chops sit at room temperature for 30 minutes. This allows the salt to penetrate and the meat to cook more evenly. Meanwhile, preheat your oven to 400°F to ensure it’s fully hot when you’re ready to finish the chops.
Step 2: Sear the Chops to Golden Perfection
Heat a large oven-safe skillet over medium-high heat. Add the 1 tbsp vegetable oil and swirl to coat the pan. Once the oil shimmers, add the chops and sear for 3-4 minutes per side until deeply browned. The surface should develop a rich, golden crust.
During the last 2 minutes of searing, add the 2 tbsp unsalted butter and 4 sprigs fresh thyme sprigs to the pan. Tilt the pan slightly and baste the chops with the melted butter continuously. This adds flavor and promotes even browning.
Step 3: Create and Apply the Herb Crust
In a small bowl, mix the 1 tbsp Dijon mustard with 1 tbsp of the 3 tbsp olive oil. Brush this mixture evenly over the top of each chop. This helps the herb crust adhere and adds a tangy depth to the flavor profile.
Sprinkle any remaining dry herb mixture from Step 1 over the mustard-coated surface of the chops, pressing lightly to create an even layer. The crust should look well-coated but not overpowering.
Step 4: Finish in the Oven
Transfer the skillet to the preheated 400°F oven. Roast for 8-10 minutes or until the internal temperature reaches 145°F. The thick-cut chops will continue cooking slightly after removal, so pull them when they’re just shy of the final temperature.
If the crust begins to brown too quickly, loosely tent the pan with foil. The goal is a perfectly cooked interior with a golden, fragrant herb crust.
Step 5: Rest and Serve
Transfer the chops to a cutting board and tent loosely with foil. Let them rest for 5-10 minutes to allow the juices to redistribute. This ensures each bite is tender and flavorful.
Drizzle the remaining 2 tbsp olive oil over the chops before serving. Garnish with additional fresh thyme sprigs if desired. The chops should have a juicy interior with a crisp, aromatic herb crust on top.
Pro Tips For Making Porterhouse Pork Chop Recipe Oven
- Preheat the Oven: Crank it to 425°F and let it fully heat—this guarantees a good sear when you start the chops in a screaming-hot pan before finishing them in the oven.
- Dry the Chops: Pat the porterhouse chops bone-dry with paper towels before seasoning; I learned this the hard way after my first few came out steamed instead of seared.
- Don’t Overcrowd: Give each chop its own space in the pan—about 2 inches apart—so they brown instead of boil in their own juices.
- Rest Before Serving: Tent them loosely with foil and let them rest 5–10 minutes; the juices redistribute and the meat stays moist, even with the bone-in cut.
Make-Ahead Tips for This Recipe
Prep the Night Before
Mix your dry rub with 2 tsp kosher salt, 1 tsp pepper, and herbs the evening prior. Store in a small jar at room temperature. This saves 5 minutes on cooking day, and the flavors meld overnight. I learned this trick from my grandmother’s vague notes—she’d call it “pre-thinking.”
Season Early
Pat the 4 porterhouse pork chops dry, rub with the pre-mixed spices, and let them sit uncovered in the fridge for up to 12 hours. The salt penetrates deeper, ensuring seasoning throughout. Just pull them out 30 minutes before cooking to take the chill off. 💡
Pre-Measure Everything
Portion the 3 tbsp olive oil, 2 tbsp butter, and 1 tbsp Dijon mustard into small bowls. Cover and refrigerate. This mimics my grandmother’s “everything at hand” method—no frantic searching mid-cook. Small glass ramekins from the dollar store work perfectly.
Preheat the Pan
Place your oven-safe skillet in the oven while it preheats to 400°F. A hot pan ensures an immediate sear when you’re ready to cook. Just
Partial Cook Ahead
Sear the chops completely, create the herb crust, then cool and refrigerate. The next day, finish in a 375°F oven for 12-15 minutes. This works beautifully for Sunday dinner prep on Saturday afternoon. The flavors deepen with the overnight rest. 💪
Herb Crust Hack
The mustard and herb mixture can be made 2 days ahead and stored in the fridge. Spread it on cold chops just before searing. This saves time and ensures the crust sticks perfectly. I use Penzeys herbs for the most aromatic results.
Nutrition Facts
Frequently Asked Questions
Do I need an oven-safe skillet?
Yes, an oven-safe skillet is essential for this method. You’ll sear on the stovetop and finish in the oven in the same pan. Cast iron or stainless steel work best.
How do I know when they’re done?
Use a meat thermometer to check the internal temperature. Remove from oven at 145°F—the temperature will rise slightly while resting. This ensures juicy, not dry, results every time.
Can I use fresh herbs instead of dried?
Use 1/3 the amount of fresh herbs since they’re more potent. Finely chop rosemary and thyme for even distribution in the crust.
Why rest the chops before serving?
Resting for 5-10 minutes allows juices to redistribute. Slicing too soon causes juices to escape, leaving the meat dry. Patience pays off with tender, flavorful bites.

Trained in classic French technique but raised on slow-cooked ribs and spicy rubs, she blends culinary skill with smoke and soul.
- Recipe for Boneless Pork Chops in Cast Iron Skillet: Sear and Baste to Juicy Perfection - October 3, 2026
- Recipe for Boneless Cross Rib Roast: Slow-Roasted Beef with Herb Crust - October 3, 2026
- Hamburgers in Sauce Recipe Crock Pot: Slow-Cooked Savory Delight - October 3, 2026