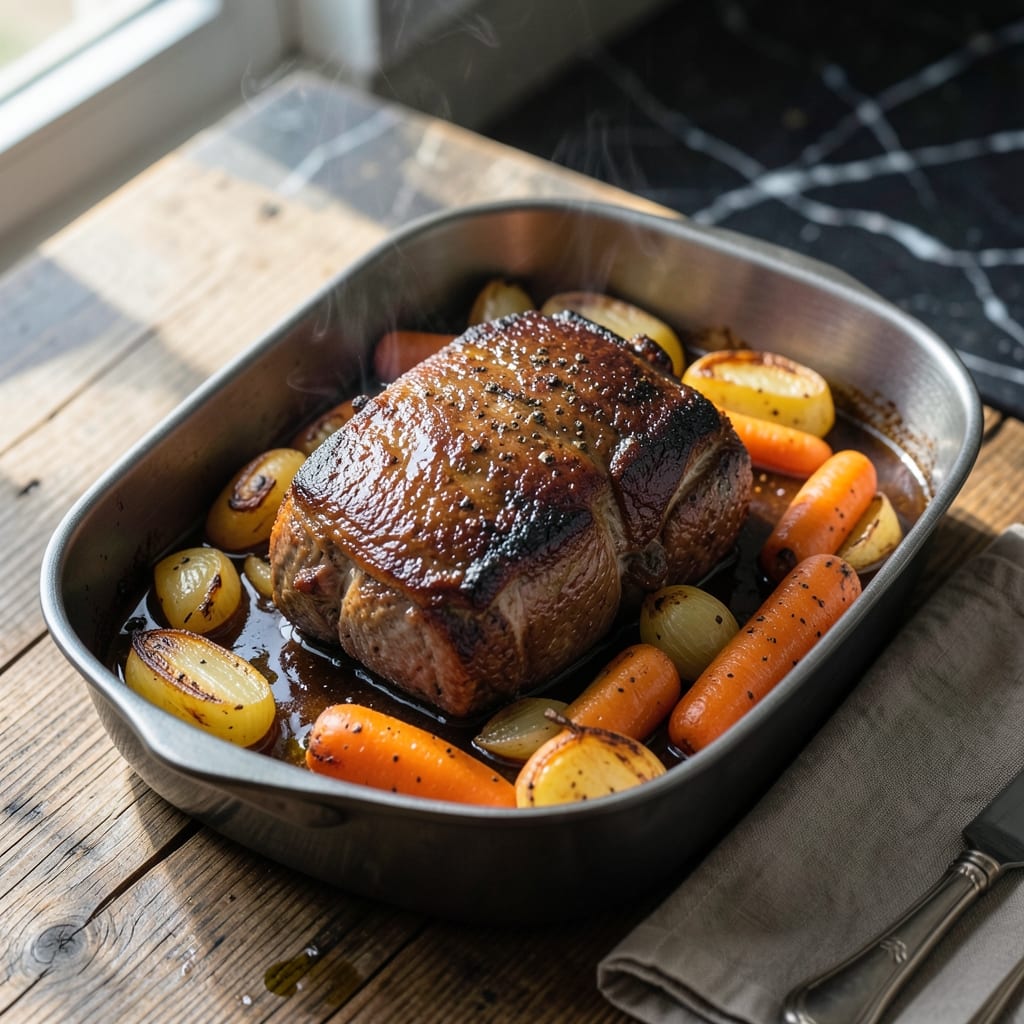
I’ve burned through more pot roasts than I care to admit, but the breakthrough came when I nailed the temperature and timing. This method transforms tough cuts into tender, fall-apart meat with deep, rich flavor.
The key is a slow, steady 325°F oven. Low heat allows the connective tissue to break down gradually, ensuring every bite is juicy and flavorful. A covered Dutch oven traps steam for maximum moisture.
After a few hours, the meat will be fork-tender with a caramelized crust. The vegetables soak up the braising liquid, turning simple carrots and potatoes into something extraordinary.
This is the kind of dish that fills the kitchen with an irresistible aroma—proof that patience and precise heat create the best results.
Ingredients for Pot Roast Recipe Temperature
A well-stocked pantry plus a few fresh staples deliver rich, fork-tender perfection.
| Ingredient | Amount | Notes |
|---|---|---|
| Chuck Roast 🥩 | 3 lb | Well-marbled, boneless preferred |
| Kosher Salt 🧂 | 1 ½ tsp | Diamond Crystal brand preferred |
| Freshly Ground Black Pepper 🌶️ | 1 tsp | Coarse grind for texture |
| Olive Oil 🫒 | 2 tbsp | For searing the roast |
| Yellow Onions 🧅 | 2 whole | Large, quartered |
| Carrots 🥕 | 4 whole | Peeled, cut into chunks |
| Russet Potatoes 🥔 | 1 ½ lb | Peeled, cut into large pieces |
| Garlic Cloves 🧄 | 6 cloves | Smashed, skin removed |
| Dried Thyme 🌿 | 1 tsp | Or fresh thyme sprigs doubled |
| Dried Rosemary 🍃 | 1 tsp | Crushed between fingers |
| Bay Leaves 🌿 | 2 pieces | Whole, for braising liquid |
| Beef Broth 💧 | 3 cups | Low-sodium preferred |
| Tomato Paste 🍅 | 2 tbsp | For depth of flavor |
| Red Wine 🍷 | 1 cup | Dry bold variety |
| Worcestershire Sauce 💧 | 1 tbsp | Adds umami complexity |
[recipe_ingredient_scaler]
The chuck roast is non-negotiable here—look for generous marbling (those white fat streaks) which melts into the meat as it cooks. Costco has excellent pre-portioned chuck roasts, but any butcher can cut you a 3-pound piece. For the vegetables, firm, unblemished produce holds up best during the long braise. I always grab my potatoes and carrots from the farmers market when they’re in season (the flavor difference is noticeable).
No red wine? Substitute additional beef broth with 1 tbsp balsamic vinegar. Dried herbs work fine, but fresh thyme and rosemary (tied in cheesecloth) add a brighter note. If you’re avoiding alcohol, beef broth alone still produces great results. The tomato paste can come from those Trader Joe’s squeeze tubes—no can-opener required. For the Worcestershire, Annie’s makes a solid vegetarian version if needed.
This tastes even better the next day once the flavors meld. Keeps in the fridge for 4-5 days, or freeze portions for 3 months. Leftovers make incredible sandwiches—shred the meat and pile it high on crusty bread (trust me on this). The braising liquid also freezes beautifully for future use in soups or gravies.
Why You’ll Love This Recipe
- Set and Forget: The chuck roast goes straight from fridge to oven—no babysitting required.
- Rich Beefy Depth: Kosher salt and black pepper crust the meat, while onions melt into a gravy so good you’ll lick the pan.
- Sunday or Wednesday: I’ve served this at dinner parties and weeknight meals with zero stress.
- Leftovers for Days: One roast yields sandwiches, tacos, and stew—honestly, it just keeps giving.
Step-by-Step Instructions for Oven-Braised Pot Roast
Here’s my foolproof method for transforming tough chuck roast into fall-apart tender perfection.
Step 1: Sear the Chuck Roast to Develop Deep Flavor
Pat the 3 lb chuck roast completely dry with paper towels—this ensures a proper sear rather than steaming. Season aggressively on all sides with the 1.5 tsp kosher salt and 1 tsp freshly ground black pepper, pressing the seasoning into the meat so it adheres well.
Heat the 2 tbsp olive oil in a Dutch oven over medium-high heat until shimmering. Add the roast and sear undisturbed for 4-5 minutes per side until a deep, dark crust forms. You’ll know it’s ready to flip when it releases easily from the pan. This searing step builds the flavor foundation for your entire dish.
Step 2: Sauté the Aromatics and Deglaze the Pan
Remove the roast and set aside. In the same pot, add the 2 whole yellow onions, 4 whole carrots, and 1.5 lb russet potatoes. Cook for 5 minutes, stirring occasionally, until the onions begin to soften and develop some color.
Add the 6 cloves garlic cloves, 1 tsp dried thyme, and 1 tsp dried rosemary, cooking for 1 minute until fragrant. Stir in the 2 tbsp tomato paste and cook for 2 minutes to deepen its flavor. Pour in the 1 cup red wine, 1 tbsp Worcestershire sauce, and 3 cups beef broth, scraping up all the browned bits from the bottom of the pot.
Step 3: Braise Low and Slow Until Fork-Tender
Return the seared chuck roast to the pot along with the 2 pieces bay leaves. The liquid should come about halfway up the roast—add a bit more broth if needed. Bring to a simmer, then cover and transfer to a preheated 325°F oven.
Braise for 2.5 to 3 hours, turning the roast halfway through, until it’s fork-tender and shreds easily with a gentle tug. You’ll know it’s done when a fork slides in with no resistance and the meat nearly falls apart. This low-and-slow method transforms the collagen in the chuck roast into gelatin, creating that melt-in-your-mouth texture.
Step 4: Rest and Serve with the Vegetables
Carefully remove the roast from the pot and transfer to a cutting board. Let it rest for 10-15 minutes before slicing or pulling apart. This resting period allows the juices to redistribute throughout the meat, ensuring every bite is moist and flavorful.
Skimming excess fat from the braising liquid if desired, then serve the pot roast with the vegetables and some of the rich, flavorful liquid spooned over the top. The vegetables should be tender and infused with the deep, savory flavors of the braise. This dish tastes even better the next day as the flavors continue to meld.
Pro Tips For Making Pot Roast Recipe Temperature
- Sear It Hot: Use high heat and about 2 tablespoons of olive oil to get a deep brown crust on the chuck roast—this builds flavor that low-and-slow cooking can’t replicate. I learned this the hard way after too many pale, bland roasts.
- Salt Generously Early: Pat the chuck roast dry, then season aggressively with kosher salt at least 45 minutes before cooking. Sounds like overkill, but it actually penetrates the meat and keeps it juicy.
- Don’t Rush the Oven: Set your oven to 300°F and let it go for 3-4 hours—resist the urge to crank it higher. After burning the edges of one too many pot roasts, I finally accepted that patience wins every time.
- Slice Against the Grain: Once it’s fall-apart tender, slice the chuck roast against the grain for the most tender bites. My grandmother swore by this, and she was right—it makes a real difference in texture.
Storing and Reheating Leftovers
Refrigerator Storage
Let your pot roast cool for no more than 2 hours before transferring to an airtight container—I love my glass Pyrex set from Target. Store at 40°F or below for up to 5 days. The flavors actually deepen overnight as everything melds together. ❄️
Freezer Storage
This dish freezes beautifully for up to 3 months without quality loss. I use heavy-duty quart-size freezer bags because they stack flat and thaw quickly. Leave 1 inch of headspace for expansion and squeeze out excess air to prevent freezer burn.
Stovetop Reheating
This is my preferred method because it maintains the best texture. Transfer the roast and juices to a heavy pot, add ¼ cup beef broth to prevent sticking, and heat over medium-low heat for 15-20 minutes. Stir occasionally and taste before serving—it often needs a pinch more salt. 🔥
Microwave Reheating
For quick leftovers, place a single portion in a microwave-safe dish and cover with a damp paper towel. Heat on 70% power for 3-4 minutes, then check and continue in 1-minute intervals until reaching 165°F. Add a splash of water if it looks dry.
Oven Reheating
For larger portions, preheat your oven to 300°F and place the pot roast in a covered baking dish with some extra liquid. Heat for 20-30 minutes until warmed through. This method works especially well if you’re reheating the entire batch for a crowd.
Nutrition Facts
Frequently Asked Questions
What oven temperature works best for pot roast?
A steady 325°F is ideal. This moderate heat allows collagen to break down slowly without drying out the meat.
How long should it cook at this temperature?
Plan for 2.5 to 3 hours for a 3 lb chuck roast. The meat is done when it shreds easily with a fork.
Can I cook it at a higher temperature to save time?
Avoid going above 325°F. Higher heat toughens the meat before the connective tissue can melt. Patience is key!
Should I cover it while cooking?
Yes, always use a lid or foil. This traps steam, keeping the roast moist and tender throughout the long cook.

Trained in classic French technique but raised on slow-cooked ribs and spicy rubs, she blends culinary skill with smoke and soul.
- Recipe for Boneless Pork Chops in Cast Iron Skillet: Sear and Baste to Juicy Perfection - October 3, 2026
- Recipe for Boneless Cross Rib Roast: Slow-Roasted Beef with Herb Crust - October 3, 2026
- Hamburgers in Sauce Recipe Crock Pot: Slow-Cooked Savory Delight - October 3, 2026