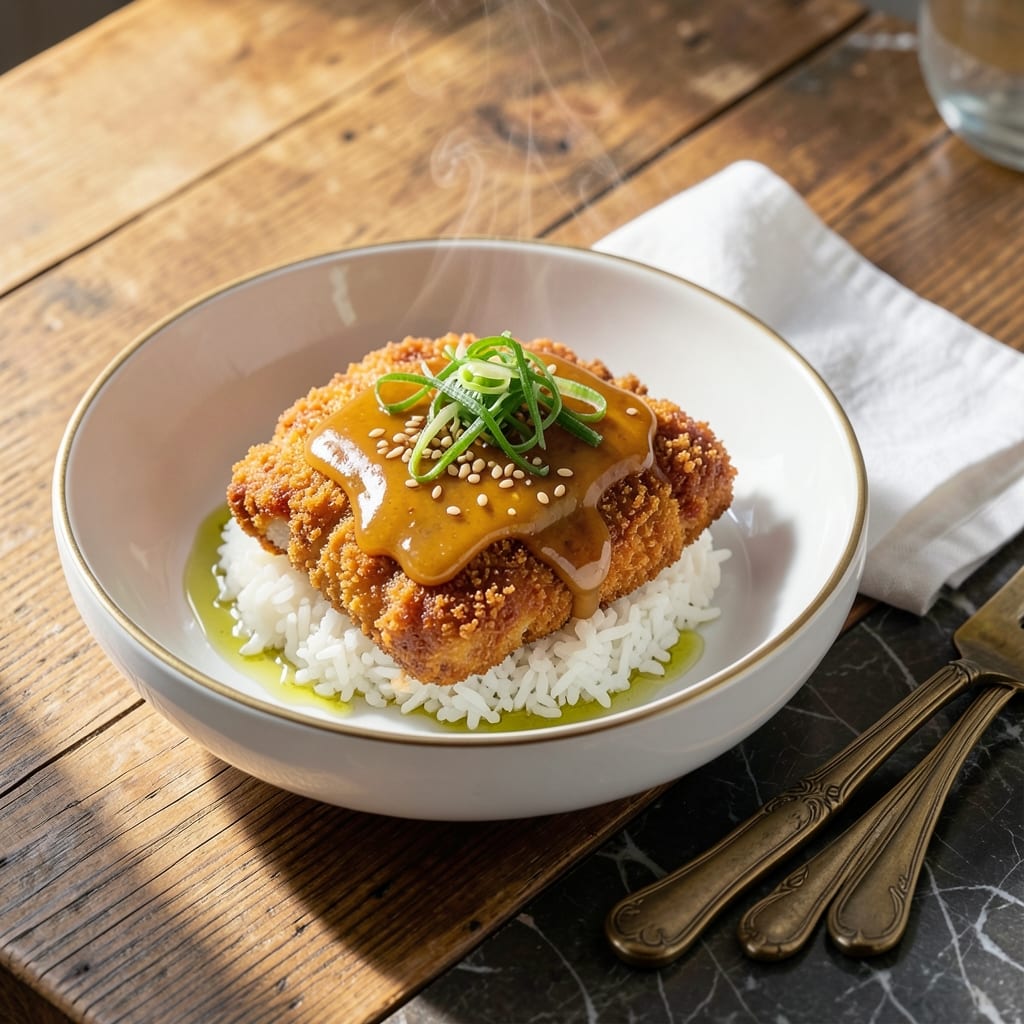
This Japanese comfort dish brings together crispy panko-breaded chicken and fluffy rice in a savory egg sauce. I perfected this after multiple attempts in my small Boston kitchen, ensuring every bite delivers on texture and flavor.
The key is double-frying the cutlet for maximum crunch and layering the components just before serving. The egg sauce ties everything together, creating a harmony of salty, sweet, and umami notes over warm rice.
What you get is a bowl where the chicken stays crispy against the soft rice, with the egg sauce adding richness. It’s a meal that feels special but comes together with straightforward techniques.
Serve hot for the best experience. Here’s how to build this dish.
Ingredients for Recipe Chicken Katsu Don
Simple ingredients create that signature crispy, saucy, and comforting Japanese bowl everyone loves.
| Ingredient | Amount | Notes |
|---|---|---|
| Chicken Breast 🍗 | 1 ½ lb | Boneless, skinless, pounded thin |
| Panko Breadcrumbs 🍞 | 1 ½ cups | Japanese-style for extra crunch |
| All-Purpose Flour 🌾 | ½ cup | For dredging chicken |
| Large Eggs 🥚 | 2 whole | Beaten for breading |
| Short-Grain White Rice 🍚 | 2 cups | Uncooked, or use Japanese rice |
| Dashi Stock 🍲 | 1 cup | Japanese broth base |
| Soy Sauce 🫒 | 3 tbsp | Low-sodium preferred |
| Mirin 🍶 | 2 tbsp | Sweet rice wine |
| Granulated Sugar 🍚 | 1 tbsp | Balances savory flavors |
| Onion 🧅 | 1 whole | Thinly sliced for sauce |
| Vegetable Oil 🫒 | 2 cups | For deep-frying cutlets |
| Green Onions 🧅 | 2 whole | Thinly sliced for garnish |
| Fresh Ginger 🌿 | 1 tbsp | Grated, for depth of flavor |
[recipe_ingredient_scaler]
The panko is non-negotiable here—Kikkoman or Progresso brands at most grocery stores have the right texture (the good stuff, not the fine breadcrumbs). Chicken breasts should be pounded to an even thickness so they cook through without drying out. Trader Joe’s or Whole Foods have great pre-pounded options if you’re short on time. For rice, Nishiki or Koshihikari short-grain varieties are ideal for that sticky texture you want.
No panko? Crush cornflakes or plain breadcrumbs in a pinch, but they won’t be as crispy. Mirin can be swapped with a mix of sake plus a pinch of sugar. If you don’t have dashi, chicken or vegetable broth works (just reduce sodium elsewhere). The onions can be subbed with shallots for a milder flavor. Fresh ginger is best, but ground ginger at half the amount is fine.
The cooked chicken keeps 3-4 days in the fridge, but it’s best eaten fresh for maximum crunch. The rice and sauce can be made ahead and reheated. Leftovers? Store components separately and assemble just before serving to keep the cutlet crispy.
Why You’ll Love This Recipe
- One Pan Wonder: I bread the chicken, fry it, and assemble the don all in the same skillet. Minimal mess, maximum flavor.
- Crispy Meets Comfort: That panko crust stays shatteringly crisp while the egg and rice underneath soak up all the savory sauce. Honestly, it’s the texture combo I crave.
- Weeknight Hero: It’s my go-to for busy evenings—ready faster than takeout and way more satisfying.
- Budget Stretcher: Chicken breast and pantry staples like panko and eggs make this a filling, cost-effective meal that still feels special.
Step-by-Step Instructions for Chicken Katsu Don
Here’s how I create this comforting bowl with perfect crispy cutlets every time.
Step 1: Prepare and Bread the Chicken
Start by slicing the 1.5 lb Chicken Breast into 4 even cutlets, then pound them to ¼-inch thickness between plastic wrap. This ensures even cooking and maximum crispiness. Season both sides lightly with salt.
Set up a breading station with 0.5 cup All-Purpose Flour in one dish, 2 whole Large Eggs beaten in another, and 1.5 cups Panko Breadcrumbs in a third. Dredge each piece in flour, shake off excess, dip in egg, then press into panko until fully coated. I like to let them rest 5 minutes so the coating adheres better.
Step 2: Fry the Cutlets to Golden Perfection
Heat 2 cups Vegetable Oil in a deep skillet to 350°F. The oil is ready when a panko crumb sizzles immediately. Fry the cutlets 2 at a time to avoid crowding—this prevents the oil temperature from dropping.
Cook for 3-4 minutes per side until deep golden brown and the internal temperature reaches 165°F. Drain on a wire rack (not paper towels) to keep them crispy. I always check the first cutlet and adjust heat if it’s browning too fast or slow.
Step 3: Cook the Rice and Prepare the Sauce Base
Rinse the 2 cups Short-Grain White Rice until the water runs clear, then cook according to package instructions. While it steams, thinly slice the 1 whole Onion and grate the 1 tbsp Fresh Ginger.
In a saucepan, combine the 1 cup Dashi Stock, sliced onion, and grated ginger. Bring to a gentle simmer for 5 minutes until the onion softens. This aromatic base is what makes the sauce so flavorful.
Step 4: Assemble the Donburi Sauce
To the simmering dashi mixture, add 3 tbsp Soy Sauce, 2 tbsp Mirin, and 1 tbsp Granulated Sugar. Stir until the sugar dissolves, then let it reduce slightly for 2-3 minutes.
The sauce should coat the back of a spoon but still be pourable. Taste and adjust seasoning if needed—you want a balance of savory, sweet, and umami. Slice the 2 whole Green Onions thinly for garnish.
Step 5: Assemble and Serve Immediately
Divide the hot rice among bowls. Slice each crispy cutlet into strips and arrange over the rice. Ladle the hot sauce and onions over the chicken, then scatter green onions on top.
Serve right away while the cutlets are still crispy—the contrast between the crunchy coating and the tender chicken is what makes this dish special. The sauce should be absorbed slightly by the rice but not make it soggy.
Pro Tips For Making Recipe Chicken Katsu Don
- Pound the Chicken: Use a meat mallet to pound the chicken breast to an even 1/2-inch thickness—this guarantees even cooking and prevents dry, chewy spots that ruin the katsu texture.
- Chill Before Frying: After breading, refrigerate the chicken for 15 minutes to set the panko coating; I learned this the hard way after losing too many crumbs in the oil.
- Skip Overcrowding: Fry only one or two cutlets at a time in 350°F oil—any more and the temperature drops, leaving you with greasy, soggy breading instead of that perfect crunch.
- Warm the Bowls: Rinse your serving bowls with hot water before assembling the donburi; it keeps the rice and egg topping hot while you finish the last cutlet.
Dietary Considerations for This Dish
Gluten-Free Option
Swap the panko breadcrumbs for gluten-free panko—Kikkoman makes a great version I find at Whole Foods. Use gluten-free flour for dredging and verify your soy sauce is gluten-free too. The texture stays surprisingly crispy. 💪
Lower-Carb Version
For fewer carbs, replace the 2 cups short-grain rice with cauliflower rice. Sauté it with a splash of soy sauce for flavor. The dish loses some authenticity but keeps all the delicious saucy, crispy elements.
Dairy-Free and Egg-Free
The recipe is naturally dairy-free, but the breading uses 2 eggs. For an egg-free version, use flax eggs (1 tbsp ground flaxseed + 3 tbsp water per egg) or aquafaba for binding. Press the panko extra firmly to help it adhere.
Lower-Sodium Adjustments
Use low-sodium soy sauce and low-sodium dashi to reduce salt. I also cut the soy sauce to 2 tbsp and add a dash of rice vinegar for brightness. The mirin and sugar still provide depth.
Nut Allergy Note
This dish is nut-free as written, but always check your panko breadcrumbs for cross-contamination warnings. Some brands process in facilities with nuts. Kikkoman panko is typically safe but verify labels.
Vegetarian Swap
Replace the chicken with panko-crusted eggplant slices. Use the same breading and frying method. The eggplant soaks up the sauce beautifully, though it won’t have the same protein richness.
Nutrition Facts
Frequently Asked Questions
Why do I need to double-fry the chicken?
Double-frying creates an extra-crispy crust that stays crunchy even after the sauce is added. First fry at 325°F cooks the chicken through, then a second fry at 350°F perfects the golden color and texture.
Can I use chicken thighs instead of breasts?
Yes, boneless thighs work great and stay juicier. Pound them to an even ½-inch thickness since they’re naturally thicker. The cooking time remains about 3-4 minutes per side.
How do I prevent the cutlet from getting soggy?
Assemble the bowl right before serving and use a wire rack to drain the fried cutlets. Also, slice the chicken just before adding it to the rice to maintain maximum crispness.
What if I don’t have dashi stock?
Substitute with 1 cup chicken broth plus ½ tsp soy sauce. It won’t have the same depth but will still taste delicious. Reduce other sodium in the recipe slightly.

Trained in classic French technique but raised on slow-cooked ribs and spicy rubs, she blends culinary skill with smoke and soul.
- Best Smoked Oxtail Recipe: Deep-Rich Flavor After Low-and-Slow Cooking - October 14, 2026
- Pit Boss Smoked Prime Rib Roast Recipe: Bark-to-Bone Crispness in 4 Hours - October 14, 2026
- Smoked Tuna Steak Recipe: Seared Crust Meets Silky Centers - October 14, 2026