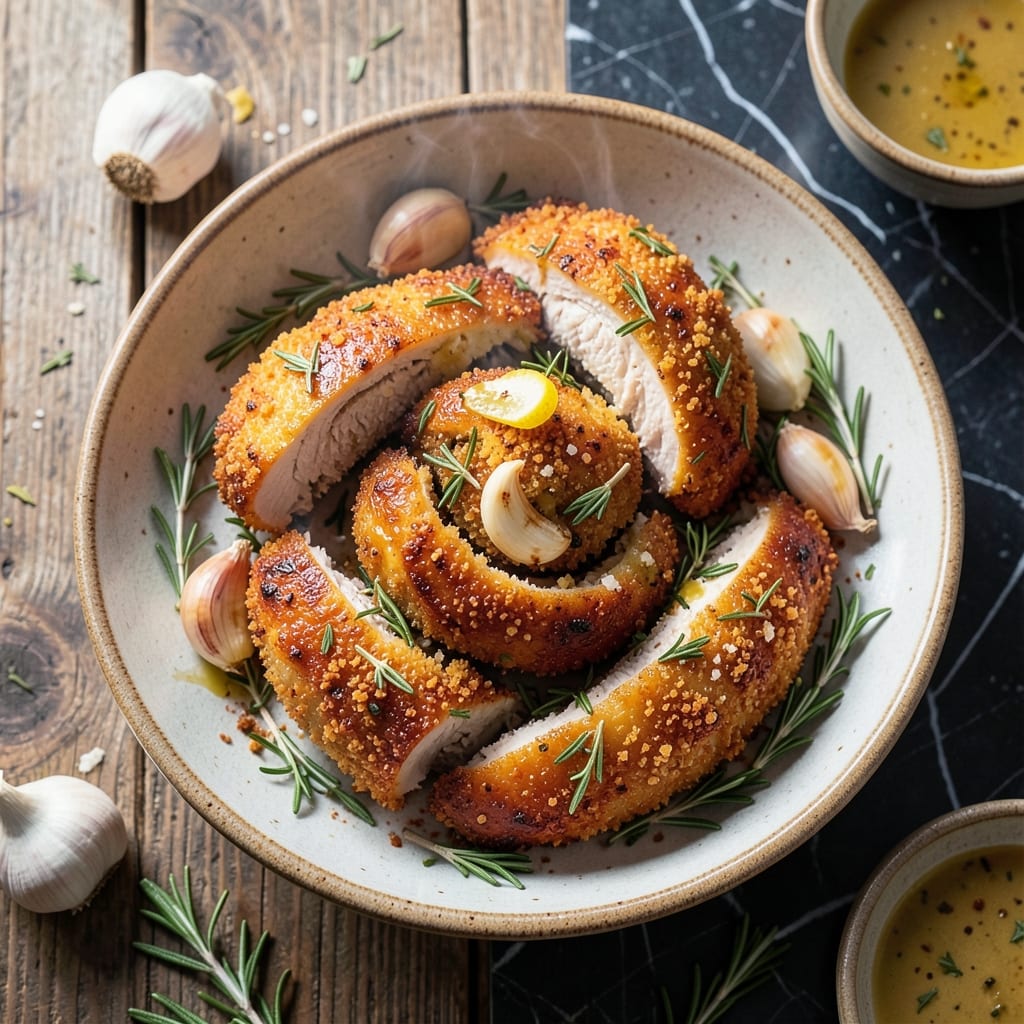
This oven-baked method delivers tender chicken tenderloins with a golden herb crust every time. No complicated techniques required—just a simple preparation that locks in juices while creating a flavorful exterior.
I developed this recipe after years of testing different approaches, learning that high heat and a brief marinade make all the difference. The chicken emerges moist and perfectly cooked, with herbs forming a crisp, aromatic coating.
The process takes 25 minutes from start to finish, making it ideal for busy weeknights. You’ll get restaurant-quality results without the fuss, proving that great meals don’t need to be complicated.
Serve with roasted vegetables or a fresh salad for a complete dinner that satisfies without effort.
Ingredients for Recipe for Chicken Tenderloins in Oven
Simple ingredients create that golden herb-crusted chicken with juicy, tender results every time.
| Ingredient | Amount | Notes |
|---|---|---|
| Chicken Tenderloins 🍗 | 1 ½ lb | Patted dry for crispiness |
| Olive Oil 🫒 | 2 tbsp | Extra-virgin for best flavor |
| Dijon Mustard 🟡 | 1 ½ tbsp | Smooth, not grainy |
| Fresh Thyme Leaves 🌿 | 2 tbsp | Stems removed, chopped |
| Fresh Rosemary 🌿 | 2 tbsp | Finely minced, stems discarded |
| Garlic Cloves 🧄 | 3 cloves | Minced finely |
| Panko Breadcrumbs 🍞 | ¾ cup | For crisp herb crust |
| Parmesan Cheese 🧀 | ½ cup | Freshly grated from block |
| Kosher Salt 🧂 | 1 tsp | Diamond Crystal preferred |
| Black Pepper 🌶️ | ½ tsp | Freshly ground |
| Paprika 🌶️ | ½ tsp | Sweet or smoked variety |
| Lemon Zest 🍋 | 1 tsp | From 1 medium lemon |
[recipe_ingredient_scaler]
The chicken tenderloins are the star—opt for air-chilled, hormone-free from Whole Foods or your trusted butcher. The Panko breadcrumbs create that shatteringly crisp crust, and fresh herbs (thyme and rosemary) deliver the aromatic punch. I source my Parmesan from Murray’s Cheese—it’s worth the splurge for that nutty depth. Always pat the chicken dry before coating; it’s the difference between crisp and soggy.
No fresh herbs? Dried thyme and rosemary at one-third the amount work in a pinch. Swap Dijon for whole-grain mustard if you prefer texture. Almond flour can replace Panko for a gluten-free crust. The Parmesan is optional but adds a salty, umami kick—Pecorino Romano is a sharper alternative. For extra heat, add half a teaspoon of cayenne to the breadcrumb mix.
The herb-crusted tenderloins keep in the fridge for up to 3 days—reheat in a 375°F oven for 10 minutes to revive the crust. Freeze uncooked portions for up to 3 months. Thaw in the fridge overnight before baking for best texture and even cooking.
Why You’ll Love This Recipe
- One Pan Magic: I toss the tenderloins with olive oil, mustard, and herbs, pop them in the oven, and that’s it—no babysitting required.
- Herb Infused Bite: The thyme and rosemary crust gives every piece that earthy, aromatic kick that makes my kitchen smell like a French bistro.
- Weeknight Hero: Honestly, it’s my go-to for busy Tuesdays, but fancy enough for Sunday dinner with the in-laws.
- Leftovers Win: Cold slices taste even better the next day in a sandwich. I’ll be real: I sometimes make extra just for this.
Step-by-Step Instructions for Chicken Tenderloins in Oven
This method ensures crispy, herb-crusted chicken with juicy interiors in under half an hour.
Step 1: Prepare the Herb Crust Mixture
In a medium bowl, combine the 0.75 cup Panko Breadcrumbs, 0.5 cup Parmesan Cheese, 2 tbsp Fresh Thyme Leaves, 2 tbsp Fresh Rosemary, 1 tsp Lemon Zest, 1 tsp Kosher Salt, 0.5 tsp Black Pepper, and 0.5 tsp Paprika. Stir until the herbs and cheese are evenly distributed throughout the breadcrumbs.
The mixture should look slightly damp from the cheese but still crumbly. I use my fingers to break up any clumps of cheese for even coating. This blend creates a fragrant, crispy exterior that will contrast beautifully with the tender chicken inside.
Step 2: Coat the Chicken with Mustard and Crust
Pat the 1.5 lb Chicken Tenderloins completely dry with paper towels. This step is crucial—any moisture will prevent the crust from adhering properly. Place the tenderloins on a clean work surface and brush each piece generously with the 1.5 tbsp Dijon Mustard.
The mustard acts as a glue for the herb crust. I use a pastry brush for even coverage, making sure to coat all sides of each tenderloin. Press the prepared breadcrumb mixture onto each mustard-coated piece, applying firm pressure to ensure an even, thick layer adheres to all sides.
Step 3: Sear for Color and Finish in Oven
Heat the 2 tbsp Olive Oil in a large oven-safe skillet over medium-high heat until it shimmers. Add the crust-coated chicken tenderloins and sear for 2-3 minutes per side until the crust turns golden brown and crisp.
Don’t move the pieces around too much—let them develop a deep golden color before flipping. The searing step adds flavor and helps set the crust before the oven finish. Transfer the skillet to a preheated 400°F oven.
Step 4: Bake to Perfection
Bake the chicken for 10-12 minutes or until the internal temperature reaches 165°F on an instant-read thermometer. The crust should be deeply golden and crisp, while the chicken remains juicy inside.
I check the thickest piece to ensure doneness. If the crust begins to brown too quickly, tent the skillet loosely with foil. The 3 cloves Garlic Cloves are already incorporated into the crust, infusing each bite with aromatic flavor without overpowering.
Let the chicken rest for 5 minutes before serving to allow the juices to redistribute. This final step guarantees tender, juicy meat with every bite.
Pro Tips For Making Recipe For Chicken Tenderloins In Oven
- Preheat the Pan: I learned this the hard way—get your oven and baking sheet screaming hot (425°F minimum) before adding the tenderloins, or you’ll end up with pale, soggy chicken instead of that golden crust.
- Pat Them Dry: Sounds obvious, but I used to skip this and wondered why my chicken steamed instead of seared. Blot the tenderloins with a paper towel first—every bit of moisture is the enemy of crispy edges.
- Don’t Overcrowd: After burning three batches, I finally figured out that these need space to brown. Spread them out with at least an inch between each piece, or they’ll just boil in their own juices.
- Rest Before Serving: My grandmother swore by this, and she was right: give the tenderloins 5 minutes under foil after baking—it keeps them juicy and lets the Dijon-thyme glaze cling better.
Dietary Considerations for This Recipe
Gluten-Free Option
Swap the Panko Breadcrumbs for 1 cup almond flour or crushed gluten-free cornflakes. The texture stays crispy, and I’ve found almond flour adds a nice nutty note. Just press it on firmly like the original crust. 💪
Dairy-Free Adaptation
Omit the Parmesan Cheese and add 2 tbsp nutritional yeast to your breadcrumb mix. It delivers that cheesy, umami flavor without dairy. I’ve tested this with great results—no one misses the cheese!
Low-Carb Version
Replace the Panko Breadcrumbs with ½ cup crushed pork rinds or parmesan crisps. The crust stays crunchy, and the carb count drops dramatically. Perfect for keto diets while keeping all the flavor.
Egg-Free Note
This recipe is naturally egg-free since the crust adheres with Dijon Mustard instead of egg wash. No modifications needed—just follow the original method. Ideal for those with egg allergies.
Sodium Considerations
Reduce the Kosher Salt to ½ tsp and use low-sodium Parmesan. The herbs and lemon zest still provide plenty of flavor. I often do this for family members watching their salt intake.
Nut Allergy Warning
If using almond flour for gluten-free, skip it for nut allergies. Stick with gluten-free breadcrumbs or crushed cornflakes. Always check labels for cross-contamination warnings. 💡
Nutrition Facts
Frequently Asked Questions
What temperature should the oven be?
Preheat your oven to 400°F for the best results. This high heat ensures the crust gets crispy while the inside stays juicy.
Can I use chicken breasts instead?
Yes, but pound them to an even thickness first. This prevents dry spots and ensures even cooking. Expect a slightly longer bake time.
How do I know when it’s done?
Use a meat thermometer to check for 165°F internally. The crust should be golden brown and the juices should run clear.
Can I make this ahead?
Assemble the coated tenderloins up to 4 hours ahead. Refrigerate uncovered, then bake as directed when ready.

Trained in classic French technique but raised on slow-cooked ribs and spicy rubs, she blends culinary skill with smoke and soul.
- Smoked Teriyaki Beef Jerky Recipe: Umami-Deep Flavor in Every Chewy Bite - October 15, 2026
- Stewed Beef Brisket Recipe: Deep-Rich Flavor After 8 Hours of Slow Simmering - October 15, 2026
- Beef Brisket Rolls Recipe: Flaky Layers and Smoky Sweet Filling - October 15, 2026