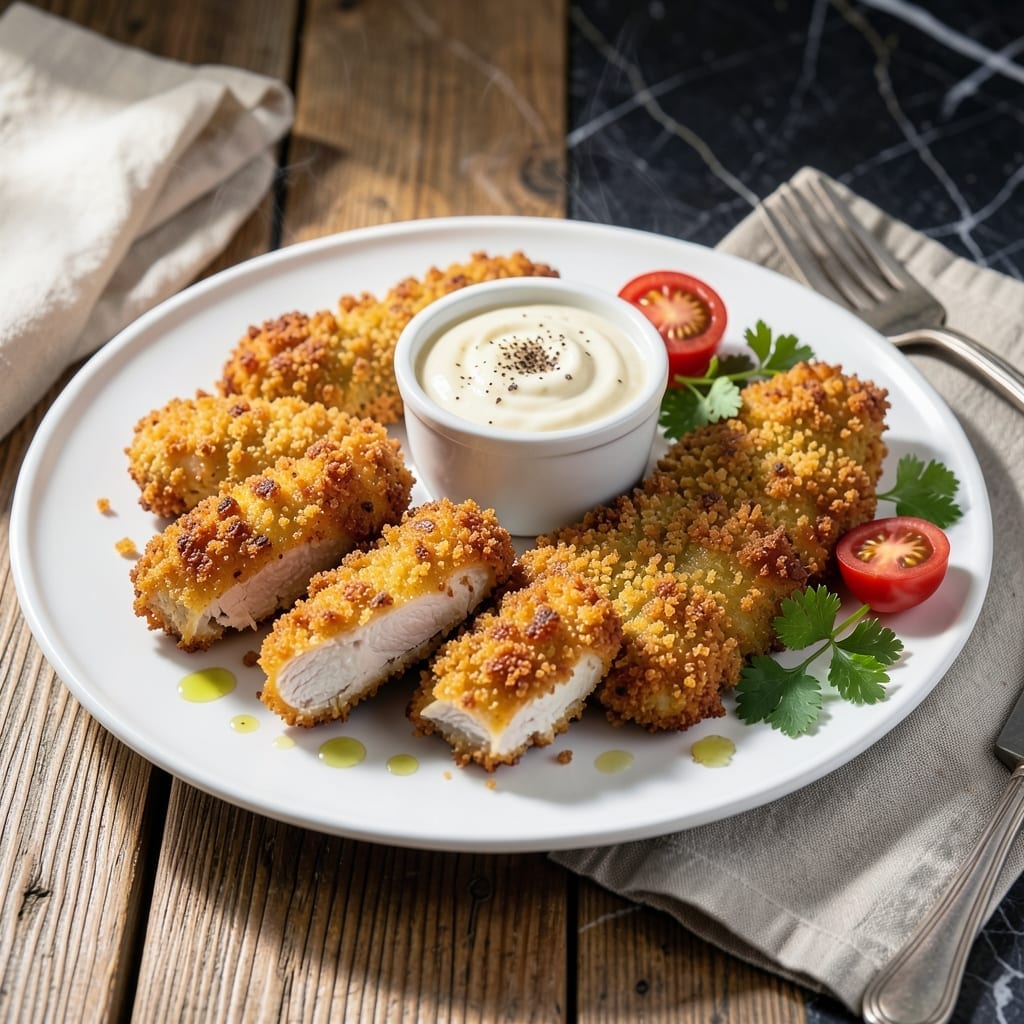
I developed this method after one too many soggy breading failures in my tiny Boston kitchen. The secret lies in a double-dipping technique that ensures maximum crunch while keeping the chicken tender inside.
Panko breadcrumbs create that signature crispy texture without deep frying. A brief rest between coating and baking helps the breading adhere better, preventing those bare spots that ruin the experience.
These oven-baked tenders emerge golden and shatteringly crisp, with juicy chicken that never dries out. The panko forms a thick, crunchy crust that stays intact even when dipped in your favorite sauce.
Serve with honey mustard or ranch for a crowd-pleasing meal that’s just as good as any restaurant version. This technique works for both chicken tenders and larger strips.
Ingredients for Recipe for Chicken Tenders with Panko Bread Crumbs
Simple ingredients for oven-baked chicken tenders with that restaurant-quality crunch at home.
| Ingredient | Amount | Notes |
|---|---|---|
| Chicken Tenders 🍗 | 1 ½ lb | Boneless, skinless, cut into strips |
| Panko Breadcrumbs 🍞 | 2 cups | For extra crispy coating |
| All-Purpose Flour 🌾 | ½ cup | For initial dredging |
| Large Eggs 🥚 | 2 whole | Beaten for egg wash |
| Olive Oil 🫒 | 2 tbsp | For baking sheet preparation |
| Salt 🧂 | 1 tsp | Kosher or sea salt |
| Black Pepper 🌶️ | ½ tsp | Freshly ground preferred |
| Garlic Powder 🧄 | 1 tsp | Adds savory depth |
| Paprika 🌶️ | ½ tsp | For a touch of color |
| Dijon Mustard 🟡 | 1 tbsp | For honey mustard sauce |
| Honey 🍯 | 2 tbsp | For sweetness in sauce |
| Mayonnaise 🥄 | ¼ cup | For ranch or dipping base |
[recipe_ingredient_scaler]
The panko is non-negotiable here—look for the Japanese-style breadcrumbs in the Asian aisle or near the regular breadcrumbs. They’re coarser, which is why they crisp up so nicely. I grab mine from Whole Foods or Trader Joe’s (their panko is always fresh). For the chicken, breast tenders are easiest, but you can slice larger breasts into strips. Just make sure they’re similar in size so they cook evenly.
No panko? Crushed cornflakes or Ritz crackers work in a pinch (but the texture won’t be as shattery). Short on flour? Cornstarch at half the amount gets you a similar grip. For the sauce, swap honey for maple syrup if you prefer. The Dijon can be any mustard you’ve got—yellow or whole grain both taste great. Out of olive oil? Avocado oil has a similar smoke point.
The breaded tenders bake best day-of, but you can prep the chicken strips and dry coating the night before. Store leftovers in an airtight container—they’ll keep in the fridge for 3-4 days. Reheat in the oven or toaster oven to revive the crunch.
Why You’ll Love This Recipe
- One Bowl Wonder: I just dump the flour, eggs, and panko in separate bowls and go—no fancy prep or gadgets.
- Crispy Perfection: That panko crust gives it this ridiculous crunch, while the chicken stays impossibly juicy inside.
- Kid-Tested Winner: My picky nephew devoured these, and honestly, I’ve served them at game day and date nights alike.
- Leftovers? Sold.: They reheat in the toaster oven almost as good as fresh—my lazy lunch the next day was spot-on.
Step-by-Step Instructions for Chicken Tenders With Panko Bread Crumbs
Here’s how I get that perfect crunch without frying—simple, foolproof, and always delicious.
Step 1: Prep the Chicken and Coating Stations
Pat the 1.5 lb Chicken Tenders dry with paper towels—this is non-negotiable for maximum crispiness. I like to lay them out on a plate while I set up my dredging station. Season both sides lightly with 1 tsp Salt and 0.5 tsp Black Pepper.
Grab three shallow dishes: one with the 0.5 cup All-Purpose Flour, one with the 2 whole Large Eggs beaten with a fork, and one with the 2 cups Panko Breadcrumbs mixed with 1 tsp Garlic Powder and 0.5 tsp Paprika. This spice blend adds just the right amount of flavor to the coating.
Step 2: Coat Each Tender Evenly
Working one piece at a time, dredge each tender in the flour, shaking off any excess. Then dip it into the beaten eggs, letting any extra drip off. Finally, press it firmly into the panko mixture, turning to coat all sides completely. I press down gently to ensure the crumbs adhere well.
Place the coated tenders on a plate and let them rest for 5 minutes. This brief pause helps the coating set so it doesn’t fall off when you move them to the baking sheet. Real talk: skipping this step often leads to a crumbly mess.
Step 3: Bake Until Golden and Crispy
Preheat your oven to 400°F. While it heats, line a large baking sheet with parchment paper and drizzle it with the 2 tbsp Olive Oil, spreading it evenly with a brush or your fingers. This prevents sticking and promotes even browning.
Arrange the tenders in a single layer on the baking sheet, leaving a little space between each piece so air can circulate. Bake on the middle rack for 12-15 minutes, then flip each tender and bake for another 8-10 minutes until they’re golden brown and the internal temperature reaches 165°F.
Step 4: Make the Honey Mustard Dipping Sauce
While the tenders bake, whisk together the 0.25 cup Mayonnaise, 1 tbsp Dijon Mustard, and 2 tbsp Honey in a small bowl. I always taste and adjust—if it needs more tang, add a touch more mustard; if it’s too sharp, a drizzle of honey balances it out.
This sauce comes together in 2 minutes and keeps well in the fridge for up to 3 days. The sweetness of the honey perfectly complements the savory, crispy tenders. Don’t skip this—it takes the dish to the next level.
Pro Tips For Making Recipe For Chicken Tenders With Panko Bread Crumbs
- Preheat the Pan: I learned this the hard way—start with a screaming hot pan over medium-high heat. If the oil isn’t shimmering before the tenders go in, you’ll get soggy breading instead of that crispy panko crust. —
- Pat the Chicken Dry: Sounds obvious, but I used to skip this and wondered why my coating wouldn’t stick. Blot the tenders with paper towels first—even a little moisture ruins the panko’s crunch. —
- Double Dip the Coating: For extra crunch, drag each tender through flour, then egg, then panko, then back into the egg and panko again. It’s messy, but the texture is worth it. —
- Rest Before Serving: Let the tenders drain on a rack for 2-3 minutes after frying. This keeps them crispy instead of turning into a greasy puddle on the plate.
Creative Variations of This Recipe
Spicy Buffalo Style
Toss baked tenders in ¼ cup melted butter mixed with ⅓ cup Frank’s RedHot sauce. The panko crust holds up beautifully to the tangy heat. I add 1 tsp smoked paprika to the breading for extra depth. Serve with cool ranch or blue cheese dressing. 🌶️
Parmesan Herb Variation
Mix ½ cup grated Parmesan into the panko with 1 tbsp dried Italian seasoning. The cheese melts into the crust, creating a golden, flavorful shell. I use BelGioioso from my local Italian deli—it’s worth the splurge.
Lemon Pepper Zing
Add 1 tbsp lemon zest and 1 tsp cracked black pepper to the panko mixture. The citrus brightens the dish, while the pepper adds a subtle kick. I often serve these with a creamy dill yogurt sauce for dipping.
Gluten-Free Adaptation
Replace all-purpose flour with ½ cup cornstarch and use gluten-free panko (I find Kikkoman works best). The texture is nearly identical to the original. Bake on a wire rack for extra crispiness on all sides.
Air Fryer Method
Spray coated tenders lightly with avocado oil and air fry at 375°F for 10-12 minutes, flipping halfway. The hot air circulation mimics deep frying without the oil. My Boston apartment’s tiny kitchen was the perfect testing ground for this.
Nutrition Facts
Frequently Asked Questions
What can I use if I don’t have panko?
Crushed cornflakes or Ritz crackers work in a pinch. They won’t be as crispy but still add good texture. For best results, pulse them in a food processor first.
How do I keep the coating from falling off?
Pat the chicken completely dry first. The double-dip method (flour, egg, panko) helps it stick. Let the coated tenders rest for 5 minutes before baking.
Can I make these ahead of time?
Prep the chicken and dry coating the night before. Store separately in the fridge. Bake day-of for best texture. Leftovers keep 3-4 days in an airtight container.

Trained in classic French technique but raised on slow-cooked ribs and spicy rubs, she blends culinary skill with smoke and soul.
- Stewed Beef Brisket Recipe: Deep-Rich Flavor After 8 Hours of Slow Simmering - October 15, 2026
- Beef Brisket Rolls Recipe: Flaky Layers and Smoky Sweet Filling - October 15, 2026
- Masterbuilt Smoker Beef Brisket Recipe: Bark-To-Meat Ratio Hack for Unmatched Flavor - October 15, 2026